How to Clean a Frigidaire Ice Maker: Expert Tips & Professional Steps
Your Frigidaire ice maker is a convenient appliance that delivers fresh, cold ice at the touch of a button. However, like all kitchen appliances, it requires regular maintenance to function optimally and produce clean, hygienic ice. Over time, mineral deposits, mold, and bacteria can accumulate inside the ice maker’s internal components, affecting ice quality and potentially compromising food safety. Learning how to clean a Frigidaire ice maker properly ensures your appliance operates efficiently while extending its lifespan significantly.
Regular cleaning of your ice maker prevents costly repairs and maintains the integrity of your refrigeration system. Whether you have a built-in ice maker or a standalone Frigidaire unit, understanding the correct cleaning procedures protects your investment and safeguards your family’s health. This comprehensive guide walks you through every step of the cleaning process, from gathering necessary supplies to addressing common problems that arise from neglect.
Why Regular Ice Maker Cleaning Matters
Ice makers accumulate mineral deposits from hard water, which can restrict water flow and reduce ice production efficiency. These deposits, primarily composed of calcium and magnesium, create a crusty buildup that forces your ice maker to work harder than necessary. Beyond mineral accumulation, mold and bacterial growth thrive in the damp, cold environment of ice maker components, potentially contaminating every ice cube produced.
According to the CDC food safety guidelines, proper appliance maintenance is essential for preventing foodborne illness. Your ice maker’s water supply line and internal passages create an ideal breeding ground for harmful microorganisms when neglected. Additionally, dirty ice makers produce cloudy or discolored ice, which indicates mineral content or bacterial presence. Regular cleaning prevents these issues while maintaining the appliance’s warranty validity.
The cleaning frequency depends on your water hardness level and usage patterns. Most manufacturers, including Frigidaire, recommend cleaning your ice maker every three to six months for optimal performance. If you live in an area with particularly hard water, monthly cleaning may be necessary. Consider checking your Frigidaire product documentation for specific recommendations based on your model number.
Tools and Supplies You’ll Need
Before beginning the cleaning process, gather all necessary supplies to ensure you work efficiently without interruptions. Having everything prepared prevents you from leaving your ice maker partially disassembled for extended periods, which could allow bacteria to develop in exposed areas.
- White vinegar – The primary cleaning agent for dissolving mineral deposits naturally
- Distilled water – Essential for rinsing to avoid introducing new minerals
- Soft-bristled brush – Ideal for scrubbing without damaging delicate components
- Microfiber cloths – Non-abrasive and highly absorbent for thorough drying
- Plastic scraper or soft plastic tool – For removing stubborn deposits without scratching surfaces
- Small bowl or container – For holding vinegar solution during component cleaning
- Flashlight or headlamp – Improves visibility inside the ice maker cavity
- Gloves and safety glasses – Protect your hands and eyes during the process
- Bucket or towels – Catches water spillage during disassembly and cleaning
Avoid using harsh chemical cleaners, bleach, or abrasive scrubbing pads, as these can damage plastic components and affect water quality. White vinegar is an effective, food-safe alternative that dissolves mineral deposits without introducing toxic residues. For models requiring commercial cleaning solutions, consult your manufacturer’s manual for approved products.
Pre-Cleaning Preparation Steps
Proper preparation prevents accidents and ensures the cleaning process proceeds smoothly. Begin by unplugging your Frigidaire refrigerator from the electrical outlet or switching off the ice maker function entirely. This critical safety step prevents accidental activation while you work inside the appliance. Never attempt to clean an ice maker that’s actively running or powered on.
Next, locate the water supply valve, typically found behind the refrigerator where the water line connects. Turn off this valve by rotating it clockwise until it stops. This prevents water from flowing into the ice maker during cleaning and reduces spillage risk. Some models have an inline shut-off valve on the water line itself, while others have a main valve under the kitchen sink.
Allow any remaining ice to melt naturally or remove it manually using a plastic scoop. Never use sharp objects like ice picks or metal utensils, as these can damage the ice maker’s interior surfaces. Dispose of the melted water and clean the ice bin thoroughly with warm soapy water before reinstalling it. This step is as important as learning how to clean a dry erase board—attention to detail prevents future problems.
Empty the ice bin completely and inspect it for cracks, discoloration, or damage. A compromised ice bin should be replaced before resuming normal operation. Check the ice maker’s visible components for obvious debris, mold, or mineral buildup. Take photos of the current condition for reference if you need to contact customer support later.
Step-by-Step Cleaning Process
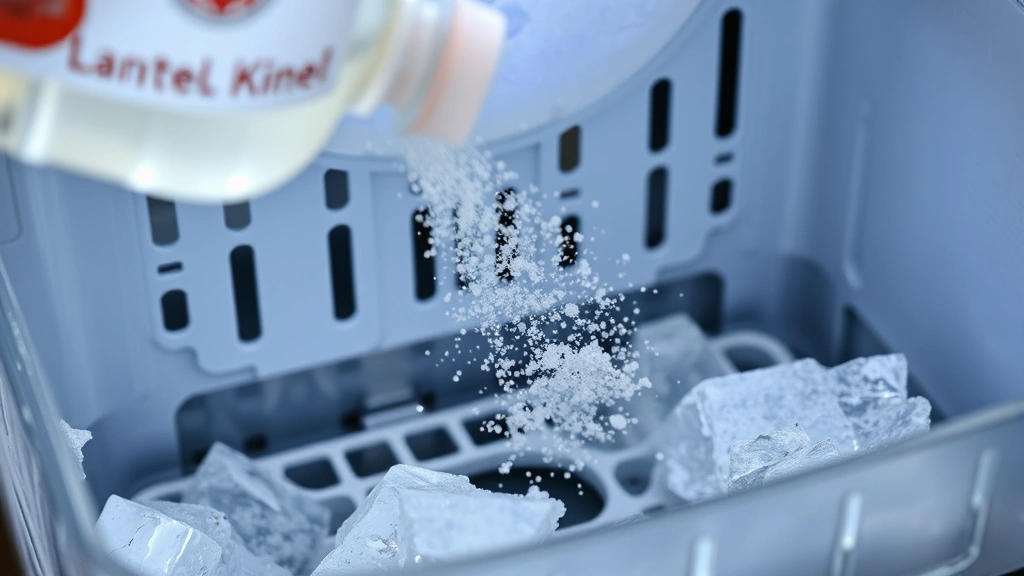
Begin the actual cleaning by preparing your vinegar solution. Mix equal parts white vinegar and distilled water in a spray bottle or small container. This solution effectively dissolves mineral deposits while remaining safe for food contact surfaces. Some heavily scaled ice makers may require undiluted vinegar for the initial treatment, though this should be followed by thorough rinsing with distilled water.
Spray or apply the vinegar solution to all visible interior surfaces of the ice maker compartment. Pay special attention to the water inlet area, where mineral deposits accumulate most heavily. Allow the solution to sit for 10-15 minutes, giving it time to break down calcium and magnesium buildup. This waiting period is crucial—rushing this step reduces cleaning effectiveness significantly.
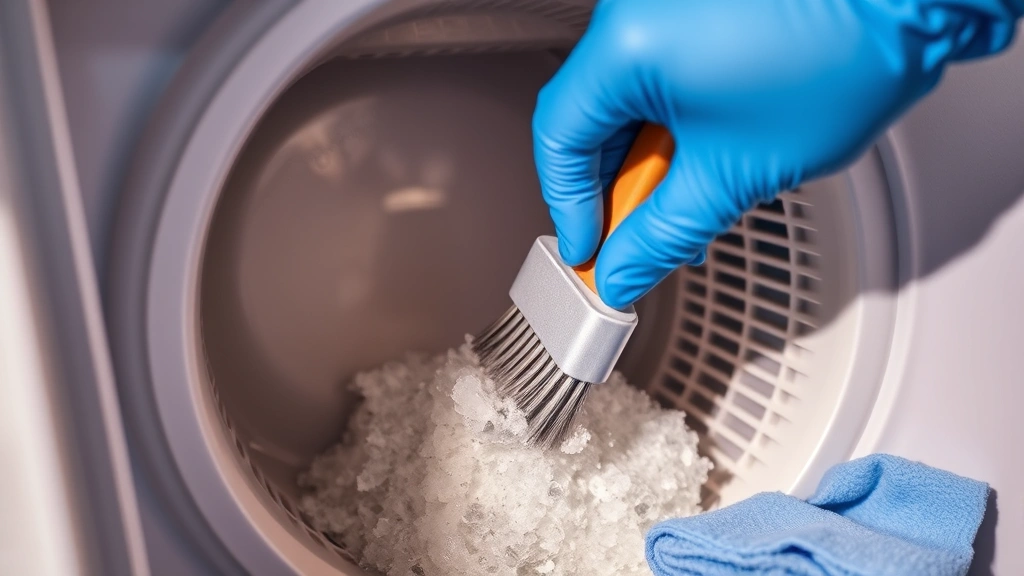
Use your soft-bristled brush to gently scrub the treated surfaces, working in circular motions to dislodge loosened deposits. Focus on crevices, corners, and any areas where water typically flows. For stubborn mineral buildup, use your plastic scraper carefully, applying gentle pressure to avoid gouging the interior surfaces. If you encounter excessive buildup, apply more vinegar solution and wait an additional 10 minutes before scrubbing again.
Rinse all cleaned surfaces thoroughly with distilled water, ensuring no vinegar residue remains. Vinegar left behind can affect ice taste and quality, so this rinsing step is absolutely essential. Use fresh distilled water for multiple rinses until the water runs clear and no vinegar smell persists. Dry all surfaces completely using microfiber cloths, as any remaining moisture promotes mold growth.
Cleaning the Water Supply Line
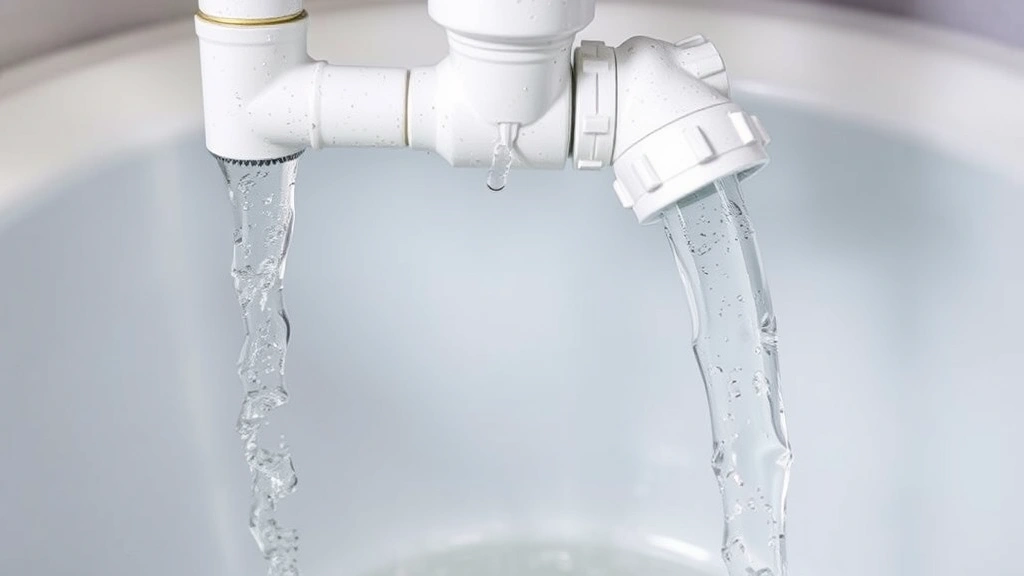
The water supply line represents one of the most critical components requiring regular cleaning, as it directly affects ice quality and safety. Over time, sediment, mineral deposits, and biofilm accumulate inside the line, restricting water flow and contaminating ice. Begin by locating the water line connection point at your refrigerator’s rear. This is typically a plastic tube connected to a copper or plastic inlet valve.
If your model allows for line removal, carefully disconnect the water line by turning the compression fitting counterclockwise. Use a small container to catch any residual water. Run distilled water through the line into a sink or bucket to flush out loose debris. For significant buildup, use your vinegar solution—pour it through the line and let it sit for 15-20 minutes before flushing thoroughly with distilled water.
If your water line cannot be safely removed, use a different approach. Fill a small spray bottle with vinegar solution and carefully spray it into the inlet connection point while the line is disconnected. Allow the solution to work through the line into a bucket below. This process may require several applications and should be followed by flushing with distilled water until the water runs clear.
Some Frigidaire models include replaceable water filters designed to catch sediment and contaminants. Check your manual to locate this filter and follow manufacturer instructions for replacement. Most filters require changing every 6-12 months, depending on water quality and usage. Replacing a clogged filter is often simpler than deep-cleaning the line and prevents future buildup.
Sanitizing Internal Components
Beyond mineral deposits, bacterial and mold growth require specific sanitization procedures. While vinegar is effective against mineral buildup, it’s less effective against established mold colonies. For comprehensive sanitization, create a diluted bleach solution using one tablespoon of unscented household bleach per gallon of water. This solution kills mold and bacteria effectively while remaining safe for food contact surfaces when properly rinsed.
Apply the diluted bleach solution to any areas showing visible mold or discoloration. Mold typically appears as black, green, or pink spots on interior surfaces. Allow the solution to sit for 5-10 minutes, then scrub gently with your soft brush. Never leave bleach solution in contact with ice maker components for extended periods, as this can damage plastic and metal parts. Rinse extremely thoroughly with distilled water at least three times, ensuring absolutely no bleach residue remains.
For ice makers with removable components like evaporator coils or water distribution tubes, remove these parts carefully according to your manual’s instructions. Soak these components in your vinegar solution for 20-30 minutes to dissolve mineral deposits, then scrub gently and rinse thoroughly. Allow all parts to air dry completely before reinstalling. Proper drying is crucial—moisture trapped under reinstalled components creates ideal conditions for mold regrowth.
After completing all sanitization steps, run several cycles of ice production and discard the first few batches of ice. This ensures any residual cleaning solution is completely flushed from the system before you use the ice. The ice from these initial cycles may taste slightly off or appear slightly cloudy as remaining deposits dissolve. This is normal and typically resolves after 2-3 cycles.
Maintenance Schedule and Prevention
Establishing a regular maintenance schedule prevents the need for intensive deep cleaning. Monthly visual inspections take just a few minutes and can catch problems before they become serious. Check for visible mold, mineral buildup, or unusual discoloration. Listen for unusual sounds—grinding or squealing noises indicate potential mechanical problems requiring professional service.
Quarterly cleaning using the vinegar solution method described above maintains optimal performance between deeper cleanings. This regular maintenance prevents mineral accumulation from becoming excessive and keeps bacterial growth minimal. Set phone reminders or calendar notifications to ensure you maintain consistency, treating this as you would maintain other home systems.
Your water quality significantly impacts cleaning frequency requirements. If you have hard water, consider installing a whole-house water softening system or point-of-use water filter for your refrigerator. These systems reduce mineral content entering your ice maker, extending the interval between cleanings and improving overall ice quality. Water filters for refrigerators are inexpensive investments that pay dividends in reduced maintenance burden.
Keep your ice maker’s instruction manual accessible for reference. Different Frigidaire models may have specific requirements or recommendations that vary from general guidance. Some newer models include self-cleaning functions activated through the control panel—consult your manual to determine if your unit has this feature. If your ice maker has built-in cleaning cycles, running these monthly supplements manual cleaning efforts.
Troubleshooting Common Issues
If your ice maker produces cloudy ice despite regular cleaning, mineral content remains excessive. Increase your cleaning frequency and consider whether your water source requires filtration. Cloudy ice indicates mineral-rich water—while not necessarily harmful, it suggests your cleaning intervals are too long for your water conditions. Some people find that purchasing a separate water pitcher with activated carbon filtration helps reduce minerals before they enter the ice maker.
Ice production slowdown or complete failure often results from mineral deposits restricting water flow. Begin with a thorough vinegar cleaning of the water supply line and inlet valve. If this doesn’t restore function, the inlet valve itself may be defective and require professional replacement. Never attempt to disassemble or repair the inlet valve yourself, as this can damage your refrigerator’s water system and void your warranty.
Unusual odors coming from your ice maker indicate mold or bacterial growth that requires immediate attention. Follow the sanitization procedures outlined earlier, paying particular attention to areas where water sits or drains. If odors persist after thorough cleaning, contact Frigidaire customer service or a qualified appliance technician, as internal components may require replacement.
If your ice maker stops producing ice entirely after cleaning, ensure you’ve properly reconnected the water supply line and turned the water valve back on. Verify that the water valve is fully open—partial closure restricts water flow sufficiently to prevent ice production. Check that your refrigerator’s ice maker function is activated through the control panel settings. Many modern Frigidaire models require manual activation of ice-making features.
Leaking water around the ice maker usually indicates improper water line connection or a cracked water line. Carefully inspect all connections, tightening any loose fittings by hand or with a wrench. If you see cracks in the plastic water line, the line requires replacement—this is a common maintenance item that most hardware stores stock. Turn off the water supply immediately if you discover leaks to prevent water damage to your kitchen cabinets.
FAQ
How often should I clean my Frigidaire ice maker?
Most manufacturers recommend cleaning every three to six months for standard conditions. If you have hard water or use your ice maker frequently, monthly cleaning is appropriate. Check your specific model’s manual for manufacturer recommendations, as some newer units have different requirements than older models.
Can I use regular tap water for rinsing instead of distilled water?
Distilled water is strongly preferred because tap water introduces the same minerals you’re trying to remove. If distilled water isn’t available, filtered tap water is acceptable as a secondary option, but minerals will still accumulate more quickly than if you use distilled water exclusively.
Is white vinegar safe to use in an ice maker?
Yes, white vinegar is food-safe and effective for cleaning ice maker components. However, you must rinse thoroughly with distilled water afterward to remove all vinegar residue, which can affect ice taste. Never leave vinegar solution sitting in the ice maker for extended periods.
What should I do if I see black mold in my ice maker?
Black mold requires sanitization with diluted bleach solution (one tablespoon per gallon of water). Apply the solution, wait 5-10 minutes, scrub gently, and rinse extremely thoroughly with distilled water at least three times. If mold returns quickly after cleaning, consult a professional technician, as internal components may require replacement.
Can I run vinegar through my ice maker’s water line without removing it?
Yes, you can pour vinegar solution through the water inlet with the line still connected, allowing it to flow into a bucket below. This is less effective than removing the line for soaking, but works for routine maintenance. Let the solution sit for 15-20 minutes before flushing with distilled water.
Why does my ice taste like vinegar after cleaning?
Insufficient rinsing leaves vinegar residue in the system. Run 3-5 ice-making cycles and discard all ice from these cycles before using ice again. Ensure you’ve rinsed all interior surfaces and the water supply line thoroughly with distilled water multiple times during the cleaning process.
How do I know if my water supply line needs replacement?
Signs include visible cracks, persistent leaks despite tightening connections, reduced ice production that doesn’t improve with cleaning, or water discoloration. If the line is more than five years old and you haven’t replaced it, replacement is preventive maintenance worth considering.
Is it safe to clean my ice maker while the refrigerator is running?
No, always unplug your refrigerator or switch off power to the ice maker before cleaning. Never work inside an active appliance, as you risk electrical shock or accidental activation of moving components. Allow adequate time for the system to depressurize before opening connections.
What’s the difference between cleaning and sanitizing an ice maker?
Cleaning removes mineral deposits and visible debris using vinegar solution, while sanitizing kills mold and bacteria using diluted bleach solution. Both processes are important—cleaning alone won’t eliminate biological contamination, and sanitizing without first removing mineral deposits is less effective.
Can I use commercial ice maker cleaning products instead of vinegar?
Yes, if your Frigidaire manual approves specific commercial products. These products are formulated for ice maker use and may be more effective on heavy mineral buildup. Always follow product instructions carefully and rinse thoroughly afterward, regardless of the cleaning product used.


