How to Clean a Dry Erase Board: Expert Tips & Techniques
Dry erase boards are essential tools in offices, classrooms, home studios, and creative workspaces. Whether you’re using one for project planning, brainstorming sessions, or daily reminders, keeping your board clean and functional is crucial for maintaining its effectiveness and longevity. Over time, dry erase markers can leave stubborn stains, ghosting, and residue that diminish the board’s writing surface quality and appearance.
Many people struggle with dry erase board maintenance, often resorting to harsh chemicals or ineffective methods that can damage the board’s surface. Understanding the proper cleaning techniques, materials, and preventative strategies will help you maintain a pristine writing surface for years to come. This comprehensive guide covers everything you need to know about cleaning dry erase boards like a professional, whether you’re dealing with fresh marker marks or years of accumulated residue.
Why Dry Erase Boards Need Regular Cleaning
Dry erase boards function through a specialized coating that allows marker pigment to adhere temporarily to the surface. When you write on the board, the marker’s oil-based ink sits on top of this coating, making it easy to erase with friction. However, without proper maintenance, several issues develop that compromise the board’s functionality.
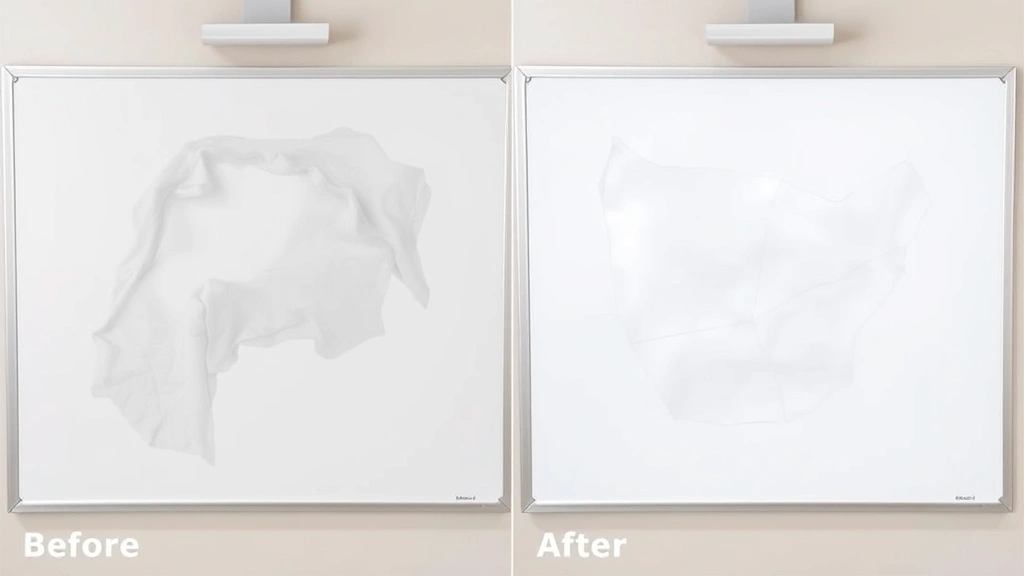
The primary concern is ghosting—the faint shadow or stain that remains even after erasing. This occurs when marker pigment penetrates the board’s protective coating or settles into microscopic imperfections on the surface. Unlike a fresh DIY project from our blog, ghosting accumulates gradually and becomes increasingly difficult to remove. Additionally, repeated marker applications without thorough cleaning can create a buildup that makes future writing appear less crisp and vibrant.
Regular cleaning maintains the board’s whiteness, preserves the coating’s integrity, and ensures markers continue to erase cleanly. A well-maintained board also presents a more professional appearance in office or educational settings, which impacts productivity and perception. Without consistent care, even quality boards deteriorate faster, requiring earlier replacement and increased long-term costs.
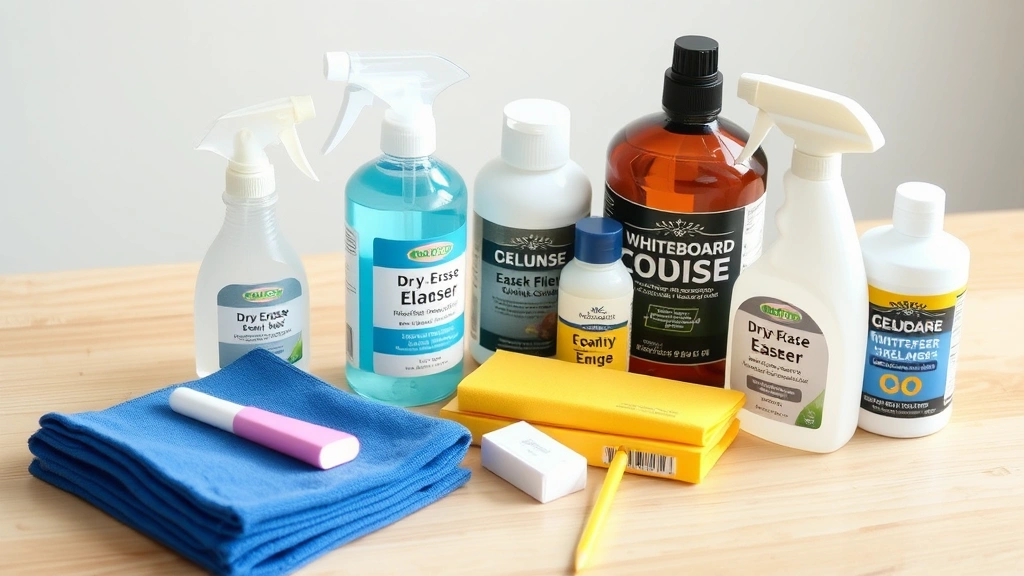
Essential Cleaning Supplies and Materials
Before starting your cleaning routine, gather the right materials. Using improper tools or substances can scratch, damage, or permanently stain your dry erase board, similar to how cleaning a coffee maker requires specific techniques to avoid damage.
Recommended Cleaning Supplies:
- Dry erase board cleaner: Commercial products designed specifically for these boards are most effective. Brands like Expo, Clorox, and Whiteboard Cleaner are formulated to dissolve marker residue without harming the coating.
- Isopropyl alcohol: A 70% or 90% solution works excellently for removing stubborn stains and ghosting. It evaporates quickly and leaves no residue.
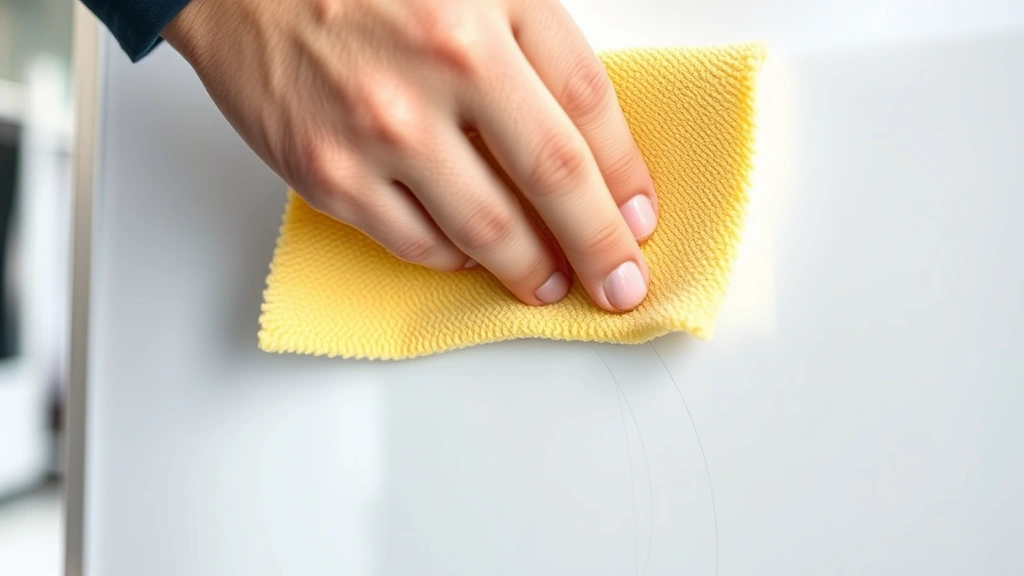
- Soft microfiber cloths: These are gentler than paper towels and won’t scratch the surface. Microfiber’s design traps dust and particles effectively.
- Soft-bristled brushes: For reaching corners and edges, a small soft brush helps dislodge particles without causing damage.
- Whiteboard erasers: Quality erasers with felt or wool materials work better than cheap foam erasers that shed and leave marks.
- Household vinegar solution: A mixture of equal parts white vinegar and water serves as an economical alternative for light cleaning.
- Spray bottle: For even distribution of liquid cleaners without over-saturating the board.
- Paper towels or lint-free cloths: Keep extras available for drying and final buffing.
Avoid acetone, harsh solvents, abrasive scrubbers, bleach-based cleaners, and rough cloths. These substances can damage the board’s protective coating, cause discoloration, or create permanent marks. Always check your board’s manufacturer recommendations before using any cleaning product.
Step-by-Step Cleaning Process
Follow this systematic approach for optimal results when cleaning your dry erase board:
Step 1: Erase All Content Begin by using a quality whiteboard eraser to remove all visible marker content. Use firm, circular motions to thoroughly erase the entire surface. This initial step prevents marker particles from spreading during wet cleaning and reduces the overall cleaning burden.
Step 2: Remove Loose Particles Use a soft-bristled brush or dry microfiber cloth to brush away eraser residue and dust particles. Work from top to bottom in gentle strokes, allowing particles to fall naturally. This prevents particles from being pushed into the board’s pores during wet cleaning.
Step 3: Apply Cleaner Spray your chosen cleaner onto a microfiber cloth rather than directly onto the board. Direct spraying can oversaturate the surface and potentially damage edges or cause liquid to seep behind the board. A light mist on the cloth is sufficient for effective cleaning.
Step 4: Wipe the Surface Using gentle circular motions, wipe the entire board surface with your damp cloth. Start from the top and work downward. Pay special attention to areas with visible stains or ghosting. Allow the cleaner to sit for 30-60 seconds on stubborn areas to break down residue.
Step 5: Dry the Board Use a clean, dry microfiber cloth or paper towels to remove excess moisture. Thorough drying prevents water spots and ensures the board is ready for immediate use. Leave the board to air dry for a few minutes before writing on it again.
Removing Stubborn Stains and Ghosting
When standard cleaning doesn’t eliminate persistent ghosting or stains, advanced techniques become necessary. These methods require patience and careful execution to avoid damaging the board.
Isopropyl Alcohol Method For significant ghosting, isopropyl alcohol proves highly effective. Apply 70% or 90% isopropyl alcohol to a microfiber cloth and gently rub affected areas. The alcohol dissolves marker pigment that water-based cleaners cannot remove. Work in small sections and avoid excessive pressure. Isopropyl alcohol evaporates quickly, but allow extra drying time before using the board.
Whiteboard Cleaner Intensified Treatment Some commercial whiteboard cleaners contain stronger solvents than standard solutions. Apply the cleaner generously to a cloth, press it against stubborn areas for 2-3 minutes to allow penetration, then wipe thoroughly. Repeat if necessary, but avoid aggressive scrubbing which can damage the coating.
Eraser Conditioning Method Sometimes a high-quality whiteboard eraser can remove ghosting more effectively than liquid cleaners. Use firm pressure with circular motions on the affected area. Felt-based erasers work better than foam for this purpose. This mechanical action can dislodge pigment particles trapped in surface imperfections.
Prevention Through Frequent Cleaning The most effective approach to avoiding stubborn stains is consistent, frequent cleaning. Erasing and light cleaning daily prevents pigment buildup that becomes difficult to remove. Think of it similarly to how regular car maintenance prevents major issues—preventative care is always more effective than remedial treatment.
Preventative Maintenance Tips
Implementing preventative strategies extends your board’s lifespan and reduces cleaning frequency and intensity.
Establish a Daily Erasing Routine Erase your board completely at the end of each workday or session. This prevents overnight pigment settling and makes the next cleaning easier. A quick 30-second erase with a quality eraser maintains the surface’s condition significantly.
Use Quality Markers Premium dry erase markers contain better formulations that erase more cleanly than budget options. They produce less residue and ghosting. Avoid markers that are dried out or old, as they leave thicker deposits and erase poorly. Replace markers regularly rather than forcing them to work past their effective lifespan.
Store Markers Properly Keep dry erase markers capped when not in use. Uncapped markers dry out and produce poor-quality marks that are difficult to erase. Store them horizontally or tip-down in a dedicated holder to maintain ink consistency.
Control Environmental Factors Extreme temperature and humidity fluctuations can affect the board’s coating and marker performance. Maintain moderate indoor conditions (65-75°F, 30-50% humidity) when possible. Avoid placing boards in direct sunlight, near heat sources, or in very humid areas where condensation forms.
Protective Measures Consider using a board cover when not in use to prevent dust accumulation and environmental damage. Some workspaces use protective film on boards that receive heavy daily use, though this requires eventual replacement.
Common Mistakes to Avoid
Understanding what not to do is equally important as knowing proper techniques.
Avoid Harsh Chemicals Never use bleach, acetone, paint thinner, or strong solvents. These dissolve the protective coating, causing permanent damage. Even seemingly mild substances like Windex or furniture polish can leave streaks and degrade the surface over time. Stick to products specifically designed for dry erase boards or mild alternatives like isopropyl alcohol and vinegar.
Don’t Use Abrasive Materials Steel wool, scouring pads, rough paper towels, and abrasive brushes scratch the board’s surface. These scratches trap pigment and create permanent marks. Always use soft microfiber cloths and gentle-bristled brushes.
Avoid Over-Saturation Excessive liquid damages the board’s edges and can seep behind the surface, compromising structural integrity. Apply cleaner to cloths, not directly to the board. Damp cleaning is more effective than soaking.
Don’t Ignore the Coating The board’s protective coating is delicate. Aggressive erasing, pressing hard with markers, or using old, stiff erasers can damage it. Handle the board gently and replace worn erasers promptly.
Avoid Permanent Markers Never use permanent markers, highlighters, or oil-based pens on dry erase boards. These create permanent marks that cannot be removed without damaging the board. Ensure everyone using the board understands this critical rule.
When to Replace Your Board
Even with excellent maintenance, dry erase boards eventually reach the end of their functional lifespan. Recognizing when replacement is necessary prevents frustration and maintains productivity.
Signs Your Board Needs Replacement:
- Persistent ghosting that resists all cleaning methods indicates coating degradation
- Visible scratches or gouges on the surface trap pigment permanently
- Markers no longer erase cleanly despite using quality erasers and cleaners
- Discoloration or yellowing that cannot be removed with cleaning
- Water damage, warping, or physical deformation of the board structure
- Cracks or damage to the board’s frame or edges
- Mold or mildew growth that indicates environmental damage
When replacing your board, consider upgrading to premium options that include better coatings, stronger frames, and enhanced durability. Quality boards from established manufacturers like ACCO Brands or Ghent offer superior longevity compared to budget alternatives. Just as home improvement projects benefit from quality materials, investing in a better board pays dividends through years of reliable use.
FAQ
Can I use vinegar to clean my dry erase board?
Yes, a solution of equal parts white vinegar and water serves as an effective, economical cleaner for dry erase boards. It works well for light to moderate cleaning. Spray the solution onto a cloth, wipe the board, and dry thoroughly. For stubborn ghosting, vinegar may be less effective than commercial cleaners or isopropyl alcohol.
What’s the best eraser for dry erase boards?
High-quality felt or wool-based erasers work best. Avoid cheap foam erasers that shed particles and leave marks. Look for erasers specifically designed for dry erase boards. Replace erasers when they become worn, as old erasers don’t clean effectively and can scratch the surface.
How often should I clean my dry erase board?
Daily erasing is recommended to prevent pigment buildup. A thorough wet cleaning with commercial cleaner or isopropyl alcohol should occur weekly or when ghosting becomes visible. Heavy-use boards may need more frequent cleaning.
Can I use water alone to clean a dry erase board?
Water alone provides minimal cleaning benefit beyond removing loose eraser residue. While water won’t damage the board, it won’t effectively remove marker pigment or ghosting. Always use dedicated cleaners or alternative solutions like vinegar or isopropyl alcohol for actual cleaning.
Is it safe to use rubbing alcohol on dry erase boards?
Yes, 70% or 90% isopropyl rubbing alcohol is safe and effective for cleaning dry erase boards. It dissolves stubborn stains and ghosting without damaging the protective coating. Allow proper drying time after using alcohol, as it evaporates quickly.
Why does my board still have ghosting after cleaning?
Persistent ghosting indicates that pigment has penetrated the protective coating or settled into surface imperfections. Try stronger solutions like isopropyl alcohol or commercial whiteboard cleaners. If ghosting remains permanent despite these efforts, the board’s coating may be degraded and replacement might be necessary.
Can I use Clorox wipes on my dry erase board?
Avoid standard Clorox wipes, as they contain bleach which damages the board’s protective coating. However, Clorox does manufacture specific whiteboard cleaning wipes that are safe. Always check product labels to ensure they’re specifically designed for dry erase boards.
What causes dry erase board ghosting?
Ghosting occurs when marker pigment penetrates the board’s protective coating or settles into microscopic surface imperfections. Infrequent cleaning, using poor-quality markers, and aggressive erasing all contribute to ghosting. Consistent daily erasing and weekly cleaning prevent most ghosting issues.
How do I protect my dry erase board from damage?
Use soft erasers, quality markers, and gentle handling. Store markers properly capped. Maintain moderate temperature and humidity. Use board covers when not in use. Avoid harsh chemicals and abrasive materials. Clean regularly to prevent pigment buildup that requires aggressive cleaning.
Is it better to buy a new board or try to restore an old one?
If ghosting and staining resist all cleaning methods, the coating is likely permanently degraded. New boards cost less than extensive restoration efforts and provide better performance. However, if the board is structurally sound and cleaning methods haven’t been thoroughly attempted, restoration is worth pursuing before replacement.


