How to Build a Shed: Expert Tips Inside
Building a shed is one of the most rewarding DIY projects you can undertake. Whether you need extra storage space, a workshop, or a garden retreat, constructing your own shed gives you complete control over design, materials, and functionality. This comprehensive guide walks you through every step of the shed-building process, from initial planning through final touches, ensuring your project succeeds whether you’re a seasoned builder or tackling this for the first time.
A well-built shed not only provides valuable storage but also adds curb appeal and functionality to your property. The key to success lies in proper planning, understanding local building codes, selecting quality materials, and following proven construction techniques. Throughout this guide, we’ll cover everything from site selection and foundation work to roofing and finishing touches, so you can build a shed that lasts for decades.

Planning Your Shed Project
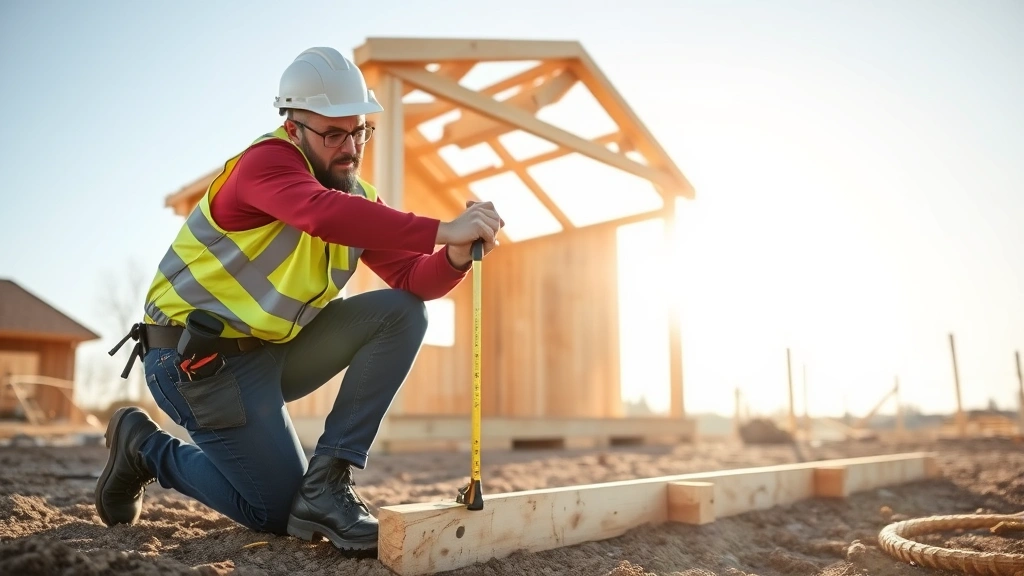
Before you drive a single nail, comprehensive planning determines your project’s success. Start by assessing your needs: What will you store? How much space do you require? Will the shed serve multiple purposes? These questions guide your design decisions. A typical storage shed ranges from 8×10 feet to 12×16 feet, though custom sizes work equally well if your property allows.
Research local building codes through the International Code Council to understand setback requirements, height restrictions, and whether you need permits. Many jurisdictions allow small sheds under 200 square feet without permits, but regulations vary significantly. Contact your local building department to confirm requirements before purchasing materials. This step prevents costly mistakes and ensures your shed meets all safety standards.
Create detailed plans including dimensions, material lists, and construction sequences. You can find free shed plans online or purchase professional blueprints. Consider your climate: snow load capacity matters in northern regions, while ventilation becomes critical in humid southern areas. Your DIY Nests Hub Blog offers additional building resources to supplement your planning phase.
Choosing the Right Location
Location selection profoundly impacts your shed’s longevity and functionality. Choose level ground with good drainage to prevent water accumulation around the foundation. Avoid low-lying areas where water pools during heavy rains, as this causes foundation deterioration and wood rot. Ensure adequate clearance from property lines according to local setback requirements—typically 5-10 feet depending on your jurisdiction.
Consider sun exposure and wind patterns. A shed receiving excessive western sun may become uncomfortably hot in summer, while northern exposure provides cooler, more stable temperatures. Position the shed to minimize wind exposure if possible, as this reduces structural stress. Ensure convenient access from your home or driveway, but position it far enough away to maintain aesthetics and privacy.
Check for underground utilities before excavation. Call 811 or your local utility locating service to mark gas, electric, water, and cable lines. This critical safety step prevents dangerous accidents and expensive repairs. Document the location with photos and measurements for future reference.
Foundation Options Explained
Your shed’s foundation determines durability and longevity. Four primary options exist, each with advantages and considerations. The skid foundation uses pressure-treated wooden beams placed directly on gravel or landscape fabric. This budget-friendly option works for smaller sheds but requires excellent drainage and periodic maintenance. Inspect skids annually for rot and pest damage.
A concrete pad foundation provides superior durability and moisture protection. Pour a 4-6 inch concrete slab with proper slope for drainage. This option costs more upfront but eliminates wood rot concerns and lasts indefinitely. Ensure the subbase is properly compacted and includes a gravel layer for drainage.
Pier foundations elevate the shed using concrete piers spaced 4-6 feet apart. This option works excellently on uneven terrain and provides superior ventilation underneath. Piers must extend below the frost line in cold climates to prevent heaving damage. For areas with minimal frost, 24-30 inches deep usually suffices.
Concrete block foundations offer a middle ground between cost and durability. Stack concrete blocks on a gravel base, creating a perimeter foundation. This allows air circulation while protecting the shed base from ground moisture. Ensure proper drainage around the exterior.
Regardless of foundation type, ensure proper grading around the shed so water slopes away at least 1 inch per foot for the first 6 feet. This simple step prevents moisture problems that compromise structural integrity.
Building the Frame Structure
The frame provides your shed’s skeleton and must be constructed with precision. Begin by establishing a square, level base using a transit level or laser level. Check diagonal measurements—they should be equal if the structure is perfectly square. Even small errors compound as you build upward.
Use pressure-treated lumber for the bottom plates contacting the foundation, and standard 2×4 lumber for walls. Space wall studs 16 inches on center for standard construction, or 24 inches for larger sheds with greater roof loads. Ensure studs are plumb (perfectly vertical) using a 4-foot level frequently throughout construction.
Install corner bracing diagonally using 2x4s to prevent racking—the tendency for rectangular frames to twist under stress. These braces are critical for structural integrity. Nail or bolt all connections securely, using 3-inch nails for framing or structural bolts for heavy loads. The National Frame Builders Association provides detailed framing specifications and best practices.
Add a top plate above the wall studs, ensuring it’s securely fastened. This distributes roof loads evenly across all walls. Install roof rafters or trusses according to your design, ensuring proper spacing and support. Roof structures bear significant loads, especially in snow-prone regions, so follow engineering specifications precisely.
Installing Walls and Siding
Once the frame is complete and square, add wall sheathing. Plywood or OSB sheathing creates a continuous surface for siding attachment and adds structural rigidity. Install sheathing with the face grain running vertically, using 8-penny nails spaced 8 inches on center. Stagger seams between rows for added strength.
Apply house wrap or felt paper over sheathing before installing siding. This moisture barrier prevents water penetration while allowing vapor transmission. Overlap horizontal seams by at least 6 inches and seal all penetrations with caulk.
Choose siding based on your climate and aesthetic preferences. Wood siding offers classic beauty but requires regular maintenance and painting. Vinyl siding provides durability and minimal maintenance, making it popular for sheds. Metal siding resists rot and insects while offering clean aesthetics. Composite materials combine durability with wood-like appearance.
Install siding from bottom to top, ensuring proper overlap and spacing for seasonal wood movement. Leave 1/8-inch gaps at corners and seams to accommodate expansion and contraction. Seal all nail holes and seams with exterior-grade caulk to prevent water infiltration.
Roofing Your Shed
The roof protects your shed’s interior and must shed water effectively. Install roof decking over rafters, then add underlayment—typically asphalt-saturated felt or synthetic material. Underlayment provides secondary water protection if shingles fail.
Install drip edge along roof perimeter before shingles, ensuring water drips clear of fascia boards. This prevents water from running down walls. For areas receiving significant snow, install snow and water shield—a self-adhesive membrane—in vulnerable areas like valleys and at eaves.
Apply roofing shingles from bottom to top, nailing each shingle with 4 nails per shingle (6 nails for high-wind areas). Stagger seams between rows for water shedding efficiency. Ensure proper overlap—typically 5 inches for standard asphalt shingles. The National Roofing Contractors Association provides detailed roofing installation guidelines.
Install roof ventilation to prevent moisture accumulation in the attic space. Ridge vents at the roof peak combined with soffit vents create natural airflow that extends shingle life and prevents ice dams. For sheds without attics, ensure adequate ventilation through gable vents or ridge vents.
Adding Doors and Windows
Doors and windows require careful framing to ensure square installation and proper operation. Frame door openings with a header—a doubled 2×4 or larger beam depending on span—to carry roof loads above the opening. The header must rest on king studs extending to the top plate.
Install a threshold that slopes slightly outward to shed water away from the shed interior. Use exterior-grade doors rated for weather exposure. Prehung doors simplify installation but ensure the rough opening is perfectly square and plumb before hanging.
Windows improve ventilation and interior lighting. Ensure windows are rated for exterior use and include proper flashing to prevent water intrusion. Install flashing before surrounding trim, overlapping shingles above the window. Seal all gaps with exterior caulk.
Paint or stain all exterior wood trim and doors with quality exterior finishes. Two coats provide superior protection. For long-term durability, reapply finish every 2-3 years in high-exposure areas.
Interior Finishing and Organization
Interior finishing transforms your shed into a functional space. Insulation improves temperature control and sound dampening if desired. Fiberglass batts or blown-in cellulose work well for sheds. Vapor barriers prevent moisture accumulation, especially important in humid climates.
Install drywall or plywood interior walls for a finished appearance, or leave framing exposed for industrial aesthetics and easier future modifications. Paint interior walls with quality exterior paint to resist moisture and mildew. Concrete floors work excellently for storage sheds and withstand heavy equipment and water exposure.
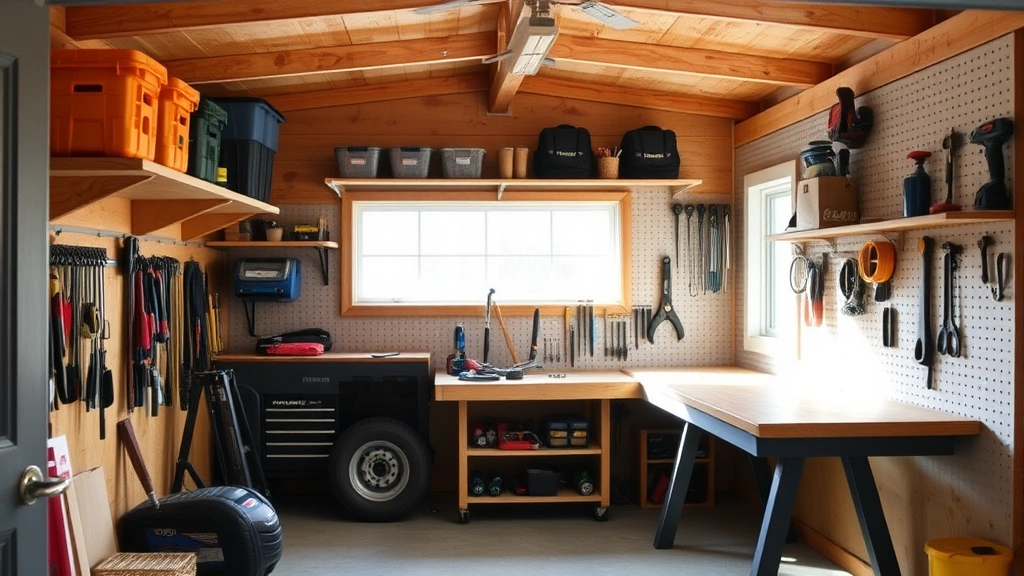
Add shelving, workbenches, and storage solutions tailored to your intended use. Pegboard walls maximize vertical storage for tools. Wall-mounted shelves keep items organized and accessible. If your shed will serve as a workshop, ensure adequate electrical service with properly installed circuits and GFCI protection.
Install gutters and downspouts to direct roof water away from the foundation. Gutters prevent water from splashing against walls and foundation, extending your shed’s lifespan significantly. Ensure downspouts discharge at least 4 feet from the foundation, sloping away from the building.
Maintain your shed with annual inspections. Check for damaged shingles, caulk failures, wood rot, and pest damage. Address issues promptly to prevent expensive repairs. Cleaning and organizing interior storage prevents moisture accumulation and keeps items accessible. Your DIY Car Cleaning guide offers organizational principles applicable to shed storage optimization.
FAQ
Do I need a permit to build a shed?
Permit requirements vary by jurisdiction. Many areas allow sheds under 200 square feet without permits, but setbacks, height limits, and other restrictions still apply. Contact your local building department to confirm requirements. Obtaining proper permits ensures your shed meets safety codes and prevents legal issues if you sell your property.
What’s the best foundation for a small shed?
For sheds under 120 square feet, skid foundations work well in areas with good drainage. For larger sheds or areas with moisture concerns, concrete pads or pier foundations provide superior durability. Consider your climate, soil conditions, and intended use when selecting foundation type.
How long does a shed typically last?
A well-built shed with proper maintenance lasts 20-40+ years. Lifespan depends on materials, climate, maintenance frequency, and foundation type. Concrete foundations last longest, while wood elements require periodic maintenance and refinishing to prevent rot and deterioration.
Can I build a shed on my own?
Yes, with proper planning and tools, most DIYers successfully build sheds. Start with smaller designs (8×10 feet) to build confidence. Ensure you have appropriate tools, safety equipment, and don’t hesitate to ask for help with heavy lifting or complex framing. Many communities offer building workshops that provide hands-on instruction.
What tools do I need for shed construction?
Essential tools include a circular saw, drill, level, measuring tape, square, nail gun or hammer, and safety equipment. A miter saw, table saw, and power nailer accelerate construction but aren’t absolutely necessary. Rent specialized tools rather than purchasing if you won’t use them frequently.
How much does it cost to build a shed?
A basic 8×10 shed costs $1,500-$3,000 in materials depending on siding choice and finishes. Larger sheds or those with premium materials cost proportionally more. Building yourself saves 40-60% compared to hiring contractors. Budget additional costs for permits, tools, and site preparation.


