
How to Build a Shed Door: Pro Tips Inside!
Building a shed door might seem intimidating, but with the right approach and materials, you can create a functional, durable door that will serve your storage structure for years to come. Whether you’re constructing a small garden shed or a large storage building, understanding the fundamentals of door construction ensures proper operation, weather resistance, and structural integrity. This comprehensive guide walks you through every step of the process, from planning and material selection to installation and finishing touches.
A well-built shed door isn’t just about aesthetics—it’s about protecting your belongings from the elements while providing reliable access to your storage space. Many DIY enthusiasts tackle this project as part of larger shed construction efforts, and the skills you develop here translate directly to other woodworking and building projects. By following these pro tips and best practices, you’ll achieve professional-quality results without requiring extensive carpentry experience.
Planning and Preparation
Before you purchase a single board or pick up a tool, take time to properly plan your shed door project. Measure your shed opening carefully—measure at the top, middle, and bottom of the opening, as well as the left, center, and right positions. This reveals any irregularities or out-of-square conditions that affect your door dimensions. Record the height, width, and diagonal measurements. If your opening isn’t perfectly square, you’ll need to account for this during construction and installation.
Consider the purpose of your shed and the climate conditions it will face. A shed in a humid coastal environment requires different weatherproofing considerations than one in a dry desert climate. Think about foot traffic patterns—will the door be opened multiple times daily or accessed infrequently? Heavy-use doors benefit from reinforced construction and higher-quality hardware. Additionally, consider ventilation needs; some storage applications benefit from doors with ventilation features to prevent moisture buildup and mold growth.
Research local building codes and any homeowners association requirements that might apply to your shed construction. The International Code Council (ICC) provides comprehensive building standards, though your local jurisdiction may have specific requirements. Check with your local building department to understand any setback requirements, permit needs, or structural specifications that apply to accessory structures in your area.

Materials and Tools Required
Selecting appropriate materials forms the foundation of a successful shed door build. For the frame, pressure-treated lumber or cedar resists rot and weathering better than standard pine. Two-by-four lumber works well for most residential shed doors, providing adequate strength while remaining manageable for DIY builders. For sheathing, you have several options: plywood, oriented strand board (OSB), tongue-and-groove boards, or individual planks arranged in a batten-and-board pattern.
Your material list should include:
- Pressure-treated or cedar two-by-four lumber for framing
- Exterior-grade plywood or OSB for sheathing (½ inch to ¾ inch thickness)
- Galvanized or stainless steel fasteners (nails, screws, bolts)
- Heavy-duty hinges rated for exterior use (typically 3.5 to 4 inches)
- Door handle or latch hardware
- Weatherstripping tape or seals
- Exterior wood sealant or paint
- Flashing materials for the top of the door opening
Essential tools include a circular saw or miter saw for accurate cuts, a drill-driver for fastening, a level for ensuring square installation, a tape measure, a carpenter’s square, and a stud finder. You’ll also need a hammer, pry bar, and possibly a power nailer for faster assembly. Safety equipment—including eye protection, work gloves, and a dust mask—is non-negotiable when cutting wood and working with fasteners.
Choosing Your Door Style
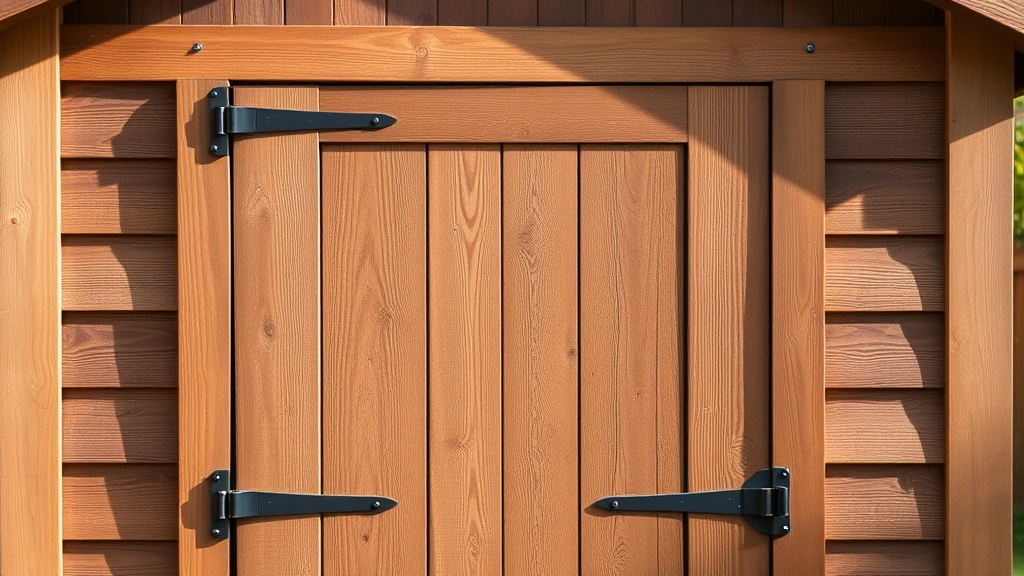
Several door styles suit shed applications, each with distinct advantages. The batten-and-board style features vertical planks held together with horizontal cross braces, creating a rustic appearance while providing excellent strength. This style works particularly well for DIY beginner woodworking projects because it’s forgiving and doesn’t require precise panel fitting.
Plywood sheet doors offer simplicity and speed—you essentially attach plywood sheets to a frame with minimal additional work. This approach suits budget-conscious builders and works well for utilitarian sheds. The frame-and-panel style provides a more finished appearance, with individual panels fitted into grooved frame members. This traditional approach requires more skill but produces aesthetically pleasing results.
Double doors work well for larger sheds or situations where you need to move large items in and out. This configuration requires careful planning to ensure doors meet evenly in the center and operate smoothly without interference. Sliding barn doors offer space-saving advantages since they don’t require clearance for swing operation, making them ideal for sheds positioned near property lines or pathways.
Building the Door Frame
Start by cutting your frame members to length. For a standard single door, you’ll need two vertical stiles (side members) and three horizontal rails—top, middle, and bottom. The middle rail adds critical strength and prevents the door from racking (twisting out of square) under its own weight and weather exposure. Cut these members from pressure-treated two-by-four lumber, ensuring clean, square cuts.
Lay out your frame components on a flat surface and check for squareness using the 3-4-5 triangle method: measure three feet along one edge, four feet along an adjacent edge, and the diagonal should measure five feet. When you’ve confirmed squareness, fasten the joints using galvanized bolts, lag screws, or heavy-duty screws rather than nails alone. Nails can work loose over time as the wood expands and contracts with moisture changes, compromising door integrity.
For added strength, consider adding diagonal bracing in an X pattern or a single diagonal from top-left to bottom-right. This bracing prevents racking and is particularly important in high-wind areas or for doors that receive heavy use. Use established construction techniques and ensure all connections are tight and properly fastened. Apply exterior wood sealant to all cut ends and joints to prevent moisture infiltration.
Pro Tip: Use a pocket hole joinery system for frame assembly—this creates strong, hidden joints that resist racking and look more professional than traditional fastening methods. Kreg Jig systems work exceptionally well for shed door construction and are widely available.
Panel and Sheathing Assembly
Once your frame is complete and square, attach sheathing material to cover the frame opening. For plywood sheathing, position sheets carefully and fasten them with galvanized nails or screws spaced every 6 inches around the perimeter and every 12 inches in the field. This fastening pattern prevents buckling and ensures the sheathing works structurally with the frame.
For batten-and-board construction, arrange vertical planks edge-to-edge across the frame, then attach horizontal cross braces (battens) on the back side. Stagger the battens for visual interest and structural benefit—typically placing them 24 to 36 inches apart. Ensure all fasteners are galvanized or stainless steel to prevent rust staining and deterioration.
When using individual boards, leave small gaps (approximately ¼ inch) between boards to allow for wood movement. Wood expands and contracts with seasonal moisture changes, and these gaps prevent buckling and splitting. Avoid fastening boards too tightly or your door will inevitably warp as wood moves.
Install flashing at the top of the door opening before hanging the door. This directs water away from the frame and prevents rot at this critical junction. Use metal flashing compatible with your siding material and extend it at least 2 inches up the shed wall and out over the door frame opening.
Hardware Installation and Hinges
Hinge selection dramatically affects door performance and longevity. Choose heavy-duty exterior hinges rated for the weight of your door—typically 3.5 to 4-inch stainless steel or galvanized strap hinges work well for shed doors. For a standard single door, use three hinges: one positioned 10 inches from the top, one 10 inches from the bottom, and one in the middle. This configuration distributes the load evenly and prevents sagging over time.
Position hinges on the door frame stile (vertical member) and the shed wall framing. Mark hinge locations precisely using a level and tape measure. Drill pilot holes slightly smaller than your fastener diameter to prevent wood splitting. Use bolts through the frame members rather than screws when possible—bolts distribute load more effectively and resist loosening from vibration and door movement.
Install the handle or latch hardware on the opposite side from the hinges. Position handles at a comfortable height—typically 36 to 42 inches from the ground. For security, consider DIY home security solutions appropriate for your shed, such as padlock hasps or combination locks if you’re storing valuable items.
Important Safety Note: Ensure your latch hardware is robust enough to prevent the door from swinging open unexpectedly in wind. A door that swings freely becomes a safety hazard and causes accelerated wear on hinges and frame members.
Finishing and Weatherproofing
Proper finishing extends your shed door’s lifespan significantly. Apply exterior wood sealant to all surfaces, paying particular attention to cut ends, joints, and areas around fasteners where water can infiltrate. Use a quality exterior paint or stain designed for high-moisture environments. If using paint, apply a primer first, followed by at least two coats of exterior paint for maximum protection.
Install weatherstripping around the door opening to prevent water infiltration and improve weather resistance. Use rubber or foam weatherstripping rated for exterior use. Position stripping on the door frame so it compresses slightly when the door closes, creating an effective seal without restricting door operation.
Consider adding a door sweep at the bottom to prevent wind-driven rain and pests from entering under the door. This simple addition dramatically improves weatherproofing performance. For sheds in particularly wet climates, install a rain cap or hood above the door opening to direct water away from the door surface.
Apply caulk to any gaps between the door frame and shed wall framing. Use exterior-grade caulk compatible with your siding material. This prevents water from infiltrating the wall structure behind the door frame, which leads to rot and structural damage.
Installation and Hanging Tips
Proper installation determines how well your door functions over its lifetime. Begin by ensuring your shed opening is square and plumb. If the opening isn’t perfectly square, your door won’t hang properly and won’t close smoothly. Use shims—thin wedges of wood—to adjust door frame positioning during installation.
Install the door frame first, securing it to the shed wall framing with bolts or heavy-duty screws. Verify that the frame is level and plumb using a quality level. Make adjustments with shims before fully tightening fasteners. Once the frame is secured, hang the door using the hinges, ensuring it swings freely and closes smoothly without binding.
Check door operation from multiple angles. The door should swing open and closed smoothly without scraping against the frame. If binding occurs, remove the door and adjust hinge positions or shim the frame as needed. This fine-tuning during installation prevents problems later.
Allow adequate clearance between the door bottom and the ground or threshold—typically ¼ inch for smooth operation without weather vulnerability. Too much clearance allows water and pests to enter; too little causes binding and wear.
Maintenance and Care
Regular maintenance keeps your shed door functioning properly and extends its service life. Inspect the door periodically for signs of rot, particularly at the bottom where water accumulation is most likely. Press on the wood with a screwdriver—soft wood indicates rot that requires attention.
Check hinges and fasteners regularly, tightening any that have loosened due to vibration and wood movement. Lubricate hinges annually with light machine oil to prevent squeaking and corrosion. Wipe down the door surface to remove dirt and debris that can trap moisture against the wood.
Reapply exterior sealant or paint every 2-3 years depending on climate and weather exposure. This maintenance task prevents water infiltration and keeps the wood protected. In coastal environments or areas with extreme weather, more frequent maintenance may be necessary.
If your door begins to sag—evidenced by difficulty closing or gaps appearing between the door and frame—check hinge fasteners first. Loose hinges are the most common cause of sagging. If fasteners are tight, the frame itself may be racking, requiring more extensive repairs. Addressing sagging early prevents worse damage.
For doors that receive heavy use, consider reinforcing the middle rail or adding additional bracing to maintain structural integrity over time. The investment in preventive maintenance is far less than repairing or replacing a damaged door.
FAQ
How long does a properly built shed door last?
A well-constructed shed door using quality materials and proper finishing techniques can last 15-25 years or longer. Pressure-treated lumber and regular maintenance significantly extend door lifespan. Sheds in protected locations with minimal weather exposure may see even longer service life.
Can I build a shed door without prior woodworking experience?
Absolutely. A simple plywood-sheathed door requires only basic carpentry skills and tools. Start with this simpler style before progressing to more complex designs like frame-and-panel construction. Our DIY blog contains numerous beginner-friendly projects that build foundational skills applicable to shed door construction.
What’s the best wood for shed doors?
Pressure-treated lumber resists rot and insect damage effectively. Cedar is an excellent alternative offering natural rot resistance and attractive appearance, though it costs more than treated lumber. Avoid untreated pine or spruce for exterior doors as these woods deteriorate quickly when exposed to weather.
Should I use screws or nails for door assembly?
Screws hold better than nails over time as wood expands and contracts seasonally. Use galvanized or stainless steel screws rated for exterior use. For maximum strength, use bolts at critical joints like hinge attachment points.
How do I prevent my shed door from warping?
Proper weatherproofing through sealant and paint application is crucial. Ensure adequate fastening to prevent stress concentration. Use quality materials and avoid over-tightening fasteners that restrict wood movement. For extra protection, apply weatherstripping and maintain consistent humidity levels inside your shed.
What size hinges do I need for my shed door?
Standard 3.5 to 4-inch hinges work for most residential shed doors. Calculate the door’s weight and select hinges rated for that weight plus a safety margin. Heavy doors may require larger hinges or additional support. Construction specification resources provide detailed hinge selection guidelines based on door dimensions and weight.
Can I build a shed door for a large double-door opening?
Yes, but each door should be designed to function independently. Build two complete doors with proper bracing to prevent each from racking under its own weight. Install a center post or frame member to which both doors attach their hinges. Ensure doors meet evenly in the center and install appropriate latches to hold them closed.
How much does building a shed door cost?
Material costs vary based on your location and material choices. A basic plywood door typically costs $150-300 in materials, while a batten-and-board door runs $200-400. Premium materials and hardware can increase costs to $500 or more. Labor costs depend on whether you build it yourself or hire professional help.
What tools do I absolutely need to build a shed door?
Essential tools include a circular saw or miter saw, drill-driver, level, tape measure, carpenter’s square, hammer, and fastening tools. A power nailer accelerates work but isn’t essential. Many builders successfully complete shed doors with just hand tools and patience, though power tools significantly reduce project time.
Should I treat or paint my shed door before installation?
Apply at least primer and one coat of paint or sealant before installing the door. This provides initial protection while allowing the door to cure properly. Apply final finish coats after installation once you’ve confirmed the door operates smoothly. This approach prevents finish from interfering with door operation.


