How to Build a Deck: Expert Tips Inside
Building a deck transforms your outdoor space into a functional entertainment area while adding significant value to your home. Whether you’re a seasoned DIYer or tackling your first major project, constructing a deck requires careful planning, proper materials, and adherence to local building codes. This comprehensive guide walks you through every step of the deck-building process, from initial design to the final finishing touches.
A well-built deck can last 15-20 years with proper maintenance, providing countless hours of outdoor enjoyment for your family and friends. The key to success lies in understanding the fundamentals of deck construction, selecting quality materials, and following established safety protocols. Throughout this guide, we’ll explore professional techniques that ensure your deck is not only beautiful but also structurally sound and compliant with building regulations.
Planning and Design Essentials
Before you purchase a single board, invest time in thorough planning. Start by measuring your space carefully and determining the deck’s intended purpose. Will it primarily serve as a dining area, lounging space, or entertainment hub? Your answer influences the size, layout, and structural requirements. Most residential decks range from 200 to 400 square feet, though custom designs can be significantly larger.
Check your local building codes and zoning regulations before beginning construction. Deck building requirements vary by location, but most jurisdictions mandate specific setback distances from property lines, height restrictions, and railing specifications. Many areas require permits for decks over 30 inches high or exceeding certain square footage thresholds. Contact your local building department to determine what permits and inspections your project requires.
Create a detailed sketch or digital design showing dimensions, post locations, and stair placement. Consider the deck’s orientation relative to sun exposure and prevailing winds. A south-facing deck receives maximum sunlight, while north-facing areas remain cooler. Account for drainage patterns and ensure water won’t pool on the deck surface. Proper slope (typically 1/8 inch per foot) prevents water accumulation and extends the deck’s lifespan.
Sketch the post layout using the American Wood Council guidelines for joist spacing and beam sizing. Posts should be spaced no more than 8 feet apart for standard residential decks, though exact spacing depends on your local codes and the load requirements. Consult span tables to determine appropriate joist and beam sizes based on your deck’s dimensions and expected load capacity.
Materials and Tools You’ll Need
Selecting the right materials makes a substantial difference in your deck’s durability and appearance. Pressure-treated lumber remains the most affordable option for structural components, though composite materials and exotic hardwoods offer superior longevity and aesthetics. Pressure-treated wood typically contains copper-based preservatives that resist rot and insect damage for 15-20 years.
For the decking surface, you have several options: pressure-treated lumber costs $1-3 per board foot, cedar or redwood offers natural beauty at $3-6 per board foot, composite decking provides low maintenance at $5-15 per board foot, and tropical hardwoods like ipe deliver exceptional durability at $8-12 per board foot. Your budget and maintenance preferences should guide this decision. If you’re interested in learning more about woodworking fundamentals, our beginner woodworking projects guide covers essential techniques applicable to deck building.
Essential tools include a circular saw or miter saw for cutting lumber, a power drill for fastening, a level for ensuring proper slope, a tape measure, and a post-hole digger or auger for foundation work. You’ll also need a carpenter’s square, pencil, and safety equipment including glasses, gloves, and dust masks. Rental equipment like power augers and pneumatic nailers can expedite the process and improve results.
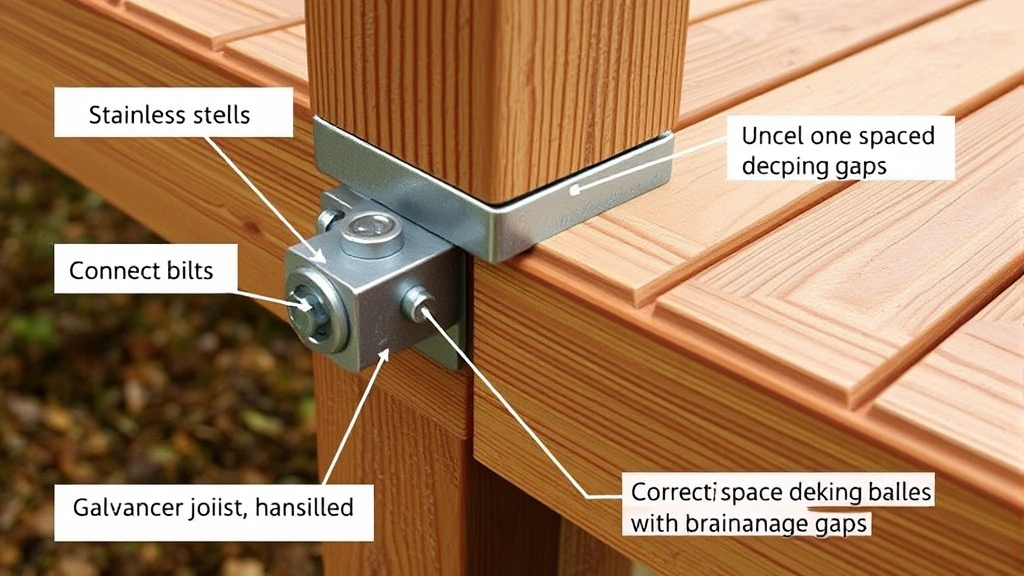
Fastening hardware deserves careful attention. Use stainless steel or galvanized bolts, lag screws, and nails rated for exterior use to prevent rust and corrosion. Composite deck fasteners prevent discoloration, while stainless steel hardware offers maximum longevity. Never use interior-grade fasteners, as they’ll rust and compromise structural integrity.
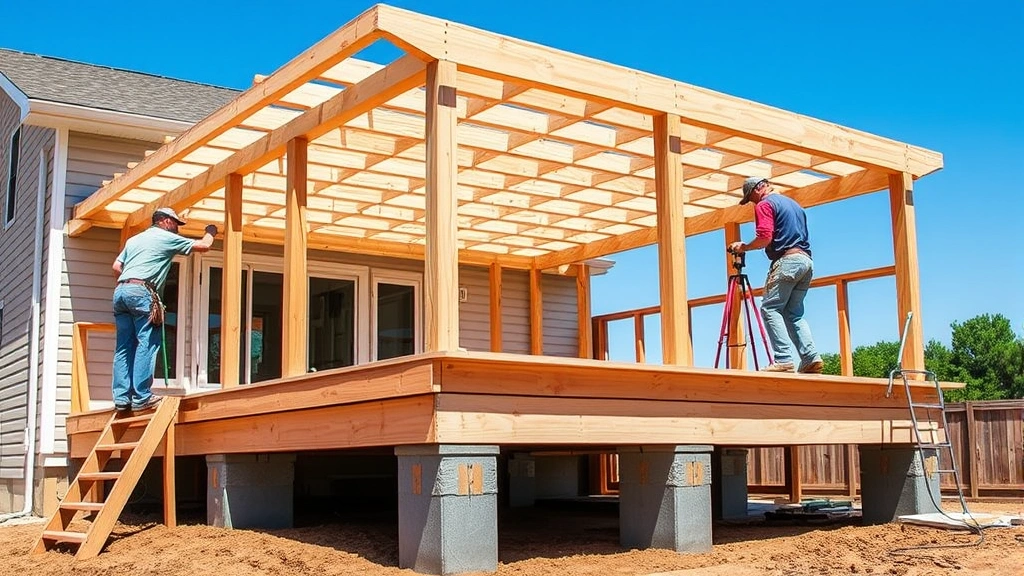
Foundation and Post Installation
A proper foundation prevents settling, shifting, and frost heave that can destabilize your entire deck structure. Posts must rest on concrete footings that extend below the frost line—typically 3-4 feet deep in northern climates, though requirements vary by location. Shallow footings allow frost to lift posts during winter freeze-thaw cycles, creating gaps and structural problems.
Dig holes using a manual post-hole digger or rent a powered auger for faster work. Mark post locations using chalk lines and a tape measure, ensuring posts align with your design plan. For decks, posts are typically spaced 8 feet apart along the beam line. Dig holes 12 inches in diameter and to your frost line depth, then add 6-8 inches of gravel for drainage.
Place concrete footings below grade to prevent water from pooling around the post base. Mix concrete according to bag instructions and fill holes to grade level, then slightly mound the surface to encourage water runoff. Allow concrete to cure for 48 hours before installing posts. Some builders prefer adjustable post bases that allow minor height corrections after concrete sets, while others use traditional post-to-concrete connections with bolts.
Set posts plumb (perfectly vertical) using a level on two perpendicular sides. Posts must be straight to ensure proper beam installation and overall deck alignment. Secure posts temporarily with bracing while concrete cures, then verify everything remains plumb before removing braces. For additional guidance on concrete-related projects, check our resource about concrete curing times and best practices.
Cut posts to height after all concrete cures and bracing is verified. Posts should extend to support beams that sit on top, creating a solid structural base. Ledger boards connecting to your house must also be properly installed, with flashing that directs water away from the house foundation. This prevents water damage and rot to your home’s structure.
Building the Frame Structure
The frame consists of beams, joists, and rim joists that create the deck’s skeleton. Beams rest on posts and support the joists, while joists run perpendicular to beams and support decking boards. Rim joists connect the outer ends of joists and provide lateral bracing. This layered structure distributes weight efficiently and creates the strength needed for safe foot traffic and furniture placement.
Install beams level and securely fastened to posts using bolts or post bases rated for your application. Beams typically measure 2×8, 2×10, or 2×12 depending on span distance and load requirements. Space bolts every 4-6 inches along the connection, using stainless steel or galvanized hardware. Ensure beams run straight by checking with a level and string line before final fastening.
Joists typically measure 2×6, 2×8, or 2×10 and rest on beams with proper spacing—usually 12, 16, or 24 inches on center depending on joist size and decking material. Closer spacing (12 inches) provides more support for composite decking, while 16-inch spacing works for most pressure-treated applications. Use joist hangers to connect joists to beams and rim joists, ensuring consistent spacing and proper load distribution.
Rim joists tie everything together and prevent racking (diagonal shifting). Install blocking between joists every 8 feet to reduce bounce and improve structural rigidity. This blocking also provides attachment points for stairs and railings. Crown each joist (place the high side facing up) to account for wood settling and natural deflection over time.
Installing Decking Boards
Decking boards create the walking surface and determine your deck’s appearance. Space boards 1/8 to 1/4 inch apart to allow for wood expansion and water drainage. Start at the house or highest point and work toward the front of the deck, ensuring consistent spacing throughout. Stagger end joints across multiple joists rather than having them align, which improves structural performance and appearance.
Fasten decking with corrosion-resistant fasteners—either galvanized nails, stainless steel screws, or composite-specific fasteners. Screws resist pull-through better than nails and allow easier removal if needed. Use 2.5-inch fasteners for standard 2×6 decking, ensuring they penetrate joists by at least 1.5 inches. Drive fasteners at slight angles (45 degrees) for better holding power.
Install boards perpendicular to joists for optimal support and appearance. Boards running parallel to the house create a traditional look, while perpendicular boards emphasize the deck’s depth. Diagonal or herringbone patterns add visual interest but require more cutting and careful layout planning. Consider your home’s architecture and landscape when choosing board orientation.
Cut boards around posts, railings, and other obstructions carefully to maintain appearance and prevent water traps. Leave 1/4-inch gaps around penetrations to allow for wood movement. Sand rough edges and splinters after installation to improve safety and aesthetics. If using composite materials, follow manufacturer guidelines for spacing, fastening, and temperature-related expansion allowances.
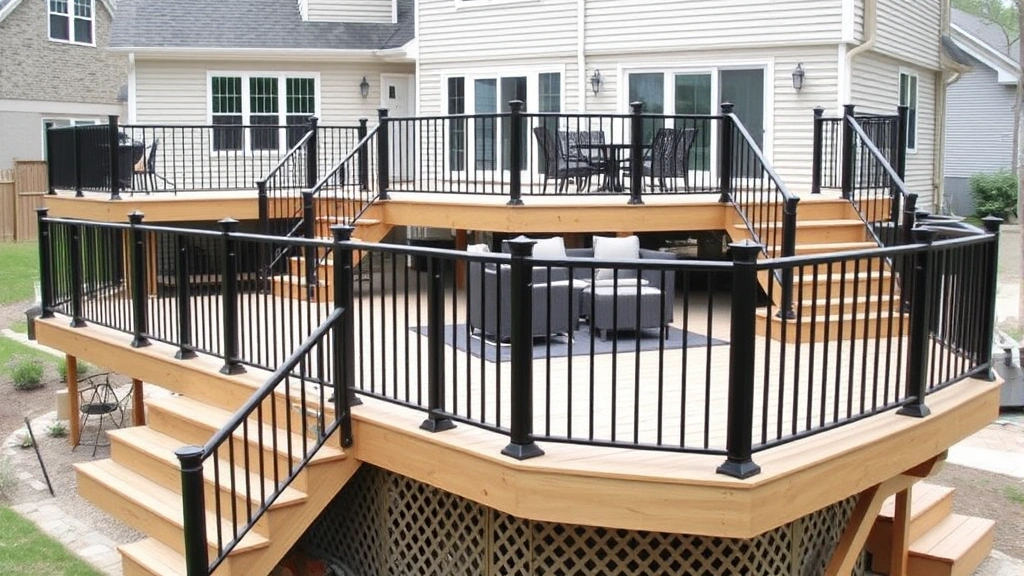
Railings and Safety Features
Deck railings serve critical safety functions while contributing to overall aesthetics. Building codes require railings on decks 30 inches or higher above ground, with specific height and baluster spacing requirements. Most jurisdictions mandate 36-42 inch high railings with balusters spaced no more than 4 inches apart to prevent children from becoming trapped.
Stair railings must have handrails on at least one side, with specific diameter and mounting height requirements. Handrails should be 1.25 to 2 inches in diameter and mounted 34-38 inches above stair treads. Test your railing with a 4-inch sphere—if it passes through, the spacing is too wide and violates codes. Posts should be spaced no more than 6 feet apart to prevent railing failure under lateral loads.
Install railings securely using lag bolts or through-bolts that penetrate posts completely. Avoid surface-mounted railings that rely on fasteners into the side of posts, as these are prone to failure. Railings must withstand 200-pound lateral force according to most building codes, ensuring they won’t fail if someone leans heavily or falls against them.
Stairs require treads (horizontal surface) measuring 10-11 inches deep and risers (vertical height) measuring 7-8 inches. Maintain consistent riser height throughout the stairway to prevent tripping. Stair stringers (the diagonal support members) must be properly cut and supported to handle the concentrated loads stairs receive. Most building codes require at least 3 treads before reaching a landing.
Finishing and Maintenance
Once your deck frame and decking are installed, finishing protects the wood and enhances appearance. Pressure-treated lumber doesn’t require immediate staining but benefits from a clear sealer to reduce moisture absorption and UV damage. Cedar and redwood look best with semi-transparent stains that highlight grain while providing protection. Let pressure-treated wood weather for 3-6 months before staining if desired, allowing the surface to stabilize.
Apply finish products according to manufacturer specifications, typically 2-3 coats with proper drying time between applications. Quality exterior stains and sealers cost $20-40 per gallon and last 2-3 years, while premium products may last 5+ years. Plan to refinish your deck every 2-3 years to maintain appearance and protection. Composite decking requires different maintenance—typically just cleaning with soap and water, though some products benefit from occasional UV protectant application.
Regular maintenance extends your deck’s lifespan significantly. Sweep debris regularly to prevent mold and mildew growth. Power wash annually to remove dirt, algae, and discoloration, but use low pressure (below 1500 PSI) to avoid wood damage. Remove leaves and standing water promptly, as these create conditions for rot and insect damage. Inspect fasteners regularly and tighten any that have loosened due to wood movement.
Check for soft spots indicating rot, especially around railings, stairs, and areas where water pools. Press a screwdriver into suspect wood—it should resist penetration. Soft, crumbly wood indicates rot requiring board replacement. Address rot immediately, as it spreads and compromises structural integrity. Consider treating cut ends of new boards with preservative to prevent rot at vulnerable areas.
For more comprehensive home improvement guidance, explore our basement finishing guide and home security guide for related projects that can enhance your outdoor living space and overall home value. Our DIY blog offers additional resources for homeowners tackling various improvement projects.
FAQ
How long does it take to build a deck?
Most residential decks take 3-7 days to complete, depending on size and complexity. A 300-square-foot deck with straightforward design typically requires 40-60 hours of labor. Larger decks, complex designs with multiple levels or built-in features, and custom railings extend the timeline significantly. Concrete curing adds 48-72 hours between foundation work and post installation, so plan accordingly.
Do I need a permit to build a deck?
Permit requirements vary by jurisdiction but generally apply to decks over 200 square feet or 30 inches high. Most areas require permits regardless of size if the deck attaches to the house or includes stairs. Contact your local building department before starting—permits typically cost $50-300 and require inspections at foundation, framing, and completion stages. Unpermitted work can create problems when selling your home or filing insurance claims.
What’s the best wood for decks?
Pressure-treated lumber offers excellent value and durability for 15-20 years. Cedar and redwood provide natural beauty but require more maintenance. Composite decking costs more initially but requires minimal maintenance and lasts 25+ years. Tropical hardwoods like ipe deliver exceptional durability and appearance but are expensive and difficult to work with. Choose based on budget, maintenance tolerance, and aesthetic preferences.
Can I build a deck on concrete?
Yes, but concrete must be properly prepared. Clean the surface thoroughly and ensure good drainage to prevent water trapping under the deck. Use concrete footings or sleepers to elevate the deck structure above the concrete, allowing air circulation that prevents rot. Never build directly on concrete without elevation, as this traps moisture and causes rapid deterioration.
How much weight can a deck support?
Most residential decks are designed for 40 pounds per square foot of live load (temporary weight like people and furniture). This equals approximately 4,000 pounds total for a 300-square-foot deck. Concentrated loads (like hot tubs) require additional support. Professional structural engineers can calculate exact capacity based on your deck’s specific design and materials. Never assume capacity—consult codes or professionals if uncertain.
What maintenance does my deck need?
Annual cleaning with a broom and occasional power washing keeps decks looking good. Inspect annually for damage, rot, and loose fasteners. Refinish stained wood every 2-3 years or as needed. Remove leaves and debris promptly to prevent mold and moisture problems. Keep gutters clean to prevent water from running directly onto the deck. Address any damage immediately to prevent further deterioration.
How do I prevent deck rot?
Proper drainage is the key to preventing rot. Ensure the deck slopes slightly for water runoff, space boards to allow water to drain through, and keep the underside clear of debris. Use pressure-treated lumber or naturally rot-resistant species. Maintain proper fastening to prevent board cupping that traps water. Treat cut ends with wood preservative, and refinish regularly to maintain water repellency. Address any soft spots immediately.
Can I attach a deck to my house?
Yes, but proper attachment is critical to prevent water damage. Install flashing between the deck ledger and house rim board to direct water away from the house. Use galvanized or stainless steel lag bolts spaced 16 inches apart. The ledger must be attached to the house structure, not just siding. Remove siding where the ledger attaches to ensure direct contact with the house framing. This prevents water from entering your home and causing costly damage.


