How to Build a Shed: Expert Tips Inside
Building a shed is one of the most rewarding DIY projects you can undertake. Whether you need extra storage space for garden tools, a workshop for your hobbies, or a retreat from the daily grind, a well-constructed shed adds both functionality and value to your property. This comprehensive guide walks you through every step of the process, from planning and foundation work to framing, roofing, and finishing touches.
A typical shed project takes anywhere from two to six weeks, depending on size, complexity, and weather conditions. With proper planning, the right materials, and attention to detail, even first-time builders can create a sturdy structure that lasts for decades. This guide covers everything you need to know to tackle your shed-building project with confidence.
Planning and Preparation
Before you break ground on your shed, invest time in thorough planning. Start by determining your shed’s purpose, size, and location on your property. Most residential sheds range from 8×10 feet to 12×16 feet, though you can build smaller or larger depending on your needs and local zoning regulations.
Check your local building codes and homeowners association rules before proceeding. Many jurisdictions require permits for structures over a certain size or setback distance from property lines. Contact your local building department to understand requirements in your area. You’ll also want to call 811 before you dig to locate underground utilities like gas, water, and electrical lines.
Create a detailed plan that includes dimensions, materials list, and a basic design sketch. Consider the shed’s orientation relative to sun exposure and prevailing winds. You might also want to review our guide on DIY beginner woodworking projects for foundational carpentry skills that will serve you well throughout this project.
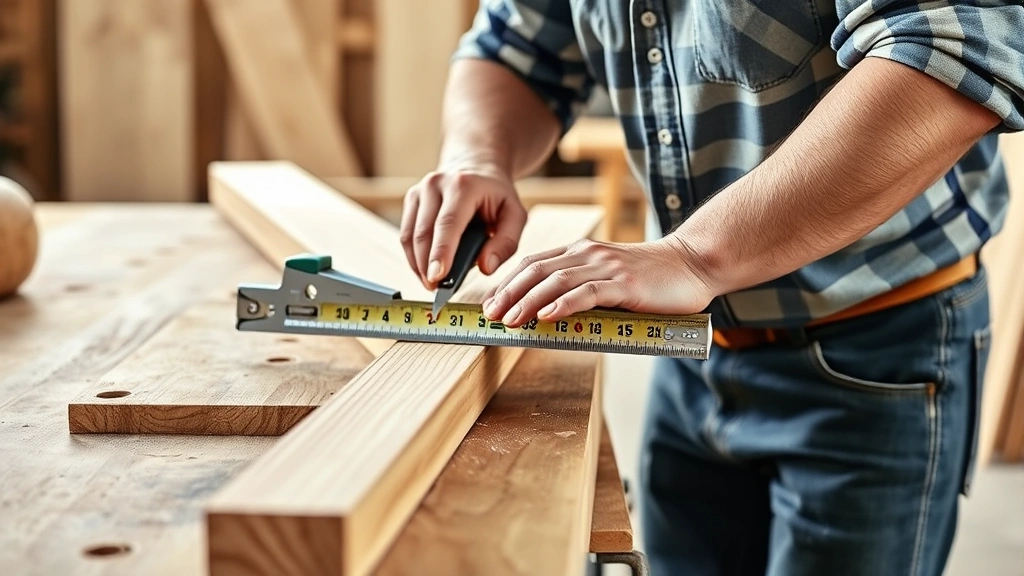
Gather all necessary tools before starting: circular saw, miter saw, power drill, level, tape measure, square, hammer, nail gun, and safety equipment including glasses and gloves. Having everything on hand prevents frustrating mid-project trips to the hardware store.
Foundation Basics
A proper foundation is critical for your shed’s longevity and structural integrity. The three most common foundation options are concrete pads, gravel bases, and concrete slabs. For most residential sheds, concrete pads or a properly prepared gravel base work well.
For concrete pads, dig holes approximately 3-4 feet deep below the frost line in your region (this varies by climate). This prevents frost heave, which occurs when frozen ground expands and pushes structures upward. Place concrete deck blocks or piers in these holes, ensuring they’re level. Learn more about concrete curing times in our article on how long concrete takes to cure, which is essential for planning your project timeline.
For a gravel base, excavate the area to remove topsoil and vegetation. Create a level, compacted base using crushed stone or gravel, typically 4-6 inches deep. Use a level to ensure proper drainage slope—aim for roughly 1/8 inch of slope per foot to direct water away from the structure.
The foundation must be square and level. Use the 3-4-5 triangle method: measure 3 feet along one side, 4 feet along an adjacent side, and measure the diagonal. If it equals 5 feet, your corner is square. Check all corners and adjust as needed before proceeding to framing.

Framing the Structure
Framing creates your shed’s skeleton and determines its strength and longevity. Start by building the floor frame using pressure-treated lumber, typically 2×6 or 2×8 joists spaced 16 inches apart. Pressure-treated wood resists rot and insect damage, making it ideal for ground-level structures.
The floor frame sits on your foundation and serves as the base for walls. Attach rim joists around the perimeter and add cross joists for support. Ensure everything is level and square before adding floor sheathing. Most builders use 3/4-inch exterior plywood for flooring, which provides adequate strength and moisture resistance.
Wall framing uses standard 2×4 studs spaced 16 inches on center. Build wall sections on the ground, then tilt them up into place. This method is faster and safer than building walls in place. Each wall section consists of top and bottom plates with studs connecting them. Add diagonal bracing or plywood sheathing for lateral stability.
The roof frame, or truss system, supports roofing materials and distributes weight to the walls. Pre-fabricated roof trusses are convenient and economical for most sheds. Alternatively, build your own rafters if you have intermediate carpentry skills. The roof pitch (slope) typically ranges from 4:12 to 8:12, providing adequate water runoff while maintaining reasonable construction complexity.
Ensure proper ventilation during framing by planning for soffit and ridge vents. These prevent moisture buildup and extend your shed’s lifespan. Our comprehensive guide to DIY basement finishing discusses ventilation principles applicable to shed construction.
Roofing Installation
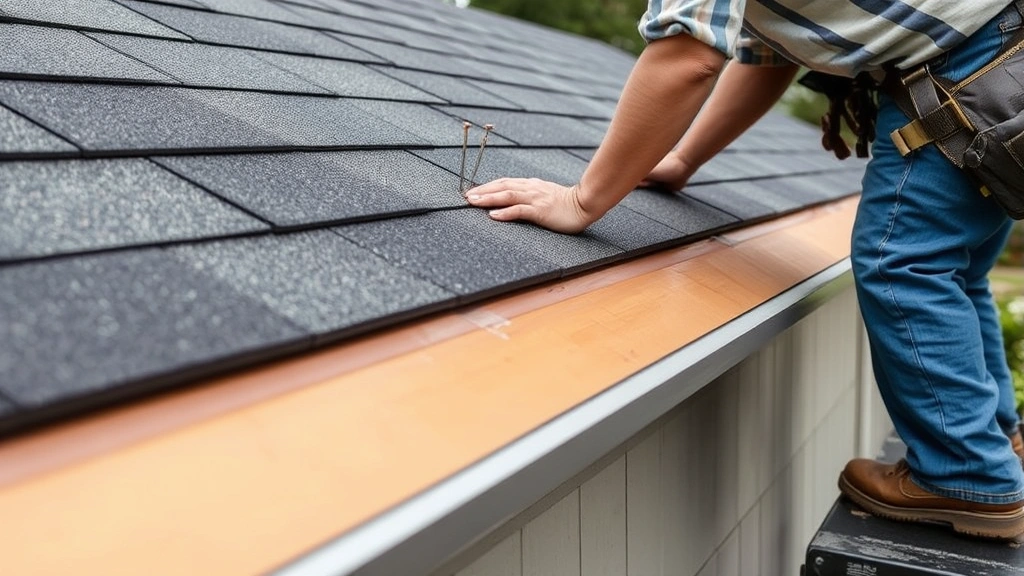
Roofing protects your shed from weather and is one of the most critical components. Start by installing roof sheathing—typically 1/2-inch plywood—over the truss structure. This provides a base for roofing materials and adds structural rigidity.
Install underlayment next, usually synthetic or felt paper that serves as a secondary moisture barrier. This protects against water intrusion if shingles are damaged. Overlap each course by at least 2 inches and secure with roofing nails spaced 4-6 inches apart.
Asphalt shingles are the most popular roofing material for sheds due to their affordability and durability. Install starter shingles along the bottom edge, then work upward in overlapping courses. Each shingle is secured with roofing nails, typically 4 per shingle. Proper nailing technique is crucial—nails should penetrate the sheathing without splitting the shingles.
Install flashing around the roof penetrations, such as vents or chimneys. Flashing directs water away from these vulnerable areas and prevents leaks. Metal flashing materials like aluminum or galvanized steel work well and last for decades.
For the roof edges, install drip edge along the eaves and rakes. This metal trim guides water away from fascia boards and prevents rot. Gutters and downspouts are optional but highly recommended for directing water away from the shed foundation.
Walls and Siding
Wall sheathing provides structural stability and serves as a base for siding. Most builders use 1/2-inch exterior plywood, which resists moisture and provides excellent strength. Install sheathing horizontally or vertically, ensuring proper overlap and securing with nails spaced 6 inches apart around edges and 12 inches in the field.
Siding options include vinyl, wood, metal, and composite materials. Each has advantages and disadvantages. Wood siding offers traditional aesthetics but requires regular maintenance. Vinyl siding is low-maintenance and affordable. Metal siding is durable and weather-resistant. Choose based on your budget, climate, and aesthetic preferences.
Install a weather-resistant barrier (house wrap) before siding. This breathable membrane allows moisture vapor to escape while blocking liquid water. Overlap each course by at least 4-6 inches and secure with staples or nails.
Install trim around windows and doors to direct water away from openings. Caulk all seams and gaps with exterior caulk to prevent water infiltration. Paint or stain siding according to manufacturer recommendations to protect against UV damage and weathering.
Window and door installation requires careful attention to flashing and sealing. Install windows after wall sheathing but before siding for easier flashing installation. Use ICC building codes as a reference for proper installation techniques in your region.
Finishing Touches
Interior finishing depends on your shed’s purpose. For storage sheds, simple shelving and organization systems suffice. For workshops or studios, consider insulation, electrical wiring, and climate control.
Shelving provides efficient storage without taking up floor space. Install sturdy shelves using 2×10 or 2×12 lumber supported by brackets or wall studs. Heavy-duty shelving can support tools, equipment, and seasonal items safely.
Lighting improves functionality and safety. Install simple LED fixtures powered by a standard outlet, or go solar-powered for off-grid locations. Motion-sensor lights near the entrance provide convenience and security.
For year-round use, consider basic insulation. Fiberglass batts between wall studs reduce temperature extremes and improve comfort. Vapor barriers prevent moisture accumulation that could cause mold or rot.
Paint or stain all exposed wood surfaces for protection and aesthetics. Use exterior-grade paint rated for your climate. Two coats provide better coverage and durability than one coat. Trim and accents can feature contrasting colors to enhance curb appeal.
Door hardware should be heavy-duty and weather-resistant. Install hinges rated for your door’s weight and a lock appropriate to your security needs. Consider a ramp if the shed will store items requiring easy access.
Safety Considerations
Shed building involves significant safety hazards that demand respect and attention. Always wear appropriate personal protective equipment: safety glasses protect against flying debris, work gloves prevent splinters and cuts, and steel-toed boots protect feet from dropped tools or materials.
Power tool safety is paramount. Read manufacturer instructions before operating any power tools. Wear hearing protection when using loud equipment like circular saws or nail guns. Keep hands clear of blade paths and never reach under operating equipment.
Fall protection becomes critical when working on roofs. Use sturdy ladders rated for your weight plus 250 pounds, and always maintain three points of contact. Consider safety harnesses when working on steep roofs or at significant heights. Never work alone on elevated surfaces.
Lifting safety prevents back injuries. Use proper technique: bend your knees, keep your back straight, and lift with your legs. For heavy materials, recruit helpers or use mechanical assistance. Knowing your physical limits prevents serious injury.
Weather awareness keeps you safe during construction. Never work in high winds that could topple structures or blow materials around. Avoid working during lightning storms. Excessive heat or cold affects judgment and physical capability, so take breaks as needed.
Our guide on DIY home security includes additional safety principles applicable to protecting your completed shed and property. Additionally, consult the OSHA guidelines for comprehensive workplace safety information.
Electrical safety is crucial if you’re adding power to your shed. Have a licensed electrician install circuits if you’re uncomfortable with electrical work. Proper grounding and circuit protection prevent shocks and fires. Use NFPA electrical codes as your safety reference.
FAQ
How long does it take to build a shed?
Timeline depends on shed size and complexity. A simple 8×10 shed typically takes 2-3 weeks with one person working part-time or 1-2 weeks with two people working full-time. Larger or more complex sheds may take 4-6 weeks. Weather delays and material delivery times can extend timelines.
Do I need a permit to build a shed?
Permit requirements vary by jurisdiction. Most areas require permits for structures over 100-120 square feet or if the shed exceeds setback distances from property lines. Check with your local building department before starting. Permits ensure your shed meets safety codes and protects your property value.
What’s the best foundation for a shed?
Concrete piers below the frost line work well in most climates, preventing frost heave that can damage structures. Properly prepared gravel bases work for temporary or portable sheds. Concrete slabs provide excellent durability but are more expensive and permanent.
How much does it cost to build a shed?
Cost varies significantly based on size, materials, and location. A basic 8×10 shed costs $1,500-$3,000 in materials using standard construction methods. Premium materials or larger structures cost proportionally more. Labor costs apply if hiring professionals.
What tools do I need to build a shed?
Essential tools include circular saw, miter saw, power drill, level, tape measure, square, hammer, and nail gun. Additional helpful tools include reciprocating saw, impact driver, and pneumatic stapler. Rent specialized equipment like scaffolding rather than purchasing.
Can I build a shed without a foundation?
Technically possible but not recommended. Sheds without proper foundations settle unevenly, causing doors and windows to jam. Ground moisture wicks into wood, causing rot. A proper foundation extends your shed’s lifespan from 10-15 years to 30+ years.
What’s the best roofing material for a shed?
Asphalt shingles offer excellent value and 15-25 year lifespan. Metal roofing lasts 40+ years but costs more. Rubber or TPO membranes work well for flat roofs. Choose based on your climate, budget, and aesthetic preferences.
Should I insulate my shed?
Insulation is optional but beneficial. Uninsulated sheds experience extreme temperature swings that can damage stored items and create uncomfortable working conditions. Basic fiberglass insulation costs $200-$400 and significantly improves comfort and item protection.


