How to Build a Deck: Expert Tips Inside
Building a deck transforms your outdoor space into a functional entertainment area while adding significant value to your home. Whether you’re a seasoned DIY enthusiast or tackling your first major project, understanding the fundamentals of deck construction ensures a safe, durable structure that withstands years of weather and use. This comprehensive guide walks you through every phase of deck building, from initial planning and material selection to finishing touches and maintenance protocols.
A well-constructed deck requires careful attention to local building codes, proper foundation techniques, and quality craftsmanship. The process typically takes 2-4 weeks for a standard 12×16 foot deck, depending on complexity, weather conditions, and your experience level. Throughout this guide, we’ll emphasize safety-first practices and code compliance to help you create an outdoor space your family will enjoy for decades.
Planning, Permits & Local Codes
Before purchasing materials or breaking ground, invest time in thorough planning and research. Contact your local building department to understand specific requirements for your area. Most jurisdictions require deck permits if the structure exceeds 30 inches in height or covers more than 200 square feet, though regulations vary significantly by location. The International Code Council (ICC) provides standardized building codes that many municipalities adopt, though your local amendments may impose stricter requirements.
Create detailed sketches or use deck design software to visualize your project. Include dimensions, post locations, stair placement, and railing configurations. Document the slope of your yard—this affects post depth requirements and water drainage. Check for underground utilities by calling 811 before you dig, preventing dangerous encounters with electrical lines, gas pipes, and water mains. Review local builder associations for specific frost line depths in your region; posts must extend below this line to prevent frost heave damage.
When obtaining permits, provide detailed construction plans showing post spacing, beam sizing, joist dimensions, and connection details. The inspection process typically occurs at three critical stages: after post holes are dug but before concrete is poured, after the frame is complete, and upon final completion. Building inspectors verify compliance with local codes, ensuring your deck meets safety standards for load capacity, railing height, and stair dimensions.
Materials & Tools Selection
Choosing appropriate materials directly impacts your deck’s longevity and maintenance requirements. Pressure-treated lumber remains the most economical choice for structural components like posts, beams, and joists. Treated wood resists rot and insect damage for 15-20 years, though it requires proper installation with adequate spacing for air circulation. Composite decking—made from wood fibers and plastic—offers superior durability and minimal maintenance but costs 2-3 times more than wood. Cedar and redwood provide natural beauty and moderate rot resistance but demand regular staining or sealing every 2-3 years.
Essential tools for deck construction include a circular saw, power drill, level, tape measure, post-hole digger or auger, and a miter saw for precise angle cuts. A pneumatic nail gun or screw gun accelerates installation significantly. Safety equipment—including safety glasses, work gloves, dust masks, and steel-toed boots—protects you throughout the project. Consider renting specialized equipment like a power auger for digging multiple post holes efficiently.
Material calculations require precise measurements. For a 12×16 foot deck at standard height, you’ll typically need: 6-8 pressure-treated posts (6×6), 2-3 beams (2×10 or 2×12), 10-12 joists (2×8 or 2×10 spaced 16 inches apart), and 180-200 decking boards (2×6). Add 10-15% extra for waste, mistakes, and future repairs. Purchase galvanized or stainless steel fasteners specifically rated for outdoor use; regular steel fasteners rust and stain decking.
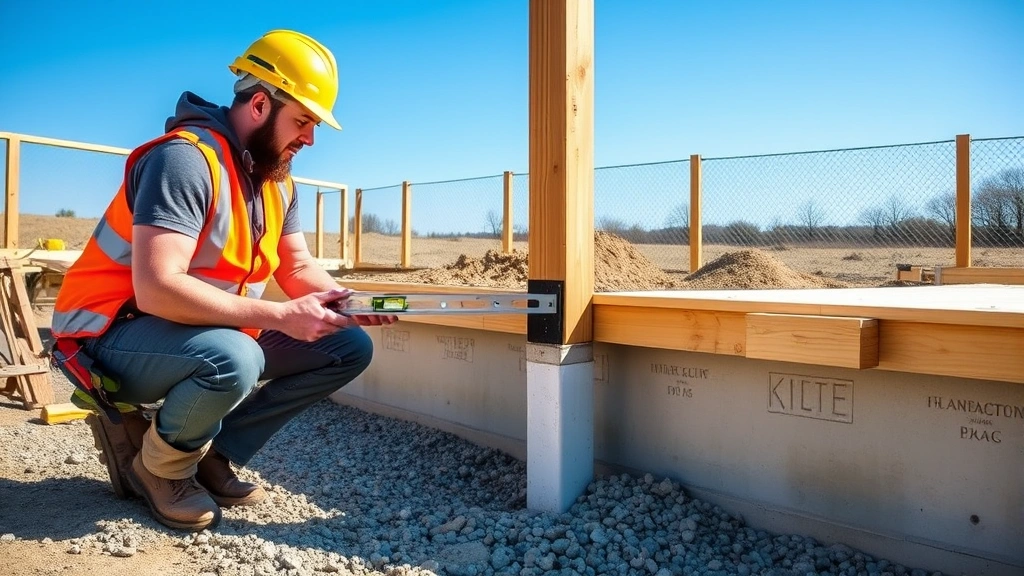
Foundation & Posts Installation
Proper foundation construction prevents settling, shifting, and structural failure. Begin by marking post locations using string lines and a carpenter’s square. Posts should be spaced no more than 8 feet apart along beams, with diagonal bracing for posts exceeding 6 feet in height. Dig holes to your area’s frost line depth—typically 36-48 inches in northern climates, though southern regions may require only 12-18 inches. Consult your local NRCS office for frost line data.
Use a post-hole digger or power auger to create holes slightly wider than post dimensions. Add 4-6 inches of gravel to each hole for drainage, improving water flow away from wood. Set posts in concrete, which provides superior stability compared to soil alone. Mix concrete according to manufacturer specifications and fill holes completely, ensuring posts remain perfectly vertical using a level. Allow concrete to cure for 48 hours before proceeding with frame construction.
Cut posts to uniform height, typically 1-1.5 inches above your finished beam height. This allows proper flashing installation and prevents water accumulation on top of beams. For decks attached to houses, install a ledger board—a critical component that connects your deck to the home’s rim joist. Use galvanized bolts spaced 16 inches apart, drilling through the house’s rim joist and ledger simultaneously. Never attach decks to siding; remove siding to expose the rim joist, ensuring direct wood-to-wood contact.
Framing & Joists Assembly
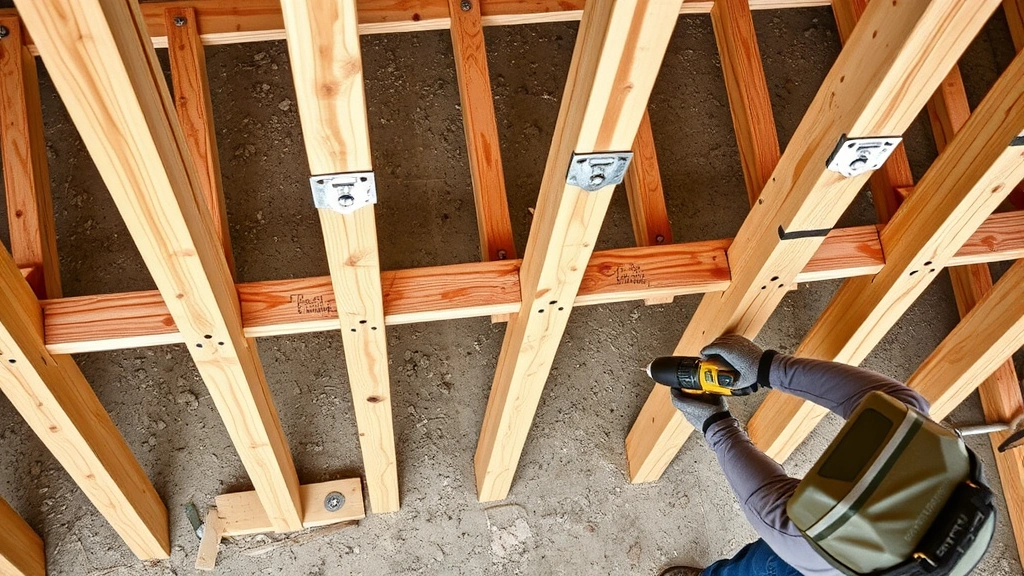
Beam installation follows post completion. Beams—typically 2×10 or 2×12 pressure-treated lumber—span between posts and support joists. Position beams on top of posts using post caps, which distribute loads evenly and prevent water from sitting on wood surfaces. Secure beams to posts with galvanized bolts or structural screws, creating rigid connections that resist lateral movement.
Joist installation requires precision spacing and level placement. Joists, typically 2×8 or 2×10 boards, are attached perpendicular to beams using joist hangers or toe-nailing with galvanized fasteners. Space joists 16 inches on center for residential decks—this standard spacing ensures adequate support for typical deck loads while minimizing material costs. Install blocking between joists every 8 feet to prevent twisting and improve overall rigidity. Ensure all joists slope slightly (1/8 inch per foot) away from the house for water drainage.
For decks with stairs or multiple levels, install doubled joists around openings and under stairways to handle concentrated loads. Use galvanized hurricane ties or joist hangers to secure joists to beams; these metal connectors significantly increase connection strength compared to traditional toe-nailing alone. Check that your concrete foundation cures properly before applying full loads to the framing system.
Decking Installation
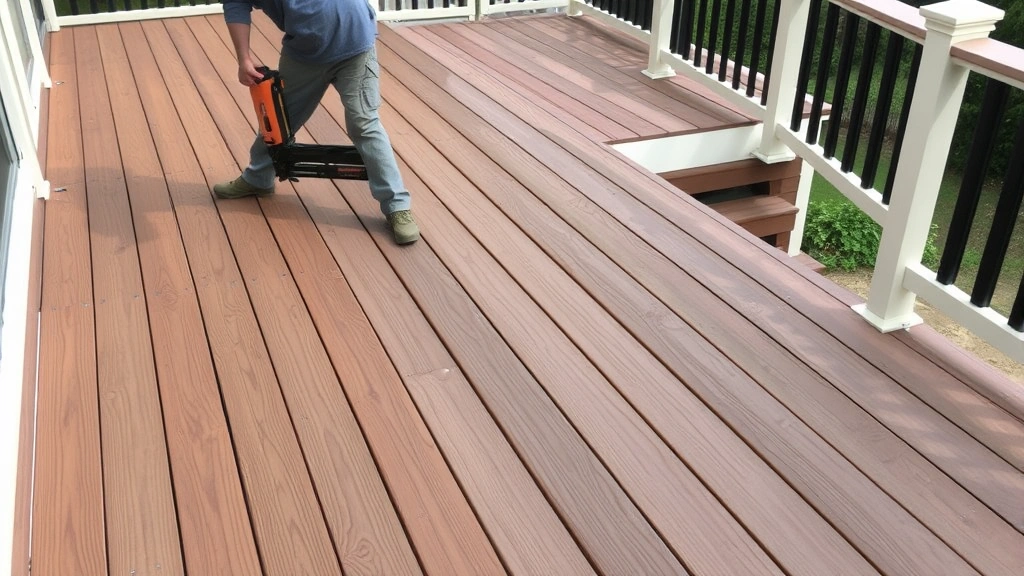
Decking boards—the visible surface—are installed perpendicular to joists, typically running parallel to the house. Begin at the ledger board, maintaining 1/8 to 1/4 inch gaps between boards to allow for wood expansion and water drainage. Composite and pressure-treated wood expand and contract with moisture and temperature changes; inadequate spacing causes buckling and surface damage.
Secure decking using galvanized screws (2.5 inches long) or hot-dipped galvanized nails, placing fasteners 2 inches from board edges and spacing them 12 inches apart. Two fasteners per joist per board prevent warping and ensure consistent appearance. Consider using hidden fastening systems for premium composite decking, which eliminates visible screw heads and creates a seamless appearance, though installation requires more time and precision.
Stagger board joints randomly rather than aligning them in straight lines; this improves structural integrity and creates a more pleasing aesthetic. Cut boards to length, slightly overhanging beam edges (typically 1-2 inches), then trim the overhang flush using a circular saw after installation. Sand any rough edges to prevent splinters and improve appearance. For decks with curved designs or complex patterns, plan layouts carefully before cutting and installation begins.
Railings & Stairs
Building codes mandate railings on decks exceeding 30 inches in height, with specific requirements for post spacing, baluster dimensions, and load capacity. Most jurisdictions require balusters spaced no more than 4 inches apart to prevent child entrapment—this is a critical safety feature. Railings must withstand 200 pounds of horizontal force at the mid-rail height without failing.
Install railing posts at 4-6 foot intervals, securely fastening them to the deck frame using bolts or lag screws. Attach top and bottom rails between posts using galvanized bolts or structural screws. Balusters—the vertical spindles between rails—can be wood, metal, or composite. Ensure consistent spacing using a template, and secure each baluster with screws at top and bottom for maximum strength.
Stairs require careful calculation and construction. Each step must have consistent rise (typically 7-7.75 inches) and run (typically 10-11 inches) to prevent tripping hazards. Code requires stair railings on one or both sides depending on width. Build stairs using stringers—the diagonal supports that carry step loads. Most residential stairs use three stringers for widths up to 3 feet, with additional stringers for wider stairs. Install treads securely to stringers using galvanized bolts, and ensure all edges are rounded to prevent foot injuries.
Finishing & Maintenance
After structural completion, finishing enhances appearance and protects materials. Pressure-treated lumber benefits from sealing after 6-12 months of weathering; this allows tannins to leach out and moisture to stabilize. Apply water-repellent sealers or semi-transparent stains every 2-3 years to maintain appearance and extend wood life. Composite decking typically requires minimal maintenance—occasional cleaning with mild soap and water keeps surfaces looking new.
Inspect your deck annually for signs of damage. Check for soft spots indicating rot, particularly around fasteners and where water collects. Look for loose boards, rusted fasteners, or deteriorated sealant around the ledger board. Replace damaged boards immediately and re-secure any loose connections. In winter climates, avoid using salt-based ice melt products, which accelerate wood deterioration; use sand or calcium chloride alternatives instead.
For enhanced functionality, consider adding outdoor lighting for security and ambiance, or coordinating deck colors with your home’s exterior. Shade structures like pergolas or retractable awnings extend usable season length. These additions transform decks into true outdoor living spaces while complementing your home’s overall aesthetic.
FAQ
How long does it take to build a deck?
A standard 12×16 foot deck typically takes 2-4 weeks for experienced builders, including permit acquisition, material procurement, and construction. Simpler designs may take 1-2 weeks, while complex multi-level decks with elaborate railings can extend to 6-8 weeks. Weather delays and material availability significantly impact timelines.
Do I need permits for my deck?
Most jurisdictions require permits for decks exceeding 30 inches in height or 200 square feet in area. Permit requirements vary by location; contact your local building department for specific regulations. Permits ensure your deck meets safety codes and may be required for insurance claims or home sales.
What’s the best decking material?
Pressure-treated lumber offers excellent value and durability at lower cost. Composite materials provide superior longevity and minimal maintenance but cost significantly more. Cedar or redwood provide natural beauty but require regular sealing. Choose based on your budget, maintenance preferences, and desired aesthetic.
How deep should deck posts be?
Posts must extend below your area’s frost line to prevent frost heave damage. Frost line depths range from 12-48 inches depending on climate; contact your local building department or NRCS office for specific requirements. Generally, northern states require 36-48 inches, while southern regions need 12-18 inches.
Can I attach my deck directly to my house?
Yes, but proper installation is critical. Use a ledger board bolted directly to your house’s rim joist using galvanized bolts spaced 16 inches apart. Remove siding to expose rim joist; never attach through siding. Ensure proper flashing prevents water intrusion, which causes structural damage and mold growth.
What spacing do deck boards need?
Leave 1/8 to 1/4 inch gaps between decking boards for water drainage and wood expansion. Inadequate spacing causes buckling, warping, and premature deterioration. Composite materials may have different expansion rates; consult manufacturer specifications for recommended spacing.
How often should I seal my deck?
Pressure-treated wood should be sealed after 6-12 months of weathering, then every 2-3 years thereafter. Composite decking rarely requires sealing but benefits from occasional cleaning. Cedar and redwood need annual sealing to maintain appearance and protect against rot.


