How to Build a Shed: Expert-Backed Guidelines for DIY Success
Building a shed is one of the most rewarding DIY projects you can undertake, providing valuable storage space while enhancing your property’s functionality and curb appeal. Whether you’re looking to organize garden tools, create a workshop, or establish a retreat space, a well-constructed shed offers practical benefits that justify the investment of time and effort. This comprehensive guide walks you through every phase of shed construction, from initial planning and site preparation through final touches, ensuring you have the knowledge and confidence to complete your project successfully.
The shed-building process typically requires careful planning, proper material selection, and adherence to local building codes and regulations. Unlike some home improvement projects, shed construction demands structural integrity and weather resistance to protect your stored items for years to come. By following expert guidelines and best practices, you’ll create a durable structure that withstands the elements while maximizing your outdoor space utilization.
Planning and Permits: The Foundation of Your Project
Before breaking ground on your shed, invest time in thorough planning. Check your local International Building Code (ICC) requirements and municipal zoning regulations, as many jurisdictions require permits for structures exceeding specific square footage or height limits. Contact your local building department to understand setback requirements, which typically mandate minimum distances between your shed and property lines. These regulations exist to ensure neighborhood harmony and prevent structural issues.
Create detailed sketches or use design software to visualize your shed’s dimensions, roof pitch, door placement, and window locations. Consider your intended use—a tool storage shed differs significantly from a workshop or studio space in terms of ventilation, electrical needs, and interior layout. Document these specifications before purchasing materials, as accurate planning prevents costly mistakes and ensures your finished structure meets all code requirements.
Budget planning is equally critical. Research material costs, tool rentals, and whether you’ll hire professionals for specific tasks like roofing or electrical work. Many DIYers find that breaking the project into phases makes the financial burden more manageable while allowing time to gather materials strategically.
Site Selection and Preparation: Creating Level Ground
Selecting the right location significantly impacts your shed’s longevity and functionality. Choose a spot with good drainage to prevent water accumulation around the structure’s base, which leads to rot and foundation deterioration. Avoid areas directly beneath tree branches that could drop debris or create excessive shade that promotes mold growth. Ensure the location receives adequate sunlight for visibility and drying, unless you specifically need shaded storage for temperature-sensitive items.
Prepare your site by clearing vegetation, rocks, and debris. Mark the shed’s footprint using string lines and stakes, then check for level ground using a long straightedge and level tool. Most sites require some grading—removing high spots and filling low areas—to achieve proper drainage. The ground should slope slightly away from the structure (approximately 1 inch per 10 feet) to direct water away from the foundation.
Before any excavation or construction, contact your local utility locating service (typically by calling 811 in the United States) to identify underground gas, electrical, water, and telecommunications lines. This critical safety step prevents dangerous accidents and expensive repairs.
Foundation Installation: Ensuring Structural Stability
A solid foundation prevents settling, shifting, and long-term structural problems. The most common shed foundations include concrete pads, concrete piers, gravel beds with pressure-treated skids, and concrete slab foundations. For smaller sheds, concrete piers or pad footings offer excellent support without the expense of a full slab. These involve digging holes below the frost line (depth varies by region—consult local building science resources for your area) and setting concrete footings that support the shed’s frame.
For larger structures or permanent installations, a concrete slab foundation provides superior protection against moisture and pests. Proper site drainage around the perimeter prevents water from pooling against the foundation. If using pressure-treated skids or lumber, ensure they rest on solid ground or concrete pads to prevent direct soil contact that accelerates rot.
Allow concrete to cure fully (typically 7-14 days) before beginning frame construction. This patience prevents foundation settling that could crack walls or misalign doors and windows. Check that all foundation elements are level and square using a transit level or laser level for accuracy.
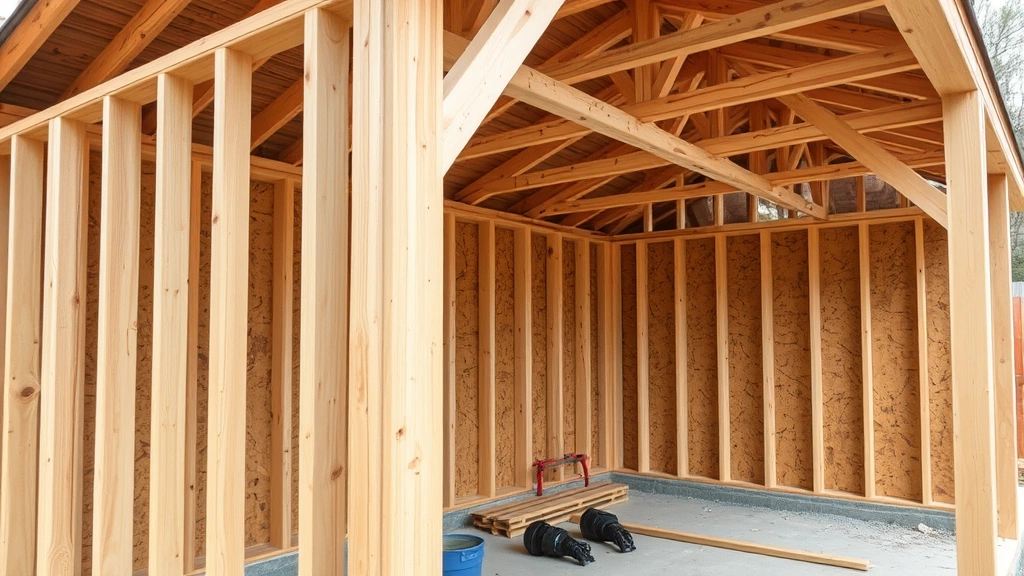
Framing the Structure: Building the Skeleton
Shed framing follows standard construction principles using pressure-treated lumber for bottom plates (in contact with foundation) and conventional lumber for walls and roof structures. Start by anchoring the bottom plates to your foundation using bolts, concrete screws, or adhesive appropriate for your foundation type. Ensure plates are perfectly level before proceeding.
Build wall frames on the ground, then tilt them into position and brace them securely. Wall framing typically uses 2×4 lumber spaced 16 inches on center, providing adequate strength while minimizing material costs. Install corner bracing and mid-wall bracing to prevent racking (diagonal distortion) during wind events. For larger sheds, consider adding interior bracing or using structural sheathing for additional rigidity.
Frame openings for doors and windows, using doubled headers to support the load above the opening. The header size depends on the opening width—consult American Wood Council (AWC) span tables for proper sizing. Install temporary diagonal bracing across wall frames to maintain squareness until permanent sheathing is applied.
Roof framing involves rafters, trusses, or collar ties depending on your roof design. Common rafter spacing matches wall framing (16 or 24 inches on center). Calculate proper rafter sizing based on roof pitch, span, and expected snow loads in your region. Many builders prefer pre-fabricated roof trusses for simplicity and consistency, though traditional rafter framing offers greater flexibility for interior design.
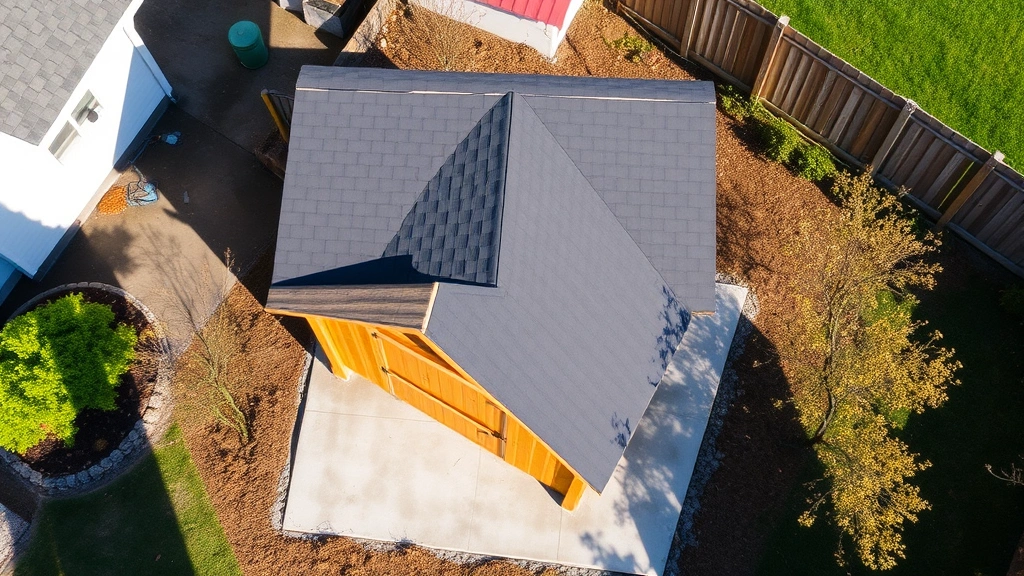
Roofing Your Shed: Protection from the Elements
A quality roof is your shed’s primary defense against weather damage. After framing is complete and sheathed, install underlayment—typically a water-resistant barrier that protects against wind-driven rain and condensation. Asphalt shingles remain the most popular roofing material for sheds due to their affordability, ease of installation, and 15-25 year lifespan. Metal roofing offers longevity (40-70 years) and superior weather performance, though at higher initial cost.
Install drip edge along all roof perimeters to direct water away from fascia and siding. Properly ventilated roofs prevent moisture accumulation in the attic space, which extends shingle life and prevents mold growth. Install soffit vents and ridge vents to create continuous air circulation, or use static roof vents if ridge venting isn’t feasible.
Ensure gutters and downspouts direct water at least 4-6 feet away from the shed foundation. This critical detail prevents water from saturating soil around the foundation or creating erosion problems. Consider gutter guards to minimize maintenance requirements.
Exterior Finishing: Weatherproofing and Aesthetics
Exterior siding protects the structure while contributing to curb appeal. Popular options include T1-11 plywood (economical and quick to install), traditional lap siding, board-and-batten, or fiber cement boards for durability. Each material offers different maintenance requirements and aesthetic qualities. Before installing siding, apply house wrap or felt paper as a secondary moisture barrier.
Seal all gaps, joints, and fasteners with appropriate caulk or sealant to prevent water infiltration. Install flashing around windows, doors, and any roof penetrations to direct water away from vulnerable areas. Paint or stain exterior surfaces to enhance weatherproofing—wood exposed to UV radiation and moisture deteriorates rapidly without protective finishes.
Install quality doors and windows that seal tightly against weather infiltration. For tool storage sheds, a single hinged door and small windows may suffice. Workshop sheds benefit from larger doors for equipment access and additional windows for natural light. Ensure door frames are properly shimmed and secured for smooth operation and tight closure.
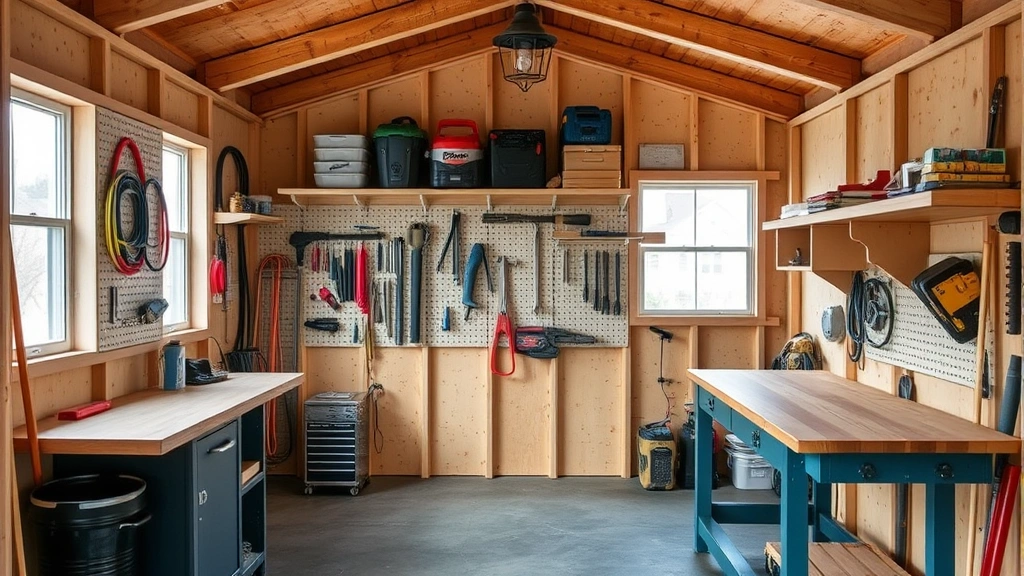
Interior Setup and Storage: Maximizing Functionality
Interior organization transforms your shed from a storage dump into an efficient workspace. Install wall-mounted shelving, pegboards, and tool racks to maximize vertical space. Consider your storage needs and layout similar to professional shop organization. Insulation and vapor barriers prove worthwhile if you store temperature-sensitive items or plan to use the space year-round, though they add cost and reduce usable interior space.
Electrical service is optional but increasingly popular for workshops and creative spaces. Run conduit through walls to accommodate future outlet installation, or hire a licensed electrician to install circuits if you lack electrical expertise. Ensure all wiring meets code requirements and includes proper grounding and circuit protection.
Flooring options range from bare ground (least expensive, requires good drainage) to gravel, concrete, or plywood subflooring with finished flooring. Consider your primary activities—a workshop benefits from concrete or finished flooring, while a tool storage shed functions adequately with gravel and good drainage.
Tools and Materials Needed: Essential Equipment and Supplies
Successful shed building requires both power tools and hand tools. Essential power tools include a circular saw, miter saw, power drill, nail gun (pneumatic or cordless), and level. Hand tools include measuring tape, framing square, hammer, shovel, and various screwdrivers. Many DIYers rent specialized equipment like concrete mixers, power augers for post holes, or trenching machines rather than purchasing.
Material requirements depend on your shed size and design. A typical 10×12 foot shed requires approximately 2,000-2,500 board feet of lumber, several bundles of roofing shingles, windows, doors, fasteners, and finishing materials. Source materials from reputable building suppliers who can provide accurate estimating assistance. Pressure-treated lumber for ground-contact applications, proper flashing materials, and quality roofing components justify slightly higher costs through extended lifespan and reduced maintenance.
Safety equipment is non-negotiable: work gloves, safety glasses, dust masks or respirators, hearing protection, and proper footwear. Fall protection becomes essential when working on roofing. First aid supplies and emergency contact information should always be accessible on job sites.
Frequently Asked Questions
How long does a typical shed construction project take?
Timeline varies significantly based on shed size, complexity, and available working time. A straightforward 10×12 foot shed typically requires 40-80 hours of labor, translating to 1-3 weeks working weekends or 1-2 weeks of full-time effort. Larger sheds, those with complex roof designs, or projects involving concrete work may require 2-3 months. Weather delays and permit processing add additional time.
Do I need a building permit for my shed?
Permit requirements vary by jurisdiction. Most areas require permits for structures exceeding 100-120 square feet or those located within setback requirements. Some municipalities require permits regardless of size. Contact your local building department to determine specific requirements for your location. Obtaining proper permits protects your property value and ensures code compliance.
What’s the best foundation type for sheds?
The ideal foundation depends on your climate, soil conditions, and shed permanence. Concrete piers below the frost line work well in most regions for small to medium sheds. Concrete slabs provide superior moisture protection in wet climates. Gravel beds with pressure-treated skids offer economy but require excellent drainage. Consult local building codes and soil conditions when selecting foundation type.
Can I build a shed without prior construction experience?
Absolutely. Many first-time builders successfully complete shed projects by carefully following plans, educating themselves about code requirements, and taking time with critical steps like foundation and framing. Start with smaller, simpler designs, don’t hesitate to ask for help with heavy lifting, and research unfamiliar techniques before beginning. Consider watching instructional videos or hiring professionals for complex tasks like roofing if you’re uncomfortable with heights.
What maintenance does a shed require?
Regular maintenance extends shed lifespan significantly. Inspect and repair roof damage promptly, clean gutters seasonally, check siding for cracks or peeling paint, and ensure proper drainage around the foundation. Reapply exterior stain or paint every 5-7 years depending on climate. Address any water intrusion immediately to prevent rot and mold. Well-maintained sheds easily last 20-30 years or longer.
Should I insulate my shed?
Insulation benefits depend on intended use and climate. Workshop sheds benefit from insulation for temperature control and comfort. Tool storage sheds in moderate climates may not require insulation. Cold climates warrant insulation to prevent moisture condensation and protect stored items from freeze-thaw cycles. Weigh insulation costs against your specific needs and intended use.
What’s the most cost-effective shed design?
Simple rectangular designs with gable roofs minimize material waste and construction complexity, reducing overall costs. Avoiding complex roof lines, excessive windows, and premium finishing materials keeps expenses manageable. Consider whether a kit shed or pre-fabricated panels align with your budget, though site-built structures often offer better customization and value long-term.
Building a shed represents a significant but achievable DIY undertaking that adds immediate value and functionality to your property. By carefully planning your project, understanding local code requirements, and following expert guidelines, you’ll create a durable structure that serves your needs for decades. Whether your shed becomes a creative workshop, organized storage space, or personal retreat, the satisfaction of completing this substantial project makes every hour invested worthwhile. Start with clear plans, invest in quality materials where it matters most, and don’t hesitate to seek professional guidance for specialized tasks—your finished shed will reward your effort with years of reliable service.
For additional DIY inspiration, explore our comprehensive guides on woodworking plans and techniques that apply directly to shed construction, or visit our DIY blog for ongoing project inspiration and expert tips.


