Maintaining your dirt bike’s carburetor is essential for optimal performance, and one of the most critical components you’ll need to work with is the carburetor needle. Whether you’re experiencing poor throttle response, inconsistent idling, or fuel mixture issues, removing the carburetor needle from the slide is often necessary for cleaning, inspection, or replacement. This detailed guide will walk you through the entire process, making it accessible even for beginners who have never worked on motorcycle carburetors before.
The carburetor needle plays a crucial role in controlling fuel flow through the carburetor’s main jet system. Located inside the slide, this tapered needle moves up and down with the throttle, precisely metering the fuel-to-air mixture at different throttle positions. Understanding how to safely remove and reinstall this component is a valuable skill that can save you hundreds of dollars in mechanic fees while keeping your dirt bike running at peak performance.
Tools and Preparation
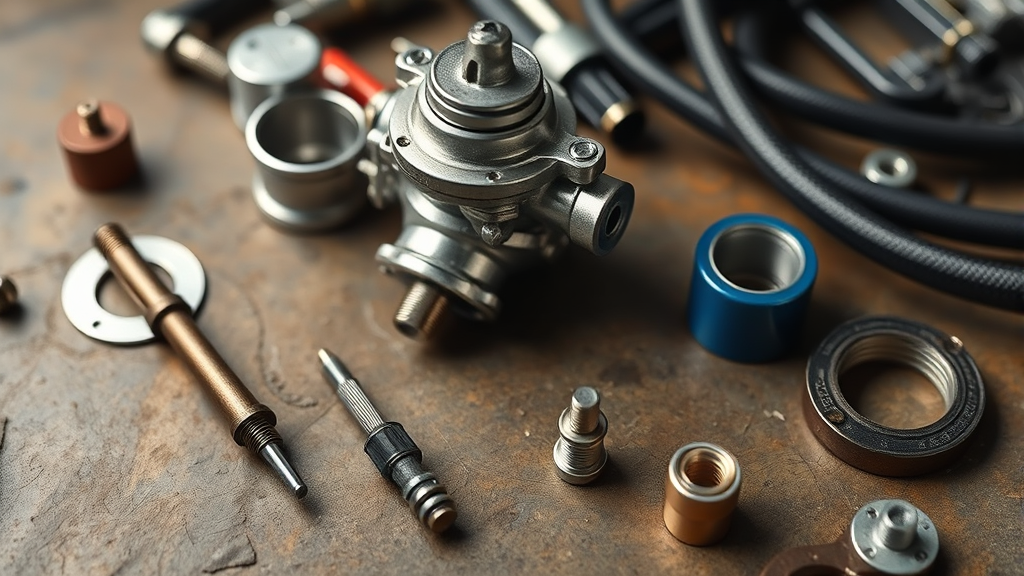
Before beginning this project, gathering the right tools and materials is essential for success. You’ll need a basic set of screwdrivers (both flathead and Phillips), needle-nose pliers, a clean workspace with good lighting, and a magnetic parts tray to prevent losing small components. Additionally, have carburetor cleaner, lint-free rags, and a digital camera or smartphone ready to document the disassembly process for reference during reassembly.
Preparation extends beyond just tools – ensure your dirt bike is completely cool before starting work. Remove the seat and side panels to access the carburetor area more easily. Having a service manual specific to your bike model is invaluable, as carburetor designs can vary significantly between manufacturers and years. If you’re interested in expanding your DIY skills beyond motorcycle maintenance, consider exploring other DIY car repairs that share similar mechanical principles.
Create a clean, organized workspace by laying out a large, clean cloth or tarp where you can place parts in order of removal. This systematic approach will make reassembly much smoother and reduce the risk of losing critical components. Consider taking photos at each step of the disassembly process, as these will serve as valuable references when putting everything back together.
Safety Considerations and Workspace Setup
Safety should always be your top priority when working with fuel systems and small engine components. Ensure your workspace is well-ventilated, especially when using carburetor cleaners or other chemical solvents. Keep a fire extinguisher nearby, as you’ll be working around fuel residue. Wear safety glasses to protect your eyes from debris and chemical splashes, and use nitrile gloves to protect your hands from harsh chemicals and sharp edges.
Disconnect the battery if your dirt bike has an electric start system, and ensure the fuel petcock is in the “off” position. If your bike doesn’t have a petcock, you may need to drain some fuel from the carburetor bowl to prevent spills. Work in a well-lit area, preferably with both overhead lighting and a portable work light to illuminate the carburetor area clearly.
Keep children and pets away from your workspace, and never smoke or use open flames when working with fuel system components. Have absorbent materials ready to clean up any fuel spills immediately. According to the EPA’s guidelines on small engines, proper handling of fuel and engine components is crucial for both safety and environmental protection.
Accessing the Carburetor
Most dirt bike carburetors are located between the air filter and the engine intake manifold. Begin by removing the seat, side panels, and any plastic covers that obstruct access to the carburetor. Locate the air filter housing and carefully disconnect the intake boot that connects the air filter to the carburetor. This may require loosening hose clamps or removing screws, depending on your bike’s design.
Next, identify the throttle cable connection point on top of the carburetor. The throttle cable typically connects to the slide mechanism through a small access cap. You’ll also need to locate and disconnect any vacuum lines, overflow tubes, and the main fuel line. Take photos of these connections before disconnecting them, as proper routing is crucial for correct operation.
If your carburetor has a cable-operated choke, disconnect this as well. Some carburetors may have additional connections such as accelerator pump lines or temperature-sensitive components. Mark each connection with masking tape and a marker to ensure correct reassembly. The goal is to free the carburetor enough to access the top cap where the slide assembly is housed.
Removing the Slide Assembly
With the carburetor accessible, locate the top cap that houses the slide assembly. This cap is typically held in place by two or four screws around the perimeter. Before removing these screws, ensure the throttle cable has sufficient slack by rotating the handlebars to the position that provides the most cable length. Carefully remove the cap screws and set them aside in your magnetic parts tray.
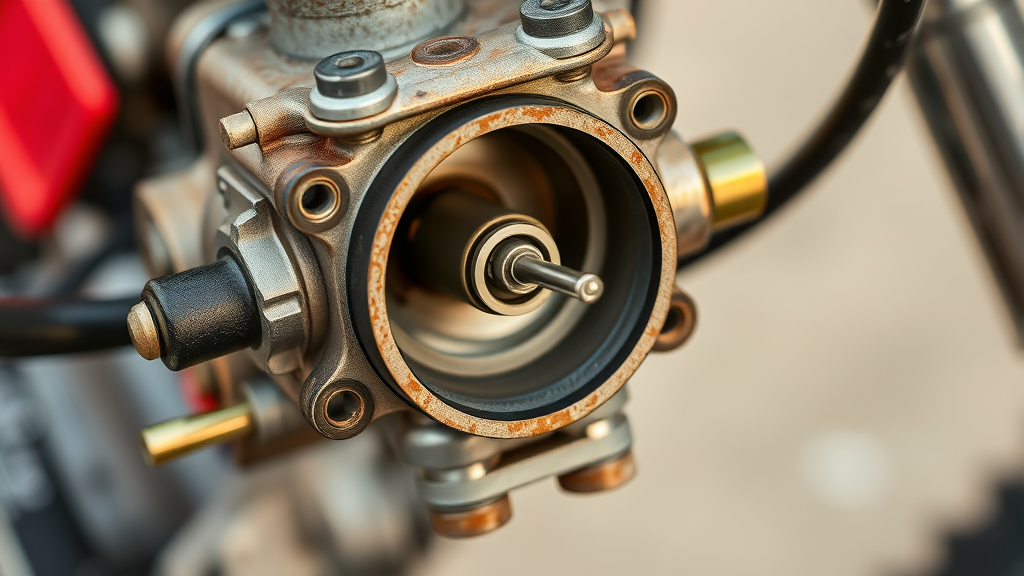
Gently lift the top cap while being mindful of the throttle cable still connected to the slide. The slide assembly should come up with the cap, revealing the needle assembly inside the slide body. At this point, you can see how the needle is positioned within the slide and how the throttle cable connects to the slide mechanism.
Some carburetor designs feature a spring-loaded slide that may try to pop up when the cap is removed. Control this motion carefully to prevent damage to the needle or slide components. If the slide seems stuck, gently work it loose with careful manipulation – never force it, as this could damage the precision-machined surfaces.
Needle Removal Process
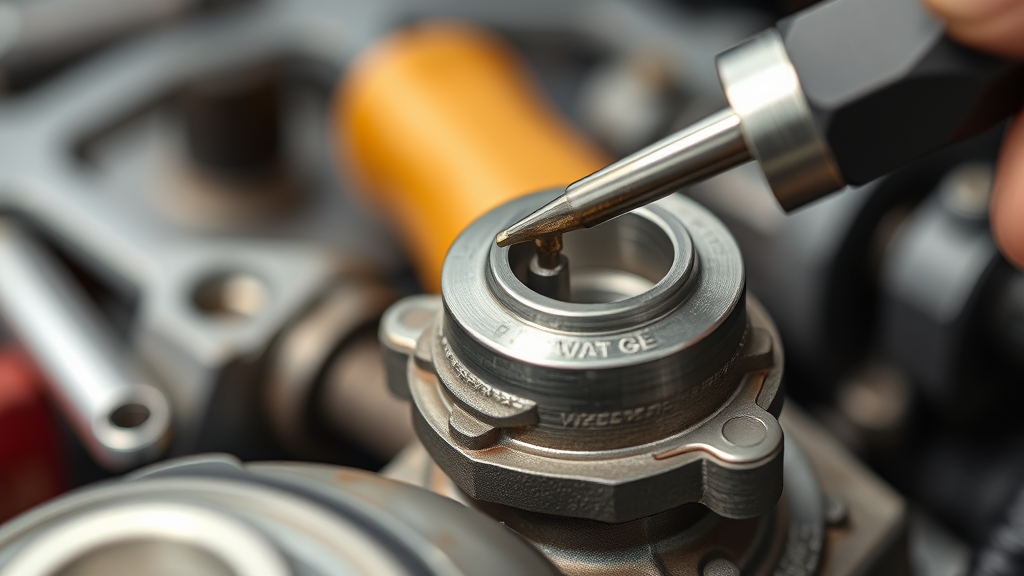
Now comes the critical step of removing the needle from the slide. The needle is typically held in place by a small clip or retaining mechanism at the top of the slide. Look for a small E-clip, circlip, or threaded retainer that secures the needle in position. Using needle-nose pliers, carefully remove this retaining clip, taking care not to let it spring away and get lost.
Once the retaining clip is removed, the needle should lift out of the slide easily. Handle the needle with care, as it’s precision-machined and any scratches or damage can affect carburetor performance. The needle may have a spring washer or other small components above or below it – keep track of the order and orientation of these parts for proper reassembly.
Examine the needle seat inside the slide for any debris or damage. This area should be clean and smooth for proper needle movement. If you notice any scoring or rough spots, this may indicate wear that requires professional attention. Clean the needle seat with carburetor cleaner and a soft brush if necessary, being careful not to damage the precision surfaces.
The needle itself may show wear patterns, particularly around the tip and along the tapered section. Normal wear appears as slight polishing of the metal surface, while excessive wear shows as significant scratches, scoring, or actual dimensional changes. Document the needle’s condition with photos for reference when ordering replacement parts if needed.
Inspection and Maintenance Tips
With the needle removed, this is an excellent opportunity to perform a thorough inspection of all components. Examine the needle for straightness by rolling it on a flat surface – any wobble indicates a bent needle that should be replaced. Check the slide for smooth operation by moving it up and down in the carburetor body. It should move freely without binding or excessive play.
Clean all components with carburetor cleaner and compressed air if available. Pay special attention to the needle jet area in the carburetor body, as this critical passage can become clogged with debris or fuel deposits. A clogged needle jet will cause poor performance regardless of needle condition. Use a soft brush and carburetor cleaner to remove any buildup, but avoid using wire brushes or abrasive materials that could damage precision surfaces.
Inspect the throttle cable for fraying, kinks, or corrosion. A damaged throttle cable can cause erratic needle movement and should be replaced if any defects are found. Lubricate the cable with appropriate cable lubricant if it appears dry or sticky. This maintenance step is similar to other mechanical maintenance tasks you might encounter in battery charging systems or other motorcycle electrical components.
Check the slide spring for proper tension and condition. The spring should provide smooth, consistent resistance without any broken or damaged coils. A weak spring can cause poor throttle response, while an overly stiff spring can make throttle operation difficult. According to motorcycle maintenance best practices, regular inspection of these components can prevent costly repairs and ensure reliable operation.
Reassembly Process
Reassembly is essentially the reverse of the disassembly process, but requires careful attention to detail to ensure proper operation. Begin by ensuring all components are clean and properly lubricated where appropriate. Install the needle into the slide, making sure it’s properly seated and oriented correctly. Replace the retaining clip, ensuring it’s fully seated in its groove.
Before installing the slide assembly back into the carburetor, test the needle movement by gently moving the slide up and down. The needle should move smoothly without binding or catching. If you notice any resistance, remove the needle and check for proper installation and cleanliness of all components.
Install the slide assembly into the carburetor body, ensuring the slide moves freely in its bore. The slide should drop to its lowest position under its own weight when the throttle is released. Connect the throttle cable to the slide mechanism, ensuring proper routing and adjustment. The cable should have slight slack when the throttle is in the closed position.
Replace the top cap and secure it with the original screws, tightening them in a cross pattern to ensure even pressure distribution. Reconnect all fuel lines, vacuum hoses, and other connections according to your reference photos. Double-check that all connections are secure and properly routed to avoid interference with moving parts.
Troubleshooting Common Issues
After reassembly, you may encounter some common issues that require attention. If the throttle feels sticky or doesn’t return to idle position smoothly, check the throttle cable routing and adjustment. The cable should move freely through its entire range without binding against any components. Improper cable routing can cause erratic throttle response and poor needle positioning.
Poor idle quality or inconsistent throttle response often indicates improper needle installation or contamination in the carburetor passages. Ensure the needle is properly seated and that all components are clean. If problems persist, the issue may be related to other carburetor adjustments such as idle mixture or main jet sizing, which require additional tuning expertise.
Fuel leaks around the carburetor area after reassembly typically indicate loose connections or damaged gaskets. Check all fuel line connections and ensure they’re properly tightened. If leaks persist from the carburetor body itself, internal gaskets may need replacement, which requires more extensive disassembly.
Engine performance issues such as hesitation, poor acceleration, or excessive fuel consumption may indicate that the needle height needs adjustment. Most carburetors allow for needle position adjustment by moving the retaining clip to different grooves on the needle. Consult your service manual for specific adjustment procedures, as this process requires careful tuning and testing. This type of precise mechanical work shares similarities with other detailed DIY projects like woodworking projects that require attention to detail and proper tool usage.
Frequently Asked Questions
How often should I remove and clean the carburetor needle?
The frequency depends on riding conditions and fuel quality, but generally, the needle should be inspected during annual maintenance or if you experience performance issues. Riders in dusty conditions or those using ethanol-blended fuels may need more frequent inspection. Signs that indicate needle service is needed include poor throttle response, hesitation during acceleration, or difficulty maintaining consistent engine speed.
Can I damage the needle during removal?
Yes, the needle is precision-machined and can be damaged by improper handling. Always use appropriate tools, handle the needle gently, and avoid dropping it on hard surfaces. Scratches or bends in the needle will affect fuel metering and engine performance. If you accidentally damage the needle during removal, it should be replaced before reassembly.
What should I do if the retaining clip breaks during removal?
Retaining clips are small and can break if handled roughly or if they’re corroded. If the clip breaks, you’ll need to obtain a replacement before reassembling the carburetor. These clips are usually available from motorcycle dealers or online parts suppliers. Never attempt to operate the carburetor without the proper retaining clip, as this could result in needle displacement and engine damage.
Is it necessary to remove the entire carburetor to access the needle?
In most cases, no. The needle can usually be accessed by removing the top cap of the carburetor while it’s still mounted on the bike. However, some carburetor designs or space constraints may require partial or complete carburetor removal. Consult your service manual for model-specific procedures, as accessibility varies significantly between different dirt bike models.
How do I know if my needle needs replacement?
Signs of needle wear include visible scratches or scoring on the tapered surface, a bent or curved needle when rolled on a flat surface, or performance issues such as poor fuel economy, hesitation, or inconsistent throttle response. Needles typically last many thousands of miles under normal conditions, but contaminated fuel or improper installation can accelerate wear.
What’s the difference between adjusting needle height and replacing the needle?
Needle height adjustment involves moving the retaining clip to different positions on the needle to raise or lower its position in the needle jet, affecting the fuel mixture at different throttle positions. This is a tuning adjustment. Needle replacement involves installing a completely new needle when the original is worn, damaged, or when changing to a different needle profile for performance modifications. According to Family Handyman’s motorcycle maintenance guide, understanding both procedures is important for proper carburetor maintenance.
Can I clean the needle with regular solvents?
Use only carburetor cleaner or other solvents specifically designed for fuel system components. Regular household cleaners or harsh solvents can damage rubber seals or leave residues that affect engine performance. Avoid abrasive cleaning methods that could scratch the needle’s precision surface. Gentle cleaning with carburetor cleaner and a soft cloth is usually sufficient to remove deposits and restore proper function. This attention to using proper cleaning materials is similar to the care required in DIY science experiments where using the correct materials ensures successful results.