Driveway Installation: How to DIY? Pro Tips Inside
Installing a new driveway is one of the most impactful home improvement projects you can undertake. Whether you’re replacing a cracked asphalt surface or laying down your first driveway, understanding the process can save you thousands in contractor fees while giving you the satisfaction of completing a major property upgrade yourself. This comprehensive guide walks you through every step of driveway installation, from site preparation to final sealing.
A well-installed driveway not only enhances your home’s curb appeal but also protects your property from water damage and provides a safe, durable surface for vehicles. The key to success lies in proper preparation, understanding material options, and following best practices for compaction and finishing. Whether you choose asphalt, concrete, or permeable pavers, the foundational principles remain consistent.

Choosing Your Driveway Material
Your material selection significantly impacts installation difficulty, longevity, and maintenance requirements. Concrete driveways offer exceptional durability, typically lasting 30-40 years with minimal maintenance. They withstand freeze-thaw cycles better than asphalt and provide a cleaner appearance. However, concrete requires precise mixing, proper curing time, and careful finishing techniques. Asphalt driveways are more budget-friendly and easier for beginners to install, though they require resealing every 3-5 years and typically last 15-20 years. Permeable pavers and recycled asphalt offer eco-friendly alternatives that allow water drainage, reducing runoff issues.
Consider your climate zone when making this decision. In regions experiencing harsh winters with salt application, concrete’s superior durability justifies the extra installation complexity. For milder climates, asphalt provides excellent value. Before committing to any material, review local ICC building codes and municipality requirements, as some areas have specific regulations regarding driveway materials and thickness standards.
Site Assessment and Preparation
Begin by evaluating your existing driveway (if replacing) and the surrounding landscape. Measure the total square footage accurately—multiply length by width, accounting for any irregular shapes by breaking them into rectangles. Document the current drainage patterns, noting where water pools or runs off. Check for underground utilities by contacting your local utility locating service (typically free or low-cost) before any excavation begins.
Remove any existing driveway material systematically. For asphalt, rent a jackhammer or hire removal services if the layer exceeds 4 inches. For concrete, use a concrete saw to cut it into manageable sections before breaking and hauling away debris. This preparation phase is crucial—neglecting it leads to uneven settling and premature failure. Clear the site of debris, vegetation, and loose soil. If you’re working on a new driveway site, remove topsoil completely, as organic material decomposes and creates voids under your finished surface.
Grading and Drainage Planning
Proper grading prevents water accumulation, the primary cause of driveway failure. Your driveway should slope away from structures at a minimum gradient of 1% (1 inch per 8 feet). Use a laser level or transit level to establish these grades accurately. Mark high and low points with stakes and string lines. This step determines whether your driveway sheds water effectively or becomes a liability during heavy rain.
Evaluate subsurface drainage carefully. If your property has a high water table or poor natural drainage, consider installing a perforated drain pipe along the driveway’s lower edge, directing water to a suitable discharge point. This investment prevents catastrophic failure in wet seasons. Mark drainage pathways before beginning base layer installation. Consult ASCE structural guidelines for your specific soil conditions and regional drainage requirements.
Base Layer Installation
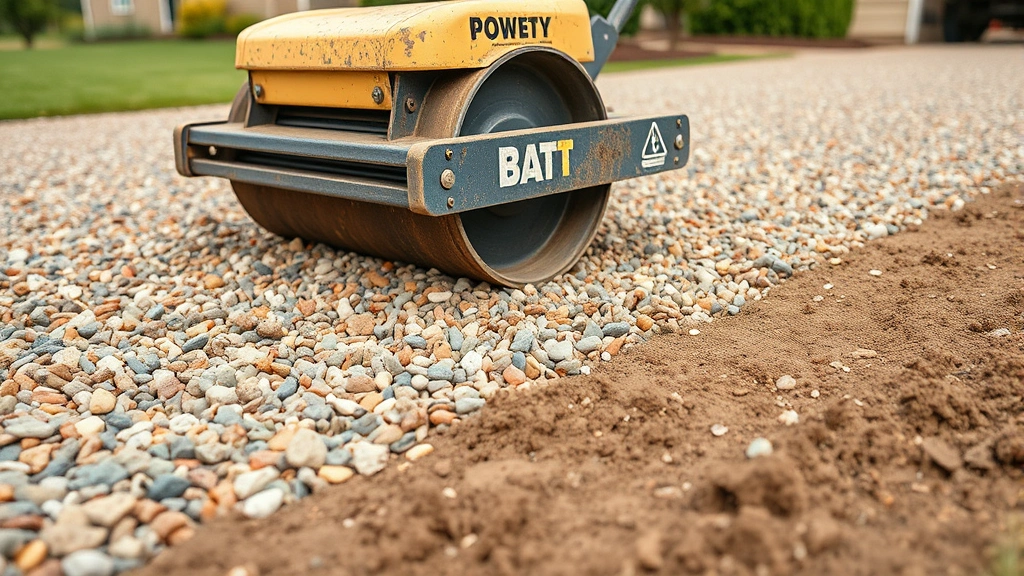
The base layer is your driveway’s foundation—it cannot be overlooked. Remove 4-6 inches of existing soil (or more if the subgrade is soft clay). Add crushed stone or gravel base material in 2-inch lifts, compacting each layer thoroughly with a plate compactor or hand tamper. Proper compaction reaches 95% of maximum dry density, eliminating future settling. Inadequate compaction is the most common DIY mistake, leading to cracking and uneven surfaces within months.
For clay-heavy soils, add a geotextile fabric layer before base material to prevent soil migration into the stone. This is especially important in areas with poor drainage. The compacted base should be level and firm—you shouldn’t sink more than a quarter-inch when walking on it. If you’re installing a basement finishing project nearby, coordinate drainage work to ensure water flows away from both structures. Use a straightedge to verify base flatness; high spots should be removed and low areas filled, then recompacted.
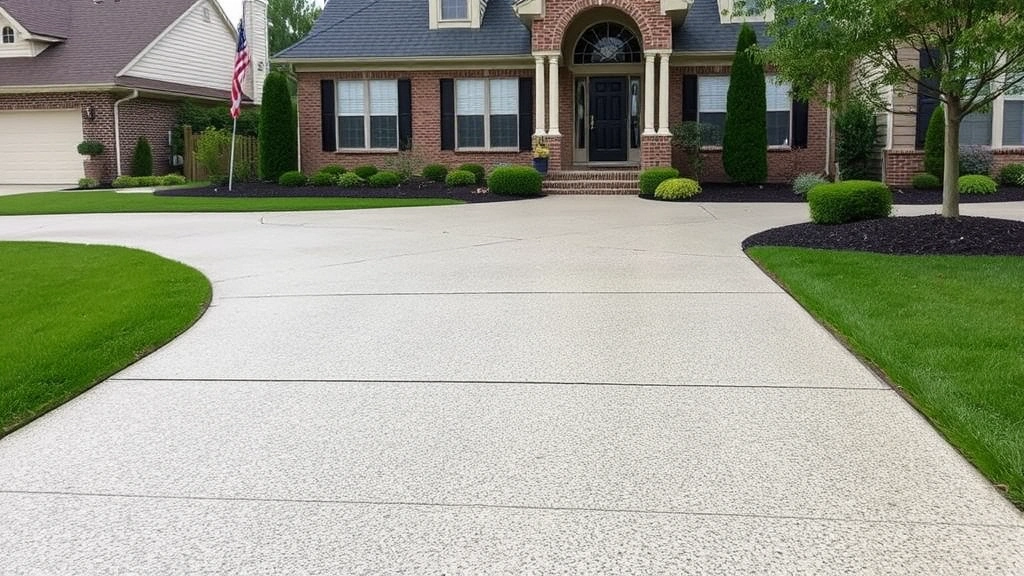
Concrete Driveway Installation
Concrete installation demands precision but delivers superior results. Construct forms using 2×4 lumber, staking them securely at the proper grade. Concrete should be 4 inches thick for residential driveways (6 inches in areas with heavy truck traffic). Mix concrete according to manufacturer specifications—use a concrete mixer for small projects or order ready-mix for larger installations. Proper mix design includes cement, sand, gravel, water, and often air-entrainment agents for freeze-thaw protection.
Pour concrete in sections, working quickly before it begins setting. Spread material evenly using shovels and rakes, then use a screed board (a long straight board) to strike off excess concrete flush with the forms. Vibrate the concrete gently with a surface vibrator to release air pockets and ensure consolidation around reinforcement. For added strength, lay wire mesh or rebar before pouring, elevating it to mid-slab height. Allow concrete to cure undisturbed for at least 7 days before vehicle traffic; optimal curing takes 28 days.
Finishing techniques affect both appearance and safety. Broom finish (dragging a stiff broom across fresh concrete) creates slip-resistant texture. Trowel finish produces a smoother, more refined look but is slippier when wet. For DIY installations, broom finish is recommended for safety. Control joints cut at 8-10 foot intervals allow concrete to expand and contract without random cracking. Use a concrete saw to cut these joints 1/4 inch deep after concrete hardens. Review ACI concrete standards for your specific climate and application requirements.
Asphalt Driveway Installation
Asphalt installation is more forgiving than concrete but still requires attention to detail. Hot-mix asphalt must be delivered and placed while hot (typically 300-350°F). Order delivery coordinated with your installation timeline—asphalt begins hardening as it cools. Spread material using a power rake or shovel, working quickly. Compact asphalt immediately using a heavy vibratory roller, making overlapping passes until the surface is smooth and dense.
Apply asphalt in 2-3 inch lifts for residential driveways. First, establish a tack coat (thin adhesive layer) if placing new asphalt over existing pavement. Allow each lift to cool before subsequent applications. The final surface should be dark, smooth, and uniform in color. Compaction is critical—under-compacted asphalt becomes rutted and deteriorates rapidly. Most DIYers should rent professional compaction equipment rather than attempting hand tools for large areas.
Asphalt requires seal coating every 3-5 years to prevent oxidation and water penetration. This maintenance is non-negotiable for longevity. Unlike concrete, asphalt cannot be DIY-installed in most regions without specialized equipment and hot-mix delivery capabilities. Many homeowners find hiring a professional asphalt contractor more practical while handling site prep and base layer work themselves, reducing overall project costs significantly.
Paver and Permeable Options
Permeable pavers and recycled asphalt offer environmentally responsible alternatives gaining popularity in sustainable home improvement projects. Permeable pavers allow water infiltration, reducing stormwater runoff and supporting groundwater recharge. They’re installed similarly to traditional pavers but require specialized base preparation with permeable materials (recycled asphalt or stone) instead of sand.
Lay permeable pavers over a 4-6 inch compacted stone base, maintaining proper slope for drainage. Use polymeric sand (sand mixed with binding agents) between pavers to prevent weed growth while allowing water passage. This material is more expensive than traditional approaches but qualifies for stormwater credits in many municipalities, potentially offsetting costs through reduced stormwater fees. Installation is labor-intensive but straightforward for DIYers without heavy equipment requirements.
Recycled asphalt millings provide the most budget-friendly option. These compacted recycled asphalt pieces bond together over time, creating a stable surface. They require regular raking and occasional top-up material additions but are easily repaired by any homeowner. This option works well for rural properties or temporary applications. For long-term durability in high-traffic areas, recycled asphalt is less suitable than concrete or new asphalt.
Sealing and Maintenance
Driveway longevity depends heavily on post-installation maintenance. Concrete should be sealed 28 days after curing using penetrating sealers that protect against water and chemical damage. Reapply sealer every 2-3 years, particularly in freeze-thaw climates. Asphalt requires seal coating within 6 months of installation, then every 3-5 years thereafter. This preventive maintenance extends asphalt lifespan from 15-20 years to potentially 25-30 years.
Address cracks immediately—small cracks expand rapidly when water infiltrates and freezes. Use concrete crack filler for hairline cracks in concrete; for larger fissures, use polyurethane caulk or concrete patching compound. Asphalt cracks require hot-pour crack filler applied with specialized equipment. Prevent water pooling by maintaining proper drainage and removing debris. In winter, use sand or calcium chloride for traction instead of rock salt when possible, as salt accelerates deterioration of both concrete and asphalt.
Regular cleaning extends visual appeal and prevents algae/moss growth. Pressure wash annually at moderate pressure (1500-2000 PSI) to avoid damaging the surface. Avoid harsh chemical cleaners that can degrade sealant. For stains, use appropriate degreasers and allow time for chemical action before pressure washing. Consult NRMCA maintenance guidelines for your specific driveway material and climate zone.
FAQ
How much does a DIY driveway installation cost?
Material costs range from $1-3 per square foot for recycled asphalt to $8-15 per square foot for new concrete or asphalt. Labor savings by DIY installation can reach 40-60% of total project cost, though equipment rental adds $200-500. A 500 sq. ft. driveway might cost $2,000-7,500 in materials depending on your material choice.
Can I install a driveway over existing asphalt?
Yes, if the existing surface is structurally sound with no major cracking or settling. Clean the surface thoroughly, fill large cracks, and apply a tack coat before new material. However, if the subbase has failed, removing and rebuilding the base is necessary—overlaying failed base layers guarantees future failure.
What’s the best driveway material for cold climates?
Concrete with air-entrainment and proper sealing outperforms asphalt in freeze-thaw cycles. Air-entrainment introduces tiny air bubbles that allow concrete to expand without cracking during ice formation. Asphalt becomes brittle in extreme cold and requires frequent seal coating. Ensure 4-6 inches of well-compacted base in cold climates.
How long before I can drive on a new concrete driveway?
Light foot traffic is safe after 24-48 hours; vehicle traffic should wait 7 days minimum. Full curing requires 28 days. Driving on incompletely cured concrete can cause surface damage and cracking. Avoid parking in one spot during the initial curing period.
Do I need permits for driveway installation?
Most municipalities require permits for new driveways or significant replacements. Permits ensure compliance with grading, drainage, and setback requirements. Check with your local building department before beginning work. Unpermitted work can affect property resale and insurance coverage.
What equipment do I need to rent?
Essential rentals include a plate compactor ($40-60/day), concrete mixer ($50-75/day for small projects), and possibly a power rake. Larger projects benefit from concrete pump rental ($200-400/day) for easier placement. Pressure washer rental ($50-80/day) helps with surface preparation and future maintenance.
How can I improve drainage on my existing driveway?
Evaluate current grading—if water pools, consider adding permeable paving strips, installing subsurface drainage, or regrading adjacent landscape. For sealed driveways, ensure gutters and downspouts direct roof water away from the surface. If the driveway has settled, professional mud-jacking can restore proper slope without replacement.


