How to Build a Deck: Contractor Tips Inside
Building a deck transforms your outdoor living space into a functional entertainment area while adding significant value to your home. Whether you’re a seasoned DIY enthusiast or tackling your first major project, understanding the fundamentals of deck construction ensures a safe, durable, and beautiful result. This comprehensive guide draws from professional contractor experience to walk you through every phase of the process.
A properly constructed deck requires careful planning, precise measurements, appropriate material selection, and adherence to local building codes. The difference between a deck that lasts decades and one that fails prematurely often comes down to foundational decisions made before a single nail is driven. By following contractor-approved practices, you’ll avoid costly mistakes and create an outdoor space your family can enjoy for years to come.
Planning and Design Considerations
Before purchasing a single board, invest time in thoughtful design and planning. Consider how you’ll use the deck—entertaining guests, quiet family dinners, or children’s play space—as this influences size, layout, and feature placement. Most contractors recommend creating a detailed scale drawing that shows dimensions, slope direction for water drainage, and proximity to existing structures.
Measure your available space carefully, accounting for setback requirements from property lines and buildings. A typical residential deck ranges from 12×16 feet to 16×20 feet, though your specific needs may differ. Calculate the deck’s height relative to your door threshold, aiming for the deck surface to be slightly below the door to prevent water infiltration. Think about sun exposure, prevailing winds, and sight lines from your home’s interior when positioning the deck.
Consider incorporating features that enhance functionality and appeal. Built-in benches, planter boxes, and shade structures add character while maximizing usable space. If you’re interested in expanding your home improvement skills beyond deck building, explore our DIY woodworking plans guide for complementary projects.
Building Permits and Code Compliance
Never skip the permitting process—it protects you legally and ensures your deck meets safety standards. Contact your local International Code Council (ICC) office or building department to understand specific requirements in your area. Most jurisdictions require permits for decks over 200 square feet or elevated more than 30 inches above grade.
Building codes address critical safety elements including post spacing (typically 6 feet maximum), railing height (36-42 inches), baluster spacing (4-inch sphere rule to prevent child entrapment), and stair dimensions. Frost line depth varies significantly by region—Northern climates may require posts to extend 4-5 feet below grade, while Southern areas might specify only 12-18 inches. Your local building department provides exact specifications for your location.
Obtain all required inspections: foundation inspection before covering posts, framing inspection before installing decking, and final inspection upon completion. These inspections verify safety and code compliance while providing documentation for insurance and future property sales. Professional contractors always factor permitting timelines into project schedules.
For comprehensive information on building codes and standards, consult the National Fire Protection Association (NFPA) guidelines and your state’s building code adoption.
Materials Selection and Preparation
Material choice significantly impacts durability, maintenance requirements, and overall cost. Pressure-treated lumber offers affordability and proven longevity when properly installed, though modern treatments are less toxic than older versions. Cedar and redwood provide natural rot resistance and attractive appearance but require regular maintenance. Composite materials combine wood fibers with plastic, offering durability and low maintenance at a higher price point.
For structural components (posts, beams, joists), pressure-treated lumber rated for ground contact is essential. Select lumber graded for outdoor use and appropriate for your climate. Allow all materials to acclimate to your site for several days before installation—this prevents warping and cupping after installation. Store lumber off the ground on level supports, keeping it dry and protected from direct sunlight.
Calculate material quantities precisely: measure joist spacing, determine board lengths with appropriate overhang, and account for waste (typically 5-10% extra). Quality fasteners matter—use stainless steel or galvanized hardware rated for exterior use to prevent rust and deterioration. Avoid mixing fastener types, as this causes galvanic corrosion.
If you’re planning additional outdoor structures or indoor improvements, our guide on basement finishing provides insights into comprehensive home improvement planning.
Foundation and Post Installation
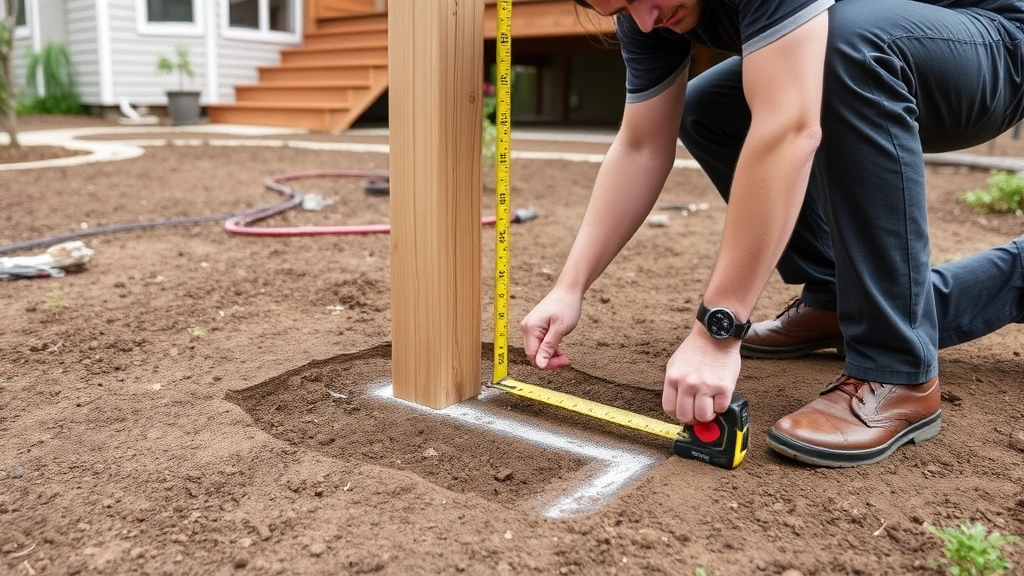
A solid foundation is absolutely critical—it prevents settling, shifting, and structural failure. Frost heave, where freezing ground expands and pushes posts upward, destroys countless poorly founded decks. Posts must rest on footings that extend below the local frost line, typically installed in holes dug with a power auger.
For each post location, dig a hole at least 12 inches in diameter extending below frost line depth. Place 4-6 inches of gravel at the bottom for drainage. Set posts in concrete footings rather than simply burying wood directly in soil—this dramatically extends post life. Use concrete rated for outdoor exposure, and ensure posts are perfectly vertical using a level checked in two directions.
Allow concrete to cure fully (typically 48-72 hours) before applying structural loads. Posts should extend at least 12 inches above grade for proper beam connections, or 36 inches if supporting railings. Some contractors install adjustable post bases that allow minor height adjustments if settling occurs, though this is less common in residential applications.
For elevated decks (more than 4 feet high), consider lateral bracing to resist wind loads and prevent swaying. Your local building code specifies exact requirements based on deck height, location, and wind exposure ratings.
Framing the Deck Structure
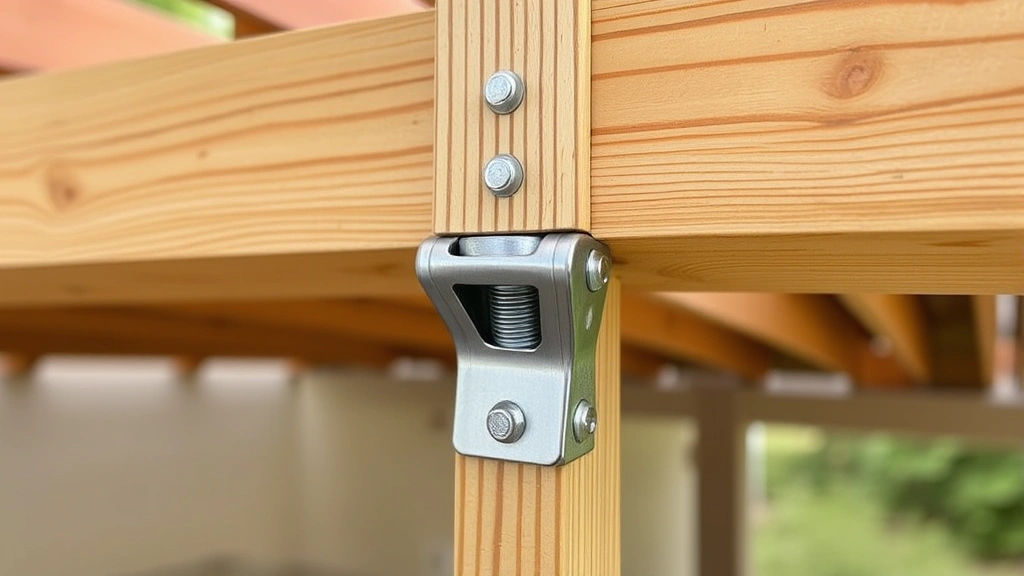
Proper framing creates the structural skeleton supporting all loads. Install beams on top of posts using bolted connections—never rely solely on nails. Bolts provide the strength necessary for long-term performance under dynamic loads from foot traffic and weather exposure. Space bolts 4-6 feet apart, using stainless steel bolts with washers and lock washers to prevent loosening.
Joists typically run perpendicular to beams, spaced 16 inches on center for standard decking or 12 inches on center for thinner boards or longer spans. Joist size depends on span length and load requirements—your building department provides span tables for your region. Always use joist hangers for connections rather than toe-nailing, as hangers provide superior load distribution and reliability.
Check that the frame is square using the 3-4-5 triangle method: measure 3 feet along one side, 4 feet along an adjacent side, and the diagonal should measure exactly 5 feet. Make adjustments before installing decking. Ensure proper slope for water drainage—typically 1/8 inch per foot sloping away from the house prevents standing water and decay.
Install blocking between joists at mid-span for longer joists to prevent twisting and bouncing. This improves structural performance and user comfort. Contractors emphasize that taking time to get framing perfectly square and level pays dividends throughout the entire project.
Installing Decking Boards
Decking boards are what you’ll see and walk on, so installation quality directly impacts appearance and safety. Begin at the house, leaving a 1/2-inch gap between the deck and house for water drainage and expansion. This gap prevents water from pooling against your siding and allows the deck to move slightly with temperature changes.
Space boards 1/8 to 1/4 inch apart (depending on material and climate) to allow for expansion and contraction. Use spacer blocks to maintain consistent gaps. Stagger board joints so they don’t align directly over joists, distributing stress more evenly across the structure. Cut boards to length before installation, using sharp blades to prevent splintering.
Fasten boards with corrosion-resistant fasteners—typically galvanized or stainless steel deck screws rated for exterior use. Screws hold better than nails and resist withdrawal as wood shrinks. Use two fasteners per joist per board, positioning them about 1-1/2 inches from the board edge to prevent splitting. Pre-drill holes for the first and last board to minimize splitting.
Sand the deck surface after all boards are installed, progressing through grits from 60 to 120 for smooth, splinter-free results. Pay special attention to board edges and corners where splinters commonly develop. This finishing touch makes a significant difference in user comfort and safety.
Railings and Safety Features
Railings serve critical safety functions while adding aesthetic appeal to your deck. Building codes mandate railings on decks more than 30 inches above ground, with specific height (typically 36-42 inches measured from the deck surface) and baluster spacing requirements. The 4-inch sphere rule prevents a 4-inch sphere from passing through any opening, protecting young children.
Construct railings with posts every 4-6 feet, connected securely to the deck frame with bolts or lag screws. Balusters (vertical spindles) must not exceed 4 inches apart, measured in any direction. Horizontal rails should also comply with spacing requirements—some codes permit up to 6 inches for horizontal openings to prevent children from climbing.
Install stairs with consistent tread depth (typically 10 inches) and riser height (7-7.75 inches maximum). Handrails on stairs must be 34-38 inches above the stair nosing and continuous along the entire stair run. These measurements prevent trips and falls while accommodating users of varying heights and abilities.
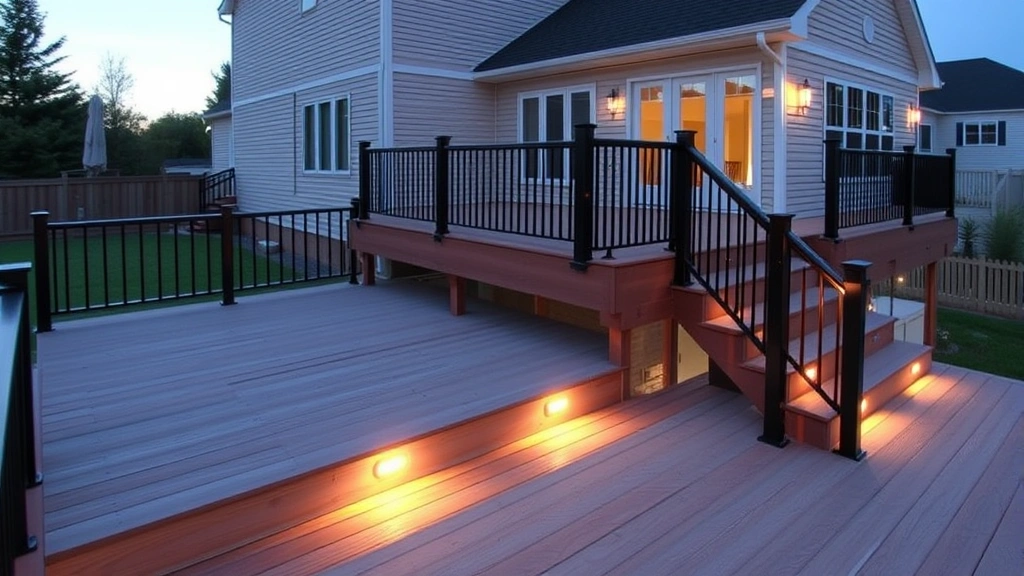
Consider adding lighting for safety and ambiance. Low-voltage LED lights installed along stair treads and railings improve visibility during evening use. Many contractors recommend consulting American Society of Safety Professionals (ASSE) guidelines for additional safety considerations on larger or more complex decks.
Finishing Touches and Maintenance
Stain or seal your deck within a few weeks of construction to protect wood from UV damage and moisture infiltration. Choose a product appropriate for your wood type and climate—pressure-treated lumber benefits from semi-transparent stains that allow the wood to breathe while providing color and protection. Composite materials typically require minimal maintenance, though some manufacturers recommend periodic cleaning.
Establish a regular maintenance routine to extend deck life. Annual inspection identifies loose fasteners, damaged boards, or structural concerns before they become serious problems. Clean debris from the deck surface and between boards to prevent moisture accumulation and rot. Pressure washing (at low pressure to avoid damage) removes mildew and algae growth that makes surfaces slippery.
Plan for periodic re-staining every 2-3 years, depending on climate and product quality. This protects wood from weathering and maintains appearance. Replace damaged boards promptly to prevent structural compromise and further deterioration. For decks in harsh climates or with heavy use, more frequent maintenance may be necessary.
If you’re interested in other home security and structural improvements, our home security guide covers additional protective measures for your property. For those looking to expand their DIY capabilities across multiple projects, the DIY Nests Hub Blog features comprehensive guides on various home improvement topics.
Professional contractors stress that proper maintenance is the most cost-effective way to maximize deck lifespan. A well-maintained deck can last 20-30 years or more, while neglected decks may fail in 10-15 years despite quality original construction.
FAQ
How long does it take to build a deck?
A typical 16×20 foot deck takes 3-5 days for an experienced contractor, or 1-2 weeks for a careful DIY builder. Permitting, material delivery, and weather delays can extend the overall timeline significantly. Always allow extra time for inspections and any necessary adjustments during construction.
What’s the most common deck building mistake?
Inadequate footings and frost heave protection top the list of contractor-identified mistakes. Posts that don’t extend below the frost line shift upward during winter freeze-thaw cycles, causing structural failure and safety hazards. Taking time to dig proper footings prevents expensive repairs later.
Can I build a deck in winter?
Winter construction is challenging but possible. Concrete curing is slower in cold temperatures, and working with cold materials is uncomfortable. Many contractors recommend waiting for warmer weather, though emergency repairs may require winter work. Never pour concrete when temperatures are below 50°F without special additives.
How much does deck construction cost?
DIY deck costs typically range from $8-$15 per square foot for basic pressure-treated construction, or $15-$30 for composite materials. Professional installation adds $10-$25 per square foot in labor. Final costs depend on size, material choice, complexity, and local labor rates.
What’s the difference between deck boards and regular lumber?
Deck boards are specifically graded and treated for outdoor exposure to ground contact. They’re pressure-treated with preservatives to resist rot and insect damage. Regular lumber lacks these treatments and deteriorates quickly when exposed to weather, making it unsuitable for deck construction.
Do I need a building permit for a small deck?
Most jurisdictions require permits for decks over 200 square feet or elevated more than 30 inches above grade. Even if your deck is below these thresholds, contact your building department—requirements vary by location. Permits protect you legally and ensure code compliance, making them worth obtaining regardless of deck size.


