How High to Hang Curtains? Designer Tips Inside
Hanging curtains at the correct height transforms any room from ordinary to polished, yet most homeowners get this detail wrong. The placement of your curtain rod isn’t just about aesthetics—it affects how light flows into your space, how tall your windows appear, and the overall proportions of your room. Whether you’re tackling a basement finishing project or updating your living room, understanding curtain height principles will elevate your interior design game immediately.
Professional interior designers follow specific measurements and guidelines that create visual harmony in any space. The good news? These rules are simple enough for any DIY enthusiast to master. This comprehensive guide walks you through every scenario—from standard windows to cathedral ceilings—and provides the exact measurements you need for flawless installation.
Standard Curtain Rod Height Guidelines
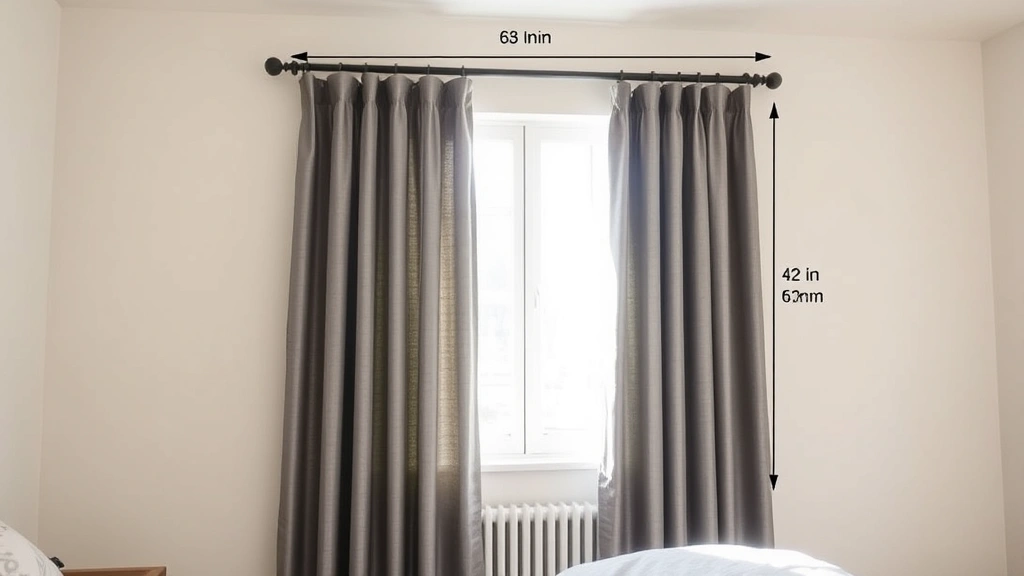
The most important measurement to remember is this: hang your curtain rod 4 to 6 inches above the window frame. This distance creates the illusion of taller windows and allows natural light to flow into your space more effectively. Interior designers consistently use this measurement because it works across virtually all window styles and room configurations.
The 4-6 inch rule applies to most residential applications, but understanding why matters. When you mount your rod closer to the ceiling, you’re essentially creating more wall space above the window, which visually elongates the entire window treatment. This technique is particularly valuable in rooms with standard 8-foot ceilings where every inch of perceived height makes a difference.
For the rod’s exact position, measure the distance from the top of your window frame straight up. Mark your measurement point with a pencil and use a level tool to ensure your marks are perfectly horizontal before drilling. This prevents tilted curtains and uneven hanging that immediately signals amateur installation.
How to Measure Your Window Correctly
Accurate measurements are the foundation of successful curtain installation. Start by measuring the width of your window frame from the inside edge of one side to the inside edge of the other. Add 8 to 12 inches to this measurement for the curtain rod—this extension allows curtains to stack fully on either side when opened, exposing maximum window area and light.
Next, measure the height. Decide whether you want your curtains to hang to the sill (bottom of window frame), apron (below the sill to the wall below), or floor. Each creates a different visual effect. Floor-length curtains are the most luxurious and formal option, elongating the room vertically. Measure from your rod height down to your desired endpoint and add 1/2 inch for the hem.
When measuring for rod placement on non-standard windows, use these benchmarks: for windows taller than 48 inches, mount the rod 6-8 inches above the frame. For smaller windows, the 4-6 inch standard applies. Always measure twice—mistakes at this stage become expensive when you’ve already purchased fabric and hardware.
Consider the wall space too. If you have substantial wall space above your window (more than 12 inches to the ceiling), you can position the rod even higher for dramatic effect. In rooms with limited ceiling height, stick to the 4-inch minimum to avoid looking cramped.
Curtain Height by Room Type
Living Rooms and Bedrooms
In these primary living spaces, traditional design principles suggest mounting rods 4-6 inches above the window. For bedrooms, floor-length curtains hung at this height create a formal, complete aesthetic. In living rooms, you might choose curtains that end at the apron for a lighter, more casual feel. The key is consistency—if you have multiple windows, maintain the same rod height across all of them for visual cohesion.
Professional designers often suggest that living room curtains should be floor-length or within 1/2 inch of the floor. This creates visual weight that grounds the room and makes furniture arrangement feel more intentional. The rod height at 4-6 inches above the window ensures the curtains frame the window properly without overwhelming the wall space.
Kitchens and Bathrooms
These functional spaces benefit from different approaches. Kitchen windows often feature shorter, café-style curtains that mount at the midpoint of the window or even on the sill itself. This maintains the practical nature of kitchen design while adding style. If you prefer full-length curtains in your kitchen, still follow the 4-6 inch rule above the window frame for consistency with other rooms.
Bathroom curtain rods should mount 4-6 inches above the window frame as well, but consider moisture and ventilation. Use moisture-resistant hardware and ensure curtains can be fully drawn back to allow steam to escape. Some bathrooms benefit from cellular shades mounted inside the frame with decorative curtains mounted 4-6 inches above for both function and beauty.
Dining Rooms
Dining room windows deserve special attention because they’re often the focal point during meals. Mount your rod 4-6 inches above the window and choose fabrics that complement your dining room color scheme and table setting. Consider the sight line when seated at the table—you want the bottom of the curtains to clear the view into your space while maintaining privacy.
Home Offices and Studies
In these spaces where natural light and focus matter, standard 4-6 inch rod mounting works perfectly. However, consider motorized or easily operable curtains that allow you to control light throughout the day. The proper rod height ensures that when curtains are fully open, they don’t obstruct views or light. If your home office has security concerns, full-length curtains at the proper height provide privacy while maintaining professional appearance.
Using Curtain Height for Visual Tricks
Strategic curtain rod placement is one of the most powerful design tools available. To make ceilings appear higher, mount your rod at the maximum recommended distance (6 inches above the frame) and extend it fully to the wall edges. This draws the eye upward and outward, creating perceived height and spaciousness. In rooms with 8-foot ceilings, this technique is invaluable.
To make windows appear wider, extend your rod 12-18 inches beyond the window frame on each side. Combined with the proper 4-6 inch height, this creates a horizontal emphasis that makes windows seem more substantial and grand. This works especially well in living rooms and bedrooms where window prominence matters aesthetically.
To add formality and sophistication, hang curtains floor-length from a rod positioned 6 inches above the window frame. This classic approach works in virtually any room and immediately elevates the space’s perceived elegance. The floor-length treatment combined with optimal rod height creates visual balance that professional designers rely on consistently.
To create coziness in smaller spaces, use the 4-inch minimum height with curtains that end at the apron or sill. This approach works well in apartments, small bedrooms, or cottage-style homes where you want intimate, collected aesthetics rather than grand, formal spaces.
Professional Installation Tips
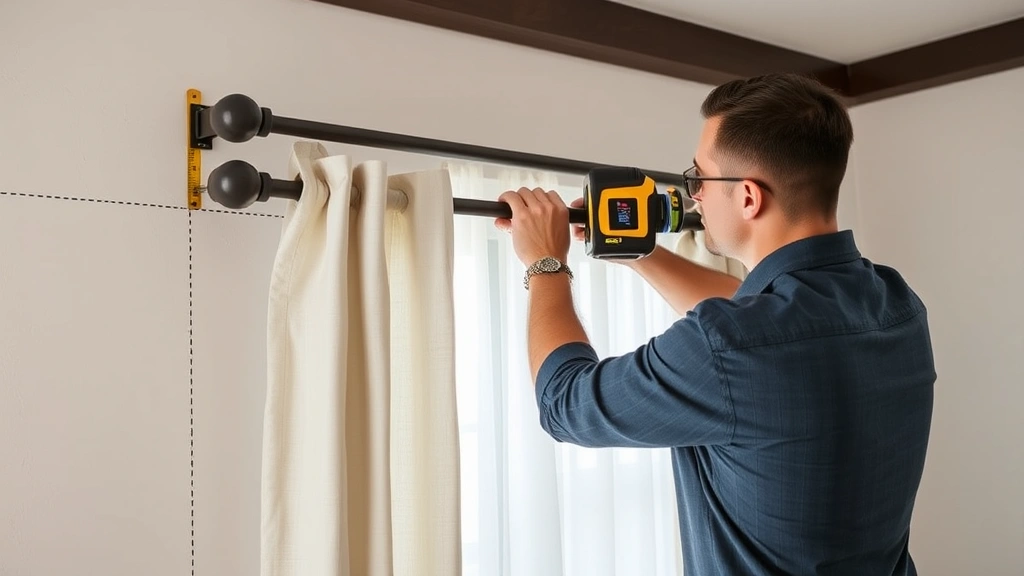
Before drilling any holes, locate wall studs using a stud finder and mark them with painter’s tape. Mounting brackets directly into studs ensures your curtain rod can support the weight of heavy fabric without sagging. If studs don’t align with your desired rod placement, use heavy-duty toggle bolts or molly anchors rated for your curtain weight.
Use a laser level or traditional bubble level to mark your mounting points. Mark the height on both sides of the window and verify the marks are perfectly level before drilling. Even slight tilts become obvious once curtains are hung, so take time with this step. Professional installers always double-check measurements before making any holes.
When drilling into drywall, use the appropriate anchors for your wall type. Standard drywall anchors work for light to medium-weight curtains, but heavy velvet or blackout curtains require stronger fasteners. Consult manufacturer specifications for your specific curtain rod and fabric weight. For basement walls or concrete, use concrete anchors or hire a professional with specialized equipment.
Install brackets 2-4 inches from the window frame edge on each side. This positioning provides proper support while allowing the curtain panels to stack neatly when opened. If your window is wider than 60 inches, consider a center support bracket to prevent rod sagging over time.
When hanging the curtains themselves, ensure they’re perfectly straight before threading onto the rod. Twisted or bunched fabric at installation creates permanent wrinkles that don’t disappear. Smooth each panel carefully and adjust the hang before stepping back to evaluate the overall appearance.
Common Mistakes to Avoid
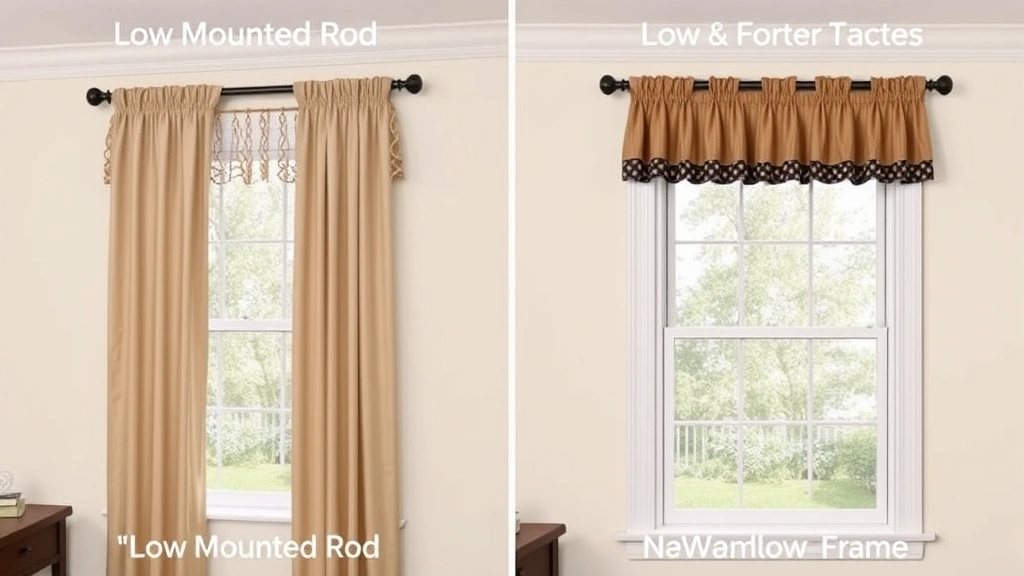
Mounting Too Low—This is the most common error. Curtain rods mounted directly on the window frame or just 1-2 inches above make windows appear smaller and rooms feel cramped. Commit to the 4-6 inch minimum height for immediate visual improvement.
Inconsistent Heights Across Multiple Windows—If your room has several windows, mount every rod at the exact same height. Varying heights create visual chaos that undermines the entire design. Use your level religiously and mark heights before drilling any holes.
Choosing Wrong Bracket Styles for Your Décor—Brackets are visible design elements, not just functional hardware. Ornate brackets suit traditional or eclectic spaces, while minimalist brackets work in modern rooms. Ensure your bracket style complements your overall interior design approach. For custom looks, consider building your own brackets if you have basic woodworking skills.
Ignoring Fabric Weight When Selecting Hardware—Heavy blackout curtains or velvet panels require stronger rods and more robust brackets than lightweight sheers. Undersized hardware sags over time, creating an immediately unkempt appearance. Check manufacturer weight ratings and err on the side of stronger hardware.
Mounting Brackets Too Close to Window Frame—Brackets positioned right at the frame edge prevent curtains from stacking properly when opened. Maintain 2-4 inches of distance from the frame to ensure full functionality and proper aesthetics.
Forgetting About Ceiling Height Constraints—In rooms with low ceilings, mounting rods 6 inches above windows might leave insufficient space. Measure your ceiling height and adjust accordingly, using the 4-inch minimum if necessary. Visual balance matters more than rigid adherence to guidelines.
FAQ
What’s the ideal distance between the curtain rod and window frame?
The standard recommendation is 4-6 inches above the window frame. This distance creates the illusion of taller windows while allowing light to flow naturally. In rooms with low ceilings, use the 4-inch minimum. In rooms with substantial wall space above windows, 6-8 inches works beautifully.
Should curtains touch the floor or hang above it?
Floor-length curtains (within 1/2 inch of the floor) create formal, luxurious aesthetics. Curtains ending at the apron or sill feel more casual and practical. Choose based on your room’s style and function. All styles should be hung from rods positioned 4-6 inches above the window frame for proper proportions.
How do I measure for curtain rod length?
Measure the window width and add 8-12 inches total (4-6 inches on each side). This allows curtains to stack fully when opened, exposing maximum window and light. Wider extensions create more dramatic stacking but require more floor space.
Can I mount curtain rods without studs?
Yes, but use appropriate anchors for your wall type. Heavy-duty toggle bolts, molly anchors, or specialized drywall anchors work well for standard drywall. For heavier curtains, locate studs or use multiple anchors for proper support. Never rely solely on drywall anchors for heavy velvet or blackout curtains.
What if my windows are different sizes?
Mount all rods at the same height for visual consistency, even if window sizes vary. This creates intentional design harmony. You can vary curtain lengths based on individual window dimensions, but keep rod heights uniform across the room.
Do rental properties need different curtain hanging approaches?
Yes—use damage-free hanging solutions like adhesive strips or tension rods that don’t require drilling. These still allow you to maintain the 4-6 inch height guideline while protecting your security deposit. Many quality tension rods mount above the window frame without permanent installation.
How high should curtains hang in rooms with cathedral ceilings?
In cathedral ceilings, mount rods 6-10 inches above the window frame to take advantage of the extra height. This creates dramatic, formal aesthetics that complement high ceilings beautifully. Floor-length curtains hung from high rods create visual drama and elegance in these spaces.


