
How to Build a Deck: Expert Tips Inside
Building a deck transforms your outdoor living space into a functional entertainment area that adds significant value to your home. Whether you’re a seasoned DIY enthusiast or tackling your first major project, understanding the fundamentals of deck construction ensures a safe, durable structure that will withstand years of use and weather exposure. This comprehensive guide walks you through every stage of the process, from initial planning and material selection through final finishing touches.
A well-constructed deck requires careful attention to local building codes, proper material selection, and precise execution of foundational elements. Most homeowners can successfully build a deck with patience, the right tools, and adherence to safety protocols. The investment in doing it correctly pays dividends through longevity and structural integrity that protects your family and guests.
Planning, Permits & Design
Before purchasing a single board, invest time in thorough planning. Start by measuring your space accurately and determining the deck’s dimensions, height, and intended use. Consider how many people you want to accommodate, whether you’ll include built-in seating or planters, and how the deck connects to your home’s architecture. Sketch your design on graph paper or use digital tools to visualize the final product.
Checking local International Building Code requirements is non-negotiable. Most jurisdictions require deck permits for structures over 200 square feet or elevated more than 30 inches. Contact your local building department to understand specific requirements for frost line depth, post spacing, railing height (typically 36 inches), and balusters spacing (no more than 4 inches). These codes exist to prevent accidents and structural failures.
Your design should account for drainage, preventing water accumulation beneath the deck that promotes rot and pest infestation. Slope the deck surface slightly away from your home at approximately 1/8 inch per foot. Plan for adequate ventilation under the deck—typically a minimum of 18 inches clearance from ground to deck joists.
Materials & Tools You’ll Need
Material selection dramatically impacts your deck’s lifespan and maintenance requirements. Pressure-treated lumber remains the most economical choice, offering good rot resistance when properly installed. Redwood and cedar provide natural beauty but require regular sealing. Composite materials blend wood fibers with plastic, offering low maintenance and excellent durability at premium prices. Tropical hardwoods like ipe and cumaru resist decay naturally but demand specialized tools for cutting.
For a typical 12×16-foot deck, gather these materials:
- Pressure-treated posts (4×4 or 6×6 depending on span)
- Pressure-treated joists (2×8 or 2×10)
- Decking boards (2×6 or composite equivalent)
- Galvanized or stainless steel fasteners (3-inch deck screws, joist hangers)
- Concrete for post footings (approximately 60-80 bags)
- Gravel for drainage
- Railing materials (balusters, rails, posts)
Essential tools include a circular saw or miter saw, power drill with bits, level, tape measure, square, post hole digger or auger, and safety equipment (work gloves, safety glasses, dust mask). A pneumatic nailer significantly speeds installation but requires an air compressor. For most DIYers, a cordless drill and quality circular saw suffice.
When selecting fasteners, invest in corrosion-resistant options. Stainless steel costs more but prevents rust staining and structural compromise. Galvanized fasteners work well for pressure-treated lumber but may corrode faster in humid climates. Never use regular nails—deck screws provide superior holding power and allow for easier removal if adjustments become necessary.
Foundation & Post Installation
The foundation determines your deck’s structural integrity and longevity. Posts must rest on footings that extend below the frost line—the depth varies by region but typically ranges from 12 to 48 inches. In areas with significant frost heave, inadequate footings cause posts to shift, compromising the entire structure.
Start by locating post positions according to your design, typically spaced 6-8 feet apart depending on joist span tables from the American Wood Council. Dig holes using a post hole digger or power auger, making them at least 12 inches in diameter. Add 4-6 inches of gravel for drainage before setting posts.
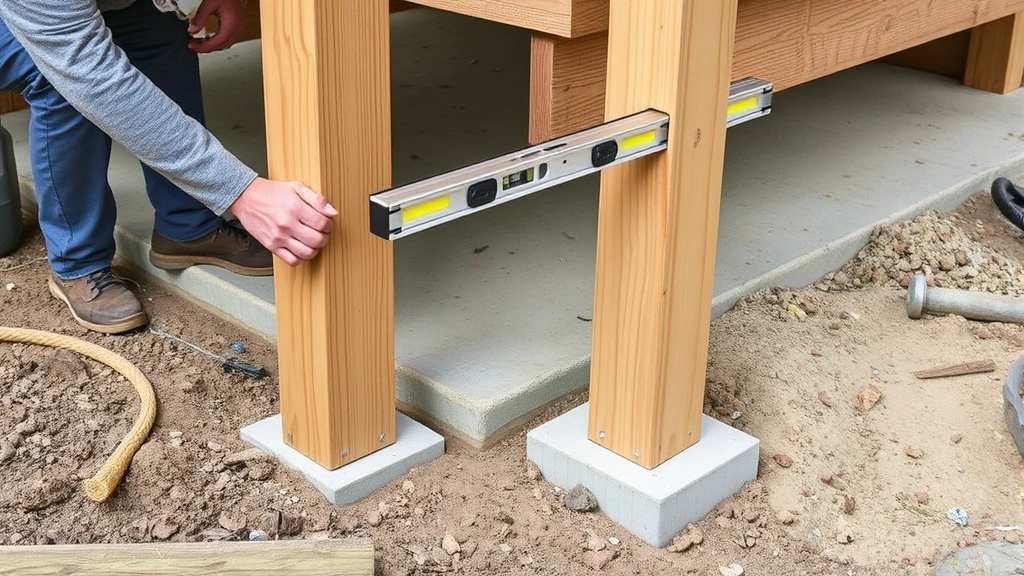
For above-ground decks, use concrete footings that either support posts directly or hold post bases. Pour concrete around posts, ensuring it slopes away slightly for water drainage. Let concrete cure fully (typically 48 hours) before applying loads. Never set posts directly on soil or concrete pads sitting on grade—this traps moisture and accelerates decay.
Check posts for plumb using a level in two directions. Posts must be perfectly vertical; even slight angles compromise load distribution. Use temporary bracing to hold posts in position while concrete sets. Some builders prefer adjustable post bases that allow for minor corrections after installation.
Consider that proper foundation techniques extend beyond decks—the same principles apply to other structural projects. Connect posts to the house band board using bolts or structural screws, ensuring the connection can handle lateral forces from wind and use.
Framing the Deck Structure
With posts set, install the rim joists (band boards) that connect posts around the deck’s perimeter. These carry significant loads and must be properly sized and supported. Attach the rim joist to the house’s band board using lag bolts spaced 16 inches apart, positioned in the rim joist’s upper portion to maximize strength.
Install field joists perpendicular to rim joists at 16-inch on-center spacing for most conditions, or 12-inch spacing for heavier loads or longer spans. Use joist hangers rated for your joist size—these transfer loads directly to rim joists, eliminating notching that weakens joists. Secure hangers with appropriate fasteners; oversized fasteners or incorrect installation compromises the hanger’s effectiveness.
Joists should slope slightly toward the outside for drainage. Install blocking between joists at the center span for longer joists (over 12 feet) to prevent twisting and bouncing. Solid blocking or X-bracing provides lateral stability while maintaining ventilation.
Check your framing progress with a level, ensuring the deck surface will be level or have appropriate slope for drainage. Measure diagonals across the deck frame—equal measurements confirm squareness. Small adjustments now prevent significant problems during decking installation.
For decks attached to homes, quality construction practices protect your investment. Install flashing between the house band board and rim joist to prevent water infiltration that causes interior damage. This often-overlooked detail prevents rot in the house’s rim joist and band board.

Installing Decking Boards
Decking board installation creates the visible surface and requires attention to spacing and fastening. Pressure-treated lumber expands and contracts with moisture changes, so space boards 1/8 to 1/4 inch apart (approximately a dime’s thickness) to allow movement and drainage. Composite boards typically require less spacing—check manufacturer specifications.
Begin with a straight board along the house side, using spacers to maintain consistent gaps. Secure each board with two fasteners per joist, positioning screws or nails approximately 1.5 inches from edges to prevent splitting. Many builders prefer screws, which resist withdrawal and allow removal if needed.
Stagger board joints across multiple joists rather than aligning them—this distributes loads more effectively and improves appearance. For boards shorter than your deck length, plan cuts strategically to minimize waste and maximize structural efficiency.
As you progress across the deck, periodically check that boards remain perpendicular to joists. Temperature and moisture changes can cause boards to cup or bow; addressing issues early prevents larger problems. Some boards may require additional fasteners or shimming to maintain proper surface plane.
After installing decking, sand the surface to remove splinters and rough spots. Use 60-80 grit sandpaper for initial smoothing, followed by 120-150 grit for finishing. This step is essential for safety and appearance, particularly for pressure-treated lumber which often has surface irregularities.
Railings & Stairs
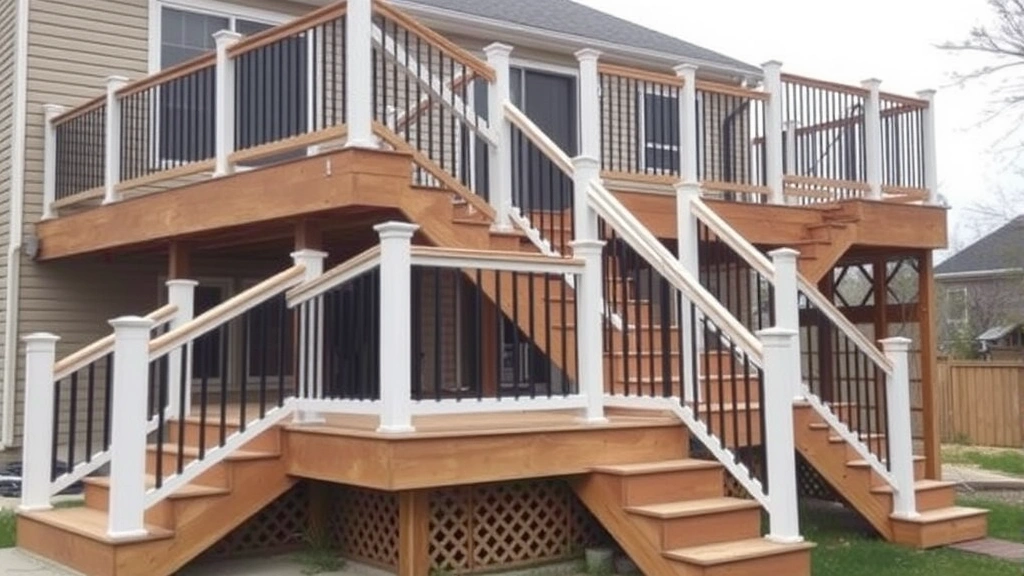
Building codes mandate railings for decks over 30 inches high, with specific requirements for height, strength, and balusters spacing. Railings must withstand 200 pounds of horizontal force applied at the top rail without excessive deflection. This seemingly simple requirement demands proper engineering and installation.
Posts supporting railings should be 4×4 lumber bolted to the deck frame, typically spaced 6 feet apart. Top and bottom rails connect these posts, with balusters (vertical supports) filling the space between. Balusters must be spaced no more than 4 inches apart, preventing a sphere 4 inches in diameter from passing through—this prevents children from becoming trapped.
For stairs, calculate rise and run carefully. Building codes typically limit individual step rise to 7.75 inches and require minimum 10-inch treads. A deck 36 inches high requires approximately 5 steps. Stringers (the angled supports holding steps) must be properly sized and supported—use 2×12 lumber for most residential applications.
Secure stairs to the deck with lag bolts or structural screws, ensuring they can’t shift under use. Add railings to stairs with balusters spaced identically to deck railings. Handrails are required for stairs with more than three steps, positioned 34-38 inches above step treads and extending beyond the top and bottom steps.
Consider that proper joinery and fastening techniques extend to all deck components. Every connection must be secure and appropriate for its load requirements.
Finishing & Maintenance
After structural completion, finishing protects your investment and enhances appearance. Pressure-treated lumber benefits from sealing after 3-6 months, allowing initial moisture release. Apply water-repellent sealers that penetrate the wood surface, preventing moisture absorption that causes rot and checking.
Composite decking requires minimal maintenance but benefits from periodic cleaning. Use mild detergent and a soft-bristle brush to remove dirt and algae. Avoid high-pressure washers that can damage surfaces.
Establish a maintenance schedule: inspect fasteners annually, tighten any that have loosened, and replace corroded fasteners immediately. Check for signs of rot, particularly in areas that remain damp. Replace any compromised boards promptly to prevent structural issues.
For pressure-treated wood, reseal every 2-3 years depending on climate and foot traffic. Monitor railings and stairs for looseness, addressing issues immediately. Clear debris from beneath the deck to prevent moisture accumulation and pest problems.
Snow removal requires care—avoid metal shovels that damage decking surfaces. Use plastic shovels and avoid deicing chemicals that accelerate corrosion. In winter, ensure adequate ventilation beneath the deck to prevent ice dam formation that can damage the structure.
Your finishing approach significantly impacts longevity. Consistent maintenance prevents expensive repairs and keeps your deck safe for family and guests.
Before beginning your project, review AWC building standards and consult NFPA guidelines for additional safety requirements. Many municipalities also publish deck building guides available through local building departments.
FAQ
How long does deck construction typically take?
A 12×16-foot deck usually requires 40-60 hours for an experienced DIYer working alone, or 20-30 hours with a helper. Complex designs with multiple levels, stairs, and built-in features require additional time. Concrete curing and wood acclimation extend total project duration to 2-4 weeks.
Can I build a deck without a permit?
Building codes exist to ensure safety. Unpermitted decks pose liability risks and may violate local ordinances. When selling your home, undisclosed unpermitted structures can create legal complications. The permit cost typically represents a small percentage of total project expense and provides inspector oversight that catches potential problems.
What’s the best wood for deck construction?
Pressure-treated lumber offers the best value for most homeowners, providing adequate rot resistance at reasonable cost. Composite materials eliminate staining and require less maintenance but cost 40-60% more. Cedar and redwood provide natural beauty but require regular sealing. Choose based on budget, maintenance tolerance, and aesthetic preferences.
How do I prevent my deck from rotting?
Proper drainage is paramount—ensure ground slopes away from deck posts and joists remain at least 18 inches above soil. Use pressure-treated lumber for all components contacting soil or remaining damp. Seal wood surfaces every 2-3 years. Promptly replace any compromised boards. Maintain gutters and downspouts to prevent water accumulation around deck foundations.
Do I need a building permit for a ground-level deck?
Most jurisdictions require permits for decks over 200 square feet regardless of height. Ground-level decks still need proper footings below the frost line and appropriate construction techniques. Check with your local building department—the small cost and minimal hassle of permitting prevents potential legal and safety issues.
What spacing should I use between decking boards?
Space pressure-treated boards 1/8 to 1/4 inch apart to accommodate expansion and contraction. Composite boards typically require 1/8 inch spacing—check manufacturer specifications. Proper spacing allows drainage and prevents buckling as moisture content changes seasonally.
How often should I reseal my deck?
Most sealers last 2-3 years before requiring reapplication. Climate significantly affects this—humid regions with intense sun exposure may need annual sealing. Clean the deck thoroughly before resealing. Test water absorption by sprinkling water on the surface—if it beads up, sealing remains effective; if it soaks in, resealing is needed.