Grout Drying Time: Expert Tips & Tricks for Perfect Results
Grout is one of the most critical components in tile installation, yet many DIYers underestimate how long it takes to cure properly. Whether you’re tackling a DIY flooring installation or upgrading your bathroom, understanding grout drying time is essential for achieving professional results that last for decades. The difference between rushing the process and allowing proper curing can mean the difference between a beautiful, durable installation and costly repairs down the road.
Grout drying time varies significantly based on multiple factors including humidity, temperature, grout type, and application thickness. Most standard cement-based grouts require 24 to 72 hours to set enough for light foot traffic, but full curing can take up to 28 days. This comprehensive guide will walk you through everything you need to know about grout drying times, environmental factors that affect curing, and expert strategies to ensure your tile work stands the test of time.
How Long Does Grout Take to Dry: Timeline Breakdown
The answer to “how long does it take for grout to dry” depends on which stage of the process you’re asking about. Initial set time typically occurs within 24 to 48 hours for standard cement-based grouts, meaning the grout becomes solid enough to walk on lightly. However, this doesn’t mean it’s fully cured. Full strength development requires 28 days, during which the grout continues to gain strength and water resistance.
For practical purposes, most professionals recommend waiting at least 24 hours before applying any stress to grouted surfaces. After 48 to 72 hours, you can typically resume normal use of the area, though you should still avoid heavy cleaning or prolonged water exposure. Many experts suggest waiting the full 28 days before subjecting the grout to extreme conditions like frequent moisture exposure or heavy foot traffic in commercial settings.
It’s important to understand that grout doesn’t “dry” in the traditional sense like paint does. Cement-based grout cures through a chemical hydration process. This means that even when it feels dry to the touch, the internal chemical reactions are still strengthening the grout structure. Rushing this process by exposing grout to water or traffic too early can result in weakened joints, staining, and premature failure.
Factors Affecting Grout Curing Time
Multiple variables influence how quickly your grout will cure to usable strength. Understanding these factors allows you to plan your project timeline accurately and take steps to optimize curing conditions.
- Temperature: Grout cures faster in warm conditions (70-75°F is ideal) and significantly slower in cold temperatures. Below 50°F, curing can nearly stall entirely.
- Humidity levels: Moderate humidity (50-80%) promotes optimal curing. Extremely dry conditions can cause surface cracks, while excessive moisture can slow hydration.
- Grout composition: Different formulations cure at different rates. Epoxy grouts cure faster than cement-based varieties.
- Tile porosity: Porous tiles absorb water from grout, accelerating surface drying but potentially compromising strength if they pull too much moisture too quickly.
- Joint width: Thicker grout joints take longer to cure throughout their depth than thin joints.
- Ventilation: Air circulation helps remove excess moisture but shouldn’t create extreme drafts that cause uneven drying.
- Substrate moisture: Wet substrates will extend curing time significantly compared to dry surfaces.
Types of Grout and Their Drying Times
Different grout formulations have dramatically different curing characteristics. Choosing the right type for your project is crucial for achieving proper drying times and long-term durability.
Unsanded Cement-Based Grout: This traditional option is best for grout joints narrower than 1/8 inch. It typically achieves initial set in 24 to 48 hours and full cure in 28 days. Unsanded grout is more prone to cracking in wider joints because it shrinks as it cures.
Sanded Cement-Based Grout: Recommended for joints 1/8 inch and wider, sanded grout contains silica sand that reduces shrinkage. Initial set occurs in 24 to 48 hours, with full curing taking 28 days. The sand particles provide better structural integrity and crack resistance.
Epoxy Grout: This premium option cures much faster—typically ready for use within 24 to 48 hours—and offers superior stain and water resistance. However, epoxy requires more careful installation technique and is more expensive. It’s ideal for areas exposed to moisture or chemicals, such as commercial kitchens or swimming pool surrounds.
Urethane Grout: A flexible alternative that cures in 24 to 72 hours and provides better movement accommodation than cement-based options. Urethane is excellent for areas subject to vibration or thermal expansion.
Furan Grout: Specialized for industrial applications, furan grout cures in 24 hours and offers exceptional chemical resistance. It’s not typically used in residential applications due to installation complexity and cost.
Each grout type requires specific mixing ratios and application techniques. Always follow the manufacturer’s instructions from the specific product you’re using, as formulations can vary between brands. Refer to ICC (International Code Council) standards for building code compliance in your region.
Environmental Conditions Impact on Grout Curing
The environment where your grout cures has more influence on final results than many DIYers realize. Creating optimal conditions during the curing period is one of the most important steps in ensuring long-lasting, high-quality grout joints.
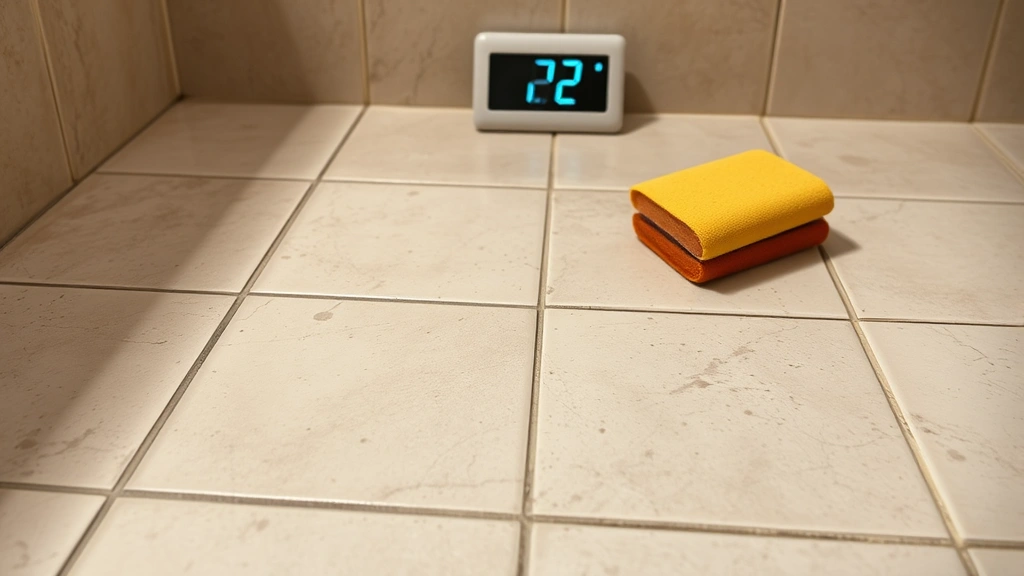
Temperature Control: Ideal curing temperature ranges from 70 to 75°F. For every 10°F drop below this range, curing time approximately doubles. In winter months or unheated spaces, you may need to use temporary heating to maintain proper temperatures. Never allow grout to cure below 50°F, as the hydration process becomes unreliable. Conversely, temperatures above 85°F can cause rapid surface drying while the interior remains uncured, leading to weakness and cracking.
Humidity Management: While grout needs some moisture for proper hydration, the humidity level should remain between 50 and 80 percent. In dry climates or seasons, mist the grouted area lightly with water twice daily for the first 48 hours to maintain proper hydration. In extremely humid environments, ensure adequate ventilation to prevent mold growth and uneven curing. Opening windows and using fans can help, but avoid direct drafts across the grouted surface.
Water Exposure Timing: This is critical. Do not expose grout to running water, standing water, or heavy moisture during the initial 72-hour period. Even accidental water exposure can compromise the cure. Bathroom showers, kitchen sinks, and outdoor areas require extra protection during curing. Use plastic sheeting or temporary barriers to prevent water contact. After 72 hours, light misting for humidity control is acceptable, but avoid soaking or splashing for at least 7 days.
When finishing a basement with tile, basement moisture conditions require special attention. High humidity in basements can significantly extend curing time. Consider using a dehumidifier during the curing period to maintain optimal moisture levels.
Pre-Grouting Preparation Steps
Proper preparation before applying grout sets the stage for optimal drying and curing. Rushing this phase often leads to problems that manifest later in the curing process.
Surface Inspection: Examine all tile surfaces and substrate conditions. Ensure tiles are properly set and fully cured before grouting. Most thin-set mortars require 24 to 48 hours before grouting can begin. Check that substrate surfaces are clean, dry, and free from dust, debris, or loose material that could interfere with grout adhesion.
Joint Cleaning: Remove any excess thinset mortar from grout joints using a grout saw or margin trowel. Joints should be clean and uniform in depth for consistent grout application and curing. Leftover mortar can create voids that weaken grout joints and create water infiltration pathways.
Moisture Assessment: Test substrate moisture levels using a moisture meter if you’re working in potentially damp areas. Substrate moisture above 4 percent can significantly extend curing time and compromise grout performance. Allow extra drying time if moisture levels are elevated.
Environmental Preparation: Set up climate control measures before grouting begins. If working in cold weather, arrange temporary heating. In dry conditions, plan for humidity maintenance. Ensure adequate ventilation without creating problematic drafts. Close windows and doors to maintain stable conditions once grouting begins.
Proper Grouting Techniques for Optimal Drying
How you apply grout directly impacts how it will dry and cure. Proper technique ensures consistent results and predictable curing times.
Mixing Consistency: Mix grout to the proper consistency—typically similar to peanut butter for sanded varieties. Too-thin grout may dry too quickly and develop weakness; too-thick grout won’t flow properly into joints. Mix only as much as you can apply in 30 to 45 minutes, as grout begins setting after mixing and becomes difficult to work with as it thickens.
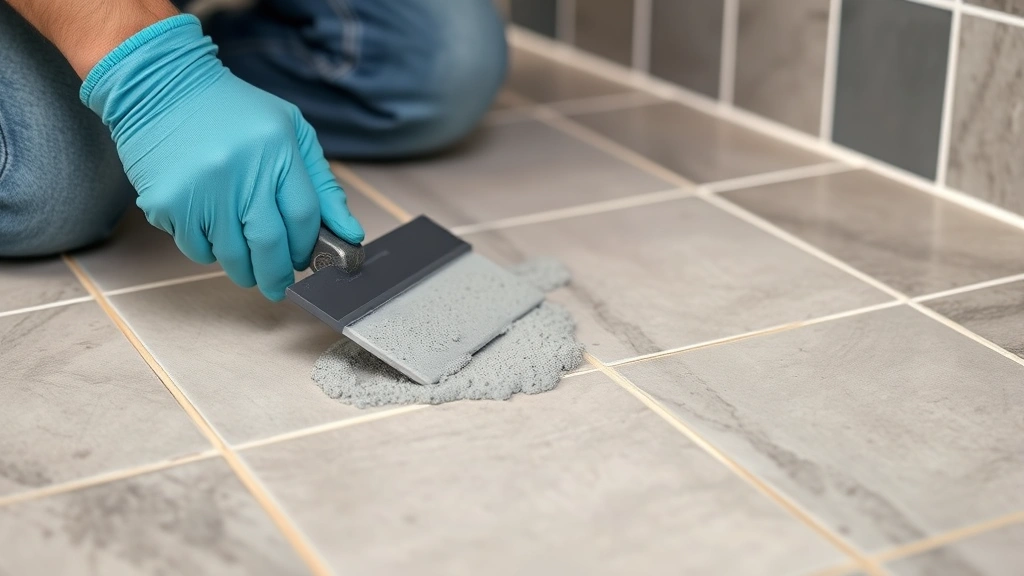
Application Method: Use a grout float held at a 45-degree angle, pressing grout firmly into joints. Work diagonally across tiles to pack joints completely and minimize voids. Multiple passes may be needed to fully fill joints, especially in wider applications. Proper packing ensures grout fully contacts all joint surfaces for maximum strength development.
Joint Filling: Ensure joints are completely filled from bottom to top. Partially filled joints create weak points that fail prematurely. After initial application, allow 15 to 30 minutes for grout to set slightly, then make a second pass to top off any joints that have settled.
Cleaning Timing: Wait until grout firms up slightly—typically 20 to 30 minutes depending on temperature and humidity—before cleaning excess from tile surfaces. Use a damp sponge and circular motions to remove grout haze without pulling material from joints. Rinse the sponge frequently and wring thoroughly. Avoid aggressive cleaning that can damage joint integrity.
Curing Protection: After cleaning, protect the grouted area from disturbance. Prevent foot traffic, water exposure, and temperature fluctuations. In shared spaces, consider rope barriers or signs to keep others away during the critical 72-hour curing period.
Post-Grouting Care and Maintenance
What you do after grouting is complete is as important as the grouting process itself. Proper post-grouting care ensures grout reaches full strength and develops the durability you expect.
First 24 Hours: This is the most critical period. Maintain stable temperature and humidity. Avoid any water contact with grouted surfaces. Do not walk on the area if possible. If the space must be occupied, restrict activity to minimize vibration and stress on curing grout. Consider temporary barriers or signage to remind people of the curing process.
Days 2-7: After initial set (usually 48 hours), light foot traffic is acceptable, though you should still minimize activity. Continue protecting from water exposure. Some light misting for humidity maintenance is acceptable after 72 hours if conditions are very dry. Begin using the space cautiously only after 7 days have passed.
Weeks 2-4: The grout is now sufficiently set for normal use, but the curing process continues. Avoid heavy cleaning or pressure washing during this period. Light cleaning with a damp cloth is fine. After 28 days, grout has reached full strength and can withstand any normal use, including heavy cleaning and water exposure.
Sealing Considerations: After full curing (28 days), consider applying grout sealer to porous, cement-based grout joints. Sealer protects against staining and moisture penetration, significantly extending grout life. Epoxy and urethane grouts typically don’t require sealing. Follow the sealer manufacturer’s instructions for application timing and methods.
Common Mistakes to Avoid During Grout Curing
Understanding common errors helps you avoid costly problems. Many failures occur due to preventable mistakes during the curing period.
- Premature Water Exposure: The most common error is allowing water contact before grout has adequately cured. Even “accidental” shower use or sink splashing can compromise the cure. Communicate clearly with household members about the grouting timeline and protect the area accordingly.
- Temperature Fluctuations: Allowing temperature to drop significantly during curing, especially overnight, slows hydration dramatically. If working in seasonal cold, maintain heating throughout the full curing period. Conversely, excessive heat causes rapid surface drying that can trap moisture inside, creating weakness.
- Improper Joint Filling: Incompletely filled joints create stress points that fail prematurely. Take time during application to ensure joints are fully packed and topped off after initial settlement.
- Inadequate Cleaning: Leaving excessive grout haze on tile surfaces makes joints appear unprofessional and can trap moisture. However, over-aggressive cleaning can damage joints. Find the balance with gentle, damp-sponge cleaning.
- Ignoring Substrate Conditions: Grouting over wet substrate or failing to allow proper thinset cure time before grouting creates a foundation for failure. Always verify substrate is ready before beginning grout application.
- Wrong Grout Type: Using unsanded grout in wide joints or sanded grout in very narrow joints leads to cracking and failure. Match grout type to your joint width specifications.
- Neglecting Ventilation: Poor air circulation can trap excessive moisture, leading to mold growth and uneven curing. Ensure adequate ventilation without creating problematic drafts.
Safety Considerations When Working with Grout
Grout handling involves potential health and safety hazards that deserve attention. Understanding proper safety practices protects you and others during the project.
Dust Hazards: Dry grout powder contains silica, which can cause respiratory issues with prolonged exposure. When mixing grout, wear a properly fitted N95 or N100 dust mask. Mix in well-ventilated areas and avoid creating dust clouds. Never sweep dry grout—use damp methods to suppress dust. For large projects, consider using a shop vacuum with HEPA filtration while mixing.
Chemical Exposure: Some grout additives and epoxy formulations contain chemicals that can irritate skin and eyes. Wear chemical-resistant gloves and safety glasses when handling these materials. If contact occurs, rinse immediately with clean water. Ensure adequate ventilation when using epoxy or urethane grouts, which release fumes during curing.
Physical Hazards: Grouting involves repetitive motions and working on your hands and knees for extended periods. Protect your knees with kneeling pads to prevent injury. Take frequent breaks to avoid repetitive strain injuries. Ensure proper lighting so you can see joints clearly and work safely.
Cleanup and Disposal: Properly dispose of excess grout. Never pour grout down drains, as it can harden and cause blockages. Allow excess grout to harden in buckets, then dispose in regular trash. Wash tools and equipment before grout hardens, as cured grout is extremely difficult to remove. Wear gloves during cleanup to protect skin from irritation.
For more information on construction safety standards, consult OSHA guidelines and the Tile Council of North America for industry best practices.
When undertaking larger home projects that involve multiple trades, understanding how coordinating different phases of work affects overall project timelines becomes important. Grout curing timelines must be factored into your broader project planning.
Frequently Asked Questions About Grout Drying Time
Can I walk on grout after 24 hours?
Light foot traffic is generally acceptable after 24 hours for standard cement-based grout, though many experts recommend waiting 48 to 72 hours for more reliable curing. Heavy traffic or prolonged standing should be avoided for at least 72 hours. The answer depends on your specific grout type and environmental conditions. When in doubt, wait longer—rushing can compromise results.
How can I speed up grout drying time?
While you cannot truly “speed up” the chemical curing process, you can optimize conditions. Maintain temperature between 70 and 75°F, control humidity between 50 and 80 percent, and ensure adequate (but not excessive) ventilation. Use fast-setting epoxy grout if your timeline is critical. Avoid extreme heat, which causes surface drying while the interior remains uncured and weak.
What happens if grout gets wet before it’s fully cured?
Water exposure during curing can compromise strength, cause efflorescence (white powder deposits), promote mold growth, and create weak joints prone to failure. If accidental water exposure occurs during the critical 72-hour period, allow extra drying and curing time. After 7 days, light water exposure is less problematic, but prolonged moisture should still be avoided until full 28-day cure is complete.
Is grout fully cured after 7 days?
Grout achieves sufficient strength for normal use after 7 days, but full strength development continues through 28 days. For standard residential applications, 7 days is generally adequate for resuming normal use. However, for high-traffic commercial areas or applications exposed to frequent moisture, waiting the full 28 days is recommended for maximum durability.
Should I seal grout after it dries?
Sealing is recommended for porous, cement-based grout joints to protect against staining and moisture penetration. Wait until full 28-day cure is complete before applying sealer. Epoxy and urethane grouts have built-in protection and typically don’t require sealing. Unsealed grout, especially in high-moisture areas, can stain easily and absorb water, reducing longevity.
Why is my grout cracking while it dries?
Cracking typically results from improper mixing consistency, rapid surface drying while interior remains wet, excessive joint width for unsanded grout, or environmental extremes. Prevent cracks by using proper mixing ratios, maintaining stable temperature and humidity, matching grout type to joint width, and protecting against rapid drying conditions. Hairline cracks may close slightly during the curing process, but significant cracks indicate a problem requiring attention.
Can I use fans to dry grout faster?
Avoid direct air circulation across grout surfaces, as fans can cause uneven drying that leads to cracking and weakness. Gentle ambient ventilation is acceptable and helpful, but powerful fans create problematic drying conditions. If you must use fans, position them to circulate room air without directly targeting grouted surfaces.


