How to Build a Deck: Expert Tips & Steps for DIY Success
Building a deck is one of the most rewarding DIY projects you can undertake, transforming your outdoor space into a functional entertainment area while adding significant value to your home. Whether you’re a seasoned builder or tackling your first major project, understanding the proper techniques, timeline, and safety considerations is essential for creating a deck that will last for decades. This comprehensive guide walks you through every step of the process, from initial planning through final finishing touches.
A typical deck construction project takes anywhere from two to four weeks for a standard 12×16-foot deck, depending on your experience level, weather conditions, and complexity of the design. More intricate designs with multiple levels, built-in features, or composite materials may extend the timeline significantly. Before you break ground, you’ll need to secure permits, verify local building codes, and understand the specific requirements in your area. Many homeowners underestimate the importance of proper planning similar to basement finishing projects, which can lead to costly mistakes and safety issues.
Understanding Building Codes and Permits
Before purchasing a single nail, contact your local building department to understand the specific requirements for deck construction in your area. Building codes exist to ensure structural integrity, safety, and property value protection. Most jurisdictions require permits for decks, and some mandate inspections at various stages of construction. The International Code Council (ICC) provides standardized building codes that most municipalities adopt, though local amendments may apply.
Key code considerations typically include:
- Frost line depth: Posts must extend below the frost line to prevent heaving during freeze-thaw cycles
- Post spacing: Usually limited to 6 feet on center for most climates
- Railing requirements: Generally 36-42 inches high with specific baluster spacing
- Load capacity: Standard residential decks must support 40 pounds per square foot of live load
- Stair specifications: Rise, run, and handrail requirements are strictly regulated
Skipping the permit process might save time initially, but unpermitted work can create serious problems when selling your home, filing insurance claims, or facing liability issues. Many homeowners also find that understanding comprehensive home improvement guidelines helps them approach all projects with proper documentation.
Tools and Materials You’ll Need
Assembling the right tools before starting prevents frustrating mid-project trips to the hardware store. Essential power tools include a circular saw, drill-driver, miter saw, and impact driver. Hand tools should include a tape measure, level, square, hammer, and adjustable wrench. Safety equipment—including work gloves, safety glasses, dust mask, and hearing protection—is non-negotiable.
Material selection significantly impacts both timeline and longevity. Pressure-treated lumber remains the most economical choice and offers excellent durability when properly installed. Composite decking costs more upfront but requires minimal maintenance and lasts longer. Tropical hardwoods like ipe or cumaru offer superior rot resistance but are expensive and difficult to work with. For a standard 12×16-foot deck, expect to need:
- Posts: 4×4 pressure-treated lumber (typically 6-8 posts)
- Beams: 2×10 or 2×12 pressure-treated lumber
- Joists: 2×8 pressure-treated lumber
- Decking boards: 2×6 or 2×8 boards (pressure-treated or composite)
- Hardware: Galvanized or stainless steel fasteners rated for exterior use
- Concrete: 80-pound bags for post footings
- Railing materials: Pressure-treated or composite components
Your material choices should align with your climate zone and maintenance preferences. Learning proper material selection parallels the approach used in beginner woodworking projects, where quality materials ensure better results.
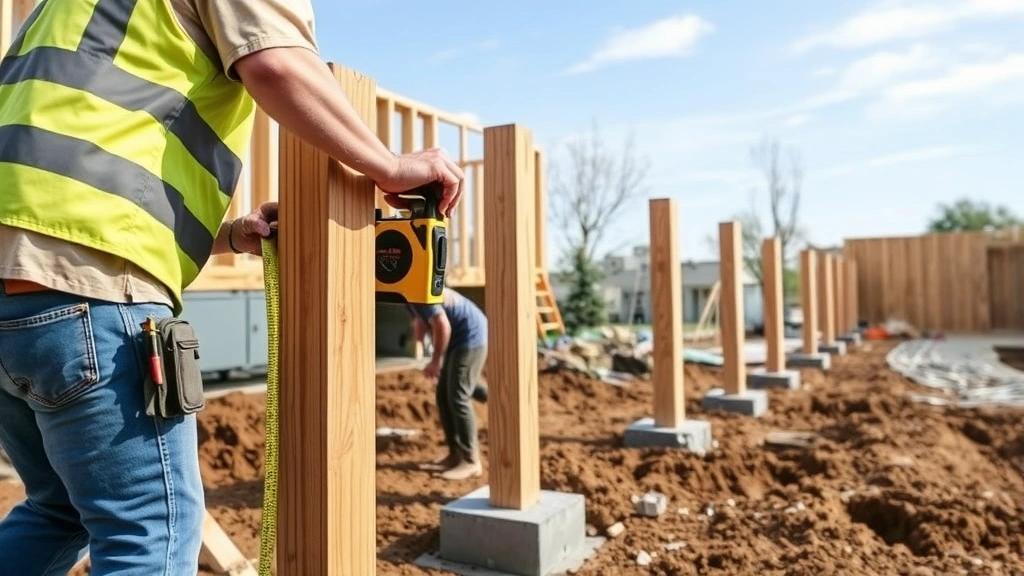
Site Preparation and Foundation
The foundation is absolutely critical to deck longevity and safety. A properly constructed foundation prevents frost heave, settling, and structural failure. Begin by marking post locations using string lines and batter boards. Most codes require posts to sit on footings that extend below the local frost line—this depth varies from 12 inches in mild climates to 48 inches in northern regions. Check your local building inspector’s frost line specifications.
For each post location, dig a hole to the required depth. Many builders use post hole diggers or augers for efficiency. Place 4-6 inches of gravel at the bottom for drainage, then set your concrete footing. You have several options: concrete piers, concrete tubes, or frost-protected shallow foundations (FPSF). Most residential applications use concrete tubes—cardboard forms that hold concrete around the post base.
Set posts plumb (perfectly vertical) using a level, and ensure the concrete cures fully before proceeding. This typically requires 48-72 hours depending on temperature and concrete type. Rushing this step compromises the entire structure. Once concrete sets, attach posts using post bases—metal brackets that attach to the concrete and support the wooden posts. This design keeps wood off wet concrete, preventing rot.
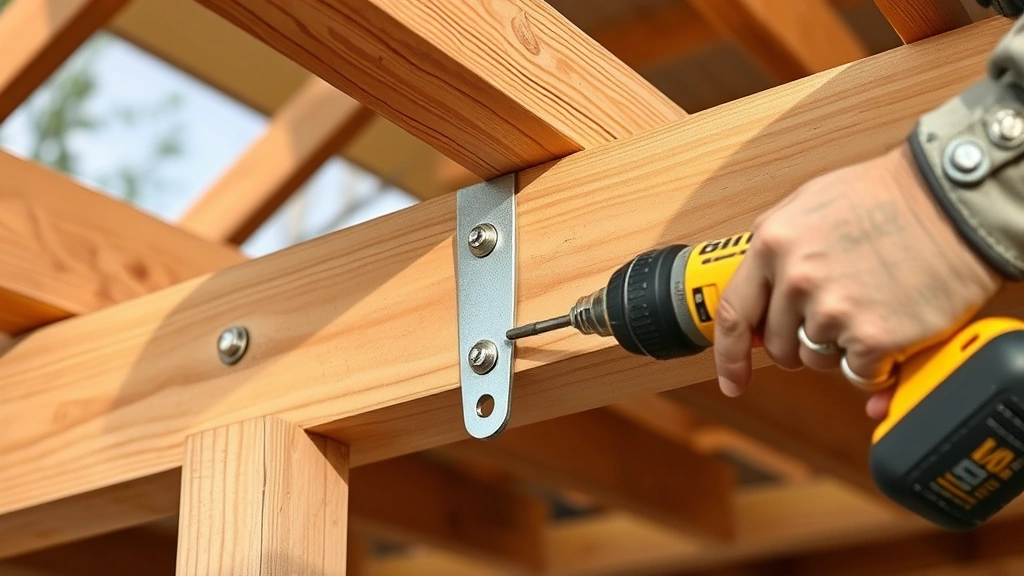
Building the Frame and Support Structure
The frame consists of beams and joists that support the decking. Beams run perpendicular to the house and are supported by posts. Joists run parallel to the house and are supported by beams. This framework must be precisely level and properly spaced to ensure even decking installation and adequate load distribution.
Begin by installing ledger boards—the connection between your deck and house. This is critical: improper ledger installation causes deck collapses. Use American Wood Council specifications for ledger attachment, which typically requires:
- Flashing to direct water away from the house
- Bolts or screws spaced 16 inches on center
- Bolts penetrating rim joists (not just rim boards)
- Removal of house siding to allow direct attachment to rim joist
After ledger installation, attach beams to posts using bolts or post bases. Ensure all connections are tight and secure. Install joists perpendicular to beams, typically spacing them 12 or 16 inches on center depending on joist size and wood species. Use galvanized or stainless steel joist hangers for secure, code-compliant connections. Check your work frequently with a level to catch problems early—correcting issues now is far easier than after decking installation.
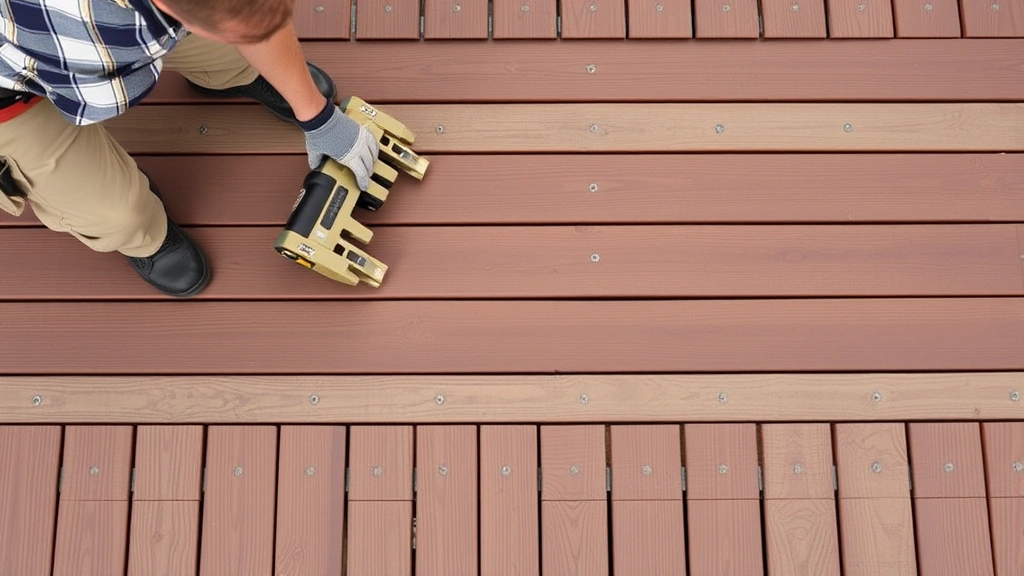
Installing Decking Boards
With the frame complete and verified for level and square, you’re ready for decking installation. Before starting, allow pressure-treated lumber to acclimate for several weeks if possible—this reduces cupping and warping. Sort through boards and set aside those with significant defects for use in non-visible areas.
Begin at the house and work outward, maintaining consistent spacing between boards. Most builders use 8-penny nails or corrosion-resistant screws spaced 12-16 inches apart. Screws are generally preferred as they hold better and allow easier removal if needed. Stagger board joints over joists rather than having them align, which strengthens the structure.
As you progress, periodically check that boards remain perpendicular to joists. Wood naturally varies in width, so boards may need slight adjustment to maintain square appearance. Use spacers between boards to ensure consistent gaps—typically 1/4 inch for pressure-treated lumber and 3/8 inch for composite materials, which expand more with temperature changes.
The decking process typically represents 20-30% of total construction time. Working methodically ensures professional results. If you’re interested in comparing construction techniques, our guide on DIY flooring installation covers similar board layout principles.
Railing and Safety Features
Railings serve both safety and aesthetic functions. Most building codes require railings on decks elevated more than 30 inches above ground. Standard specifications require:
- Railings 36-42 inches high (measured from deck surface)
- Balusters spaced no more than 4 inches apart (sphere rule)
- Railings capable of withstanding 200 pounds of horizontal force
- No openings allowing passage of 4-inch sphere
Install railing posts securely into the deck frame before adding balusters and top rails. Use galvanized bolts for secure attachment. Balusters can be traditional wood spindles, metal components, or composite materials. Ensure spacing is consistent and meets code requirements—the 4-inch sphere rule prevents children from getting their heads stuck between balusters.
Stairs require equal attention to codes. Each step must have consistent rise (typically 7-8 inches) and run (typically 10-11 inches). Handrails must be 34-38 inches high and graspable. Nosing (the edge of each step) typically requires a 1.25-inch radius. These specifications exist because improper stairs cause serious injuries. When in doubt, consult your local building inspector or hire a professional for stair construction.
Finishing and Maintenance
After structure completion, finishing protects your investment and enhances appearance. Allow pressure-treated lumber 6-12 months before applying finish, as the lumber needs time to weather. For composite decking, follow manufacturer recommendations—many don’t require finishing, though some benefit from occasional sealing.
For wood decks, consider stain, sealant, or paint. Semi-transparent stains allow wood grain visibility while providing moderate protection. Solid stains offer more coverage and protection. Sealants protect without adding color. Most finishes require reapplication every 2-3 years, depending on climate and sun exposure.
Long-term maintenance includes:
- Annual inspection for loose fasteners, rot, or damage
- Regular cleaning to prevent mold and mildew
- Prompt repair of damaged boards
- Periodic resealing or restaining
- Winter snow removal to prevent ice accumulation
Understanding material durability helps with maintenance planning. For comparison, learning about concrete curing timelines teaches similar patience principles—good materials properly maintained last decades.
FAQ
How long does it take to build a deck?
A standard 12×16-foot deck typically takes 2-4 weeks for experienced DIYers, with 3-5 days for foundation work, 3-5 days for framing, 2-3 days for decking installation, and 1-2 days for railings and finishing. Permit acquisition and concrete curing add time not spent actively building.
Do I need a permit for my deck?
Most jurisdictions require permits for decks, especially those elevated more than 30 inches. Permitted work ensures code compliance and prevents problems during home sales. Contact your local building department for specific requirements in your area.
What’s the best decking material?
Pressure-treated lumber offers the best value, composite materials provide low maintenance, and tropical hardwoods deliver maximum durability. Your choice depends on budget, climate, and maintenance preferences. Each material has distinct advantages for different situations.
How deep should deck posts go?
Posts must extend below the local frost line, which varies from 12 inches in warm climates to 48 inches in northern regions. Contact your local building inspector for specific requirements. Frost line depth is non-negotiable for preventing structural failure.
Can I build a deck without permits?
While possible, unpermitted decks create serious problems: insurance claim denials, home sale complications, liability issues if someone is injured, and potential removal requirements. The permit process is straightforward and ensures your investment is protected.
What’s the best way to prevent deck rot?
Proper drainage, using pressure-treated lumber or rot-resistant materials, maintaining adequate spacing between boards, applying protective finishes, and addressing damage promptly prevent rot. Regular inspections catch problems early when repairs are simple and inexpensive.
How often should I seal my deck?
Most wood decks require resealing every 2-3 years, though this varies based on climate, sun exposure, and finish type. Composite decks typically require less frequent maintenance. Follow manufacturer recommendations for your specific materials.
What’s the load capacity of a residential deck?
Standard residential decks must support 40 pounds per square foot of live load according to building codes. This accommodates typical furniture and occupancy. Designs requiring higher capacity need reinforced framing and professional engineering.


