Turtle Egg Hatching: Expert-Estimated Timeline
Understanding how long it takes for turtle eggs to hatch is essential for anyone interested in reptile conservation, breeding programs, or simply observing these fascinating creatures in their natural habitat. The incubation period varies significantly depending on species, temperature conditions, and environmental factors, making this a complex yet captivating biological process.
Whether you’re managing a backyard turtle habitat or studying wildlife biology, knowing the hatching timeline helps you prepare appropriate care strategies and set realistic expectations. This comprehensive guide breaks down the incubation process, explores the variables that influence hatch timing, and provides expert insights into successful turtle egg management.
Typical Turtle Egg Incubation Periods by Species
Turtle egg incubation timelines vary dramatically across different species, ranging from approximately 60 days to over 18 months in some cases. Red-eared slider turtles, one of the most commonly kept species, typically require 60 to 90 days for eggs to hatch when maintained under proper conditions. Box turtles, conversely, often experience extended incubation periods of 90 to 120 days, with some eggs entering a dormancy phase that can extend the timeline considerably.
Sea turtles present even more dramatic variations. Loggerhead sea turtles require approximately 60 to 70 days of incubation, while leatherback sea turtles may take 65 days or slightly longer. Painted turtles demonstrate the most extreme variation, with some populations experiencing obligate diapause—a dormancy period where development pauses during winter months, potentially extending the total incubation period to eight months or more.
Snapping turtles typically hatch within 60 to 90 days under optimal conditions, though this can extend significantly if temperatures fluctuate. Softshell turtles generally fall within the 50 to 80-day range. Understanding your specific species’ requirements is crucial before attempting to incubate eggs, as each has evolved unique developmental strategies suited to its natural habitat.
When setting up your basement or controlled environment for egg incubation, researching your particular species becomes the foundational step. Different species also show sex determination based on temperature—a factor that influences not just timing but overall developmental outcomes.
Temperature’s Critical Role in Hatching Timeline
Temperature stands as the single most influential factor determining how long turtle eggs take to hatch. Warmer incubation temperatures accelerate development, while cooler temperatures slow the process. This relationship follows a predictable pattern: eggs incubated at 75°F (24°C) may take significantly longer to hatch than those maintained at 82°F (28°C).
Most turtle species thrive within an optimal temperature range of 78 to 82°F (26 to 28°C) for standard incubation. However, some species tolerate or even require slightly different ranges. For instance, certain aquatic turtle species develop optimally between 80 to 84°F (27 to 29°C), while some terrestrial species prefer 75 to 80°F (24 to 27°C).
The concept of “degree days” helps breeders and researchers predict hatching more accurately. Degree days represent the cumulative heat exposure—calculated by multiplying daily temperature by the number of days. Most turtle species require approximately 1,800 to 2,500 degree days to complete development, depending on species. This means a clutch incubated at a constant 80°F will hatch approximately 45 to 50 days after incubation begins.
Temperature fluctuations create complications. Eggs exposed to temperatures below 75°F (24°C) may experience developmental delays or fail to develop altogether. Conversely, temperatures exceeding 88°F (31°C) risk causing embryonic mortality or developmental abnormalities. Professional incubators maintain precise temperature control, typically within ±1°F of the target temperature.
Understanding temperature management connects directly to your home climate control systems, as maintaining stable conditions in your incubation space requires proper insulation and environmental regulation.
Environmental Conditions That Affect Development
Beyond temperature, humidity and substrate moisture profoundly influence incubation success and timeline. Turtle eggs require specific moisture levels—typically 80 to 90 percent relative humidity—to prevent both desiccation and waterlogging. Eggs incubated in overly dry conditions may shrivel and fail to develop, while those in excessively wet environments may develop fungal or bacterial infections that halt development prematurely.
The substrate selection significantly impacts moisture retention and temperature stability. Vermiculite, perlite, and cypress mulch represent popular incubation media, each with distinct water-holding properties. A standard mixture of one part water to two parts vermiculite by weight creates an ideal substrate consistency that maintains proper humidity while allowing adequate gas exchange.
Oxygen availability, though often overlooked, proves critical for embryonic development. Eggs require constant access to fresh air, making proper container ventilation essential. Containers with sealed lids or insufficient air holes can create hypoxic conditions that slow development or cause complete developmental failure.
Light exposure generally plays a minimal direct role in most turtle species’ development, though photoperiod can influence breeding cycles in adults. Some research suggests that natural light cycles may support more natural development patterns, but artificial lighting is not typically required for successful incubation.
Substrate depth and egg positioning also matter. Eggs should be buried approximately halfway into the substrate, allowing them to maintain contact with moisture while preventing waterlogging. Eggs must never be rotated or flipped during incubation, as the embryo’s position within the shell is critical for proper development.
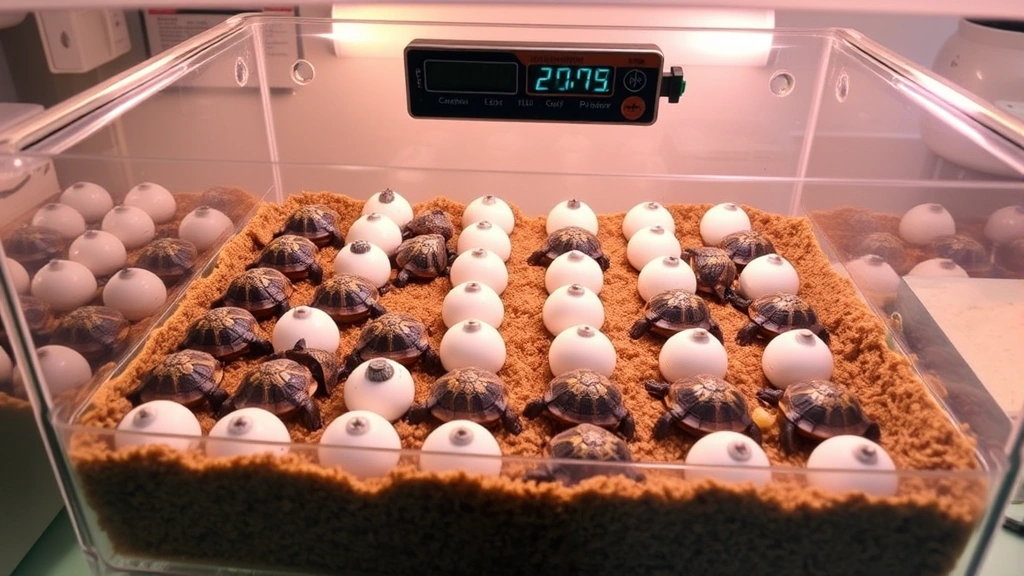
Monitoring Eggs During Incubation
Regular monitoring throughout the incubation period helps identify problems early and ensures optimal conditions. Temperature should be checked at least daily using a reliable thermometer positioned at the egg level, not the air temperature above the substrate. Digital thermometers with remote sensors provide accurate readings without disturbing the eggs.
Humidity monitoring requires a hygrometer—a device measuring relative humidity percentage. Maintaining readings between 80 and 90 percent prevents both desiccation and fungal growth. If humidity drops below 75 percent, mist the substrate lightly with water. If it exceeds 95 percent, increase ventilation or replace some wet substrate with fresh, dry material.
Candling—shining a bright light through the egg—allows visual inspection of embryonic development without opening the incubation container. Viable eggs show increasing opacity and visible blood vessels as development progresses. Candling should occur sparingly, ideally only every two to three weeks, as repeated disturbance can stress the developing embryo.
Infertile eggs typically remain clear or show minimal development after several weeks. Fungal infections appear as dark discoloration spreading across the eggshell. While some surface mold is normal and harmless, spreading internal fungal growth indicates the egg is failing. Removing obviously dead eggs prevents decomposition from affecting viable siblings.
Maintaining detailed records of temperature, humidity, and observations helps troubleshoot problems and improves success rates in future incubations. When you’re managing your DIY incubation setup with woodworking components, documenting conditions becomes even more valuable for optimizing your custom system.
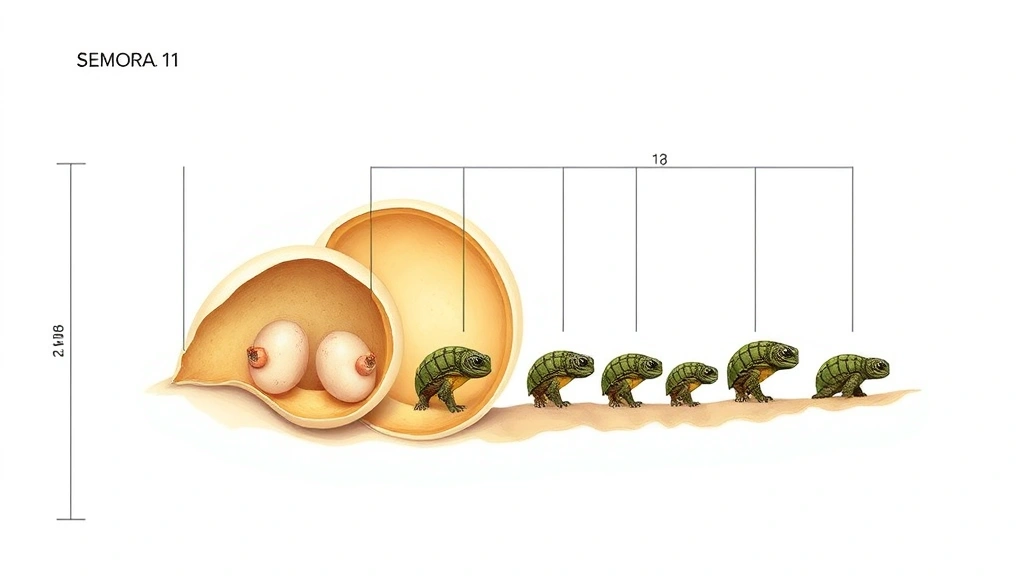
Signs Your Eggs Are Ready to Hatch
Recognizing pre-hatching signs helps you prepare for successful emergence and know when to provide assistance if necessary. Approximately 48 to 72 hours before hatching, eggs often become slightly translucent or develop a “dull” appearance as the hatchling absorbs remaining yolk. The eggshell may show slight indentations where the hatchling presses against it.
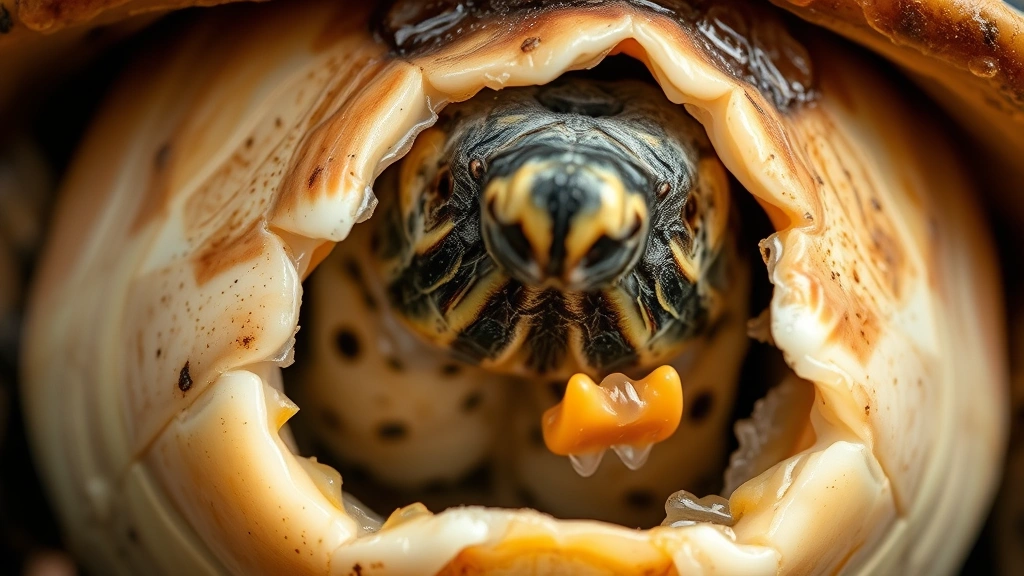
Most significantly, hatchlings develop an egg tooth—a small, keratinous projection on the snout—used to break through the shell. This egg tooth typically appears several days before actual hatching. You may observe the hatchling moving within the egg, creating visible shell movements.
Pipping—the initial breaking of the shell—represents the first critical hatching stage. A small hole appears as the hatchling uses its egg tooth to create an opening. The hatchling may rest for 12 to 48 hours after pipping, absorbing remaining yolk and adjusting to air breathing before fully emerging.
The hatching process itself varies by species and individual. Some hatchlings emerge within hours of pipping, while others take 24 to 48 hours. Patience is crucial—premature assistance can damage the hatchling or cause bleeding if the umbilical connection hasn’t fully separated.
Environmental cues sometimes trigger synchronized hatching in clutches. Hatchlings may detect vibrations or sounds from siblings, encouraging emergence around similar times. This natural synchronization likely evolved to improve survival odds by creating safety in numbers.
Assisting Hatchlings: When and How to Help
Determining whether to assist a hatching turtle requires careful judgment. In natural conditions, hatchlings emerge independently, and intervention is generally unnecessary unless the egg shows signs of distress or extended stalling beyond 48 hours post-pipping.
If assistance becomes necessary, the process demands extreme gentleness. Using a small, moistened paintbrush, carefully remove loose shell pieces around the pipped area. Never force the shell open or attempt to enlarge the opening artificially. The hatchling must do the physical work of emerging, as this strengthens muscles and completes critical physiological transitions.
Humidity during hatching assistance is crucial. The incubation environment should maintain 85 to 90 percent humidity to prevent the hatchling from drying during emergence. A slightly humid container with proper ventilation provides ideal conditions for natural hatching completion.
Once the hatchling emerges completely, resist the urge to immediately transfer it to water or a permanent enclosure. Allow the hatchling several hours to dry slightly and absorb any remaining yolk from the umbilical area. The umbilical scar typically closes within 24 to 48 hours after emergence.
First feeding should wait 48 to 72 hours post-hatching, allowing the hatchling’s digestive system to fully activate. Providing shallow water for drinking and soaking is appropriate immediately after emergence, while actual feeding can wait until the hatchling demonstrates active interest in food.
Common Hatching Problems and Solutions
Incomplete hatching—where a hatchling pips but fails to fully emerge—represents a common problem requiring intervention. This often results from excessive shell hardness, inadequate humidity during hatching, or developmental issues. Careful assistance with shell removal may be necessary if the hatchling hasn’t emerged after 48 hours of pipping.
Sticky hatchlings appear coated in yolk or membranes, unable to dry or move properly. This typically indicates premature emergence or developmental complications. Providing a humid environment and resisting the urge to wash the hatchling usually allows natural drying and absorption within 24 hours.
Bent or deformed hatchlings may result from improper incubation temperature, inadequate humidity, or genetic factors. While some minor deformities resolve as the hatchling grows, severe shell deformities or spinal curvature often indicate poor long-term survival prospects.
Fungal or bacterial infections during incubation can prevent hatching entirely. These infections typically result from excessive moisture, contaminated substrate, or poor ventilation. Removing infected eggs immediately prevents spread to viable siblings. For future incubations, use fresh substrate and maintain proper humidity balance.
Developmental stalling—where eggs show no progress toward hatching despite reaching appropriate age—usually indicates temperature issues or infertility. Review temperature records and consider candling to assess embryonic development status. If temperatures have been consistently low, eggs may require slightly warmer conditions to resume development.
Hatchlings emerging with yolk sacs still attached externally require special care. These hatchlings are extremely fragile and vulnerable to infection. Provide minimal disturbance, maintain high humidity, and avoid water immersion until the yolk sac absorbs completely, which typically takes 48 to 72 hours.
When troubleshooting hatching failures, consulting species-specific resources and reputable reptile breeding guides provides valuable insights. Professional herpetologists and established breeding communities often share detailed incubation protocols specific to particular species.
FAQ
How long do turtle eggs typically take to hatch?
Most turtle species hatch within 60 to 120 days under optimal conditions. Red-eared sliders typically require 60 to 90 days, while box turtles may need 90 to 120 days. Some species with obligate diapause can take significantly longer, up to 8 months or more.
Does temperature really affect how quickly eggs hatch?
Yes, temperature is the primary factor determining incubation length. Warmer temperatures (within the optimal range) accelerate development, while cooler temperatures slow it. Most species require approximately 1,800 to 2,500 cumulative degree days to hatch.
Can I speed up turtle egg hatching?
You can optimize hatching speed by maintaining optimal temperature (typically 78 to 82°F for most species) and proper humidity (80 to 90 percent). However, exceeding safe temperature limits risks embryonic mortality or deformities, so acceleration has practical limits.
What humidity level do turtle eggs need?
Turtle eggs require 80 to 90 percent relative humidity for successful development. Too-dry conditions cause eggs to shrivel and fail, while excessive moisture promotes fungal and bacterial infections.
Should I help my turtle hatchling out of its egg?
Generally, assistance is unnecessary unless hatching stalls beyond 48 hours post-pipping or the hatchling shows obvious distress. If assistance is needed, provide a humid environment and carefully remove loose shell pieces only—never force the opening or pull the hatchling out.
How do I know if a turtle egg is viable?
Candling reveals viable eggs, which show increasing opacity and visible blood vessels as development progresses. Infertile eggs remain clear. After several weeks, non-developing eggs show no changes or appear shrunken.
What temperature kills turtle eggs?
Temperatures below 75°F (24°C) significantly slow or halt development. Temperatures exceeding 88°F (31°C) risk embryonic mortality and developmental abnormalities. Maintaining the species-specific optimal range is crucial for success.
Can turtle eggs hatch at room temperature?
Room temperature varies too widely for reliable hatching. Most homes fluctuate between 65 and 75°F, which is below optimal for most species. Professional incubators maintaining consistent 78 to 82°F provide much better success rates.
Why haven’t my turtle eggs hatched after 120 days?
Delayed hatching may result from temperatures below the optimal range, incorrect species identification, or infertility. Review temperature records and consider candling to assess developmental progress. Some species naturally require longer incubation periods.
For more information on specialized incubation systems, explore our DIY Nests Hub Blog for comprehensive guides. You might also find our articles on DIY Pallet Projects useful for building custom incubation containers, and our house painting guide helpful for creating climate-controlled spaces.


