DIY Shed Building: Expert Tips You Need to Know
Building a shed is one of the most rewarding DIY projects you can undertake. Whether you’re creating storage for garden tools, establishing a workshop, or building a backyard retreat, constructing your own shed combines practical skill-building with tangible results. Unlike pursuing specialized fields that demand years of formal education, shed building is an achievable goal for homeowners willing to invest time, effort, and attention to detail over several weeks or months.
This comprehensive guide walks you through the essential steps, expert strategies, and critical safety considerations for successfully completing a DIY shed project. From site preparation and foundation work to framing, roofing, and finishing touches, you’ll discover the professional techniques that separate amateur attempts from structurally sound, long-lasting structures.
Planning and Site Selection
The foundation of every successful shed project begins with meticulous planning. Before purchasing a single board, invest time in selecting the optimal location on your property. Your chosen site should receive adequate drainage, avoid low-lying areas prone to water accumulation, and provide convenient access for future use. Check local zoning regulations regarding setback requirements—most municipalities mandate specific distances from property lines, typically ranging from 5 to 10 feet depending on jurisdiction.
Evaluate sun exposure carefully. If you’re building a workshop or storage shed, consider how seasonal sunlight will affect interior temperature and humidity. Sites with afternoon shade tend to stay cooler in summer, while southern exposure provides winter warmth. For garden storage, proximity to your growing areas reduces travel time and improves workflow efficiency.
Create detailed plans before breaking ground. Sketch your shed design to scale, noting dimensions, roof pitch, window placement, and door orientation. Determine whether you’ll build from scratch, use pre-designed plans, or modify existing blueprints. The International Code Council (ICC) provides building standards that inform residential construction requirements across North America. Most sheds under 200 square feet may qualify for expedited permitting in many jurisdictions, though this varies significantly.
Budget appropriately for materials and tools. A basic 10×12 shed typically costs $1,500 to $3,500 in materials, depending on siding choices, roofing materials, and finishing details. Factor in equipment rental costs for power tools you don’t own, and allocate 20-30% additional budget for unexpected challenges.
Foundation and Base Preparation
The foundation determines whether your shed will remain level and structurally sound for decades or develop problems within years. Several foundation options exist, each with distinct advantages:
- Concrete slab: Most durable and moisture-resistant option, ideal for wet climates. Requires proper grading and vapor barriers to prevent water damage to contents.
- Concrete pier blocks: Affordable, allows airflow underneath, easier to install than full slabs, and permits easier relocation if needed.
- Gravel base: Budget-friendly option suitable for dry climates, though requires regular maintenance to prevent settling.
- Pressure-treated skids: Portable option that works well for temporary structures, though less durable long-term than concrete solutions.
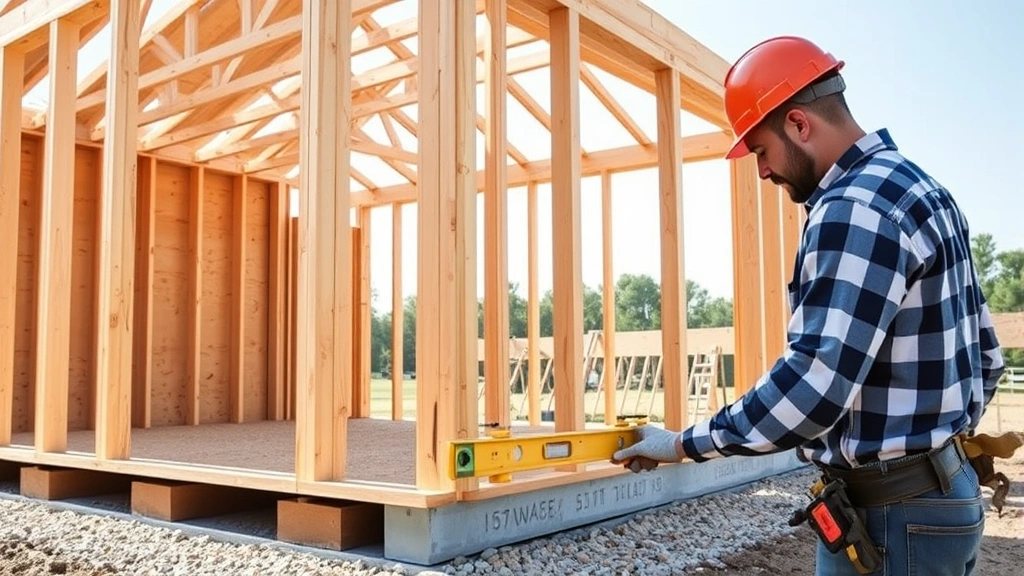
Before construction, clear the site of vegetation, rocks, and debris. Compact the soil using a hand tamper or plate compactor to prevent settling. If building a concrete pad, excavate 4-6 inches deep and establish proper drainage slope—typically 1/8 inch per foot—directing water away from the structure.
For pier block foundations, space blocks 4 feet apart in a grid pattern, ensuring they sit level and stable. Check with a long level across multiple blocks to confirm proper grade. This foundation type offers excellent accessibility for future repairs and maintenance work underneath the structure.
Moisture management is critical regardless of foundation type. Install a vapor barrier on concrete pads before building, and ensure adequate ventilation if building elevated structures. Poor moisture control leads to wood rot, mold growth, and structural failure over time.
Framing Your Shed Structure
Framing represents the structural skeleton of your shed. Proper framing techniques ensure your building withstands wind, snow loads, and seasonal movement. Begin by constructing the floor frame using pressure-treated 2×6 or 2×8 lumber, spacing floor joists 16 inches on center for standard residential sheds.
When constructing wall frames, use 2×4 studs spaced 16 inches on center for adequate strength and efficient material use. Arrange studs with one stud at each corner, additional studs flanking window and door openings, and studs every 16 inches for roof support. Install horizontal blocking between studs at mid-height to prevent racking and improve structural rigidity.
Roof framing depends on your chosen roof style. The National Frame Builders Association provides technical guidance on rafter sizing and spacing. For simple gable roofs, calculate rafter size based on roof pitch, snow load expectations, and span distance. Most DIY sheds use 2×6 or 2×8 rafters spaced 24 inches on center, providing adequate strength while minimizing material costs.
Use a speed square to mark rafter cuts accurately. A properly cut rafter requires precision at both the ridge and eave connections. Pre-cut all rafters identically, then install them in pairs, securing each pair with collar ties to prevent spreading under load.
Check squareness constantly during framing. Measure diagonally from corner to corner—equal diagonal measurements confirm square corners. Diagonal bracing or plywood sheathing improves structural integrity and prevents racking caused by wind or settling.
Roofing Systems and Installation
The roof protects everything beneath it, making quality roofing installation absolutely essential. Proper roof design begins with selecting appropriate pitch—steeper pitches shed water more effectively and handle snow loads better, while shallower pitches reduce material and labor costs.
Install roof sheathing using 1/2-inch plywood or OSB boards, fastened with 8-penny nails or structural screws spaced 6 inches apart at edges and 12 inches in the field. Ensure sheathing extends properly at eaves to support fascia boards and gutters.
Underlayment protects sheathing from water penetration before shingles are installed. Modern synthetic underlayment offers superior protection compared to traditional felt products. Secure underlayment with roofing nails or staples, overlapping courses by at least 4 inches and working from bottom to top.
Asphalt shingles remain the most popular roofing choice for DIY sheds due to affordability and straightforward installation. Start at the eave, installing starter course shingles upside-down, then proceed upward in courses. Nail shingles at four points per shingle, positioning nails 5/8 inch above the cutouts. Stagger shingle courses to prevent water from running down nail lines.
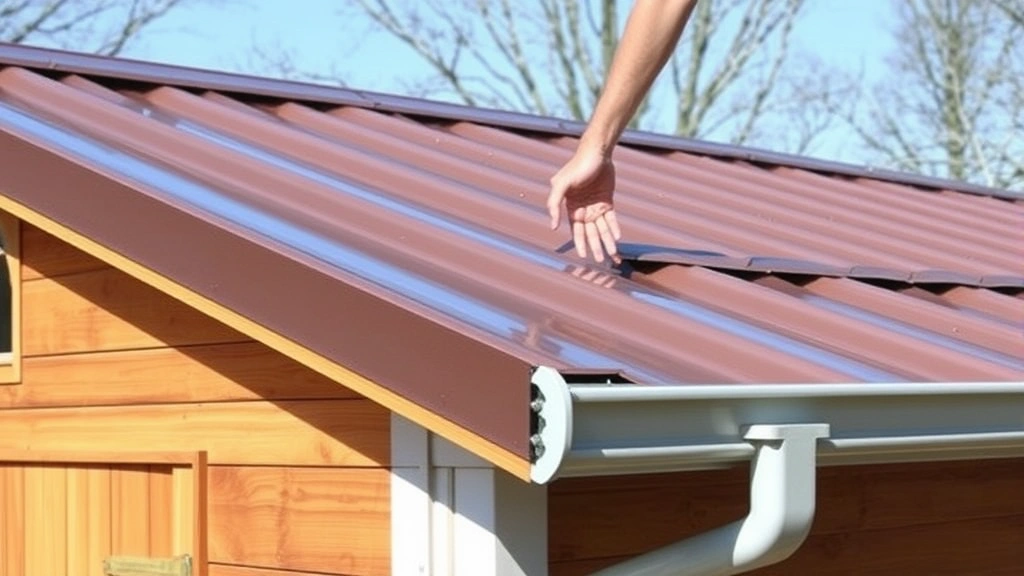
Metal roofing offers excellent durability and longevity, lasting 40+ years with minimal maintenance. Installation requires special fasteners and careful attention to panel overlap to prevent leaks. The Metal Roofing Alliance provides installation guidelines and technical specifications for metal roofing systems.
Install gutters and downspouts to direct water away from the foundation. Gutters should slope 1/4 inch per 10 feet toward downspouts, preventing water pooling that leads to overflow and foundation damage.
Walls, Siding, and Weatherproofing
Exterior walls protect the interior from weather while establishing your shed’s appearance. Install house wrap or building paper over wall sheathing before applying siding. This moisture-permeable barrier allows interior moisture to escape while preventing external water penetration.
Siding options include:
- Vinyl siding: Low-maintenance, affordable, available in numerous colors, though less durable than wood in extreme climates.
- Wood siding: Classic appearance, requires regular painting or staining, susceptible to rot if not properly maintained.
- Fiber cement: Durable, fire-resistant, low-maintenance alternative combining wood’s appearance with superior longevity.
- Metal panels: Industrial aesthetic, extremely durable, excellent for workshop environments.
Install siding according to manufacturer specifications, typically overlapping courses by 1.25 inches and fastening with corrosion-resistant fasteners spaced 16 inches apart. Leave 1/4-inch expansion gaps at corners and trim to accommodate seasonal movement.
Weatherproofing extends your shed’s lifespan significantly. Caulk all gaps where different materials meet, around windows and doors, and at corner joints. Use exterior-grade caulk rated for movement and UV exposure. Paint or stain all wood surfaces to prevent moisture absorption and UV degradation. Apply at least two coats of quality exterior paint or stain, allowing proper drying time between coats.
Install flashing around roof penetrations, chimneys, and vents to prevent water intrusion. Flashing should overlap shingles above and be covered by shingles below, creating a water-shedding shingle. This simple detail prevents the majority of roof leaks when installed correctly.
Doors, Windows, and Hardware
Doors and windows provide access and natural light while affecting structural integrity. Most DIY sheds feature a single 3-foot-wide entry door, typically 6’8″ in height to accommodate standard door frames.
Pre-hung doors simplify installation considerably. Install door frames according to manufacturer instructions, ensuring frames are level and square before fastening to the rough opening. Shim gaps around frames to maintain proper alignment, then fasten frames to studs with shims and fasteners. Install shims in pairs on opposite sides of the frame for balanced support.
Exterior doors should be solid-core or metal-clad construction to resist weathering and provide security. Install a threshold with proper slope to shed water away from the building. Apply weatherstripping around door frames to minimize air infiltration and water penetration.
Windows improve functionality and aesthetics while providing ventilation and natural light. Pre-hung windows install similarly to doors—ensure frames are level and square, use shims to maintain alignment, and caulk exterior perimeters after installation. Consider operable windows on opposite walls to enable cross-ventilation, improving comfort in warm months.
Install quality hardware including hinges, handles, locks, and latches rated for exterior use. Stainless steel or galvanized hardware resists corrosion far better than standard steel, extending hardware lifespan significantly.
Interior Organization and Finishing
Interior finishing transforms your shed from bare structure to functional space. Insulation isn’t necessary for unheated storage sheds but improves temperature stability and sound dampening. Fiberglass batts, blown cellulose, or foam board provide adequate insulation when installed between wall studs.
Drywall, plywood, or shiplap can be installed on interior walls for a finished appearance. Shiplap offers rustic charm and structural benefits, while drywall provides a cleaner, more finished look. Plywood works well in utility sheds where durability matters more than aesthetics.
Flooring depends on intended use. Concrete works best for heavy storage, while plywood or vinyl flooring provides a cleaner surface for workshops or craft spaces. Ensure proper moisture barriers beneath flooring materials to prevent mold growth.
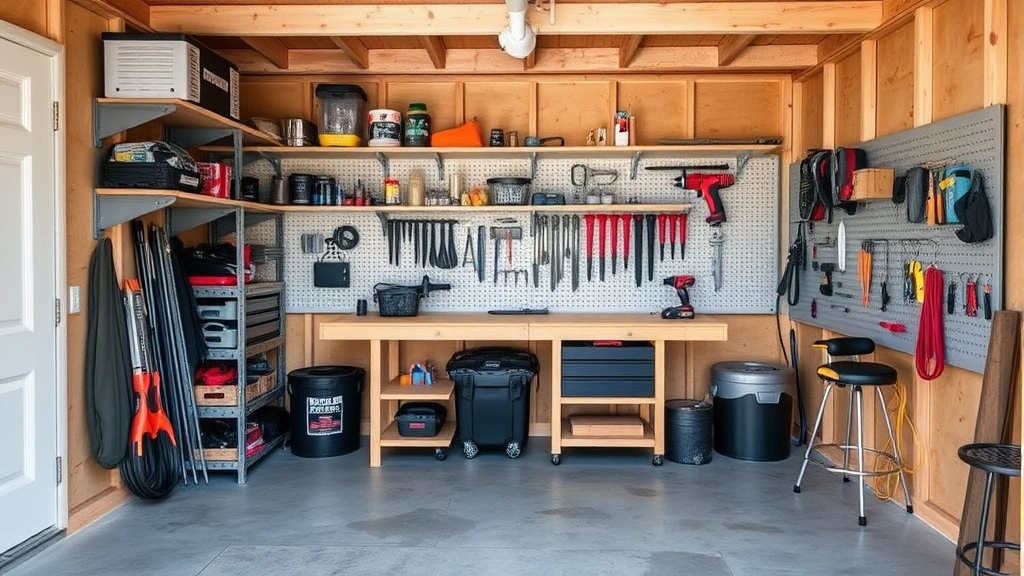
Install shelving, workbenches, and storage systems appropriate to your shed’s purpose. Wall-mounted shelving maximizes vertical space, while pegboards provide flexible tool organization. Ensure shelving units are properly fastened to wall studs for safety and stability. For workshop applications, reference DIY beginner woodworking projects for ideas on creating custom storage solutions.
Lighting improves functionality and safety. Install fixtures rated for damp locations if your shed lacks climate control. LED fixtures minimize heat generation and reduce electrical demands. Install switches near entry doors for convenient control.
Ventilation prevents moisture accumulation and extends structural lifespan. Install soffit vents and roof vents to encourage air circulation, reducing humidity levels that promote mold and wood rot. For sheds with significant moisture issues, consider installing a small exhaust fan.
Permits, Codes, and Legal Requirements
Building permits aren’t optional bureaucratic obstacles—they protect property values, ensure safety, and prevent costly disputes with neighbors. Most jurisdictions require permits for structures exceeding 100-200 square feet, though requirements vary widely.
Contact your local Building Industry Association or municipal building department to understand specific requirements for your area. Permit applications typically require site plans, construction drawings, and property surveys. Budget 2-4 weeks for permit approval and allocate $300-$800 for permit costs depending on project size.
Building codes establish minimum standards for structural safety, electrical systems, and fire resistance. The ICC publishes the International Building Code (IBC), which most jurisdictions adopt with local amendments. Familiarize yourself with code requirements affecting foundation depth, rafter sizing, roof pitch minimums, and setback distances.
Inspections occur at critical stages—foundation, framing, and final completion. Inspectors verify compliance with building codes and permit specifications. Failing inspections often requires corrective work before proceeding, so understanding code requirements prevents costly rework.
Zoning regulations control building placement, size, and use. Some jurisdictions prohibit sheds in front yards or require specific distances from property lines. Verify setback requirements, height restrictions, and use limitations before finalizing your design. Violating zoning regulations can result in forced removal of non-compliant structures.
Property line surveys prevent disputes with neighbors. Hire a professional surveyor to mark exact boundaries before construction, particularly if your shed will be located near property lines. This modest investment prevents expensive legal disputes.
For additional guidance on related home improvement projects, explore our comprehensive guides on DIY basement finishing and DIY home security systems to enhance your property comprehensively.
FAQ
How long does a typical DIY shed project take?
Most DIY builders complete basic 10×12 sheds in 4-8 weeks working weekends, assuming moderate experience and reasonable weather conditions. Smaller 8×10 structures may take 3-5 weeks, while larger or more complex designs extend timelines to 10-12 weeks. Weather delays, material shortages, and unexpected structural issues can extend timelines significantly.
What permits do I need for shed construction?
Permit requirements vary by jurisdiction. Sheds under 100-120 square feet typically qualify for expedited or no-permit approval in many areas, though some municipalities require permits for all permanent structures. Contact your local building department to confirm specific requirements. Generally, permits cost $200-$800 and require site plans and construction drawings.
Can I build a shed on a gravel base?
Gravel bases work in dry climates but require regular maintenance to prevent settling and unevenness. Concrete piers or pads provide superior long-term performance, particularly in wet climates. If using gravel, compact thoroughly, install landscape fabric to prevent weeds, and plan for annual maintenance adding fresh gravel as needed.
What roofing material lasts longest?
Metal roofing offers the longest lifespan, lasting 40-70 years with minimal maintenance. Quality asphalt shingles typically last 15-25 years. Wood shakes and shingles offer 20-40 year lifespans but require regular maintenance. Consider climate, maintenance preferences, and budget when selecting roofing materials.
Do I need ventilation in my shed?
Ventilation prevents moisture accumulation, mold growth, and wood rot. Install soffit vents and roof vents to encourage air circulation, even in unheated storage sheds. Proper ventilation extends structural lifespan and maintains a healthier interior environment.
Can I install electricity in my DIY shed?
Yes, but electrical work must comply with local building codes. Most jurisdictions require licensed electricians to install service lines, though you may run circuits within the shed if permitted locally. Hire a licensed electrician to ensure code compliance and safe installation.
What tools do I need to build a shed?
Essential tools include a circular saw, miter saw, drill-driver, level, tape measure, speed square, and hammer. A power nailer accelerates fastening considerably. Rent specialized equipment like a compressor, pneumatic nailer, and scaffolding rather than purchasing. Tool rental typically costs $100-$300 for a multi-week project.


