How to Install Drywall: Expert Steps & Tips
Drywall installation is one of the most fundamental skills in construction and home renovation. Whether you’re finishing a basement renovation project or tackling interior walls in a new build, understanding proper drywall installation techniques ensures professional results and structural integrity. This comprehensive guide walks you through every step of the drywall installation process, from material selection through final taping and finishing.
Installing drywall yourself can save thousands in labor costs while giving you complete control over your project timeline. However, the process demands attention to detail, proper tool selection, and knowledge of building codes and safety practices. We’ll cover everything you need to know to install drywall like a professional, including preparation, framing inspection, fastening techniques, and moisture considerations that affect long-term durability.
Materials and Tools You’ll Need
Before beginning any drywall project, gather all necessary materials and tools. High-quality supplies directly impact the final appearance and durability of your finished walls. The primary material is drywall sheets, typically available in half-inch thickness for interior walls and five-eighths inch for fire-rated applications. Standard sheet sizes are 4 feet wide by 8, 10, 12, or 14 feet long.
Essential materials include drywall screws (coarse-thread for wood framing, fine-thread for metal studs), joint compound (also called mud), joint tape, primer, and paint. The International Code Council (ICC) provides specifications for drywall installation in different applications, including moisture-resistant drywall for bathrooms and kitchens.
Critical tools include a drywall lift or T-square for positioning sheets, a drywall saw for cutting openings, a power drill-driver for fastening, a taping knife (12-inch and 6-inch widths), a drywall sander, and a straightedge. A chalk line helps ensure studs are properly marked, while a level confirms framing is plumb and level. Invest in quality drywall knives—cheap ones warp easily and create uneven surfaces.
Safety equipment is non-negotiable: dust masks or respirators, safety glasses, work gloves, and hearing protection when using power tools. Drywall dust contains silica, which poses serious respiratory health risks if inhaled without protection. A wet-dry vacuum with HEPA filtration minimizes airborne dust during sanding.

Preparing Your Work Space
Proper preparation determines installation success. Begin by inspecting the framing for plumb, level, and square conditions. NFPA building standards require wall framing to be within 1/8 inch of plumb over 10 feet of height. Use a level to check vertical studs and horizontal plates. Any deviation greater than this tolerance requires shimming or adjusting framing before installing drywall.
Check stud spacing—standard residential framing uses 16-inch centers, while commercial construction often uses 24-inch centers. Confirm all electrical boxes, plumbing penetrations, and HVAC ducts are properly installed and secured. Drywall installation should occur after rough-in work is complete but before final mechanical system connections.
Acclimate drywall sheets to the room’s temperature and humidity for at least 48 hours before installation. Drywall expands and contracts with moisture and temperature changes. Installing material that hasn’t acclimated causes buckling, nail pops, and cracking. Store sheets flat on the floor or on a temporary rack, never standing on edge where they can warp.
Protect existing structures and flooring with plastic sheeting and drop cloths. Drywall installation creates significant dust and debris. Set up a dust containment barrier using plastic sheeting and duct tape around work areas, especially in occupied homes. This prevents dust from migrating to other rooms and damaging HVAC systems.
Establish a work plan that minimizes joints on visible walls. Plan drywall placement to use full sheets whenever possible, reducing the number of seams requiring taping and mudding. On ceilings, orient sheets perpendicular to joists for maximum strength. On walls, running sheets horizontally reduces the number of vertical seams and creates a cleaner appearance.
Installing Drywall Sheets
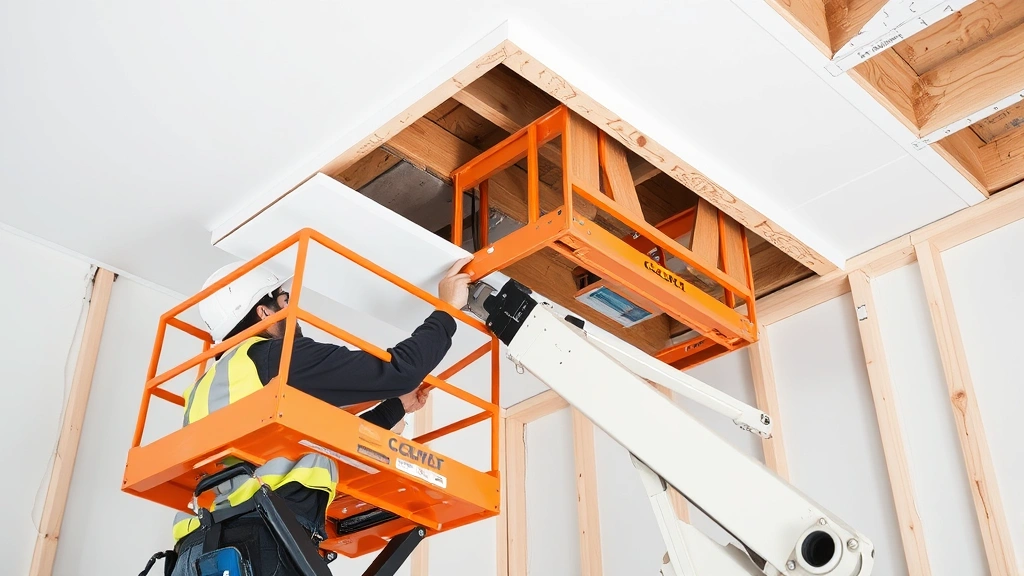
Begin drywall installation on ceilings, working from one corner systematically across the room. Ceiling work is physically demanding—rent or purchase a drywall lift, which holds sheets at ceiling height and allows one person to position and fasten them safely. This tool is essential for efficient, professional installation and prevents back injuries.
Position the first sheet with one corner at the room’s corner. The lift’s arms support the sheet while you fasten it. Drive screws perpendicular to the framing members at 12-inch intervals along joists and 16-inch intervals along cross bracing. Screws should penetrate framing by at least 5/8 inch but not more than 1 inch. Over-driving breaks the paper; under-driving leaves fasteners that pop later.
For walls, begin at the bottom and work upward, or start at the top and work down—both methods work equally well. Many professionals prefer starting at the top, as gravity assists with positioning. Install sheets horizontally when possible (with the long dimension running horizontally), which reduces the number of vertical joints and creates stronger walls. Vertical installation may be necessary in rooms with low ceilings.
Stagger joints between rows to prevent long continuous seams that weaken the wall assembly. Offset vertical joints by at least one stud width (16 inches minimum). Stagger horizontal joints by at least 4 feet. This staggered pattern distributes stress more evenly across the wall assembly.
Cut openings for electrical outlets, switches, and fixtures before or after installation. A drywall saw cuts cleanly through material, and careful measurement ensures proper fit. Measure from the nearest corner or reference point, then transfer measurements to the drywall sheet. Drill a starter hole, insert the saw blade, and cut smoothly without forcing the blade.
Ensure fasteners are driven perpendicular to the framing surface. Angled fasteners don’t hold properly and can pop through the drywall face. Fastener spacing is critical—too few fasteners cause sagging and movement; too many create ridges and dimples that show through finished surfaces. Follow the spacing guidelines in the Gypsum Association Technical Manual for your specific application.
Taping and Mudding Techniques
After all drywall is fastened, the taping and mudding process begins. This is where amateur and professional installations diverge most visibly. The goal is creating seamless walls with no visible joints or fastener heads. This requires multiple coats of joint compound applied with increasing precision.
Begin by applying self-adhesive joint tape over all seams. Crease the tape down the center with your knife, pressing it firmly into the corner. The tape bridges the gap between sheets and prevents compound from cracking along seams. Use paper tape for strength or mesh tape for easier application—both work, though paper tape is slightly stronger.
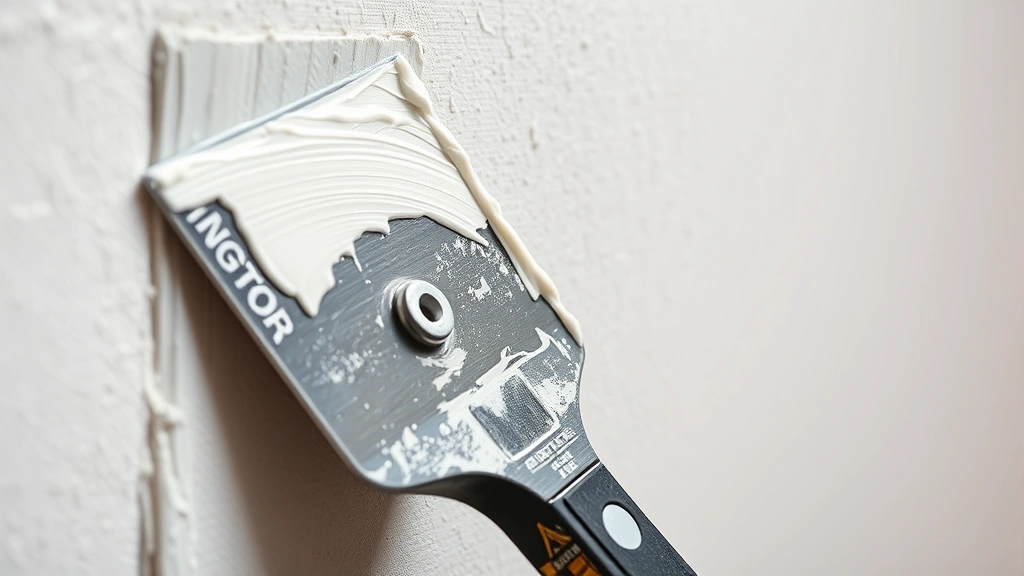
Apply the first coat of joint compound (called the “all-purpose” or “lightweight” mud) using a 6-inch or 8-inch knife. Press the compound firmly into the joint, then smooth it flat. The first coat should be thick enough to fully embed the tape and cover fastener heads. Allow this coat to dry completely (usually 24 hours) before applying the next coat.
The second coat uses wider knives (10-inch to 12-inch) to feather the compound further from the joint centerline. This spreading technique reduces visibility of the joint and creates a gradual transition from compound to drywall. The second coat should extend 8-12 inches on each side of the joint. Again, allow complete drying before proceeding.
A third coat, sometimes called the “finish coat,” uses the widest knife available (14-18 inches) to feather compound even further. This coat is typically thinner than previous coats, creating a nearly invisible transition. Some professionals apply a fourth coat for ultra-smooth, blemish-free surfaces visible under bright light.
For fastener heads (nail pops or screw dimples), apply compound directly over the fastener in a small circular motion, creating a slight dome that will be sanded flush. Multiple thin coats over fasteners work better than one thick application, which shrinks and leaves visible depressions.
Interior angles and corners use different techniques. For inside corners, fold joint tape lengthwise and press it into the corner, then apply compound to both sides. For outside corners, install metal corner bead before taping, which provides a straight edge and reinforcement. The corner bead prevents damage and ensures sharp, straight corners.
Sanding and Finishing
Once all compound coats are fully dry, sanding transforms rough, uneven surfaces into smooth, professional finishes. Sanding is dusty and requires proper respiratory protection. Use a HEPA-filter respirator, not a simple dust mask, as drywall dust contains fine particles that bypass standard masks.
Use 120-grit sandpaper for initial sanding, followed by 150-grit for final smoothing. A drywall sander with pole extension makes ceiling work manageable. Sand lightly—aggressive sanding exposes drywall paper and creates low spots that require additional compound and resanding.
Sand in circular motions, keeping even pressure. Check your work frequently by running your hand across the surface or shining a light at a low angle to reveal imperfections. High spots become obvious under raking light. Sand these areas smooth, then apply additional compound if necessary.
After sanding, vacuum thoroughly with a HEPA-filter vacuum, then wipe walls with a damp sponge to remove remaining dust. This step is essential before priming and painting, as dust interferes with paint adhesion. Allow the damp sponge application to dry completely before priming.
Prime all drywall with a quality drywall primer before painting. Primer seals the porous drywall surface, ensures uniform paint coverage, and improves final paint appearance. Drywall primer is specifically formulated for this purpose and provides better results than paint-and-primer combinations.
Common Mistakes to Avoid
Improper fastener spacing causes nail pops and fastener visibility. Many DIYers space fasteners too far apart, especially on ceilings. Follow manufacturer guidelines precisely—typically 12 inches on ceilings and 16 inches on walls. Closer spacing on ceilings provides necessary support against gravity.
Over-mudding and under-mudding both create problems. Over-application leaves thick ridges requiring aggressive sanding that damages drywall paper. Under-application leaves visible joints and fastener heads. Practice achieving the right compound thickness—enough to cover but not so much that it creates ridges.
Skipping the acclimation period causes moisture-related issues. Drywall that hasn’t acclimated to room conditions expands or contracts after installation, creating cracks, pops, and separation. Patience during this stage prevents costly rework later.
Installing drywall over wet framing or in high-moisture environments without moisture-resistant drywall leads to mold growth and structural damage. Always use moisture-resistant (green board) or cement board in bathrooms, kitchens, and basements. Standard drywall absorbs moisture and deteriorates in damp conditions.
Poor taping technique causes visible seams. Rushing between coats before complete drying, applying uneven compound thickness, or using dull knives all contribute to visible joints. Quality results require patience, proper tools, and attention to technique. Many professionals spend more time on taping and mudding than on actual drywall installation.
Inadequate corner reinforcement leads to cracked, damaged corners. Always use corner bead on outside corners, and use proper inside corner taping technique. These high-stress areas require extra attention and proper materials.
Safety Considerations
Drywall installation involves significant safety hazards requiring proper precautions. Heavy drywall sheets cause back and shoulder injuries—always use lifting techniques that protect your spine. Bend at the knees, keep the load close to your body, and ask for help with large sheets. Drywall lifts prevent injuries and improve installation quality.
Dust inhalation is a serious health concern. Silica dust in drywall particles causes silicosis, a progressive lung disease. Always wear a properly fitted N95 or P100 respirator when sanding drywall. Standard dust masks provide inadequate protection. A wet-dry vacuum with HEPA filtration reduces airborne dust when used during sanding.
Power tools present electrical and contact hazards. Ensure cords are in good condition, use ground fault circuit interrupter (GFCI) protection, and keep hands clear of rotating saw blades and sanding discs. Wear safety glasses to protect eyes from dust and debris.
Working at heights on scaffolding or ladders requires fall protection. Use sturdy ladders rated for your weight, never stand on the top rung, and maintain three-point contact when climbing. For ceiling work, use proper scaffolding or a drywall lift rather than ladders.
Proper ventilation during and after compound application prevents solvent exposure. Ensure adequate air circulation, especially when using joint compound. Modern compounds have low VOC (volatile organic compound) content, but ventilation still improves working conditions and drying times.
For large projects, consider hiring professionals or using a National Association of the Remodeling Industry (NARI) certified contractor. Professional installation guarantees quality, proper technique, and adherence to building codes. The cost difference between DIY and professional installation often justifies hiring experienced workers for visible, high-quality results.
FAQ
How long does drywall installation typically take?
Installation time depends on project scope and experience level. Hanging drywall on a typical bedroom might take 4-6 hours for one person, while taping and mudding that same room requires 2-3 days including drying time between coats. Professional crews work faster due to experience and equipment like drywall lifts. Similar to understanding project timelines in other DIY fields, drywall projects require patience for proper drying between coats.
Can I install drywall in a damp basement?
Standard drywall absorbs moisture and deteriorates in damp conditions. Always use moisture-resistant drywall (green board) or cement board in basements, bathrooms, and kitchens. Address moisture issues first through proper grading, drainage, and waterproofing before installing any drywall. When finishing a basement, moisture control is essential for long-term durability.
What’s the difference between drywall screws and nails?
Drywall screws hold better than nails because threads grip framing and resist popping. Screws require a power drill-driver but provide superior holding power. Nails are cheaper but more prone to popping as wood shrinks and structures settle. Most professionals use screws exclusively for superior results and fewer callbacks for repairs.
How do I fix drywall that’s already cracked?
Minor cracks (hairline to 1/8 inch) can be filled with joint compound using a putty knife. For larger cracks, cut away loose material, apply mesh tape, then cover with compound in multiple coats. Settlement cracks may reappear—address structural issues first. For recurring cracks, use flexible joint compound designed for movement.
Is it better to use lightweight or all-purpose joint compound?
Lightweight compound is easier to sand and requires less effort for application, making it ideal for large areas and finish coats. All-purpose compound is slightly harder, making it better for first coats where strength matters more. Many professionals use lightweight for all coats due to sanding ease and excellent results.
How many coats of joint compound do I need?
Minimum three coats are standard: one to embed tape and cover fasteners, one to feather joints, and one finish coat for smoothness. High-visibility areas under bright light may require four coats for truly seamless results. Each coat must dry completely before applying the next—rushing this process compromises quality.
What’s the proper way to tape inside corners?
Fold joint tape lengthwise and press it firmly into the corner. Apply compound to both sides of the corner using a corner knife or by applying compound to each side separately with a standard taping knife. Use multiple thin coats rather than one thick application. Inside corners are high-stress areas prone to cracking if not properly taped.
Can I paint directly over drywall without priming?
Never skip primer on new drywall. The porous drywall surface absorbs paint unevenly, creating blotchy, uneven coverage. Primer seals the surface and ensures uniform paint absorption. Drywall primer is specifically formulated for this purpose and provides better results than paint-and-primer combinations.
How do I prevent fastener pops after installation?
Use screws instead of nails, which are less prone to popping. Drive fasteners perpendicular to framing at proper spacing—too far apart allows movement. Ensure framing is fully dry before installation, as wood shrinkage causes fastener movement. Use quality fasteners and apply multiple thin coats of compound over fastener heads rather than one thick coat, which shrinks and leaves visible depressions.
What should I do about moisture-resistant drywall in wet areas?
Install moisture-resistant drywall (green board) or cement board in bathrooms, kitchens, and basements. Install a vapor barrier behind the drywall if the area is particularly damp. Ensure proper ventilation—exhaust fans in bathrooms and kitchens prevent moisture accumulation. Moisture control is essential; the drywall itself is only part of a complete moisture management strategy.


