Build a Deck? Carpenter’s Guide to DIY Success
Building a deck is one of the most rewarding DIY projects you can undertake, transforming your outdoor space into a functional entertainment area while adding significant value to your home. Whether you’re a seasoned carpenter or picking up tools for the first time, this comprehensive guide will walk you through every step of deck construction, from initial planning through final finishing touches. A well-built deck not only enhances your property’s curb appeal but also provides a safe, durable outdoor living space that your family will enjoy for years to come.
The process of deck building requires careful planning, proper material selection, and adherence to local building codes. Unlike some DIY projects where mistakes are easily hidden, a deck’s structural integrity directly impacts safety. This guide emphasizes the importance of understanding load requirements, proper fastening techniques, and weatherproofing methods that professional carpenters rely on. By following these principles, you’ll create a deck that withstands the elements and provides reliable performance.
Planning Your Deck Project
Successful deck construction begins long before you dig the first post hole. Take time to envision your finished deck and consider how it will function within your outdoor space. Determine the primary purpose—will it serve as a dining area, lounge space, or entertainment hub? Understanding your intended use helps dictate size, layout, and special features like built-in benches or shade structures.
Measure your available space carefully, considering sight lines from inside your home and the relationship to existing landscape features. A typical residential deck ranges from 12 by 16 feet to 20 by 24 feet, though custom dimensions work equally well. Sketch your design on graph paper, marking the location relative to your house, trees, and utilities. This planning phase prevents costly mistakes during construction and ensures your finished deck integrates seamlessly with your home’s architecture.
Consider the deck’s orientation relative to sun exposure and prevailing winds. A south-facing deck receives maximum sunlight, making it ideal for morning coffee or evening relaxation, while a north-facing location stays cooler and may require less maintenance. Understanding these factors influences material choices and long-term durability. When planning, also think about future outdoor living improvements that might complement your deck.
Understanding Building Codes and Permits
Before purchasing a single board, contact your local building department to understand deck construction requirements in your area. Building codes exist to protect homeowners and visitors from structural failure and safety hazards. Most jurisdictions require permits for decks, and the International Code Council (ICC) provides standardized guidelines that most municipalities adopt.
Key code requirements typically include minimum post spacing (usually 6 feet on center), frost line depth for footings (varies by region, ranging from 18 inches to 48 inches), railing height (typically 36 inches) and baluster spacing (4-inch sphere rule), and deck board span ratings. Decks attached to your home must include proper flashing to prevent water infiltration at the connection point—a detail that prevents costly structural damage. The National Fire Protection Association (NFPA) provides additional safety standards worth reviewing.
Obtaining permits might seem like bureaucratic overhead, but it serves critical purposes: building inspectors verify your work meets safety standards, and permitted decks are recognized by insurance companies and future homebuyers. Unpermitted decks can create problems when selling your home or filing insurance claims. The inspection process typically includes checks at foundation completion, framing stage, and final inspection. Plan for these checkpoints in your timeline.
Review the specific requirements for your region, as frost lines, snow load ratings, and seismic considerations vary significantly. Consulting the American Wood Council (AWC) technical resources ensures your design accommodates regional conditions. Your building inspector can answer questions about local requirements and help you avoid costly rework.
Materials Selection and Preparation
Material selection dramatically impacts your deck’s longevity, maintenance requirements, and overall cost. Traditional pressure-treated lumber remains popular for structural components due to its affordability and strength, while composite decking offers lower maintenance and improved aesthetics. Pressure-treated wood contains preservatives that resist rot and insect damage, making it ideal for posts, beams, and joists that contact soil or remain constantly moist.
For decking boards (the surface you walk on), you have several options: pressure-treated lumber (budget-friendly, requires regular staining), cedar or redwood (naturally attractive, moderate maintenance), composite materials (wood-plastic blend, minimal maintenance), or tropical hardwoods (exceptional durability, premium cost). Each material has distinct characteristics regarding water absorption, expansion/contraction, and long-term performance. Composite decking eliminates splinters and resists fading better than wood, though it may feel softer underfoot and cost more initially.
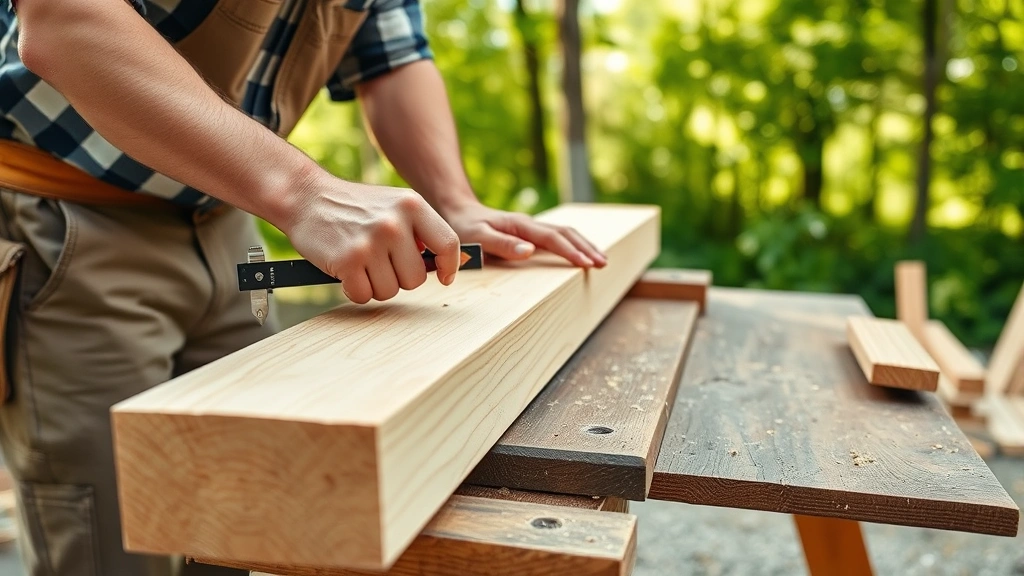
When purchasing lumber, inspect each board for defects: cupping (curved across width), checking (surface cracks), knots, and warping. Reject boards with significant defects, as they won’t perform properly in your structure. Allow pressure-treated lumber to acclimate to your climate for several weeks before installation—this reduces movement after assembly. Store materials off the ground on spacers to prevent moisture absorption and ensure good air circulation.
For fasteners, use stainless steel or hot-dipped galvanized nails and screws rated for exterior use. Regular steel fasteners corrode in treated lumber, creating unsightly stains and structural weakness. Deck screws (typically 2.5 to 3.5 inches) work better than nails for most applications, providing superior holding power and allowing easier adjustments. Budget approximately 1 pound of fasteners per 100 square feet of decking.
Understanding material specifications helps you make informed choices aligned with your budget and maintenance preferences. If you enjoy DIY woodworking projects, deck building offers excellent opportunities to develop carpentry skills with visible, functional results.
Foundation and Footings
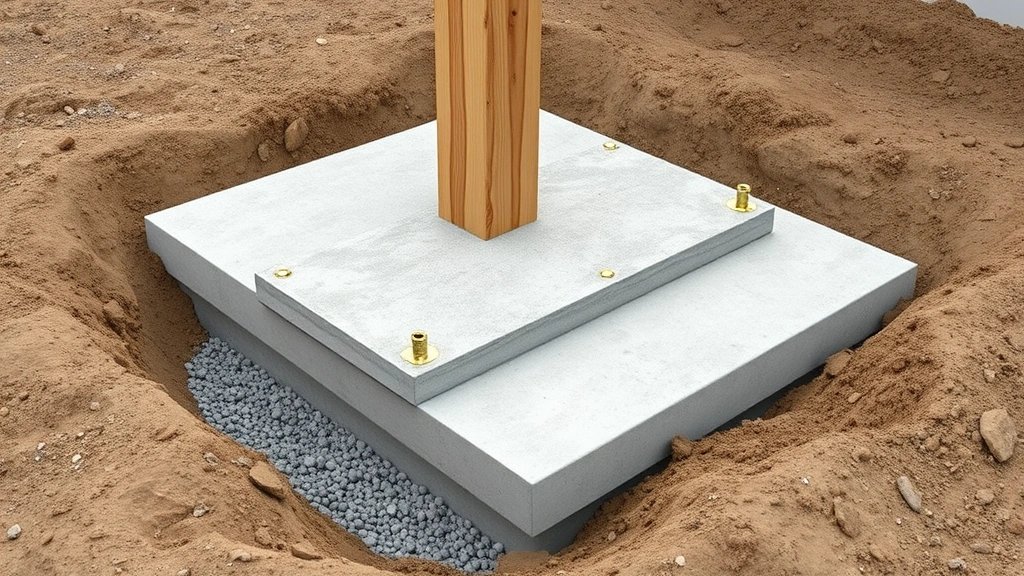
The foundation is your deck’s most critical component, yet many DIYers overlook proper footing installation. Posts must rest on footings that extend below the frost line—the depth to which ground freezes in winter. Frost heave occurs when frozen ground expands, lifting posts and destabilizing the entire structure. This is why frost line depth varies by region: northern climates require deeper footings (36-48 inches) while southern areas may need only 12-18 inches.
Excavate holes for each post location using a post hole digger or powered auger. Holes should be 10-12 inches in diameter and extend 6-12 inches below the frost line. Pour concrete footings, setting posts on concrete pads rather than directly in soil. This prevents wood-to-soil contact that accelerates rot. Some builders use concrete sonotubes (cardboard forms) that extend above ground; others prefer setting posts on concrete piers. Both methods work when properly executed.
Space posts according to local codes, typically 6 feet on center maximum (closer spacing for larger loads). Check that posts are perfectly vertical using a level—even slight tilts compound across the deck length, creating slopes that look and perform poorly. Set posts at their final height, typically 8-12 inches above grade, allowing air circulation underneath the deck. This ventilation reduces moisture accumulation and extends deck life significantly.
After concrete cures fully (typically 48-72 hours), install beams on top of posts. Beams are typically doubled 2×8, 2×10, or 2×12 boards (depending on span and load), bolted to posts with through-bolts. The connection between post and beam is critical—use galvanized bolts with washers and lock washers, tightening securely. Improper connections account for many deck failures and safety incidents.
Framing the Deck Structure
Once beams are secured, you’re ready to install joists—the boards that support your decking. Joists typically run perpendicular to beams, spaced 12 or 16 inches on center depending on joist size and decking material. Smaller joists require closer spacing; larger joists can span greater distances. Consult span rating tables from lumber manufacturers to determine proper joist sizing for your specific situation.
Attach joists to beams using joist hangers—metal brackets that support joists from above. Joist hangers distribute load more effectively than nailing joists on top of beams and allow for consistent spacing. Use all fastener holes in joist hangers, following manufacturer specifications precisely. Under-fastening joist hangers is a common mistake that compromises structural integrity.
Install rim joists (the outer joists around the deck perimeter) securely, as these bear significant loads. Brace the structure with diagonal bracing if your deck is elevated more than 30 inches above grade—this prevents racking (twisting) and improves stability. Connect any deck attached to your house with proper flashing and ledger board installation. The ledger board connection is critical: improper installation allows water infiltration that destroys your home’s rim joist and band board.
As you frame, maintain proper spacing and alignment. Use a chalk line to mark joist locations, ensuring consistent spacing throughout. Check your work frequently with a level and square, making adjustments before fastening. Framing mistakes compound as you progress, making early corrections essential. This structural phase requires precision—rushing leads to problems that become expensive to fix later.
Installing Decking and Railings
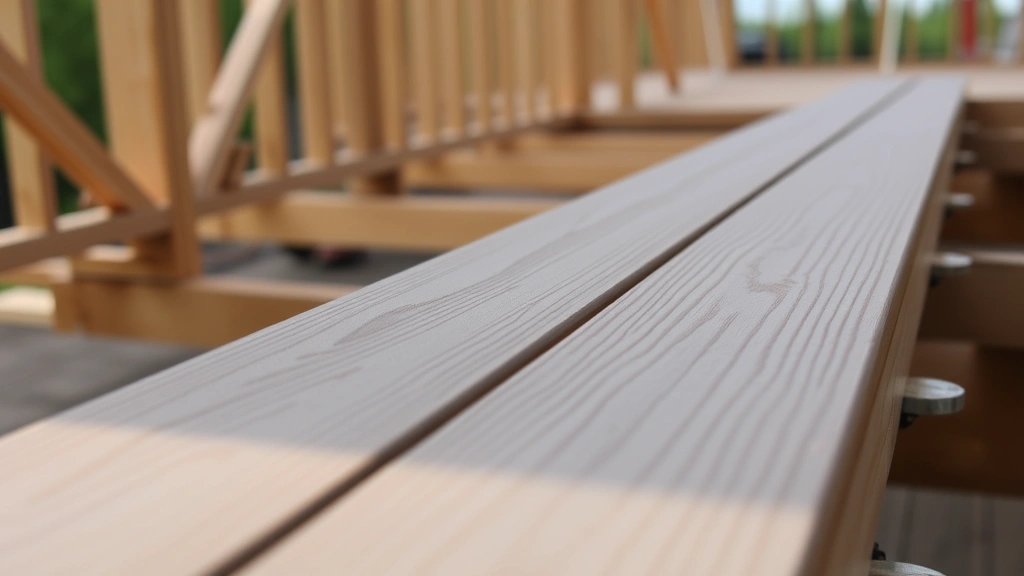
With the frame complete and inspected, you’re ready to install decking boards. Begin at the house (for attached decks) or the most visible location, working toward the opposite end. Leave a consistent gap between boards (typically 1/8 inch for wood, following manufacturer recommendations for composite) to allow for expansion and water drainage. Gaps that are too small trap moisture; gaps that are too large look unprofessional.
Fasten each decking board with deck screws (two per joist), driving fasteners at slight angles rather than perfectly perpendicular. This improves holding power and reduces splitting. Pre-drill holes in hardwoods to prevent splitting. As you progress, check alignment with a chalk line—even small deviations compound, potentially creating noticeable slopes or gaps.
Railings aren’t merely decorative—they’re safety-critical components required by code on decks over 30 inches high. Railings must be 36 inches high (measured from deck surface to top of railing) and withstand 200 pounds of horizontal force. The 4-inch sphere rule prevents children from getting their heads stuck: no opening should allow passage of a 4-inch sphere. This means baluster spacing typically cannot exceed 4 inches.
Install railing posts securely into the deck frame, bolting them with galvanized through-bolts. Attach horizontal rails and balusters following your design plan, ensuring all fasteners are stainless steel or galvanized. Test your completed railing by applying lateral pressure—it should feel rock-solid. Poor railing installation creates both safety hazards and code violations that inspectors will require you to fix.
Stairs require equally careful attention. Stair treads must be uniform height (within 3/8 inch), typically 7-8 inches tall. Treads should be 10-11 inches deep. Handrails are required if stairs have four or more risers, following the same 36-inch height and 4-inch sphere rule as deck railings. Proper stair construction prevents trips and falls that cause serious injuries.
Finishing and Maintenance
Once your deck structure is complete and inspected, finishing protects your investment and enhances appearance. Pressure-treated lumber benefits from staining and sealing, typically required every 2-3 years depending on climate and sun exposure. Composite decking requires less frequent maintenance but still benefits from occasional cleaning. Transparent stains showcase wood grain, while semi-transparent or solid stains provide more color control and UV protection.
Before staining, clean your deck thoroughly with a pressure washer (using 500-600 PSI to avoid damaging wood fiber). Allow boards to dry completely—typically 48-72 hours—before applying finish. Apply stain and sealer according to manufacturer instructions, typically requiring two coats. Quality finishing products contain mildewcides and UV inhibitors that extend deck life significantly.
Regular maintenance preserves your deck’s appearance and structural integrity. Sweep debris regularly to prevent moisture accumulation. Remove leaves and standing water from low spots. Inspect fasteners periodically, tightening any that have loosened due to wood movement. Check for rot by probing structural members with a screwdriver—soft spots indicate decay requiring board replacement.
If you’re interested in expanding your DIY skills beyond deck building, consider exploring home security projects or other DIY improvements that enhance your home’s value and functionality. The skills you develop during deck construction apply to many other projects.
FAQ
How long does it take to build a deck?
A typical 16 by 20 foot deck takes 2-4 weeks for an experienced DIYer working part-time, including planning, permitting, material procurement, and construction. First-time builders should allow 6-8 weeks. The actual construction (after foundation curing) takes 1-2 weeks depending on complexity and crew size.
What’s the best decking material for durability?
Tropical hardwoods like cumaru and ipe offer exceptional durability (25+ years), though they’re expensive and difficult to work with. Pressure-treated lumber (15-20 years) and composite materials (20-30 years) provide excellent value and easier installation. Your choice depends on budget, maintenance preferences, and climate.
Do I really need a permit for my deck?
Yes, permits are legally required in most jurisdictions and serve important purposes: they ensure your deck meets safety codes, protect your property’s insurability, and prevent problems when selling. Unpermitted decks create liability and may require removal or expensive remediation.
How deep should deck footings be?
Footings must extend below your region’s frost line. Contact your local building department for the specific depth required in your area—typically 18-48 inches depending on climate. Frost line maps are available from USDA and local extension services.
Can I attach my deck directly to my house?
Yes, but proper flashing and ledger board installation are critical. The ledger board must be bolted to your home’s rim joist with flashing installed to direct water away from the connection. Improper ledger installation causes water damage that’s expensive to repair. Your building inspector will verify proper installation.
What’s the best deck board spacing?
Leave approximately 1/8 inch between boards to allow water drainage and wood expansion. Composite materials may have different spacing requirements—consult manufacturer specifications. Consistent spacing looks professional and functions properly.
How often should I stain my deck?
Most decks require restaining every 2-3 years, though this varies based on climate, sun exposure, and product quality. High-quality sealers last longer than budget options. Regular cleaning extends finish life and keeps your deck looking attractive.


