DIY Tire Mounting: Cost Breakdown & Expert Tips
Tire mounting and balancing is one of the most common automotive maintenance tasks vehicle owners face, yet many remain uncertain about costs and whether they can tackle it themselves. Whether you’re replacing worn tires, switching to seasonal options, or maintaining your vehicle, understanding the expense involved and your options can save hundreds of dollars annually. Professional tire shops typically charge between $15 to $45 per tire for mounting and balancing, but the total cost depends on tire size, location, and service complexity.
This comprehensive guide explores the real costs associated with tire mounting and balancing, breaks down what you’re paying for, reveals DIY alternatives that work, and provides expert strategies to minimize expenses without compromising safety. If you’re already exploring DIY car repairs for beginners, tire work represents an intermediate-level project that requires specific equipment but offers significant savings potential.
Understanding Tire Mounting vs. Balancing
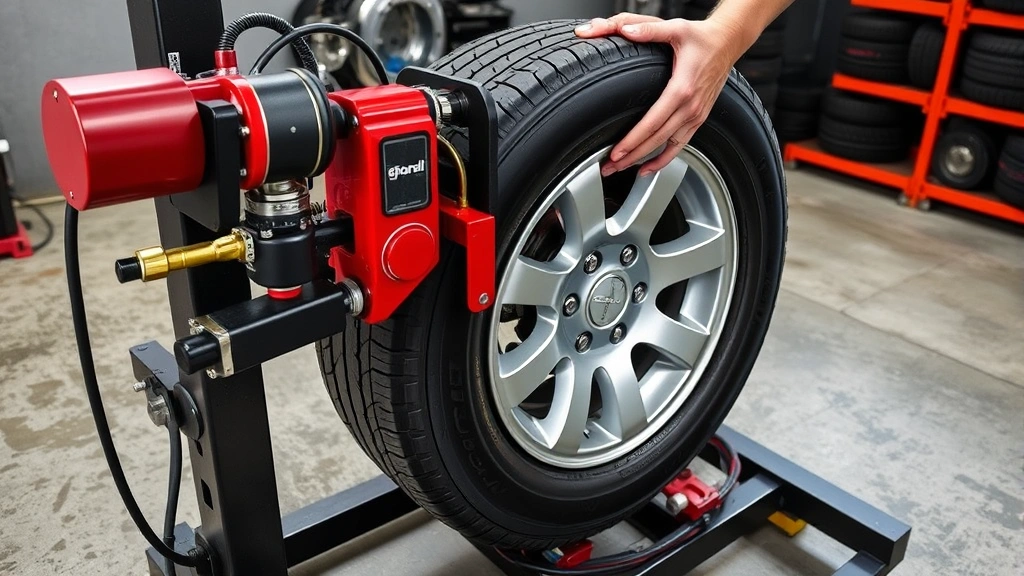
Tire mounting and balancing are distinct operations that work together to ensure safe, smooth vehicle operation. Mounting refers to the physical installation of a tire onto a wheel rim, while balancing corrects weight distribution around the tire-wheel assembly. Many people conflate these services, but they require different tools, skills, and knowledge.
Mounting involves removing the old tire from the wheel, installing the new tire, and ensuring it seats properly on the rim with correct air pressure. This process can damage wheel rims if done improperly, potentially costing hundreds in repairs. Professional mounting equipment uses tire machines with protective padding and controlled force to safely break the bead (separate tire from rim) and install new rubber without scratching or denting expensive wheels.
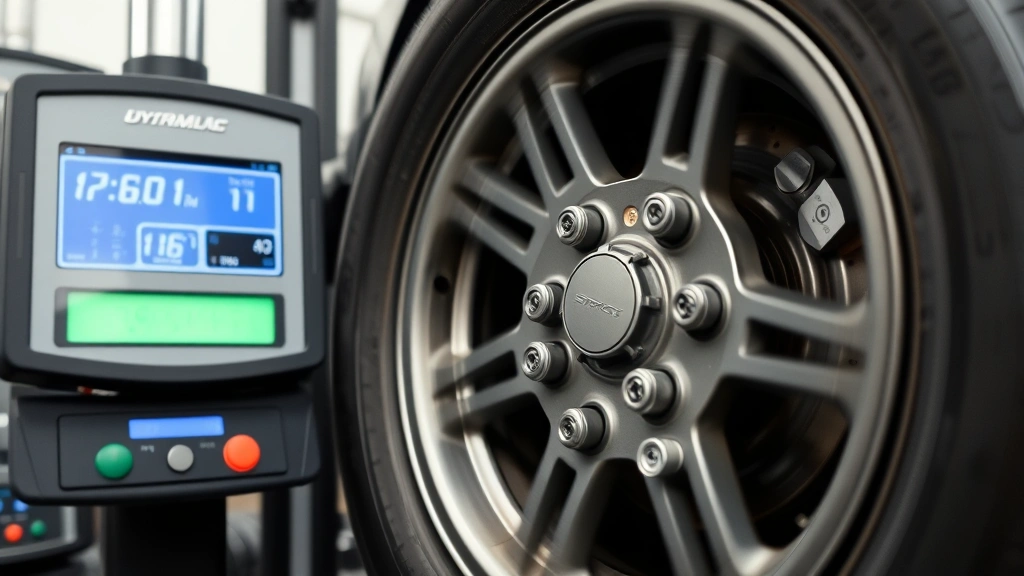
Balancing uses specialized equipment to identify weight imbalances and correct them with adhesive or clip-on weights. An unbalanced tire causes vibration, uneven wear, and steering wheel shimmy at highway speeds. This directly impacts tire lifespan, fuel efficiency, and suspension component longevity. The Tire Industry Association emphasizes that proper balancing extends tire life by 10,000-15,000 miles on average.
[IMAGE_1]
Professional Service Cost Breakdown
Understanding what you pay for at professional tire shops helps determine whether DIY mounting makes financial sense for your situation. Costs vary significantly by region, tire size, and service provider type.
National Average Pricing:
- Mounting per tire: $15-$45
- Balancing per tire: $12-$30
- Valve stem replacement: $5-$15 per stem
- Tire disposal fee: $3-$5 per tire
- Road hazard warranty (optional): $10-$25 per tire
- Alignment check (sometimes included): $0-$80
For a complete four-tire service at a mid-range shop, expect $200-$400 in labor and fees alone, before purchasing the tires themselves. Premium shops in urban areas charge significantly more, sometimes doubling these figures. Budget tire retailers and warehouse clubs like Costco or Sam’s Club typically offer the lowest mounting costs ($12-$20 per tire) but require membership and offer limited service options.
Regional variations matter tremendously. Metropolitan areas with high labor costs see mounting charges reaching $50+ per tire, while rural shops might charge $12-$18. Tire specialty shops fall between these extremes, typically charging $20-$35 per tire while offering additional services like free rotations and alignment checks.
DIY Tire Mounting Equipment Requirements
Successfully mounting tires at home requires investment in specialized equipment. Unlike general automotive maintenance, this isn’t a project where improvisation works safely. Attempting to mount tires with hand tools or improper equipment risks personal injury and wheel damage.
Essential Equipment:
- Tire mounting machine: $200-$1,500+ (new), $50-$300 (used). Manual machines cost less than automatic pneumatic versions.
- Tire balancer: $150-$2,000+ (new), $30-$200 (used). Static balancers are simpler but less accurate than dynamic balancers.
- Bead breaker: $30-$150. Separates tire from rim safely without damaging wheels.
- Wheel jack and jack stands: $50-$200. Essential for safe vehicle lifting.
- Air compressor: $100-$500+. Needs sufficient PSI and CFM for tire inflation.
- Tire gauges and valve stem tools: $15-$50
- Safety equipment: Gloves, eye protection, work apron ($20-$50)
Total startup investment for basic DIY tire mounting ranges from $500-$2,500 for used equipment, making it economical only if you’re mounting 20+ sets of tires annually. However, these tools enable other maintenance tasks, spreading costs across multiple projects.
Many DIYers rent mounting and balancing equipment from tool rental shops for $30-$75 per day, a practical solution for occasional tire work. Check local equipment rental companies, Home Depot tool rental sections, or specialty automotive tool libraries in your area.
Step-by-Step DIY Mounting Process
Once you’ve acquired proper equipment, the mounting process follows a logical sequence. Safety and patience are paramount—rushing leads to rim damage and improper tire seating.
Preparation Phase:
- Park on level ground and engage parking brake
- Remove vehicle weight from wheels using jack stands (never rely on jack alone)
- Remove lug nuts and wheels, storing them organized and safely
- Clean wheel rims thoroughly to remove dirt and old bead sealer residue
- Inspect rims for damage, cracks, or corrosion before mounting new tires
Tire Breaking Phase:
- Secure wheel firmly in mounting machine
- Position bead breaker against tire sidewall
- Apply controlled pressure to break bead seal (separate rubber from rim)
- Work around entire tire circumference systematically
- Repeat for both tire sides
Mounting Phase:
- Apply bead sealer or rubber lubricant to rim edges
- Position tire on mounting machine with proper alignment
- Lower mounting head slowly, allowing tire to slide onto rim
- Guide tire bead carefully to prevent rim scratching
- Inflate gradually while monitoring bead seating
- Verify tire sits evenly on rim with proper bead lines aligned
Final Inspection:
- Check for proper bead seating on both sides
- Verify valve stem is installed and sealed correctly
- Confirm tire pressure matches specifications
- Inspect mounted tire for visible defects or improper seating
If you’re interested in expanding your automotive skills, our guide on DIY car repairs provides foundational knowledge applicable to many maintenance tasks beyond tire work.
Balancing Tires at Home
Balancing tires at home is more challenging than mounting because it requires precision equipment calibration and technical understanding. However, it’s achievable with proper equipment and patience.
Static vs. Dynamic Balancing:
Static balancing addresses weight imbalance in the vertical plane using a simple balancer where the wheel hangs freely. This method works adequately for light-duty vehicles but doesn’t correct lateral imbalances. Static balancers cost $30-$150 and suit occasional DIYers with modest equipment budgets.
Dynamic balancing corrects both vertical and lateral imbalances using a machine that spins the wheel at speed. This produces significantly more accurate results and extends tire life substantially. Dynamic balancers cost $400-$2,000 new but provide professional-quality results. Used dynamic balancers are available for $100-$400 from tool resellers and automotive equipment suppliers.
Dynamic Balancing Process:
- Mount balanced wheel on balancer spindle
- Spin wheel to operating speed (typically 200-400 RPM)
- Machine identifies heavy spots and imbalances
- Technician applies adhesive wheel weights opposite heavy spots
- Machine confirms balance within acceptable tolerances (usually ±0.5 oz)
- Re-spin to verify correction
The Society of Automotive Engineers (SAE) establishes tire balancing standards, and professional shops aim for tolerances within ±0.25 ounces for passenger vehicles. Home DIYers should target ±0.5 ounces as acceptable.

Cost Comparison: DIY vs. Professional Services
Determining whether DIY tire mounting and balancing makes financial sense requires analyzing your specific situation, frequency of tire work, and available equipment.
One-Time Tire Service Scenario:
- Professional cost: $200-$400 (4 tires mounted and balanced)
- DIY equipment rental: $100-$200 (1-2 day rental)
- DIY time investment: 4-6 hours
- DIY cost advantage: $0-$100 (marginal savings)
For a single tire change, professional service is more economical and safer. You avoid equipment investment and get warranty backing on workmanship.
Annual Tire Service Scenario (2-3 tire changes yearly):
- Professional cost: $600-$1,200 annually
- DIY equipment rental: $200-$400 annually
- DIY time investment: 12-20 hours annually
- DIY cost advantage: $200-$800 annually
Frequent tire work justifies equipment investment or regular rentals. Savings become substantial over time, especially if you also perform other DIY car maintenance tasks.
Equipment Ownership Scenario (5+ tire changes yearly):
- Professional cost: $1,500-$2,400 annually
- DIY equipment purchase amortized: $100-$300 annually (5-year lifespan)
- DIY time investment: 20-30 hours annually
- DIY cost advantage: $1,200-$2,100 annually
For serious DIYers, equipment ownership becomes highly economical. Used equipment costs drop the initial investment significantly, improving ROI immediately.
Safety Considerations and Warnings
Tire mounting and balancing involve genuine hazards. Improper technique causes personal injury and expensive vehicle damage. Understanding these risks helps you decide whether DIY work is appropriate for your skill level.
Critical Safety Concerns:
- Tire explosions: Over-inflating tires during mounting can cause explosive failures, causing serious lacerations and eye injuries. Never exceed tire maximum PSI during installation.
- Rim damage: Improper bead breaker or mounting machine use scratches, dents, or cracks expensive wheels, costing $300-$1,000+ per rim to replace.
- Improper bead seating: Tires that don’t seat properly on rims can separate at highway speeds, causing loss of vehicle control and accidents.
- Unbalanced tires: Improperly balanced tires cause suspension damage, accelerated tire wear, and vibration that masks other mechanical problems.
- Lifting hazards: Vehicles falling off jacks cause crushing injuries and death. Always use jack stands rated for your vehicle weight.
The Occupational Safety and Health Administration (OSHA) documents tire mounting injuries annually, with many resulting from improper equipment use or inadequate safety precautions. Professional technicians receive formal training in safe procedures—something DIYers must self-educate on.
Recommended Safety Practices:
- Wear safety glasses at all times during mounting and balancing
- Use wheel chocks to prevent vehicle movement
- Never work alone on tire mounting projects
- Verify all equipment is properly maintained and functioning
- Practice on old wheels before working on vehicle wheels
- Follow equipment manufacturer instructions precisely
- Stop immediately if anything feels wrong or unsafe
Money-Saving Strategies
Whether you choose professional service or DIY mounting, several strategies reduce tire mounting and balancing expenses without sacrificing quality or safety.
Shop Strategically:
- Warehouse clubs: Costco, Sam’s Club, and BJ’s Wholesale offer the lowest mounting costs ($12-$20 per tire) plus free lifetime balancing and rotations. Membership costs offset quickly through tire savings.
- Tire retailer promotions: Discount Tire, Tire Rack, and Firestone run seasonal promotions offering free mounting, balancing, or disposal. Buy during these windows to maximize savings.
- Local independent shops: Mom-and-pop tire shops often charge less than national chains while offering personalized service and flexible scheduling.
Extend Tire Life:
- Rotate tires every 5,000-7,000 miles (often free at shops where you purchased tires)
- Maintain proper inflation pressure monthly
- Perform wheel alignments when tires wear unevenly
- Balance tires whenever they’re removed for any reason
Extending tire life by 5,000-10,000 miles through proper maintenance saves more than mounting costs. A tire lasting 35,000 miles instead of 30,000 miles due to regular maintenance pays for multiple mounting services.
Purchase Wisely:
- Buy tires during off-season (winter tires in summer, summer tires in winter)
- Consider mail-order tire retailers and have them shipped to local shops for mounting
- Evaluate total cost including mounting, balancing, disposal, and warranty
- Avoid unnecessary services like wheel alignment unless your vehicle needs it
DIY Rental Strategy:
- Rent equipment during off-peak hours (weekday mornings) for lower rates
- Schedule multiple tire jobs in one rental period to maximize equipment use
- Partner with neighbors or friends to split rental costs
- Build relationships with rental shops for potential multi-day discounts
If you’re tackling multiple home and auto projects, explore how our DIY blog covers comprehensive cost-saving strategies across various home improvement and maintenance areas.
FAQ
How much does professional tire mounting and balancing cost?
Professional tire mounting and balancing typically costs $15-$45 per tire for mounting and $12-$30 per tire for balancing, depending on your location and service provider. A complete four-tire service usually runs $200-$400 in labor and fees. Warehouse clubs offer the lowest rates ($12-$20 per tire), while specialty shops and urban locations charge premium prices.
Can I mount and balance tires at home without special equipment?
No. Attempting to mount tires without proper equipment risks serious personal injury and expensive wheel damage. Specialized tire mounting machines, bead breakers, and balancers are essential for safe, professional results. Renting equipment for $30-$75 daily is a practical solution for occasional work.
Is DIY tire mounting really cheaper than professional service?
DIY mounting becomes economical only if you’re doing it frequently (multiple times yearly) or own the equipment. For one-time tire changes, professional service is cheaper and safer. If you mount 5+ tire sets annually, equipment rental or purchase becomes financially justified.
What’s the difference between static and dynamic tire balancing?
Static balancing addresses vertical weight imbalances using a simple hanging balancer, costing $30-$150. Dynamic balancing corrects both vertical and lateral imbalances using a spinning machine, costing $400-$2,000 but providing superior results. Most vehicles benefit from dynamic balancing, which extends tire life significantly.
Can unbalanced tires damage my vehicle?
Yes. Unbalanced tires cause vibration that accelerates suspension wear, damages wheel bearings, and causes uneven tire wear. Over time, this leads to $500-$1,500 in suspension repairs. Proper balancing extends tire life 10,000-15,000 miles and prevents costly component damage.
What’s the safest way to lift a vehicle for tire work?
Always use jack stands rated for your vehicle weight—never rely on a jack alone. Place wheels chocks behind wheels to prevent rolling. Lift one wheel at a time, fully supporting the vehicle before working on it. Many serious injuries result from vehicles falling during tire work.
Should I replace valve stems when mounting new tires?
Yes, replacing valve stems during mounting is recommended. Old stems can fail after sitting unused, causing slow leaks. New stems cost $5-$15 each and should be included in mounting service. Quality stems prevent expensive pressure loss and inconvenient roadside emergencies.
How often should tires be rotated and rebalanced?
Rotate tires every 5,000-7,000 miles to promote even wear. Rebalance whenever tires are removed for rotation, replacement, or repair. Many tire retailers include free lifetime rotations and balancing with tire purchases, making these services convenient and economical.


