Build Your Own Simon Game: Expert Tips Inside
The classic Simon electronic memory game has captivated players for decades with its mesmerizing light sequences and addictive gameplay. Whether you’re a seasoned electronics enthusiast or a curious beginner looking to dive into DIY projects, building your own Simon game from scratch is an incredibly rewarding endeavor. This comprehensive guide will walk you through every step of the process, from understanding the core circuitry to mastering advanced strategies that help you beat Simon Expedition 33 and beyond.
Creating a custom Simon game isn’t just about replicating the original—it’s an opportunity to understand fundamental electronics principles, learn soldering techniques, and develop problem-solving skills. Whether you’re building this as a personal project, a gift for a gaming enthusiast, or an educational tool for younger learners, this guide provides everything you need to succeed. We’ll cover component selection, circuit design, assembly procedures, and most importantly, proven strategies to dominate the gameplay.
Understanding the Simon Game Mechanics
Before you pick up a soldering iron, it’s crucial to understand what makes Simon tick. The game operates on a simple but elegant principle: it generates a random sequence of colored lights and corresponding sounds, and the player must repeat that sequence by pressing the appropriate buttons in order. Each round, the sequence grows by one additional step, increasing the difficulty exponentially.
The original Simon game uses four colored buttons—red, yellow, blue, and green—each associated with a unique frequency tone. The microcontroller at the heart of the system generates pseudo-random sequences, controls the LED illumination timing, produces the audio feedback, and monitors user input. Understanding this architecture is essential because it informs your component choices and circuit layout decisions.
The difficulty scaling is what makes Simon so addictive. While early rounds are trivial, reaching advanced levels like Expedition 33 requires intense concentration and pattern recognition. The game typically increases speed and sequence length simultaneously, creating an exponential difficulty curve. Some versions introduce additional challenges like reduced button sizes or accelerated timing sequences.

Essential Components and Tools
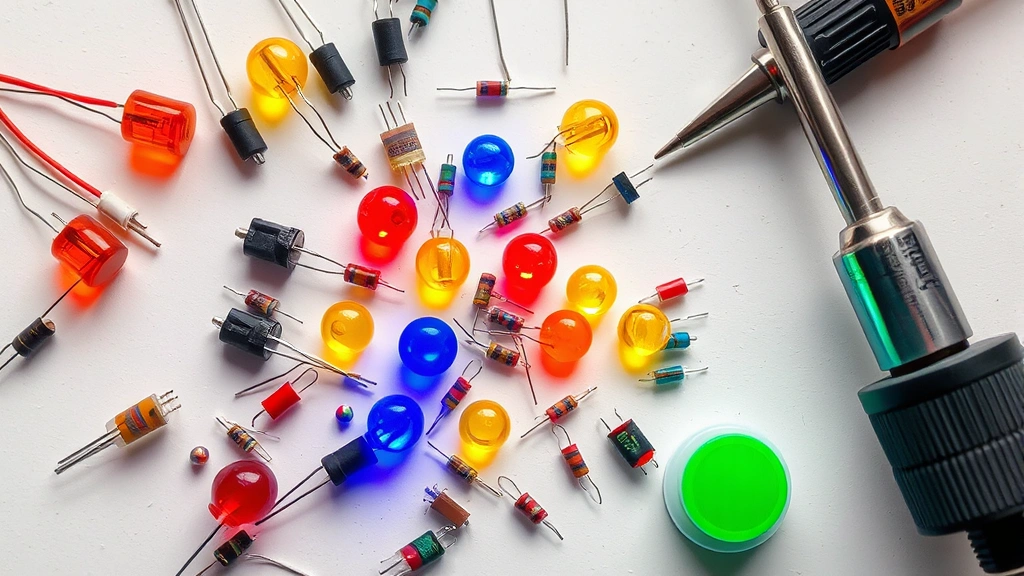
Building your own Simon game requires both electronic components and physical tools. On the electronic side, you’ll need a microcontroller—an Arduino or similar platform works well for beginners—four LEDs (preferably in red, yellow, blue, and green), four push buttons, a speaker or buzzer for audio output, resistors (both current-limiting and pull-down types), capacitors for timing circuits, and a power source such as a 9V battery with appropriate voltage regulation.
For the enclosure, consider using materials suitable for your skill level. Many builders opt for 3D-printed housings, laser-cut acrylic, or traditional plastic cases. If you’re interested in more elaborate projects, check out our guide on DIY beginner woodworking projects for inspiration on creating custom wooden enclosures.
Essential tools include a soldering iron (25-40W is standard), solder (lead-free recommended), desoldering braid or solder sucker, wire strippers, a multimeter for testing, hot glue gun, and safety equipment including solder fume extractor and safety glasses. A breadboard allows you to prototype circuits before committing to permanent solder connections. Having a comprehensive DIY guide handy helps you understand general building principles that apply across projects.
Circuit Design Fundamentals
The circuit design for a Simon game centers around the microcontroller, which serves as the brain of the operation. The microcontroller manages four digital output pins for LED control, four analog or digital input pins for button detection, and one or two audio output pins for sound generation.
Each LED requires a current-limiting resistor to protect both the LED and the microcontroller pin. Calculate resistor values using Ohm’s law: R = (Vcc – Vled) / I, where Vcc is your supply voltage (typically 5V), Vled is the LED forward voltage (usually 2V), and I is your desired current (typically 20mA). This usually results in 150-220 ohm resistors.
Button circuits typically use pull-down resistors connected to ground, allowing the microcontroller to detect when a button press pulls the input pin high. This configuration prevents false readings from electrical noise. A debounce delay in software handles the mechanical bouncing that occurs when buttons are pressed.
The audio output can range from a simple piezo buzzer for basic tones to a more sophisticated audio amplifier with speaker for richer sound. PWM (Pulse Width Modulation) on the microcontroller can generate different frequencies, creating the distinctive tones associated with each color.
Step-by-Step Assembly Instructions
Start by organizing your workspace and verifying all components are present and functioning. Test each LED, button, and resistor with your multimeter before integration. Begin assembly on a breadboard to prototype your circuit before soldering permanent connections.
Breadboard Testing Phase: Connect your microcontroller to the breadboard power rails. Wire each LED with its current-limiting resistor to separate output pins, connecting the other end to ground. Connect each button with its pull-down resistor to separate input pins. Connect your audio output pin to the buzzer. This allows you to test your code before making permanent connections.
Once your breadboard prototype functions correctly, transfer the circuit to your permanent medium. For most builders, this means soldering components onto perfboard or a custom PCB. Use the breadboard layout as a guide, and take time to create a logical, organized layout that minimizes wire crossings and potential shorts.
Soldering Best Practices: Heat both the component lead and the pad simultaneously for 2-3 seconds before applying solder. Use just enough solder to create a shiny, cone-shaped joint—excessive solder creates cold joints that fail intermittently. Allow each joint to cool naturally before moving to the next. Clean the soldering iron tip frequently on a damp sponge.
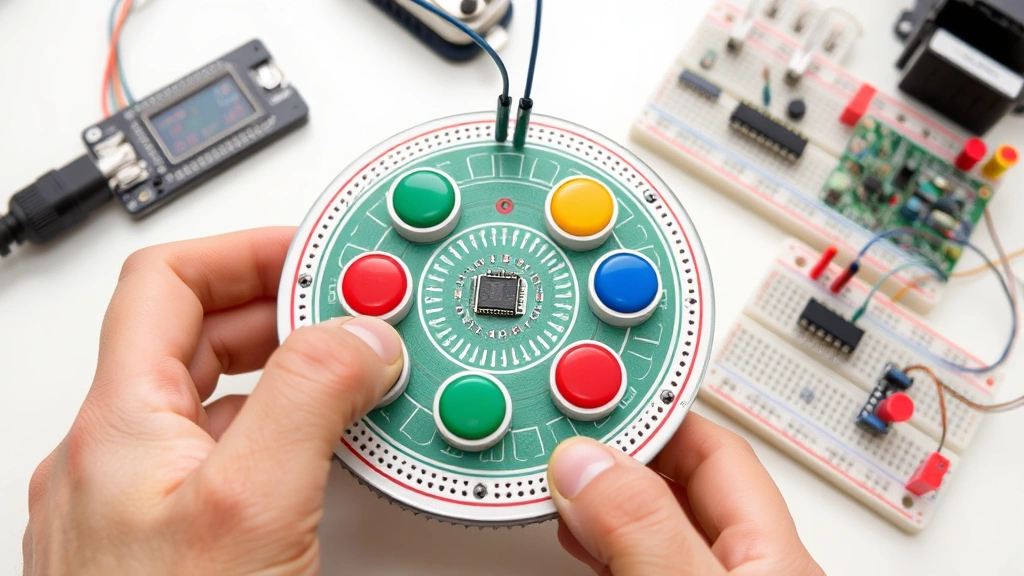
Mount your buttons and LEDs in your enclosure before final assembly. If you’re creating a custom housing similar to the original Simon design, arrange the four buttons in a square pattern with their associated LEDs behind translucent colored plastic. Ensure buttons are positioned ergonomically and require moderate pressure to activate.
Programming Your Simon Game
The software running your Simon game handles sequence generation, timing, user input detection, and game state management. Most builders use the Arduino IDE to program their microcontroller, which uses a simplified C++ syntax accessible to beginners.
Your program needs several core functions: one to generate random sequences, one to display sequences with appropriate timing and audio feedback, one to detect and validate user input, and one to manage game difficulty progression. Here’s the basic logic flow:
- Initialize the game with empty sequence array
- Generate random number 0-3 and append to sequence
- Display entire sequence with 500ms delays between button activations
- Wait for user input with timeout protection
- Validate each user input against the stored sequence
- If user completes sequence correctly, increase difficulty and repeat
- If user makes mistake, end game and display score
For beating Simon Expedition 33, your code should include adjustable difficulty settings. Expedition 33 typically features accelerated timing (reduced delays between button presses), longer sequences, and potentially reduced button sizes on the physical device. Implement difficulty multipliers that compress timing as the game progresses.
Consider adding features like sound volume control, difficulty selection menus, and persistent high score storage using EEPROM. These enhancements make your custom Simon game more engaging and replayable. Check out our DIY Nests Hub Blog for additional electronics projects that build similar skills.
How to Beat Simon Expedition 33
Simon Expedition 33 represents one of the most challenging versions of the classic game, combining several difficulty modifiers that separate casual players from true masters. Understanding the specific characteristics of this version is essential for success.
Expedition 33 Characteristics: This difficulty level typically features sequences that reach 30+ steps, button activation times reduced to 200-300ms, gaps between button presses compressed to 100-150ms, and sometimes reduced button size or increased button spacing. The psychological pressure of maintaining concentration for such extended periods is as challenging as the physical memory task.
Strategic Approaches: Rather than trying to memorize the entire sequence, successful players use chunking—breaking the sequence into smaller, manageable groups of 3-5 button presses. This approach leverages how human memory works, allowing you to maintain accuracy even as sequences grow longer. Practice identifying natural patterns within the random sequence.
Develop a consistent visualization technique. Many expert players mentally map the buttons to spatial locations or create vivid mental imagery associated with each button combination. Some players use rhythm-based memorization, treating the sequence as a musical pattern rather than a visual one.
Physical Technique Matters: Position your fingers on all four buttons simultaneously, ready to press. This reduces reaction time and prevents fumbling when you need to respond quickly. Maintain steady breathing and avoid tensing your shoulders—physical relaxation improves accuracy. Take brief mental breaks between rounds to prevent fatigue-induced errors.
Practice Progression: Don’t jump directly to Expedition 33. Master progressively harder difficulty levels first, building your concentration stamina. Start with original Simon, progress through intermediate levels, and only attempt Expedition 33 after you can consistently reach level 20+ on harder difficulties.
Troubleshooting Common Issues
Even well-constructed Simon games sometimes experience problems. Here are solutions to the most common issues:
LED Not Lighting: Test the LED with your multimeter in diode mode. If it doesn’t light, it’s likely reversed or burned out—replace it. If the LED is good, check the current-limiting resistor value with your multimeter. Verify the microcontroller pin outputs 5V when activated using a multimeter. Finally, check your solder joints for cold connections using a magnifying glass.
Button Not Registering: Verify the button mechanically clicks when pressed. Clean any corrosion from the button contacts using fine sandpaper. Check that pull-down resistor value matches your circuit design (typically 10K ohms). Inspect solder joints on the button circuit. Test the microcontroller input pin voltage when the button is pressed—it should read approximately 5V.
Audio Not Working: Verify your buzzer or speaker receives power when audio pins activate. Test the audio output pin with a multimeter to confirm it’s generating signal. Check that your buzzer hasn’t burned out by testing it with a 9V battery. Ensure you’ve programmed the correct PWM frequencies for each button tone.
Sequence Generation Issues: If sequences repeat patterns or seem non-random, verify your random seed initialization. Most Arduino boards require seeding the random number generator with an analog input reading from an unconnected pin. Add this line to your setup function: randomSeed(analogRead(A0));
FAQ
What microcontroller is best for building Simon?
Arduino Uno is ideal for beginners due to its extensive documentation and community support. Arduino Nano offers a more compact form factor if you’re building a space-constrained enclosure. For advanced builders, ARM-based microcontrollers like STM32 provide more processing power, though they require more complex programming setup.
Can I build Simon using just discrete components without a microcontroller?
Yes, but it’s significantly more complex. Original Simon used discrete logic chips like the 555 timer and CMOS logic gates. This approach requires deep understanding of analog electronics and results in bulkier circuits. Microcontroller-based designs are more practical for modern builders.
How do I make my Simon game battery-powered?
Use a 9V battery with a voltage regulator (like 7805) to provide stable 5V to your microcontroller and LEDs. Add a power switch and consider implementing sleep mode to extend battery life. Some builders use rechargeable battery packs with USB charging circuits for sustainability.
What’s the easiest way to create the enclosure?
3D printing offers the fastest path if you have access to a printer—many Simon enclosure designs are available on Thingiverse. Laser-cutting acrylic is another excellent option. For traditional approaches, drill holes in a plastic project box and mount components internally. If you’re interested in more elaborate housing designs, our guide on adding crown molding demonstrates precision drilling and finishing techniques applicable to custom enclosures.
How can I modify Simon to add new game modes?
Software modifications are endless—you can add reverse mode (where you input sequences the game repeats), speed run mode (complete sequences as fast as possible), or multiplayer modes with alternating turns. Hardware additions might include additional buttons, color variations, or difficulty selection switches.
Is building Simon a good first electronics project?
Absolutely. Simon projects teach soldering, circuit design, microcontroller programming, and troubleshooting—all fundamental skills. The project is forgiving enough for beginners but offers room for advanced customization. Start with a breadboard prototype before committing to permanent assembly. For additional beginner-friendly projects, explore our DIY basement finishing guide, which covers planning and execution skills transferable to electronics projects.
What safety precautions should I observe when building Simon?
Use a solder fume extractor or work in well-ventilated areas—lead-free solder produces less toxic fumes but still requires ventilation. Wear safety glasses when soldering to protect against splashing. Never touch the soldering iron tip. Allow solder joints to cool naturally before touching. Use proper grounding techniques to prevent static discharge damage to sensitive components.


