How to Lay Concrete Blocks: Pro Tips Inside
Concrete block masonry is one of the most versatile and durable building techniques in residential and commercial construction. Whether you’re building a foundation wall, creating a retaining structure, or constructing an outdoor feature, learning how to lay concrete blocks properly ensures structural integrity, longevity, and compliance with building codes. This comprehensive guide walks you through every step of the process, from site preparation to final finishing touches, with professional insights that will help you achieve results comparable to experienced masons.
Laying concrete blocks requires precision, patience, and attention to detail. Unlike casual DIY projects, masonry work demands understanding of mortar composition, block alignment, and load-bearing principles. The good news is that with proper preparation and technique, homeowners and DIY enthusiasts can successfully complete concrete block projects that withstand years of use and environmental stress. We’ll cover everything you need to know to tackle this rewarding building challenge.
Essential Materials and Tools
Before you begin laying concrete blocks, gather all necessary materials and tools. The foundation of successful masonry work starts with having the right equipment and quality materials. Concrete blocks come in various sizes, with standard blocks measuring 8 inches by 8 inches by 16 inches (nominal dimensions). You’ll also need Portland cement, sand, water, and mortar additives to create a strong, workable mortar mixture.
Essential tools include a trowel (both pointing and margin trowels), a level (preferably 4-6 feet long), a mason’s string, a rubber mallet, a mortar board, and a mixing container or wheelbarrow. Safety equipment is non-negotiable: wear heavy-duty gloves, safety glasses, dust masks, and steel-toed boots. A mortar mixer or mixing drill makes preparing large quantities significantly easier. Consider investing in a block splitter if you need to cut blocks to fit, and keep a spray bottle handy for moisture control.
Quality matters tremendously in masonry. Purchase concrete blocks from reputable suppliers who meet ASTM C140 standards for concrete masonry units. Verify that your mortar components comply with ASTM C270 specifications, which define mortar strength and composition requirements for different applications.

Site Preparation and Foundation
Proper site preparation determines whether your concrete block structure will remain plumb, level, and stable for decades. Begin by marking your layout using string lines and batter boards. Ensure the ground is level, compacted, and free of debris. Foundation preparation is critical: you must establish a solid, level base that prevents settling and moisture infiltration.
For most residential applications, you’ll pour a concrete footing below the frost line (depth varies by climate zone—check local building codes). The footing should be at least twice the width of the blocks you’re laying. For example, if using standard 8-inch blocks, your footing should be at least 16 inches wide. Allow the concrete footing to cure fully (typically 7 days) before beginning block work.
Once the footing is cured, apply a damp-proof membrane or sealant to prevent moisture from wicking up through the blocks. This step is essential for foundation walls and any structure exposed to ground moisture. Use a level to verify that your footing is truly level—even slight deviations compound over multiple courses. Mark your reference line on the footing where the first course of blocks will sit. This ensures consistent height and proper alignment throughout the project.
When planning your basement finishing or foundation work, consider how concrete block masonry integrates with your overall construction plan. Proper foundation preparation prevents future problems with settlement, cracking, and water intrusion.
Mixing and Preparing Mortar
Mortar is the critical binding agent that holds blocks together and creates a watertight, structurally sound assembly. The mortar mixture must have the right consistency—thick enough to support block weight but workable enough to spread and tool smoothly. Standard mortar ratios are 1 part Portland cement to 3 parts sand by volume, with water added until you achieve a peanut butter-like consistency.
Mixing procedure matters significantly. Combine dry ingredients first, mixing thoroughly to ensure even cement distribution. Add water gradually while mixing, checking consistency frequently. The mortar should hold together when squeezed but spread easily with a trowel. Mix only what you can use in 2-3 hours, as mortar begins setting and becomes unusable.
For better workability and water retention, many masons add lime to the mixture (1 part cement, 1 part lime, 6 parts sand). Lime improves the mortar’s ability to bond with blocks and reduces cracking. Always follow recommendations from local building codes and ICC standards for your specific application, as requirements vary for load-bearing versus non-load-bearing walls.
Temperature affects mortar performance significantly. In hot weather, keep materials cool and mist blocks lightly before laying to prevent rapid water absorption. In cold weather (below 50°F), mortar sets too slowly and may not develop proper strength. Winter masonry requires heated mortar, heated water, and protective covering during curing. Never lay blocks in freezing conditions without proper precautions.
Laying the First Course
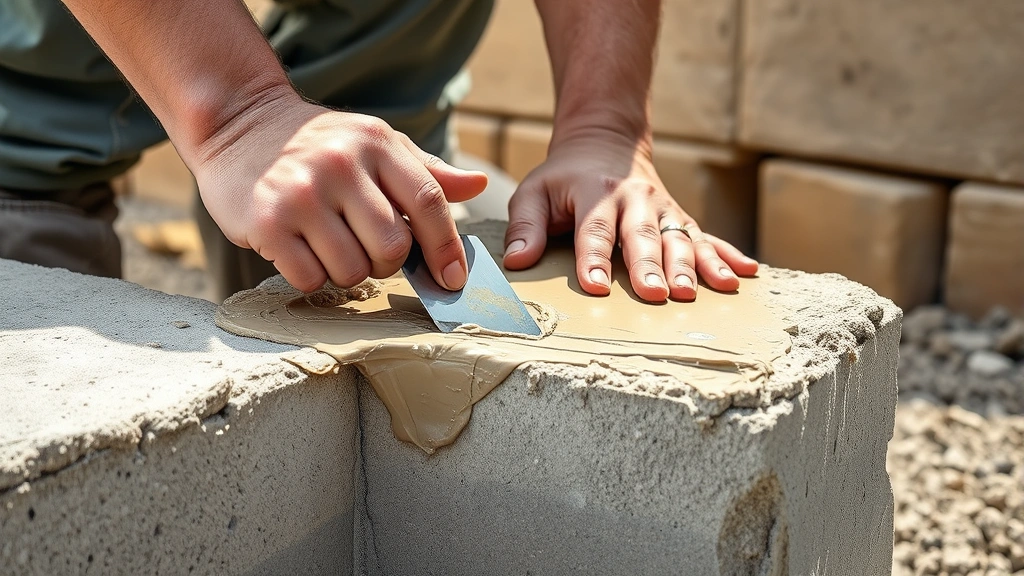
The first course sets the standard for your entire project. Spend extra time ensuring this foundation course is perfectly level, plumb, and aligned. Begin by spreading a mortar bed on the footing, approximately ½ inch thick. Use your trowel to create a consistent layer across the entire footing area.
Place the first block firmly into the mortar bed, pressing down and slightly twisting to create a good bond. Check that it’s level in both directions and sits at the correct height. Butter the vertical joint (the end of the block) with mortar before placing the next block. Butter means applying mortar to the end of the block using your trowel. Press the second block firmly against the buttered end of the first, creating a mortar joint approximately ½ inch thick.
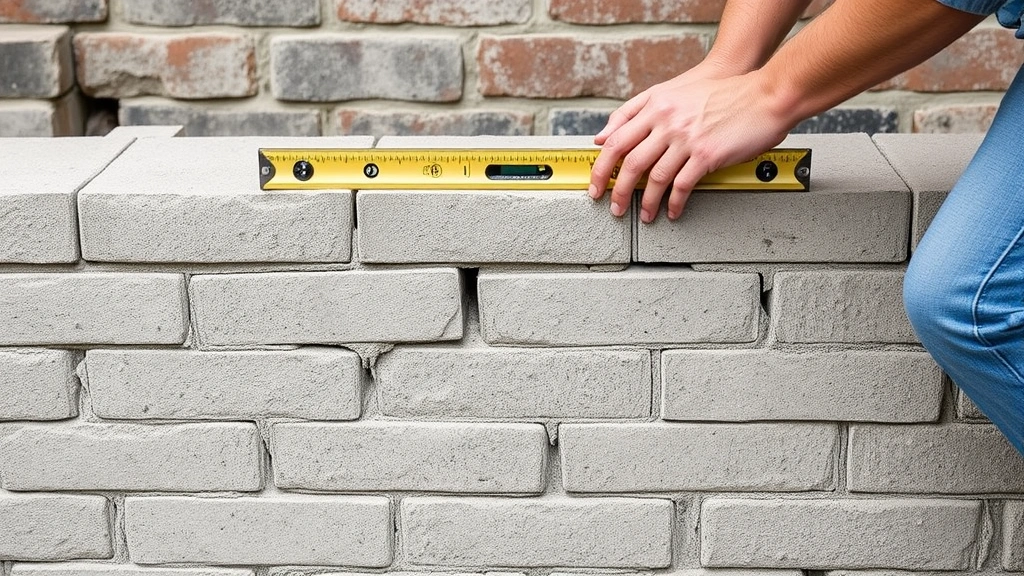
Continue laying blocks along the first course, checking frequently with your level. Blocks should be level side-to-side and front-to-back, and the course should be plumb (perfectly vertical when viewed from the side). Adjust blocks by tapping gently with your rubber mallet before the mortar sets. Every 4-6 blocks, step back and check your progress with a 6-foot level.
As you work, tool the mortar joints to compress them and remove air pockets. This step, called striking or tooling, improves water resistance and appearance. Use a pointing trowel to create a slightly concave joint, which sheds water better than flush or raked joints. Tool joints when the mortar is “thumb-print hard”—firm enough to hold shape but still slightly plastic.
Building Subsequent Courses
Once the first course is complete and the mortar has set (typically 24 hours), begin laying the second course. Use a mason’s string to maintain consistent block height and alignment. Stretch the string from corner to corner at the top of the previous course, ensuring it’s perfectly level. Each block should just touch the string without pressing against it.
Running bond is the most common block pattern, where each block overlaps the joints of the course below by half a block length. This overlapping creates structural strength and prevents vertical cracks from running straight up the wall. At corners, alternate which end of the block is exposed to maintain the running bond pattern.
Maintain consistent mortar joint thickness throughout—approximately ⅜ to ½ inch is standard. Use a mortar joint gauge or simply cut a spacer from wood to maintain consistency. Thicker joints than necessary waste mortar and reduce strength; thinner joints may not provide adequate bonding. Each course should be perfectly level, and the wall should be plumb when checked with a 4-6 foot level placed vertically against the blocks.
Check your progress regularly with both horizontal and vertical reference lines. When laying multiple courses, the structural integrity of basement walls depends on proper block alignment and consistent mortar joints. Sloppy workmanship at this stage compounds problems in upper courses.
Butter both the horizontal and vertical joints as you work. The horizontal joint (mortar bed) should be spread on top of the previous course before laying blocks. The vertical joint should be buttered on the end of each block before pressing it into place. This dual-buttering technique ensures complete mortar coverage and strong bonds.
Reinforcement and Structural Support
Reinforcement is essential for walls that will bear significant loads or resist lateral forces (wind, water pressure, soil pressure). Vertical reinforcement (typically ½-inch diameter steel rebar) should be placed in the cores of blocks at specified intervals, usually every 32 inches or as required by local codes. Horizontal reinforcement (ladder-type joint reinforcement) can be placed in mortar beds every 2-3 courses.
When installing vertical reinforcement, place rebar in the block cores and fill those cores with grout (a thinner mortar mixture). Grout provides stability and bonds the reinforcement to the blocks. For load-bearing walls, consult the National Concrete Masonry Association (NCMA) design guidelines to determine appropriate reinforcement spacing and size for your specific application.
Horizontal reinforcement should be embedded in the mortar bed and run continuously across the wall. This reinforcement resists tensile stresses that develop from bending loads. In areas prone to seismic activity, consult current building codes for enhanced reinforcement requirements—the International Code Council (ICC) publishes updated seismic design standards annually.
For retaining walls or basement walls, proper structural considerations extend beyond simple block stacking. Drainage behind the wall, proper backfill procedures, and adequate reinforcement prevent failure. Never underestimate the forces that soil and water exert on masonry structures.
Common Mistakes to Avoid
Rushing the mortar curing process is a frequent error. Applying new courses before mortar has set adequately results in weak bonds and potential structural failure. Follow manufacturer recommendations, typically 24 hours between courses in normal conditions. Cold or wet weather extends curing time significantly.
Inconsistent mortar joints create weak points and poor appearance. Maintain uniform ⅜ to ½ inch joints throughout by using spacers or joint gauges. Thick joints in some areas and thin joints in others indicate inconsistent technique and reduce wall strength.
Poor tooling of joints leaves air pockets and paths for water infiltration. Tool every joint while mortar is thumb-print hard, compressing the mortar and creating a slightly concave profile. Untooled or improperly tooled joints are vulnerable to weather damage.
Insufficient overlap in running bond compromises structural integrity. Each block must overlap the joint below by at least half a block length (8 inches minimum). Anything less creates vertical crack planes that can propagate through the wall.
Neglecting to butter joints creates voids in the mortar bed and reduces bonding strength. Every vertical joint must be buttered on the block end before pressing it into place. Dry joints or partially buttered joints develop weak spots.
Ignoring plumb and level throughout the project results in walls that appear crooked and may perform poorly structurally. Check frequently with a level, and correct misalignment immediately while mortar is still plastic. Small errors compound dramatically over multiple courses.
Inadequate foundation preparation causes settlement and cracking. Ensure your footing is below the frost line, properly compacted, and cured before beginning block work. A weak foundation dooms the entire structure.
Finishing and Curing
After the final course is laid and mortar has set (minimum 7 days, preferably 14 days), you can begin finishing work. Curing is the process of mortar gaining strength, and it’s critical not to rush this phase. Keep newly laid blocks moist (but not saturated) during the first week by misting with water or covering with plastic sheeting. This slow curing process allows mortar to hydrate properly and develop full strength.
Once curing is complete, you can apply finish treatments. For exposed blocks, options include waterproof sealers, paint, stucco coating, or leaving the blocks natural. Waterproof sealers protect against moisture infiltration while allowing the blocks to breathe. Penetrating sealers are typically superior to film-forming coatings for masonry, as they don’t trap moisture.
Clean excess mortar from block faces while it’s still slightly soft (usually 24-48 hours after laying). Use a stiff brush and small amounts of water to scrub away dried mortar without damaging the blocks or joints. For stubborn mortar residue, specialized masonry cleaners are available, though they should be used cautiously to avoid etching the block surface.
For basement applications or structures subject to water pressure, apply a dampproof coating to the interior surface. This prevents moisture from wicking through the mortar and blocks. When planning basement finishing projects, ensure the concrete block wall is properly sealed and protected before adding insulation or interior finishes.
Inspect your completed work for cracks, voids, or areas where mortar joints are missing. Small gaps can be filled with mortar using a pointing trowel. Larger cracks may indicate structural problems requiring professional evaluation. Proper curing, maintenance, and inspection ensure your concrete block structure performs as intended for decades.
FAQ
What size are standard concrete blocks?
Standard concrete blocks measure 8 inches by 8 inches by 16 inches in nominal dimensions (actual dimensions are slightly smaller to account for mortar joints). Half-blocks, corner blocks, and specialty shapes are also available for specific applications.
How long does mortar take to cure?
Mortar typically reaches handling strength in 24-48 hours, but full strength development takes 7-14 days depending on temperature, humidity, and mortar composition. Cold weather extends curing time significantly; hot, dry weather may accelerate it.
Can I lay concrete blocks in cold weather?
Yes, but with precautions. Avoid laying blocks when temperatures are below 50°F. Use heated mortar and water, and protect newly laid blocks from freezing with plastic covering and insulation blankets. Winter masonry requires additional time for curing and careful monitoring.
What mortar ratio should I use?
Standard mortar is 1 part Portland cement to 3 parts sand by volume, with water added to achieve proper consistency. Some applications benefit from adding lime (1 part cement, 1 part lime, 6 parts sand). Always verify requirements with local building codes for your specific application.
How deep should concrete block foundations be?
Footings must extend below the frost line, which varies by geographic location. In cold climates, this may be 36-48 inches deep. Consult local building codes for your area’s specific frost line depth. The footing width should be at least twice the block width.
Do I need reinforcement in concrete block walls?
Load-bearing walls and walls subject to lateral forces (wind, water pressure, soil pressure) require reinforcement. Verify requirements with local building codes and consult NCMA design guidelines for your specific application. Improper or absent reinforcement can result in structural failure.
What’s the best way to tool mortar joints?
Tool joints when mortar is thumb-print hard—firm enough to hold shape but still slightly plastic. Use a pointing trowel or specialized joint tool to create a slightly concave profile, which sheds water effectively. Concave joints are superior to flush or raked joints for weather resistance.
How can I prevent water infiltration in concrete block walls?
Apply a waterproof sealant to the exterior surface, ensure proper mortar joint tooling, use penetrating sealers rather than film-forming coatings, and provide adequate drainage behind retaining walls or below-grade structures. Interior dampproof coatings add additional protection for basement walls.


