Build a Barn Door: Expert Steps to Follow
Barn doors have evolved from purely functional agricultural elements into stunning design features that add character and rustic charm to modern homes. Whether you’re looking to create a sliding barn door for your bedroom, bathroom, or as a room divider, learning how to build a barn door is an achievable DIY project that delivers professional results. This comprehensive guide walks you through every step of the process, from selecting materials to installing hardware, ensuring your finished door becomes a focal point in any space.
Building a barn door requires careful planning, quality materials, and attention to detail. Unlike standard swing doors, barn doors operate on a track system that demands precision in measurement and assembly. With the right tools, materials, and guidance, you can construct a beautiful, functional barn door that rivals custom installations at a fraction of the cost. This project combines woodworking fundamentals with modern hardware installation, making it perfect for DIYers with intermediate skills.
Materials and Tools You’ll Need
Before starting your barn door project, gather all necessary materials and tools. Having everything prepared prevents interruptions and ensures a smoother building process. The materials list varies depending on your door size and design, but core components remain consistent across most projects.
Essential Materials:
- Lumber (2x4s, 2x6s, or 1x boards depending on design)
- Wood screws (2.5-inch and 1.25-inch)
- Wood glue
- Barn door hardware kit (track, rollers, guides)
- Hinges or mounting brackets
- Sandpaper (80, 120, and 220 grit)
- Wood stain or paint
- Polyurethane or exterior sealant
- Shims for leveling
Required Tools:
- Miter saw or circular saw
- Drill-driver
- Impact driver
- Level (4-foot and 2-foot)
- Tape measure
- Square
- Clamps
- Stud finder
- Orbital sander
- Pocket hole jig (optional but recommended)
- Socket wrench set
Investing in quality tools makes the building process safer and more efficient. If you don’t own all these tools, consider renting specialized equipment like a pocket hole jig from local hardware stores. Check out our guide on how to build a bar for additional woodworking tool recommendations.
Measuring and Planning Your Barn Door
Accurate measurements form the foundation of a successful barn door project. A poorly measured door won’t slide smoothly and may not fit your opening properly, creating frustration and wasted materials.
Step 1: Measure Your Opening
Measure the width and height of your doorway or opening multiple times at different points. Openings are rarely perfectly square, so take measurements at the top, middle, and bottom for width, and on both sides for height. Use the smallest width measurement and largest height measurement when planning your door size. This ensures the door will clear the opening when sliding.
Step 2: Plan Your Hardware Placement
Barn door track systems require installation above the opening. Most systems need 1.5 to 2 inches of clearance above the door opening for the track and rollers. Measure up from the top of your opening and locate wall studs where you’ll anchor the track. Use a stud finder for secure mounting to ensure proper support. The track must be perfectly level, so use a 4-foot level to verify before drilling any holes.
Step 3: Determine Door Size
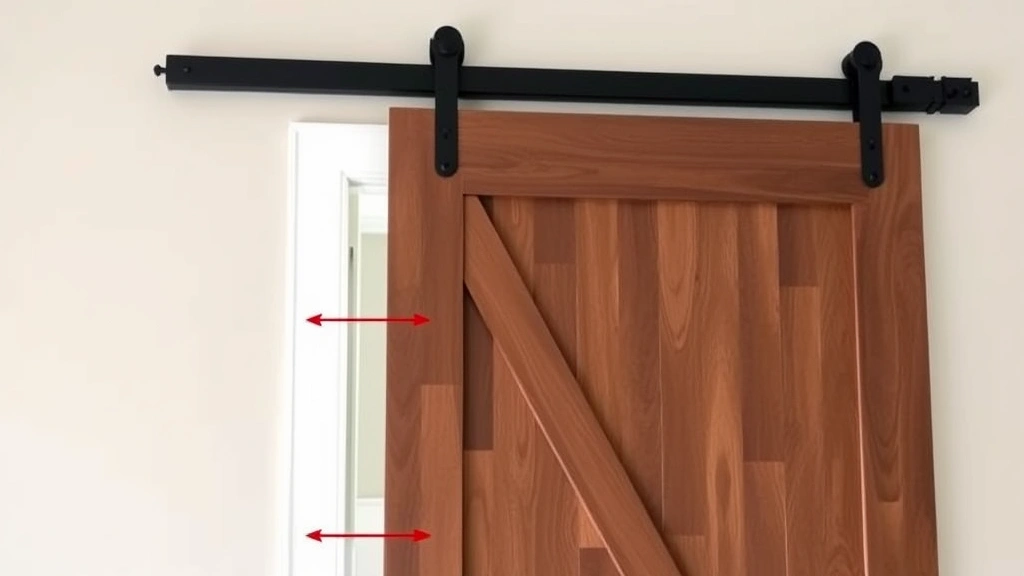
Your barn door should be slightly wider than the opening (typically 2-3 inches on each side for aesthetic appeal) and tall enough to reach from near the floor to just below the track. Account for the bottom guide system, which typically sits 1-2 inches above the floor.

Selecting and Preparing Wood
Wood selection dramatically impacts your barn door’s appearance, durability, and performance. Different wood species offer varying aesthetics and structural properties, so choose based on your design preferences and intended use.
Wood Options:
- Pine: Budget-friendly, easy to work with, takes stain well, less durable outdoors
- Reclaimed Wood: Authentic rustic appearance, variable quality, more expensive
- Cedar or Redwood: Naturally weather-resistant, attractive grain, moderate cost
- Hardwoods: Extremely durable, beautiful finish, higher cost, more difficult to work with
For barn doors that will experience moisture exposure, select wood rated for exterior use or apply appropriate sealants. Avoid pressure-treated lumber for interior doors due to chemical concerns. Visit the Forest Products Laboratory for detailed wood species specifications and performance data.
Preparing Your Wood:
Once you’ve selected your lumber, allow it to acclimate to your home’s humidity for 48 hours before cutting. This prevents warping after installation. Inspect each board for defects, knots, or damage. Plan your cuts to minimize waste and maximize the visual appeal of grain patterns. If using reclaimed wood, carefully remove any nails or hardware before cutting.
Building the Door Frame and Panels
The door frame provides structural integrity and determines how smoothly your barn door operates. A sturdy, well-constructed frame is essential for long-term performance.
Step 1: Cut Your Components
Based on your measurements, cut your vertical stiles (side pieces) and horizontal rails (top and bottom pieces). Most barn doors use a simple frame-and-panel construction where vertical boards create the outer frame, and additional boards fill the interior. Cut all pieces slightly longer than needed, then trim to exact size during assembly.
Step 2: Assemble the Frame
Lay out your frame pieces on a flat surface. Apply wood glue to joints and use pocket holes or traditional joinery to connect frame pieces. A pocket hole jig creates strong, hidden joints perfect for barn doors. Drill pocket holes at a slight angle into the back side of rails, then drive screws through these holes into the stiles. Clamp the frame square and verify all corners are 90 degrees using a square.
Step 3: Add Interior Boards
Once the frame is assembled and glue has cured (typically 24 hours), add vertical or horizontal boards to fill the interior. Traditional barn doors feature vertical boards, creating a classic appearance. Space these boards evenly or arrange them in patterns like chevron or diagonal designs. Secure each board with wood glue and screws driven from behind the frame, keeping fasteners hidden from the front.
Step 4: Reinforce with Diagonal Bracing
Add a diagonal brace across the back of your door to prevent racking (twisting). This brace, typically made from a 2×4, runs from the top corner to the opposite bottom corner. Secure it with bolts or heavy-duty fasteners for maximum strength.
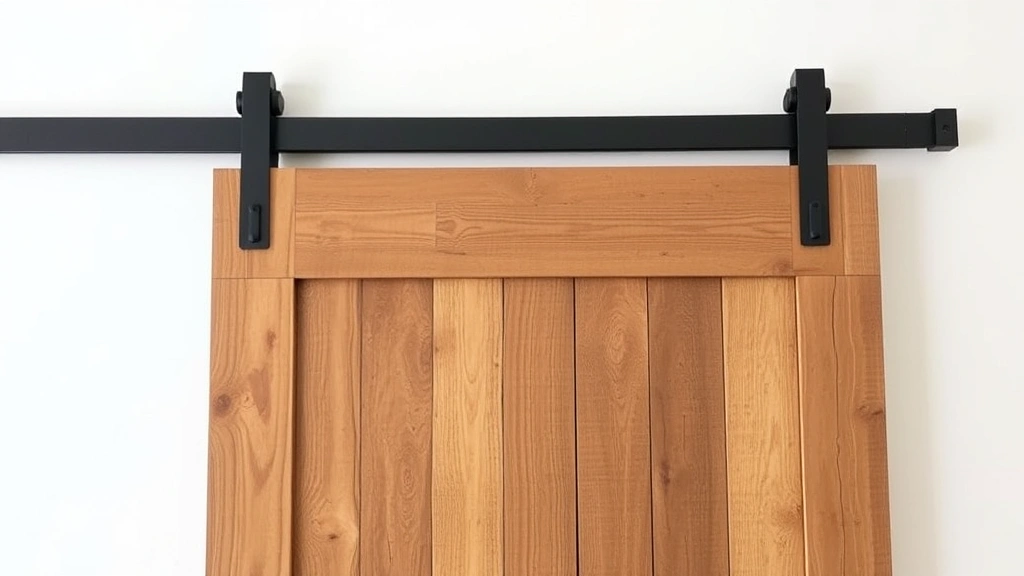
Installing Hardware and Track System
Hardware installation requires precision and proper wall preparation. Improper installation leads to operational problems and potential safety hazards.
Step 1: Install the Track
Locate and mark the wall studs where your track will mount. Most barn door kits require mounting into studs for adequate support. Position the track according to your measurements, ensuring it’s perfectly level using a 4-foot level. Mark all mounting holes, then drill pilot holes to prevent wood splitting. Use the bolts or lag screws provided in your hardware kit, tightening securely but not excessively.
Step 2: Install Rollers on the Door
Most modern barn door systems use roller wheels mounted to the top of the door. Center the roller brackets on the top edge of your door, positioning them according to your hardware kit’s specifications. Typically, rollers mount near the top corners of the door. Drill pilot holes and use the provided bolts to secure rollers, ensuring they spin freely without binding.
Step 3: Hang the Door
With track and rollers installed, carefully lift the door and position the rollers into the track. This step may require assistance, as barn doors are heavy. Ensure the door hangs straight and level, making adjustments with the provided adjustment bolts on the rollers. The door should roll smoothly without binding or rubbing.
Step 4: Install Guides and Stops
Bottom guides prevent the door from swinging away from the wall and keep it aligned. Install these according to your hardware kit’s instructions, typically at the floor level directly below the track. End stops prevent the door from rolling off the track. Adjust these stops so the door stops cleanly at both the fully open and fully closed positions.
Consult the International Code Council for door safety and installation standards in your jurisdiction, as requirements vary by location.
Finishing and Sealing
Proper finishing protects your barn door and enhances its visual appeal. The finishing process involves sanding, staining or painting, and sealing.
Step 1: Sand Your Door
Begin with 80-grit sandpaper to smooth rough edges and remove mill marks. Progress to 120-grit, then finish with 220-grit for a smooth surface. Sand with the wood grain, not against it, to avoid creating scratches. Pay special attention to edges and joints, ensuring everything is smooth to the touch.
Step 2: Apply Stain or Paint
Choose between stain and paint based on your design aesthetic. Stain showcases wood grain and adds warmth, while paint offers unlimited color options and better protection. Apply stain with a brush or rag, following the manufacturer’s instructions for drying time. For paint, use high-quality exterior-grade paint (even for interior doors) for superior durability. Apply two coats, sanding lightly between coats with 220-grit paper.
Step 3: Seal with Polyurethane or Sealant
Protect your finish by applying polyurethane or exterior sealant. Water-based polyurethane dries quickly and minimizes odor, while oil-based polyurethane offers superior durability. Apply at least two coats, sanding lightly between applications. For doors exposed to moisture, use marine-grade sealant for maximum protection.
For additional finishing inspiration, explore our comprehensive painting guide for professional techniques and color selection strategies.
Maintenance and Care
Regular maintenance ensures your barn door operates smoothly for years to come. Establish a simple care routine to prevent problems.
Monthly Maintenance:
- Wipe the track clean of dust and debris using a damp cloth
- Check that rollers spin freely without grinding sounds
- Inspect for any visible damage or wear
- Ensure the door opens and closes smoothly
Seasonal Maintenance:
- Inspect the finish for chips, cracks, or water damage
- Touch up stain or paint as needed
- Check mounting bolts and fasteners for tightness
- Lubricate rollers and track with silicone-based lubricant (never use oil-based products)
Annual Maintenance:
- Reapply polyurethane or sealant if the previous coat shows wear
- Inspect wood for signs of rot, insect damage, or warping
- Check door alignment and adjust rollers if necessary
- Verify that bottom guides and stops remain secure
If you’re interested in other home improvement projects, check out our guide on basement finishing for comprehensive home transformation ideas. You might also enjoy exploring creative pallet projects for complementary décor.
FAQ
How much weight can a barn door support?
Most barn door hardware systems support between 100-200 pounds, depending on the specific kit. Verify your hardware’s weight capacity before installation. Heavier doors require heavy-duty hardware rated for greater loads. Consult manufacturer specifications for your particular system.
Can I install a barn door in a rental property?
Yes, but you’ll need landlord approval first. Barn door installation requires mounting the track to the wall, which involves wall modifications. Discuss this with your landlord before beginning the project. Some installations can be designed for easier removal if needed.
What’s the difference between single and double barn doors?
Single barn doors slide to one side, requiring wall space on that side. Double barn doors split the opening, with each door sliding to opposite sides. Double doors work well for wider openings and create a more balanced aesthetic. However, they require more wall space and more complex hardware installation.
How do I prevent my barn door from warping?
Proper wood selection, acclimation, and sealing prevent warping. Use quality lumber rated for interior use, allow wood to acclimate to your home’s humidity before assembly, and apply protective sealant to all surfaces, including the back. Avoid exposing the door to direct sunlight or extreme humidity fluctuations.
Can I use reclaimed wood for my barn door?
Absolutely! Reclaimed wood creates authentic rustic character. Carefully inspect reclaimed wood for hidden nails, hardware, and damage before use. Budget extra time for cleaning and preparation. The unique character and patina of reclaimed wood often make the extra effort worthwhile.
What’s the best lubricant for barn door tracks?
Use silicone-based lubricant sprays designed for sliding door tracks. Never use oil-based lubricants, as they attract dust and debris that can clog the track system. Apply lubricant sparingly to the track and roller wheels, wiping away excess with a clean cloth. Reapply every 6-12 months or when you notice squeaking.
How do I fix a barn door that’s binding or sticking?
First, clean the track thoroughly to remove dust and debris. Next, check that the door is level and the track is properly aligned. If binding persists, adjust the roller bolts slightly to change the door’s position in the track. Make small adjustments and test after each one. If the door still binds, the frame may be twisted and requires disassembly and reassembly.
Do barn doors provide sound insulation?
Barn doors offer minimal sound insulation compared to standard doors with seals and gaskets. If noise reduction is important, consider adding weatherstripping or acoustic panels behind the door. Thicker doors with denser wood construction provide slightly better sound dampening than thin designs.


