DIY Humidifier for Itchy Throat Relief: Expert Tips
An itchy throat can be incredibly frustrating, affecting your sleep quality, work productivity, and overall comfort. Whether caused by dry indoor air, seasonal changes, or environmental factors, finding relief doesn’t always require expensive commercial solutions. A properly functioning humidifier can transform your living space into a more comfortable environment, and building your own DIY humidifier offers both cost savings and customization options that match your specific needs.
Understanding how humidity levels affect throat health is the first step toward creating an effective solution. Indoor air during winter months or in arid climates can drop to dangerous levels, stripping moisture from your respiratory passages and causing persistent irritation. By learning how to construct and maintain a DIY humidifier, you gain control over your indoor air quality while developing practical skills that extend beyond this single project.
Understanding Humidity and Throat Health
Relative humidity plays a crucial role in maintaining respiratory health and preventing throat irritation. According to the EPA’s Indoor Air Quality guide, humidity levels between 30-50% are considered optimal for most homes. When humidity drops below 30%, your throat’s mucous membranes dry out, leading to itching, scratching sensations, and increased susceptibility to infections.
The science behind this is straightforward: your respiratory tract relies on a protective layer of mucus to trap irritants and pathogens. When air becomes too dry, this protective layer thins, exposing sensitive tissues underneath. This is why you might notice itchy throat symptoms intensifying during winter months when heating systems run continuously, or in naturally arid climates where outdoor air contains minimal moisture.
Beyond throat comfort, maintaining proper humidity supports overall respiratory health. Children, elderly individuals, and people with asthma or allergies benefit significantly from controlled humidity levels. A DIY humidifier allows you to target specific rooms where family members spend the most time, such as bedrooms or living areas, making your solution both economical and efficient.
Types of DIY Humidifiers You Can Build
Several humidifier designs work well for home construction, each with distinct advantages depending on your skill level and available materials. Understanding the differences helps you select the best option for your needs.
Evaporative Humidifiers represent the simplest DIY option. These units use the natural process of water evaporation to add moisture to air. A fan draws air through a damp pad or cloth, and as the air passes through, it absorbs water molecules. This method is energy-efficient, self-regulating (as humidity increases, evaporation naturally slows), and requires minimal electrical components. You can construct a basic evaporative humidifier using a container, cotton fabric, and a small fan.
Ultrasonic Humidifiers create a fine mist by vibrating water at ultrasonic frequencies. While more complex than evaporative models, DIY ultrasonic units are achievable if you source an ultrasonic transducer online. These units produce visible mist and work quickly, though they require more maintenance to prevent mineral buildup. This type is particularly effective for how to calm itchy throat symptoms because the visible mist provides immediate moisture relief.
Steam Vaporizers heat water to create steam, which naturally humidifies the air. These are straightforward to build using a heating element, water container, and basic electrical components. Steam humidifiers are excellent for therapeutic purposes, as inhaling warm steam directly soothes throat irritation. Many people find this method provides the fastest relief from itchy throat discomfort.
For beginners, I recommend starting with an evaporative model. It requires the least technical expertise, poses minimal safety risks, and provides reliable, consistent humidification. As you gain confidence, you can explore more advanced designs.
Materials and Tools Required
Building an effective DIY humidifier requires careful selection of materials. Here’s what you’ll need for a basic evaporative model:
- Container: A plastic storage box, glass vase, or ceramic pot serves as your water reservoir. Choose a size appropriate for your room—larger containers require less frequent refilling.
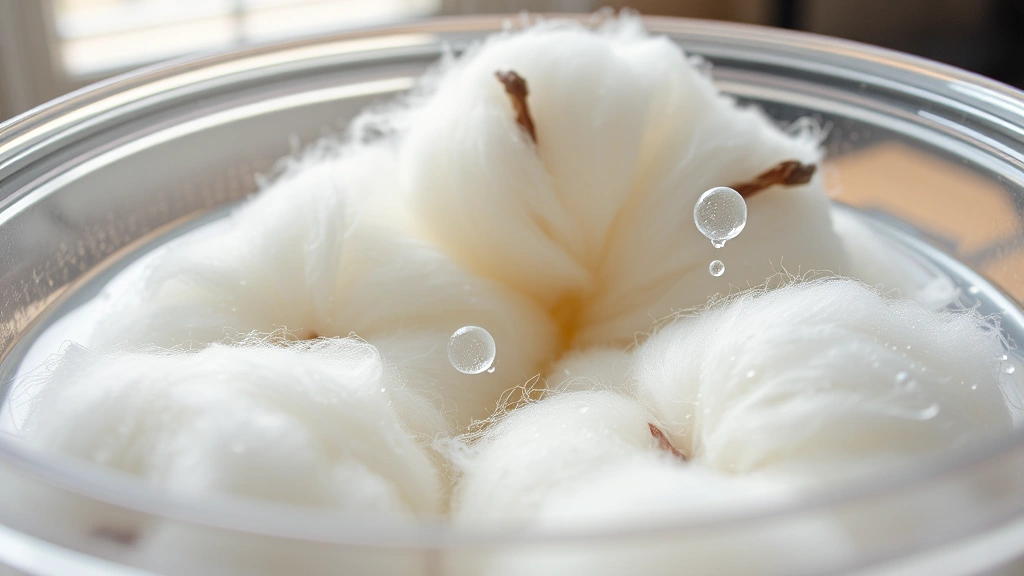
- Absorbent Material: Natural cotton fabric, unbleached cotton towels, or specialized filter material wicks water upward. Avoid synthetic materials that don’t absorb water effectively.
- Small Electric Fan: A USB-powered or battery-operated fan (6-8 inches diameter) provides adequate air circulation. Ensure it’s rated for continuous operation.
- Water Source: Distilled water prevents mineral deposits that damage components and create white dust. Tap water works but requires more frequent cleaning.
- Support Structure: Wooden dowels, plastic tubing, or metal rods hold the fabric in position above water level.
- Sealing Materials: Waterproof silicone or food-grade sealant prevents leaks around connection points.
For tools, you’ll need:
- Drill with bits for creating mounting holes
- Scissors or utility knife for cutting fabric and materials
- Measuring tape and pencil for marking dimensions
- Sandpaper for smoothing rough edges
- Safety glasses and work gloves
Before starting your project, review local building codes and electrical safety standards to ensure your construction meets safety requirements.
Step-by-Step Construction Guide
Follow these detailed instructions to build your evaporative humidifier:
Step 1: Prepare Your Container
Select your water reservoir and clean it thoroughly. If using a plastic container, ensure it’s food-grade and free of chemical residues. Drill or carefully cut a hole in the container’s side, approximately 2 inches from the bottom, for water level monitoring. Insert a clear plastic tube through this opening, allowing you to see water levels without opening the container.
Step 2: Create the Wick Structure
Cut your absorbent material into strips approximately 4 inches wide and long enough to extend from your container bottom to 6-8 inches above the water line. Bundle 3-4 strips together, securing them with cotton twine at the top. This creates a wick that pulls water upward through capillary action.
Step 3: Install Support Framework
Position wooden dowels or plastic tubing vertically inside your container, creating a frame that holds the wick bundle. The wick should hang freely in the water without touching the container bottom, allowing water to circulate around all sides. Secure the framework to your container using waterproof silicone sealant.
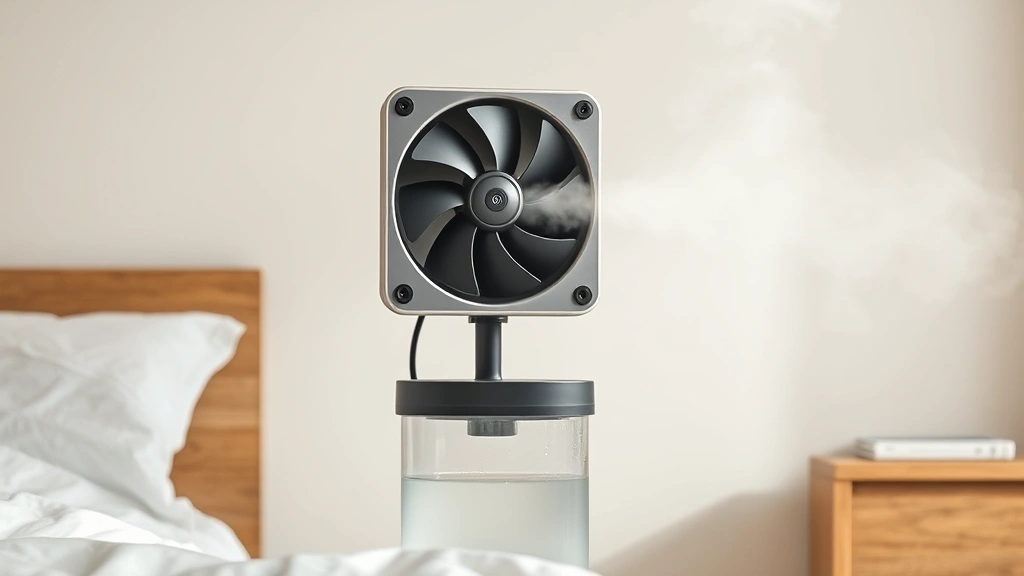
Step 4: Mount the Fan
Position your small electric fan so it blows air directly across the damp wick material. You can mount it using a flexible arm clamp or create a simple bracket from aluminum angle iron. The fan should be adjustable so you can direct airflow precisely across the wick surface. Ensure electrical cords are kept away from water and properly insulated.
Step 5: Fill and Test
Fill your container with distilled water to just below the wick bundle. Turn on the fan at low speed and observe how quickly the wick absorbs water. You should see moisture visibly moving up the fabric within minutes. Adjust the wick position if water isn’t wicking properly, or if water pools at the bottom instead of being absorbed.
Step 6: Optimize Performance
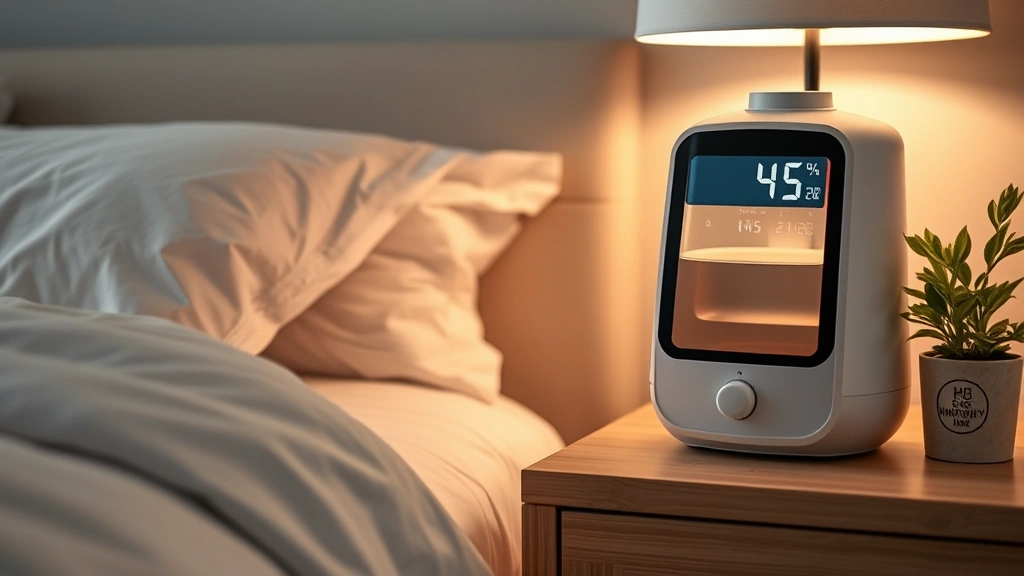
Once water wicks properly, run the humidifier for 30 minutes in your target room. Use a humidity meter (available at hardware stores for $15-30) to measure results. Most DIY evaporative humidifiers raise room humidity by 5-15% depending on room size, fan speed, and wick surface area. Adjust fan speed to achieve your target humidity range.
Optimal Humidity Levels for Health
Achieving the right humidity balance is essential for both throat health and overall comfort. The American Academy of Otolaryngology recommends maintaining indoor humidity between 35-45% for optimal respiratory health. This range prevents both the problems associated with excessive dryness and those caused by overly humid environments.
During winter months when heating systems reduce indoor humidity to dangerous lows (sometimes below 20%), your DIY humidifier becomes particularly valuable. If you’re experiencing persistent itchy throat symptoms, measuring your current humidity level should be your first diagnostic step. Many people discover their throat problems disappear simply by raising humidity from 25% to 40%.
Different rooms may require different humidity levels. Bedrooms, where you spend 6-8 hours breathing the same air, benefit most from careful humidity control. Living areas where you’re more active and spend less time can tolerate slightly wider humidity ranges. Bathrooms naturally maintain higher humidity due to shower use, so you may not need humidification there.
It’s important not to exceed 60% humidity, as this creates ideal conditions for mold growth, dust mites, and mildew. Maintaining a humidity meter in your primary living spaces helps you monitor levels and adjust your DIY humidifier output accordingly. Many advanced humidifiers include automatic shut-off features that activate when humidity reaches predetermined levels, preventing over-humidification.
Maintenance and Safety Considerations
Proper maintenance ensures your DIY humidifier operates safely and effectively for years. Unlike commercial units with sealed components, homemade humidifiers require regular attention to prevent problems.
Daily Maintenance
Check water levels daily and refill with distilled water as needed. Even if your humidifier runs only during sleeping hours, daily checks prevent the wick from drying out completely, which reduces efficiency. Inspect the wick material for visible mold or discoloration, which indicates bacterial growth requiring immediate replacement.
Weekly Cleaning
Remove and rinse the wick material thoroughly with clean water. Squeeze out accumulated minerals and debris, then reinstall. Wipe down the fan blades with a damp cloth to remove dust that restricts airflow. Clean the water container’s interior with a soft brush, paying attention to corners where algae might develop. Never use harsh chemicals; warm water and mild soap suffice.
Monthly Deep Cleaning
Soak wick material in a 1:1 white vinegar and water solution for 30 minutes to dissolve mineral deposits. This extends wick life significantly. Clean the container with the same vinegar solution, scrubbing stubborn mineral buildup. Inspect all electrical connections and cords for damage, replacing any that show wear.
Safety Precautions
Always unplug your humidifier before cleaning or maintenance. Keep electrical cords away from water sources and ensure they’re not damaged or frayed. Position your DIY humidifier on a stable, level surface away from heat sources. Never attempt to operate the unit while standing water is actively being heated, as this creates burn risks.
If using a steam-based DIY humidifier, exercise extreme caution with hot water and steam. Keep the unit away from children and pets. Ensure your heating element has proper temperature controls and automatic shut-off features. Consider consulting Consumer Product Safety Commission guidelines for homemade appliances.
Ensure adequate ventilation in the room where your humidifier operates. Stagnant, overly humid air can contribute to respiratory problems despite your good intentions. Open windows occasionally, even in winter, to maintain air circulation and prevent moisture accumulation in corners and on windows.
Advanced Modifications and Upgrades
Once you’ve successfully built a basic DIY humidifier, several upgrades enhance functionality and convenience. These modifications build on the foundational skills you’ve already developed.
Automated Water Level Control
Install a simple float switch (similar to those in toilet tanks) that automatically shuts off your fan when water levels drop below a safe threshold. This prevents the wick from drying out and damaging your humidifier. Float switches cost $10-20 and connect easily to your fan’s electrical circuit using basic wiring.
Humidity Sensing Activation
Add a humidity sensor that automatically activates your fan when room humidity drops below your target level. These sensors are inexpensive ($15-30) and can be wired to a relay that controls fan operation. This creates a semi-automated system that maintains consistent humidity without manual adjustment.
Aromatherapy Integration
For enhanced throat soothing, add a small essential oil diffuser pad to your wick material. Eucalyptus or peppermint oil vapors can provide additional respiratory relief when combined with humidification. Use only food-grade essential oils and apply sparingly to avoid overwhelming scents that might irritate rather than soothe.
Multi-Room Distribution
Connect flexible ducting to your humidifier’s air output, directing moisture to multiple rooms. This requires a more powerful fan and larger water reservoir, but allows a single unit to serve your entire home. Ensure ducts are properly sealed to prevent air leaks that reduce efficiency.
Mineral Filtration System
Build a simple filtration stage by running water through activated charcoal and sand before it enters your humidifier. This removes minerals and impurities, reducing maintenance requirements and extending component life. A basic gravity-fed filter system costs under $30 in materials.
Consider reviewing comprehensive ASHRAE standards for indoor air quality when designing advanced modifications. These standards provide technical guidance ensuring your upgrades maintain safe, healthy operating parameters.
For those interested in broader home improvement projects, explore our guides on DIY basement finishing and home security systems to develop additional practical skills. The fundamental construction principles you learn building a humidifier apply across many DIY projects throughout your home.
FAQ
How quickly will a DIY humidifier relieve my itchy throat?
Relief timing varies based on room size, initial humidity levels, and humidifier capacity. Most people experience noticeable improvement within 2-4 hours of running a properly functioning humidifier. Significant symptom reduction typically occurs within 24-48 hours as your throat’s mucous membranes rehydrate. For immediate relief while waiting for humidity to build, drink warm liquids and use throat lozenges alongside humidifier use.
Can I use tap water instead of distilled water?
While tap water works, it leaves mineral deposits that damage components and reduce efficiency. Minerals accumulate on the wick, blocking water absorption, and can create white dust that spreads throughout your room. If distilled water isn’t available, filtered water is a reasonable alternative. Plan to clean your humidifier more frequently if using tap water, increasing maintenance from weekly to every 3-4 days.
What size humidifier do I need for my room?
Room size directly affects humidifier capacity requirements. A small bedroom (100-150 square feet) needs a humidifier with 1-2 gallon capacity. Medium living rooms (200-300 square feet) require 2-3 gallons. Larger spaces (400+ square feet) need 3-5 gallons or multiple units. Your DIY humidifier’s effectiveness also depends on fan power and wick surface area, not just water volume.
Is it safe to run a humidifier overnight?
Yes, running your DIY humidifier overnight is generally safe if properly constructed and maintained. Many people find overnight humidification particularly beneficial for throat health, as your mouth naturally dries during sleep. However, ensure your unit has reliable water level monitoring to prevent operating with insufficient water. Use distilled water to minimize mold growth in stagnant overnight water.
Can excessive humidity cause health problems?
Humidity above 60% creates ideal conditions for mold, mildew, and dust mites, potentially worsening respiratory problems. Condensation on windows and walls indicates excessive humidity requiring immediate reduction. If you notice these signs, reduce humidifier fan speed or run it for shorter periods. Maintain humidity monitoring to prevent overshooting your target range.
What should I do if my DIY humidifier develops mold?
Mold indicates insufficient cleaning or water stagnation. Immediately empty and thoroughly clean all components using a 1:1 vinegar and water solution. Replace the wick material entirely rather than attempting to clean it. Prevent future mold by using distilled water exclusively, cleaning weekly, and ensuring your humidifier operates in a well-ventilated area. If mold persists despite these measures, the unit may need complete reconstruction.
How does a DIY humidifier compare to commercial units?
DIY humidifiers offer cost savings (typically $30-60 versus $100-300 for commercial units) and customization for specific needs. However, commercial units often feature automatic humidity sensing, larger capacities, and more refined designs. A well-constructed DIY unit performs comparably to entry-level commercial humidifiers, making it an excellent choice for budget-conscious individuals willing to invest maintenance time.


