Bromeliad Care Tips: Gardener-Approved Guide
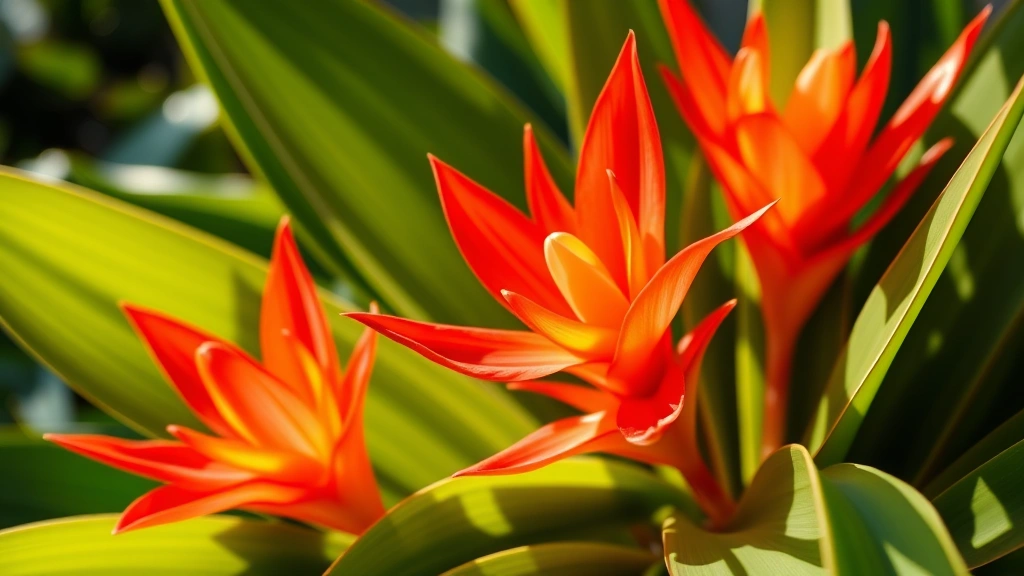
Bromeliads are stunning tropical plants that bring vibrant color and exotic appeal to any indoor or outdoor space. With their distinctive rosette formations, striking foliage, and long-lasting blooms, these plants have become increasingly popular among both novice and experienced gardeners. Whether you’re a seasoned plant enthusiast or just beginning your gardening journey, understanding how to care for bromeliads is essential to keeping these magnificent plants thriving for years to come.
The beauty of bromeliads lies not only in their aesthetic appeal but also in their surprising resilience and adaptability. Unlike many tropical plants that demand constant attention and precise conditions, bromeliads are relatively forgiving and can tolerate a range of environments. However, to truly unlock their potential and encourage spectacular blooms, you’ll need to master the fundamentals of bromeliad care. This comprehensive guide will walk you through everything you need to know, from watering techniques to light requirements, soil preparation, and troubleshooting common issues.
Light Requirements and Placement
One of the most critical factors in successful bromeliad care is providing appropriate lighting. These tropical plants naturally grow as epiphytes—clinging to trees in rainforest canopies—which means they thrive in bright, indirect light. Understanding this natural habitat is key to replicating ideal growing conditions in your home or garden.
For indoor bromeliads, position your plants near a bright window where they receive filtered sunlight for at least four to six hours daily. A south or west-facing window is typically ideal, though the light should be diffused through sheer curtains or blinds to prevent harsh direct rays from scorching the delicate foliage. If you’re growing bromeliads in a north-facing window, supplement with grow lights positioned 6-12 inches above the plant canopy to ensure adequate photosynthesis.
Outdoor bromeliad placement requires similar consideration. Plant them in areas with dappled shade beneath larger trees or on covered patios where they receive bright, filtered light. Full sun exposure can cause leaf bleaching and stress, while insufficient light leads to weak growth and reduced flowering. The ideal scenario is morning sun with afternoon shade, which provides energy for growth while protecting from intense midday heat.
When you notice your bromeliad displaying pale leaves or slow growth, inadequate light is often the culprit. Conversely, if foliage appears bleached or washed out, the plant is receiving too much direct sunlight. Adjust placement accordingly and monitor for improvements over the following weeks.
Watering Your Bromeliads
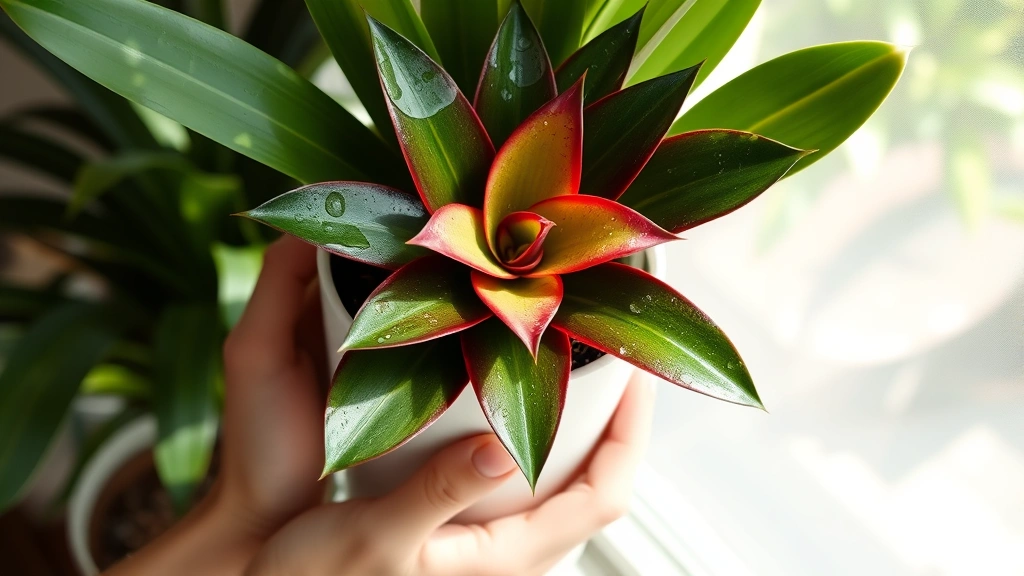
Proper watering technique is perhaps the most misunderstood aspect of bromeliad care, yet it’s absolutely fundamental to plant health. Unlike most houseplants that absorb water through soil, many bromeliads have specialized leaf structures that funnel water into a central cup or tank formed by their rosette arrangement. This unique adaptation requires a distinctly different watering approach than traditional houseplants.
The primary watering method for tank-forming bromeliads involves filling the central cup with water. Use distilled or rainwater when possible, as many bromeliads are sensitive to chlorine and fluoride found in tap water. Fill the cup until water sits about one-half to three-quarters full, and refresh this water every week or two, depending on humidity levels and temperature. This mimics the natural water collection in their rainforest environment.
Beyond the central tank, the soil itself requires moderate moisture during the growing season but should never become waterlogged. Water the soil base until it’s evenly moist, then allow the top inch to dry slightly before watering again. Reduce watering frequency during winter months when growth naturally slows. If your bromeliad doesn’t have a pronounced central cup—such as some ground-dwelling species—treat it more like a standard houseplant, watering when the top inch of soil feels dry.
Drainage is absolutely critical. Always use pots with drainage holes and a well-draining potting mix. Excess water sitting around roots promotes fungal infections and root rot, which are among the most common reasons bromeliads fail. If you notice a musty smell or soft spots at the base of your plant, root rot is likely present and immediate repotting into fresh soil is necessary.
Soil and Nutrition Needs
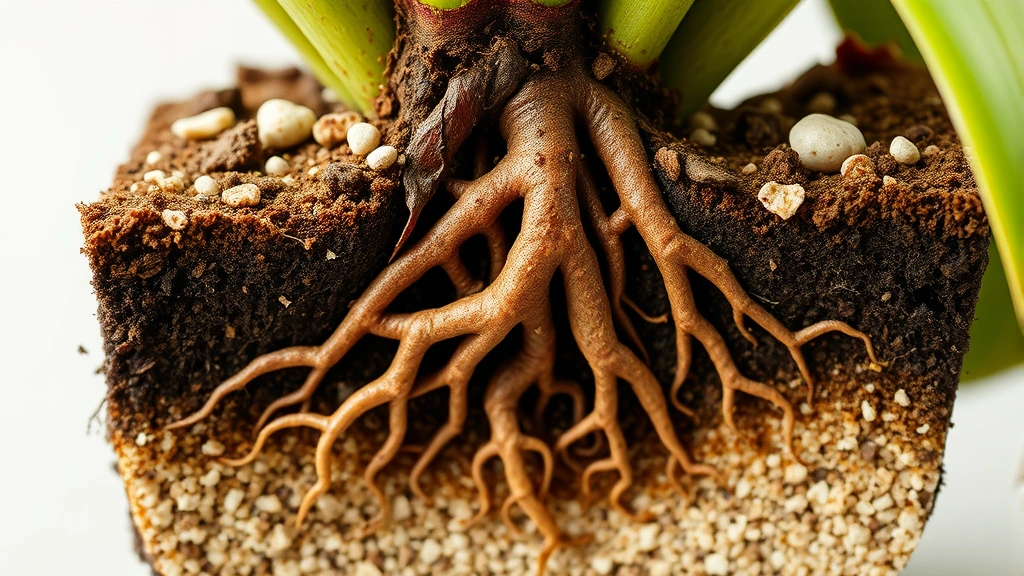
Selecting the right growing medium is essential for bromeliad success. Since many bromeliads are epiphytes in nature, they prefer light, airy, well-draining soil that mimics the loose bark and organic matter they cling to in their native forests. Standard potting soil, while convenient, often retains too much moisture for optimal bromeliad growth.
The ideal bromeliad potting mix combines orchid bark, coconut husk chips, perlite, and a small amount of peat moss or coconut coir. This combination provides excellent drainage while maintaining some moisture retention and allowing air circulation around the roots. Many gardeners purchase pre-made orchid or epiphytic plant mixes, which work beautifully for bromeliads. If you prefer to create your own blend, aim for a ratio of 40% orchid bark, 30% perlite, 20% coconut coir, and 10% compost.
Nutrition requirements for bromeliads are relatively modest compared to heavy feeders. During the active growing season (spring and summer), apply a balanced, water-soluble fertilizer diluted to half strength every four to six weeks. Many gardeners prefer fertilizers specifically formulated for bromeliads or orchids, which contain micronutrients essential for healthy foliage and vibrant blooms. Reduce fertilizing to once every two months during fall and winter when growth naturally slows. Over-fertilizing can damage the delicate foliage and reduce flowering, so err on the side of caution.
For those interested in expanding their indoor plant collection, our guide on how to care for begonias covers similar tropical plant principles that apply across multiple species. Both bromeliads and begonias appreciate indirect light, consistent moisture, and well-draining soil, though their specific requirements do differ in important ways.
Humidity and Temperature Control
As tropical plants, bromeliads naturally prefer warm, humid environments. Replicating these conditions in your home ensures vigorous growth and encourages spectacular flowering. Most bromeliads thrive in temperatures between 60 and 80 degrees Fahrenheit, with higher humidity levels ranging from 50 to 60 percent or greater.
Humidity can be increased through several methods. Grouping plants together creates a microclimate where transpiration from surrounding foliage raises ambient humidity. Placing your bromeliad on a pebble tray filled with water—ensuring the pot sits above the water line, not in it—provides consistent moisture evaporation. Misting foliage with distilled water several times weekly is another effective approach, particularly during dry winter months or in arid climates.
Bathroom environments naturally provide excellent humidity for bromeliads, making them ideal locations if light conditions are adequate. Kitchens also benefit from elevated moisture levels. In very dry climates, consider using a room humidifier or creating a terrarium-like environment with a clear plastic dome or cloche, though ensure adequate air circulation to prevent fungal issues.
Temperature fluctuations should be minimized. Most bromeliads dislike cold drafts from air conditioning vents, open windows in winter, or heating ducts. Sudden temperature drops below 50 degrees Fahrenheit can shock plants and inhibit blooming. Maintain consistent warmth and avoid placing plants near temperature extremes. If you’re growing bromeliads outdoors in cooler climates, bring potted specimens indoors before the first frost.
Propagation and Encouraging Blooms
One of the most rewarding aspects of bromeliad cultivation is propagating new plants and encouraging the spectacular blooms these plants are famous for. Understanding the bromeliad life cycle is essential to success in both endeavors.
Most bromeliads flower only once during their lifetime, producing a single inflorescence that can last for months. After blooming, the mother plant gradually declines, but not before producing pups—miniature plants that emerge from the base. These pups are the primary propagation method for bromeliads. Once pups reach one-third the size of the mother plant, carefully separate them using a clean, sharp knife and pot them individually in appropriate bromeliad soil mix. Keep new pups in bright, indirect light and maintain consistent moisture until they establish roots, typically within 4-8 weeks.
Encouraging blooming requires patience and proper care. Most bromeliads need to reach maturity—typically 2-4 years from propagation—before flowering. Once mature, ensure the plant receives adequate light, appropriate temperatures, and proper nutrition. Some gardeners use a technique called ethylene forcing, which involves placing a ripe apple or banana in a plastic bag with the plant for several days. The ethylene gas produced can trigger blooming in mature plants that are otherwise reluctant to flower.
Another proven method involves cool winter temperatures combined with reduced watering, which many bromeliads interpret as a signal to enter their reproductive phase. Maintain temperatures around 50-60 degrees Fahrenheit for 4-6 weeks during winter, then return to normal conditions. This temperature shift often stimulates flower bud initiation within weeks.
Common Pests and Diseases
While bromeliads are generally hardy plants, they can fall victim to several pests and diseases, particularly in indoor environments where natural predators are absent. Early identification and treatment prevent minor infestations from becoming serious problems.
Mealybugs are among the most common bromeliad pests, appearing as cottony white clusters on leaf joints and the undersides of foliage. Spider mites, which cause fine webbing and yellowing leaves, thrive in dry conditions. Scale insects appear as brown bumps on stems and leaves. For all these pests, begin with the least toxic approach: isolate affected plants, spray with a strong water stream to dislodge pests, and treat with neem oil or insecticidal soap according to product directions.
Fungal infections, particularly leaf spot and root rot, develop in overly wet conditions or poor air circulation. Remove affected leaves immediately, improve drainage, reduce watering frequency, and increase air movement with a small fan. Bacterial infections are less common but equally problematic; unfortunately, no cure exists, and severely affected plants should be discarded to prevent spreading to other specimens.
Prevention is always preferable to treatment. Inspect all new plants before bringing them home, maintain proper watering practices, ensure adequate air circulation, and quarantine new acquisitions for at least two weeks. These simple precautions eliminate most pest and disease problems before they become established.
FAQ
Can I grow bromeliads in low light conditions?
While bromeliads tolerate lower light better than some tropical plants, they genuinely prefer bright, indirect illumination. In low light, growth slows dramatically and blooming becomes unlikely. If your space has limited natural light, supplement with full-spectrum grow lights positioned appropriately to encourage healthy development.
How often should I repot my bromeliad?
Most bromeliads require repotting only every 2-3 years or when they become severely root-bound. Since the mother plant declines after blooming anyway, many gardeners simply propagate the pups and discard the parent. When repotting, use fresh bromeliad soil mix and choose a container only slightly larger than the current one to prevent excess soil moisture.
Why isn’t my bromeliad blooming?
Non-blooming bromeliads typically indicate insufficient light, immaturity (less than 2-3 years old), inadequate nutrition, or lack of a winter cool period. Ensure your plant receives 4-6 hours of bright, indirect light daily, fertilize regularly during growing season, and try the ethylene forcing method or cool winter dormancy period to trigger flowering.
Is tap water safe for bromeliads?
Many bromeliads are sensitive to chlorine and fluoride in tap water, particularly when these minerals accumulate in the central cup. Distilled or rainwater is ideal, but if tap water is your only option, let it sit uncovered for 24 hours before using to allow chlorine to evaporate. Avoid softened water, which contains salt harmful to these plants.
Can bromeliads survive outdoors in cold climates?
Most bromeliads are tropical and cannot tolerate frost or prolonged temperatures below 50 degrees Fahrenheit. In cold climates, grow them in containers and bring them indoors before winter. Some cold-hardy species like Puya and certain Tillandsia can tolerate cooler temperatures, but these are exceptions rather than the rule.
For broader DIY home improvement projects, check out our comprehensive guide on DIY basement finishing if you’re considering creating a dedicated plant room with controlled temperature and humidity. Visit the DIY Nests Hub Blog for more plant care and home improvement articles that help you create the perfect growing environment.


