DIY Chessboard? Expert Tips to Checkmate Your Opponent
Building your own chessboard is a rewarding woodworking and craft project that combines strategic gameplay with hands-on creation. Whether you’re a chess enthusiast looking to personalize your game or a DIY builder seeking a meaningful project, constructing a chessboard from scratch offers satisfaction that store-bought alternatives simply cannot match. This comprehensive guide will walk you through essential techniques, material selection, and finishing methods to create a professional-quality chessboard that showcases both craftsmanship and tactical excellence.
A custom-built chessboard becomes more than just a gaming surface—it transforms into a functional art piece that reflects your personal style and dedication to the game. From selecting premium wood species to applying protective finishes, every step contributes to durability and visual appeal. Understanding how to checkmate your woodworking challenges requires the same strategic thinking you’ll use during gameplay, making this project an engaging endeavor for both novice and experienced builders.
Materials and Wood Selection for Chessboard Construction
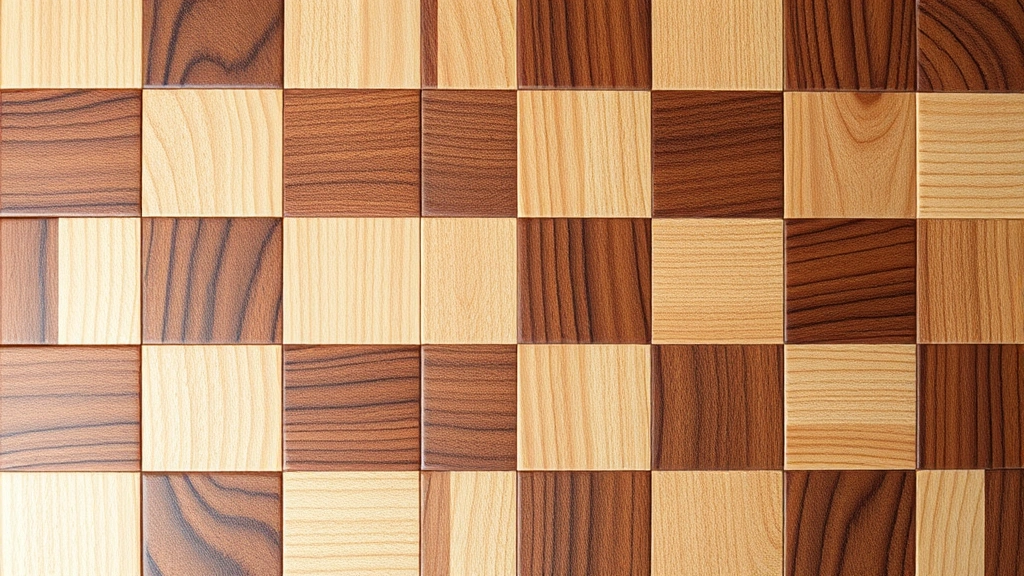
Selecting the right materials is fundamental to building a chessboard that will endure years of gameplay and maintain its aesthetic appeal. The wood species you choose directly impacts the board’s appearance, durability, and ease of construction. Premium hardwoods like maple, walnut, cherry, and padauk offer superior grain patterns and color contrast that make exceptional chessboards. Maple provides a light, creamy base, while walnut delivers deep chocolate tones perfect for the darker squares.
Consider purchasing kiln-dried lumber from reputable suppliers to ensure moisture content remains stable between 6-8%, preventing warping or splitting after construction. Hardwood thickness should range from 0.75 to 1.5 inches depending on your design preferences and structural requirements. For a standard 8×8 chessboard, you’ll need enough material to create 64 squares, typically requiring approximately 4-6 board feet of primary wood and additional material for borders.
Wood moisture content represents a critical factor in construction quality. According to the U.S. Forest Products Laboratory, wood movement increases significantly with moisture fluctuations, potentially causing dimensional instability. Always allow wood to acclimate to your workshop environment for 7-10 days before cutting, ensuring the material has adjusted to local humidity levels.
Beyond primary wood selection, gather high-quality adhesives rated for woodworking applications, finishing oils or polyurethane sealers, and sandpaper in progressive grits (80, 120, 180, 220). These supporting materials ensure your chessboard achieves professional durability and appearance while protecting your investment in premium wood stock.
Cutting and Preparing Your Wood Pieces
Precision cutting determines whether your chessboard squares align perfectly or create frustrating misalignments during assembly. Begin by calculating exact dimensions—a standard chessboard uses 8×8 squares, so dividing your total board width by 8 provides individual square dimensions. For a 16-inch board, each square measures 2 inches, requiring 64 pieces of that exact size.
Utilize a table saw with a fine-toothed blade and a quality fence system to maintain consistent measurements throughout the cutting process. Create a stop block attached to your fence to ensure every piece matches precisely. Cut all squares slightly oversize (approximately 1/16 inch larger), then use a planer or belt sander to achieve final dimensions. This approach compensates for saw kerf loss and blade thickness variations.
Organize your cut pieces into two distinct piles representing alternating square colors. This systematic approach prevents confusion during assembly and ensures the classic checkerboard pattern emerges correctly. Sand all individual pieces with 120-grit sandpaper before assembly, removing any saw marks or rough edges that could compromise glue joints or final finish quality.
Safety during cutting operations cannot be overstated. Always wear appropriate eye protection and hearing protection when operating power tools. Keep hands at safe distances from blade paths, and never reach across active cutting surfaces. Consider using push sticks or featherboards to maintain control while processing multiple identical pieces.
Creating the Classic Alternating Square Pattern
The iconic chessboard pattern emerges through careful arrangement of alternating wood colors in a precise grid formation. Begin assembly by creating eight rows, each containing four pairs of contrasting squares. This modular approach simplifies construction and reduces the likelihood of pattern errors.
Use a flat work surface—ideally a dead-flat assembly table—and arrange your first row of eight squares in the traditional pattern: light-dark-light-dark-light-dark-light-dark. Verify spacing and alignment before applying adhesive. Premium woodworking glue rated for interior applications provides adequate bonding strength, though you may consider Wood Magazine’s recommended adhesives for enhanced reliability.
Apply glue to adjoining edges in thin, even beads, then press squares firmly together. Use cauls (straightedges clamped across the assembly) to prevent cupping or warping during drying. Clamp pressure should be firm but not excessive—approximately 100-150 pounds per linear inch provides adequate bonding without crushing wood fibers. Allow each row to cure for minimum 4 hours before removing clamps.
Once individual rows have cured completely, arrange them perpendicular to create the full board pattern. Alternate row orientation so light and dark squares offset correctly, creating the characteristic checkerboard appearance. This requires careful attention to pattern continuity—verify the pattern matches traditional chess board layouts before final assembly.
The gluing process for joining rows follows identical procedures: thin adhesive beads, proper clamping pressure, and adequate cure time. Many experienced builders create a simple frame jig using 2×4 lumber clamped to prevent lateral movement during assembly, ensuring rows remain perfectly perpendicular throughout the curing process.
Assembly and Gluing Techniques
Successful assembly depends on understanding wood movement and grain direction orientation. Apply glue to edges perpendicular to the grain whenever possible, as this orientation provides maximum glue surface area and strongest bonds. Avoid excessive glue application, which creates squeeze-out requiring cleanup and potentially damaging wood surfaces.
Clamp assembly strategically to distribute pressure evenly across all glue joints. For a full 8×8 board, employ at least six clamps positioned top and bottom, spaced approximately 4-6 inches apart along the board length. This distribution prevents bowing or twisting during cure time. Check diagonal measurements—corners should measure equidistant, confirming the assembly remains square.
Temperature and humidity significantly influence glue cure times and bond quality. Optimal conditions range between 65-75°F with 45-55% relative humidity. Avoid assembling during extreme temperature or humidity conditions, as these factors can compromise adhesive performance and create internal stress that manifests as cracks or separations months after construction.
After glue cures completely (typically 24 hours for quality woodworking adhesives), remove clamps gradually rather than suddenly. Rapid clamp removal can cause boards to shift unexpectedly. Check the assembled board for flatness using a straightedge or precision level, identifying any high spots requiring later sanding correction.
Sanding and Surface Preparation
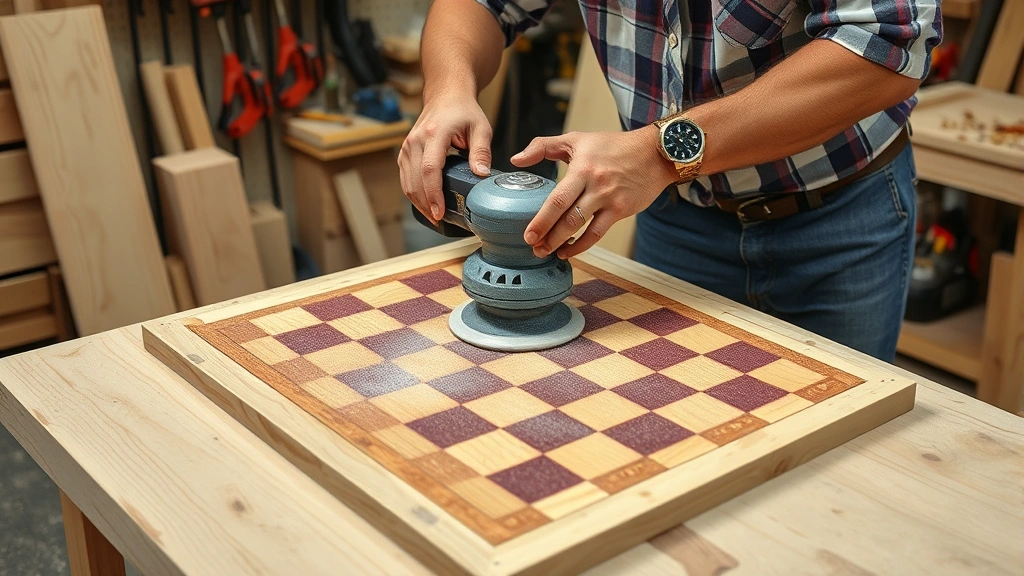
Progressive sanding transforms rough glue joints and uneven surfaces into a smooth, professional playing surface. Begin with 80-grit sandpaper to address major irregularities and glue squeeze-out, then progress through 120, 180, and finally 220-grit for a furniture-quality finish. Each grit removes scratches from the previous stage, creating increasingly refined surface texture.
Use an orbital sander for flat surfaces, applying light pressure and allowing the tool’s weight to do the work. Sand in the direction of wood grain whenever possible, preventing cross-grain scratches that become visible under finish coats. Pay particular attention to transitions between different wood species, as varying wood densities sand at different rates.
Hand sanding addresses corners, edges, and areas inaccessible to power tools. Use a sanding block to maintain consistent pressure and prevent rounding over sharp edges. Consider slightly beveling board edges (approximately 1/16 inch) to create a refined appearance and reduce splinter risk during gameplay.
After reaching 220-grit smoothness, vacuum thoroughly to remove all dust, then wipe with a tack cloth to capture fine particles. These final preparation steps prove essential for achieving high-quality finish coats, as remaining dust particles create surface imperfections visible under glossy finishes.
Finishing and Protective Coatings
Selecting appropriate finish coatings protects your chessboard investment while enhancing wood grain visibility and color depth. Oil finishes like tung oil or Danish oil penetrate wood, enriching natural colors while remaining food-safe and easily repairable. Polyurethane provides harder, more durable protection suitable for frequently used boards, though application requires careful technique to avoid brush marks or bubbles.
Water-based polyurethane offers excellent clarity and rapid drying, making it ideal for builders seeking quick project completion. Conversely, oil-based polyurethane delivers richer amber tones and superior durability but requires extended drying time (24+ hours between coats) and adequate ventilation due to volatile organic compounds.
Apply finish coats with high-quality brushes or foam applicators, working in long, even strokes parallel to wood grain. Avoid overworking the finish, which introduces air bubbles and creates uneven appearance. Most quality finishes require 2-3 coats for adequate protection, with light sanding (220-grit) between coats to improve adhesion and smoothness.
According to the Fine Woodworking editorial standards, protective finish selection should balance aesthetic preferences with functional requirements. Chessboards subjected to regular play benefit from harder finishes resisting wear and moisture, while display pieces may prioritize visual richness over protective durability.
Allow finish to cure completely (typically 7 days) before subjecting the board to gameplay or moisture exposure. Premature use can result in soft spots, fingerprints, or water damage compromising the entire finish appearance.
Adding Borders and Decorative Elements
Borders frame your chessboard while adding visual sophistication and structural reinforcement. Consider contrasting wood species, inlays of exotic materials, or decorative edge treatments that complement your board’s primary aesthetic. Borders typically measure 0.75 to 1.5 inches wide, providing adequate visual weight without overwhelming the playing surface.
Attach borders using edge banding techniques or solid wood strips rabbeted to fit flush with the board surface. Ensure border grain direction runs perpendicular to board edges, maximizing strength and visual appeal. Mitered corners (45-degree cuts meeting at corners) create professional appearance, though require precise cutting and careful glue-up to maintain alignment.
Consider incorporating algebraic notation along borders—the letters A-H for columns and numbers 1-8 for rows—enhancing the board’s functionality for serious chess study and practice. Inlay techniques using contrasting wood species or metal create lasting, elegant labeling that resists wear from repeated gameplay.
Decorative elements should enhance rather than distract from gameplay. Avoid excessively ornate designs that complicate square identification or create visual confusion during rapid play. The International Chess Federation (FIDE) provides official specifications for tournament-quality boards, which may guide your design choices if competitive play is anticipated.
Feet or stands represent another valuable addition, elevating the board to comfortable playing height while protecting surfaces from moisture and damage. Felt pads prevent scratching furniture surfaces and reduce noise during piece movement, enhancing the overall playing experience.
FAQ
What wood species work best for DIY chessboards?
Maple and walnut provide classic contrast and excellent durability. Cherry, padauk, and purpleheart offer alternative colors for unique aesthetics. Ensure all species are kiln-dried hardwoods suitable for fine woodworking applications, avoiding softwoods prone to denting and wear.
How long does a DIY chessboard project typically require?
Expect 20-30 hours across multiple sessions: material selection and preparation (4-5 hours), cutting (3-4 hours), assembly and gluing (4-6 hours), sanding (4-5 hours), and finishing (4-6 hours). Add curing time between assembly and finishing stages—typically 7-10 days total project duration including cure times.
Can I use stains to create color contrast instead of different wood species?
While staining is possible, natural wood contrast proves superior for durability and appearance. Stains fade over time with UV exposure and gameplay wear, potentially compromising the classic checkerboard pattern visibility. Natural wood colors remain consistent indefinitely.
What safety precautions should I observe during construction?
Always wear eye and hearing protection when operating power tools. Use push sticks and featherboards to maintain safe distances from cutting surfaces. Ensure adequate ventilation when applying finishes, particularly oil-based polyurethane. Follow all manufacturer safety guidelines for adhesives and finishing products.
How do I maintain my completed chessboard?
Clean periodically with a slightly damp cloth, never soaking the board. Avoid placing near heat sources or direct sunlight, which cause wood movement and finish fading. Reapply oil finishes annually; polyurethane may require refinishing every 3-5 years depending on usage intensity. Store in climate-controlled environments maintaining 45-55% relative humidity.
Is building a chessboard suitable for beginners?
Yes, though the project demands precision and patience. Beginners should start with simpler designs, potentially using pre-milled lumber and avoiding complex inlays or decorative elements. Success requires understanding basic woodworking techniques covered in our DIY guides for fundamental building principles.
What finish provides the best gameplay surface?
Satin polyurethane offers optimal balance—smooth enough for piece movement without excessive slickness causing pieces to slide unexpectedly. Matte finishes provide grip but may show fingerprints; glossy finishes are slippery and prone to glare. Test finish samples before committing to full application.
Can I incorporate chess piece storage into my board design?
Absolutely. Design drawer compartments beneath the playing surface or hinged compartments integrated into borders. Ensure storage mechanisms don’t compromise board flatness or structural integrity. This addition transforms your chessboard into a complete chess set storage solution, enhancing functionality and elegance.


