How to Clean a Mass Air Flow Sensor: Expert-Approved Steps for Better Engine Performance
Your mass air flow (MAF) sensor is one of the most critical components in your vehicle’s engine management system. This delicate instrument measures the amount of air entering your engine, allowing the fuel injection system to deliver the precise fuel-air mixture needed for optimal combustion. When a MAF sensor becomes contaminated with dust, oil residue, or carbon deposits, your engine’s performance suffers dramatically—resulting in rough idling, reduced fuel economy, hesitation during acceleration, and in some cases, warning lights on your dashboard.
Cleaning your MAF sensor is one of the most cost-effective maintenance tasks you can perform as a DIY enthusiast. Unlike many automotive repairs that require specialized tools or technical expertise, cleaning a MAF sensor is straightforward and can save you $200–$500 in professional diagnostic and replacement costs. In this comprehensive guide, we’ll walk you through the entire process, from identifying whether your sensor needs cleaning to reinstalling it safely and confirming proper operation.
Signs Your MAF Sensor Needs Cleaning
Before you begin any work, you should confirm that a dirty MAF sensor is actually causing your vehicle’s symptoms. Several warning signs indicate contamination or malfunction. The most obvious is the illumination of the check engine light with a diagnostic trouble code related to MAF sensor function. Common codes include P0101 (Mass or Volume Air Flow Circuit Range/Performance Problem) and P0102 (Mass or Volume Air Flow Circuit Low).
Beyond diagnostic codes, watch for these performance symptoms: rough or unstable idling where RPMs fluctuate between 300 and 1000, hesitation when accelerating from a stop, sudden power loss during highway driving, or unexpected stalling while driving. You may also notice your fuel economy dropping noticeably—sometimes by 10–20%—because the engine compensates for inaccurate air measurements by injecting excess fuel.
A contaminated MAF sensor can also cause your vehicle to enter “limp mode,” a safety feature where the engine computer defaults to a fixed fuel map, severely limiting performance and preventing normal operation. If you’re experiencing any of these symptoms, a MAF sensor cleaning should be your first diagnostic step before considering sensor replacement.
Tools and Materials You’ll Need
Gathering the right tools before you start prevents frustration and ensures you complete the job safely. Here’s everything required for a successful MAF sensor cleaning:
- Socket set and wrenches: Usually 8mm, 10mm, or 12mm depending on your vehicle model
- Screwdrivers: Both Phillips and flathead in various sizes
- MAF sensor cleaner: Specialized aerosol cleaner designed specifically for mass air flow sensors (never use carburetor cleaner or brake cleaner, as they can damage the sensor element)
- Soft-bristle brush or compressed air: For removing loose debris before wet cleaning
- Clean lint-free cloths: Microfiber cloths work best to avoid leaving fibers on the sensor
- Container or small bowl: If you prefer to soak the sensor element
- Safety glasses and gloves: Essential protection from cleaner chemicals and engine components
- Shop towels: For wiping and drying
- Torque wrench: Optional but recommended for precise reinstallation torque
- Vehicle service manual: Your specific manual provides exact torque specifications and sensor location details
Quality matters when selecting MAF sensor cleaner. Brands like CRC Mass Air Flow Sensor Cleaner and Gumout are specifically formulated to dissolve oil and carbon deposits without damaging the delicate sensor element. Avoid generic degreasers or solvents, as they may corrode internal components.
Safety Precautions and Preparation
Working on your engine requires careful attention to safety. Always disconnect the negative battery terminal before beginning any electrical work. This prevents accidental short circuits and ensures the engine won’t start unexpectedly while you’re working on it. Use a wrench to loosen the negative terminal clamp, then move the cable away from the battery post.
Allow your engine to cool completely before touching any components. A hot engine can cause severe burns, and hot metal parts can ignite cleaning solvents. Wait at least 30 minutes after your last drive to ensure the engine bay is safe to handle.
Never work on a running or recently running engine. Ensure the ignition is completely off and removed from the ignition cylinder. Wear safety glasses to protect your eyes from debris, and use nitrile gloves to protect your skin from cleaning solvents and engine oil residue. Work in a well-ventilated area—either outdoors or in a garage with the door open—because MAF sensor cleaner produces fumes that shouldn’t be inhaled in confined spaces.
Locating Your MAF Sensor
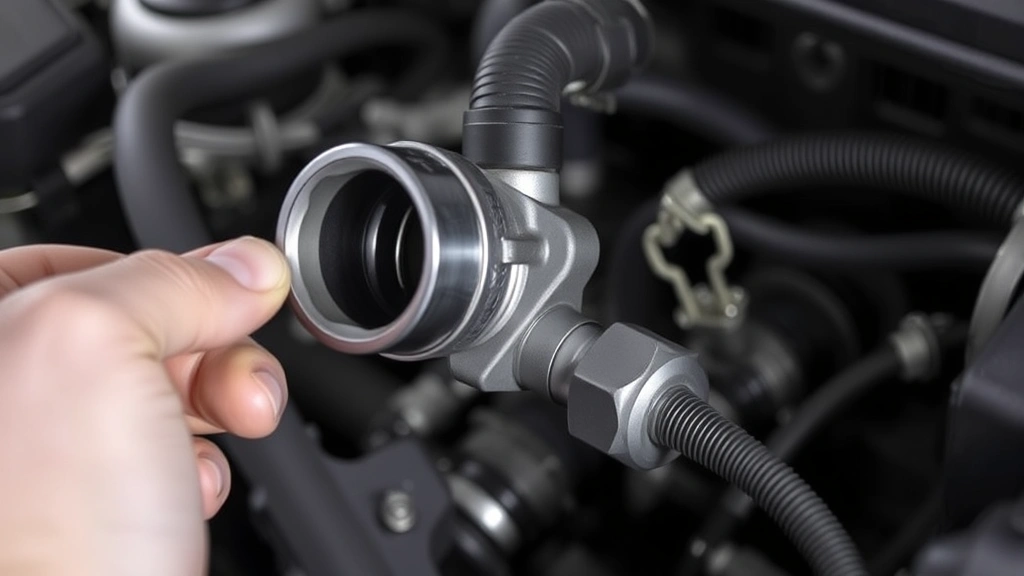
The MAF sensor location varies by vehicle make, model, and year, but it’s typically found in the intake system between the air filter and the throttle body. In most vehicles, you’ll find it mounted in the air intake tube or integrated into the air box assembly. Consult your vehicle’s service manual for the exact location—this is crucial because incorrect identification can lead to damage or incomplete repairs.
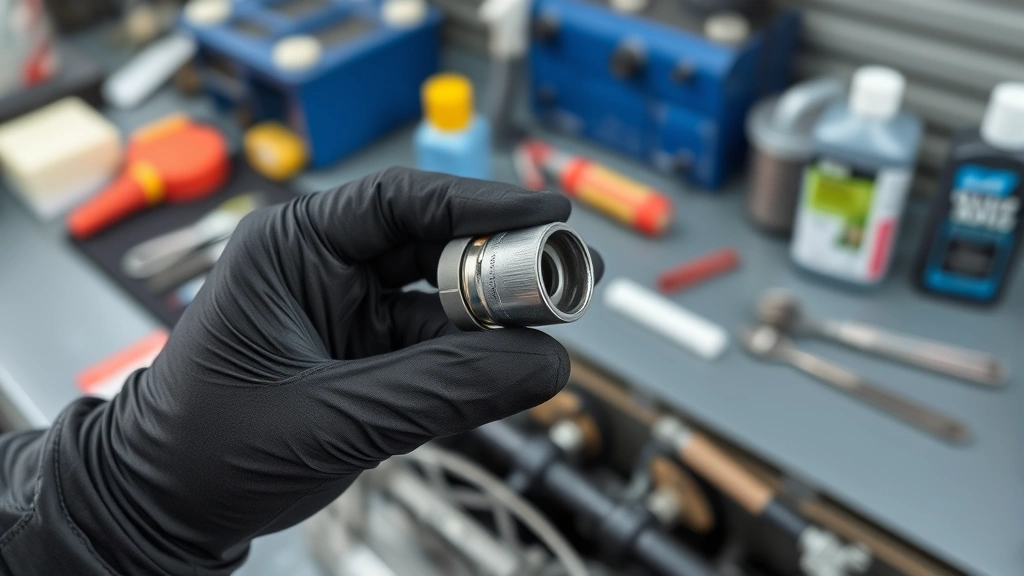
To locate it, trace the large flexible hose from your air filter box toward the engine. The MAF sensor is usually a small cylindrical or rectangular component with an electrical connector at one end. It may be mounted vertically or horizontally depending on your vehicle’s design. Once you’ve visually identified it, take a photo with your phone to reference during reassembly.
Removing the MAF Sensor
Before removing anything, disconnect the MAF sensor’s electrical connector by gently pressing the release clip and pulling the connector straight away. Don’t force it—these connectors are fragile. Set the connector aside carefully to avoid bending the pins inside.
Next, remove any hoses or intake components that obstruct access to the sensor. This might include intake tubes, the air box, or resonator chambers. Take photos of your disassembly process so you can reassemble everything correctly. Use appropriate socket sizes—typically 8mm or 10mm—and work slowly to avoid stripping fasteners.
Once the sensor is fully accessible, carefully unscrew it from its mounting location. Most MAF sensors are held in place by one or two bolts or screws. Work gently and deliberately; the sensor is a precision instrument and rough handling can cause damage. If you’re removing the sensor from an intake tube, you may need to unbolt or unclamp the tube first.
As you remove the sensor, note its orientation. The sensor element is typically located at the tip of the probe that extends into the airflow path. This element is extremely delicate and must never be touched with your bare hands or brushes. The oils from your skin can permanently damage the sensor’s accuracy.
Cleaning the Sensor Element
Now comes the critical step: cleaning the sensor element without causing damage. Place the removed sensor on a clean work surface with the element facing upward. Using compressed air held at least 12 inches away, gently blow away loose dust and debris. Never use a brush or cloth to wipe the element itself—this is a common mistake that damages the delicate platinum or ceramic filament inside.
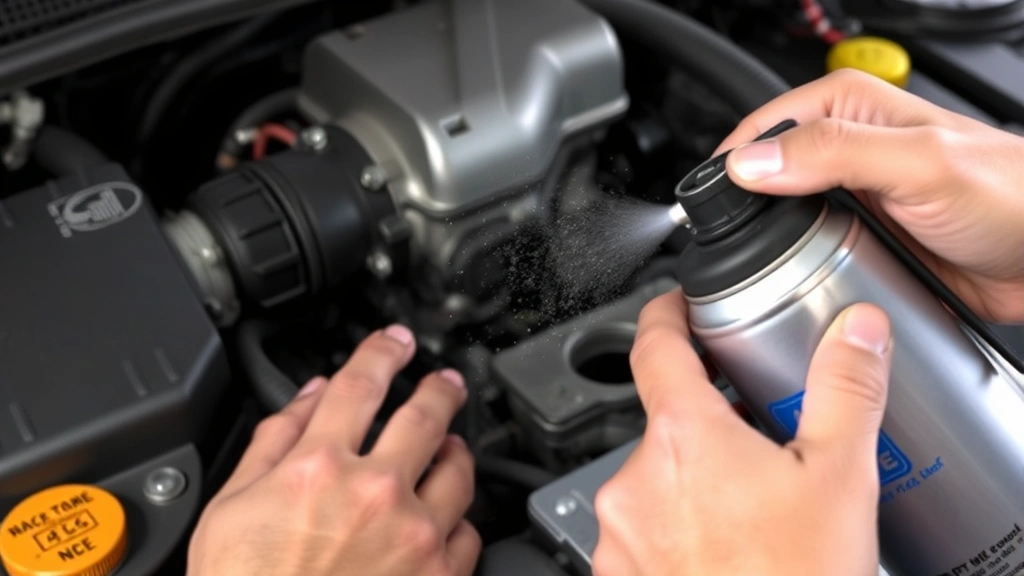
If the sensor requires wet cleaning, use your specialized MAF sensor cleaner. Hold the sensor horizontally with the element pointing downward, then spray the cleaner in short bursts. Allow the cleaner to drip away and evaporate naturally. Never submerge the entire sensor in liquid unless your specific service manual recommends it. Some technicians prefer soaking only the sensor tip in a small container of MAF cleaner for 5–10 minutes, then air-drying thoroughly.
Repeat the cleaning process 2–3 times if the sensor is heavily contaminated. Between applications, allow the cleaner to completely evaporate—this usually takes 5–10 minutes. You’ll know it’s dry when no moisture remains on the sensor body.
The cleaning process removes carbon deposits, oil residue, and dust particles that interfere with the sensor’s ability to measure airflow accurately. A properly cleaned sensor will function like new and restore your engine’s performance.
This MAF sensor cleaning is part of comprehensive engine maintenance. For complete vehicle care, consider our guides on how to change your oil and other essential services that keep your engine running smoothly.
Reinstalling and Testing
Before reinstalling, ensure the sensor is completely dry. Any moisture inside the sensor or on its electrical connectors can cause shorts or corrosion. Allow it to air-dry for at least 15–20 minutes after your final cleaning.
Carefully reinstall the sensor in its original location, screwing it in by hand first to ensure the threads align properly. Then tighten with your socket wrench to the specification listed in your service manual—typically 12–25 foot-pounds of torque. Don’t overtighten; excessive force can crack the sensor body or strip the threads.
Reconnect the electrical connector by aligning it properly and pushing straight in until you hear a click. Ensure the connector is fully seated and the release clip is engaged. Reinstall any hoses, air boxes, or intake components you removed earlier, referencing your photos to ensure everything goes back correctly.
Reconnect the negative battery terminal by sliding the clamp over the post and tightening with your wrench. Start the engine and listen for any unusual sounds. The engine should start smoothly and idle at a normal RPM (typically 600–800 for most vehicles). If the check engine light illuminates immediately, don’t panic—sometimes the engine computer needs a moment to re-read the sensor data. Drive the vehicle for 10–15 minutes, allowing the engine to reach normal operating temperature and the computer to complete its diagnostic cycle.
After driving, check whether the check engine light has cleared. If it persists, you may need to clear the diagnostic trouble codes using an OBD-II scanner before retesting. Many auto parts stores offer free diagnostic scanning services if you don’t have a scanner.
Prevention and Maintenance
A clean MAF sensor is easier to maintain than a contaminated one. Regular engine maintenance prevents premature sensor fouling. Change your engine air filter every 12,000–15,000 miles or annually, whichever comes first. A clean air filter prevents dust and debris from reaching the MAF sensor in the first place.
Use quality engine oil and maintain proper oil change intervals—typically every 3,000–7,000 miles depending on your vehicle and oil type. Excessive oil consumption or leaks allow oil vapor to reach the intake system and coat the MAF sensor.
Avoid driving through deep water or extremely dusty conditions when possible, as these environments accelerate MAF sensor contamination. If you must drive in such conditions, inspect your air filter more frequently.
Consider your vehicle’s overall engine health as part of a broader maintenance strategy. Our comprehensive DIY car cleaning guide covers exterior and interior cleanliness, while DIY car detailing techniques help preserve your vehicle’s condition. Just as you maintain your car’s exterior, engine cleanliness ensures longevity and reliability.
If cleaning doesn’t resolve your symptoms after 50–100 miles of driving, the sensor may be permanently damaged and require replacement. Modern MAF sensors are sealed components that cannot be repaired—only cleaned or replaced. A replacement sensor typically costs $150–$400 depending on your vehicle, making preventive maintenance and proper cleaning even more valuable.
FAQ
Can I use carburetor cleaner to clean my MAF sensor?
No. Carburetor cleaner, brake cleaner, and similar products are too harsh and can damage the delicate sensor element. Always use MAF-specific cleaner formulated for this application.
How often should I clean my MAF sensor?
Most vehicles don’t require MAF cleaning unless symptoms appear. However, if you drive in dusty conditions or have a history of sensor fouling, consider cleaning every 50,000–100,000 miles as preventive maintenance.
Will cleaning my MAF sensor fix my check engine light?
Cleaning usually resolves MAF-related check engine codes if the sensor is merely contaminated rather than damaged. After cleaning and reinstalling, drive for 10–15 minutes to allow the computer to relearn. If the light persists, the sensor may need replacement or another issue may be causing the code.
Can I drive with a dirty MAF sensor?
You can drive, but performance will be noticeably degraded. Rough idling, poor acceleration, reduced fuel economy, and potential stalling make driving uncomfortable and unsafe. Address the issue promptly rather than delaying.
Do I need a torque wrench to reinstall the sensor?
A torque wrench ensures you apply exactly the right amount of force, preventing over-tightening that could crack the sensor or under-tightening that could cause air leaks. While not absolutely required, it’s highly recommended for precision work.
What if my sensor won’t start after cleaning?
Ensure the electrical connector is fully seated and the negative battery terminal is properly connected. If the engine still won’t start, you may have accidentally disconnected another component. Review your photos and reinstall any hoses or connectors you may have overlooked.
Can I clean my MAF sensor without removing it?
It’s not recommended. Spray cleaners applied without removal may not reach all contaminated areas, and overspray could damage surrounding components. Proper cleaning requires sensor removal for thorough treatment.


