Rusty Cast Iron Pan? Pro Cleaning Tips Inside
Cast iron cookware has graced kitchens for over a century, prized for its heat retention and durability. However, rust can quickly compromise these beloved pans, turning them from kitchen heroes into seemingly unusable relics. The good news? Rust on cast iron is rarely permanent, and with the right techniques, you can restore your pan to its former glory.
Whether your cast iron pan has been neglected in a damp basement, inherited from a relative, or simply exposed to moisture through improper storage, rust removal is absolutely achievable. This comprehensive guide walks you through professional-grade cleaning methods that work, from gentle approaches for light surface rust to aggressive techniques for severe oxidation. You’ll learn the science behind why cast iron rusts, how to safely remove corrosion without damaging the metal, and most importantly, how to prevent rust from returning.
Understanding Cast Iron Rust Formation
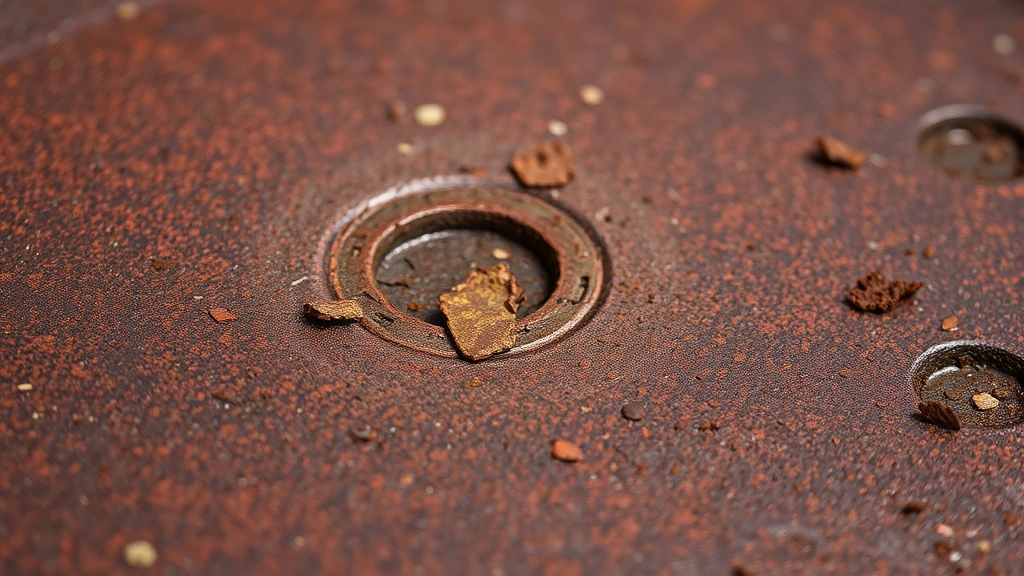
Cast iron rust develops through a chemical oxidation process that occurs when iron meets oxygen and moisture. Unlike stainless steel, cast iron contains no chromium to create a protective oxide layer, making it inherently vulnerable to corrosion. The seasoning—that dark, slick patina built up through years of cooking—actually protects bare iron from rust. When this seasoning is compromised through washing, storage in humid conditions, or physical damage, rust formation accelerates.
The rust you see is iron oxide (Fe₂O₃), which appears as reddish-brown flaking or pitting on the surface. Surface rust is cosmetic and relatively easy to remove, while deep rust pitting can create structural weaknesses if left untreated. Understanding this distinction helps you choose the appropriate cleaning method. The longer rust sits, the deeper it penetrates, so prompt action is essential. Temperature and humidity both accelerate rust formation—cast iron stored in bathrooms, basements, or near sinks faces elevated rust risk.
Cast iron’s porous surface actually works against you during rust removal. Unlike smooth stainless steel, the microscopic pits and valleys in cast iron can trap rust particles and moisture. This is why thorough drying and proper seasoning afterward are critical steps in the restoration process. Think of rust removal as preparing a blank canvas; you’re not just removing the rust, you’re preparing the metal to accept a protective seasoning layer.
Assessing Rust Severity Levels
Before diving into rust removal, evaluate how severe the problem is. This assessment determines which method will work best and how much elbow grease you’ll need to invest. Light surface rust appears as a thin reddish coating that flakes off easily. You can typically see the underlying gray iron beneath. This type requires minimal intervention and responds well to gentle methods. Moderate rust shows deeper discoloration with some pitting visible to the naked eye. Heavy rust creates thick flaking, significant pitting, and may even show through to the opposite side of thin-walled pans.
A simple test helps classify your rust: run your finger across the affected area. Light rust brushes away easily. Moderate rust requires slight pressure. Heavy rust feels rough, textured, and won’t budge with gentle touch. For cast iron cookware, even heavy rust is usually restorable unless structural integrity is compromised—look for holes, severe thinning, or cracks that indicate the pan is beyond salvage.
Documentation before you start helps track progress. Take photos of the rust from multiple angles. This visual record helps you stay motivated during the restoration process and proves the effectiveness of your chosen method. Many DIYers find this especially rewarding when comparing before-and-after results.
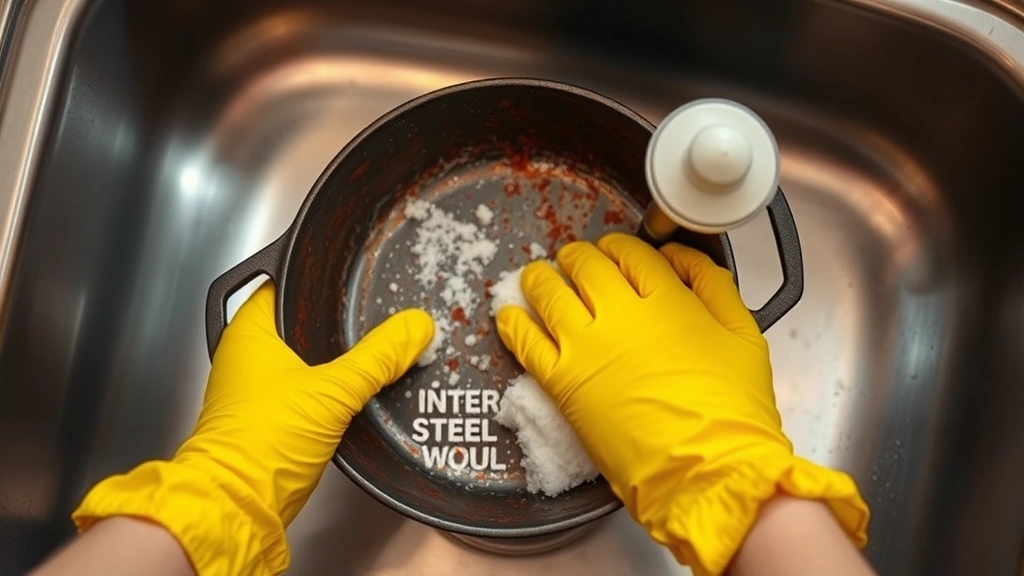
Method 1: Vinegar and Steel Wool Approach
The vinegar method is the gentlest rust removal technique, making it ideal for DIY restoration projects with light to moderate rust. White vinegar contains acetic acid, which chemically dissolves iron oxide without damaging the underlying cast iron. This method requires patience but minimal specialized equipment.
Materials needed: White vinegar (5% acidity), steel wool (0000 or 00 grade), soft-bristled brush, rubber gloves, paper towels, and a container large enough to hold your pan. Avoid using vinegar directly on the stovetop, as the acid can damage the seasoning on unaffected areas.
Step-by-step process: Submerge your rusty pan in white vinegar, ensuring the vinegar covers all rust-affected areas. For a large Dutch oven or skillet, you may need to soak it in stages, rotating to expose different sections. Let it soak for 30 minutes to 2 hours, depending on rust severity. Check progress every 30 minutes—you want the rust to soften but not dissolve completely into the vinegar.
After soaking, remove the pan and scrub gently with 0000 steel wool in circular motions. The rust should roll off in dark flakes. Use moderate pressure; aggressive scrubbing can gouge the metal unnecessarily. Rinse under running water and inspect. If rust remains, repeat the soak-and-scrub cycle. Most light rust clears in 1-3 cycles.
The vinegar method works because acetic acid reacts with iron oxide, converting it to iron acetate, which is water-soluble and easily removed. This chemical process is slower than mechanical methods but far less likely to damage the pan’s underlying structure. The downside? You must work quickly after removing the pan from vinegar, as exposed iron oxidizes rapidly when wet. Dry immediately and thoroughly with paper towels, then move to the seasoning phase.
Method 2: Electrolysis Restoration
For severe rust or when you’re restoring multiple cast iron pieces, electrolysis offers a hands-off approach that removes rust without any scrubbing. This method uses electrical current to reverse the oxidation process, making it ideal for pans with heavy pitting or intricate designs where steel wool can’t reach.
Equipment required: A car battery charger (12V, minimum 10 amp), a plastic or glass container, washing soda (sodium carbonate), stainless steel electrode (rebar works well), jumper cables, and distilled water. Never use table salt; it creates chlorine gas. Washing soda is food-safe and available at most grocery stores in the laundry aisle.
Setup process: Fill your container with distilled water and dissolve approximately 1 tablespoon of washing soda per gallon of water. Submerge your rusty pan so it’s completely covered. Place the stainless steel electrode in the container, ensuring it doesn’t touch the pan. Connect the negative battery terminal to the pan and the positive terminal to the electrode using jumper cables. Set the charger to 12V and turn it on.
The electrolysis process works through reduction—applying electrical current reverses the chemical reaction that created rust. You’ll see hydrogen bubbles forming (this is normal and safe), and the water may turn slightly cloudy or discolored. Depending on rust severity, electrolysis takes 4-24 hours. Check progress every few hours by carefully removing the pan (while the charger is off) and inspecting. The rust should flake away easily once electrolysis is complete.
This method is remarkably effective for deep pitting and works on cast iron without damaging the metal. However, it requires electrical safety knowledge and proper setup to avoid shock hazards. Always disconnect the charger before removing or adjusting the pan. Electrolysis is particularly valuable when restoring vintage metal items where surface damage must be minimized.
Method 3: Grinding and Wire Brushing
For aggressive rust removal, mechanical abrasion using power tools delivers fast results. A wire wheel attachment on an angle grinder or rotary tool removes rust quickly, though it requires proper safety precautions and operator skill. This method works best for heavy rust that won’t respond to gentler approaches.
Safety requirements: Wear a full face shield, safety glasses, heavy-duty work gloves, and a dust mask rated for metal particles. Work in a well-ventilated area or outdoors. Never wear loose clothing or jewelry that could catch on the spinning wheel. Secure the cast iron pan in a bench vise to prevent it from spinning unexpectedly.
Grinding technique: Use a coarse wire wheel (0.020″ diameter) on your angle grinder set to moderate speed. Apply steady, even pressure, moving the grinding wheel across the rust in overlapping passes. Grind until you reach bare metal—you’re looking for that gray, shiny appearance. The process generates sparks and heat, so work slowly and let the tool do the work rather than forcing it.
After grinding, switch to a finer wire brush (hand-held or rotary) to smooth the surface and remove any remaining rust particles. This secondary step prevents rust flakes from becoming embedded in the metal’s pores. Finally, wipe the entire pan with a degreaser to remove metal dust and grinding residue, then dry thoroughly.
The grinding method is fastest but creates the most aggressive surface texture. You’ll need to re-season the pan more carefully afterward, as the newly exposed metal is extremely porous and oxidation-prone. This approach is ideal when restoring cast iron that hasn’t been used in decades and cosmetic perfection isn’t required.
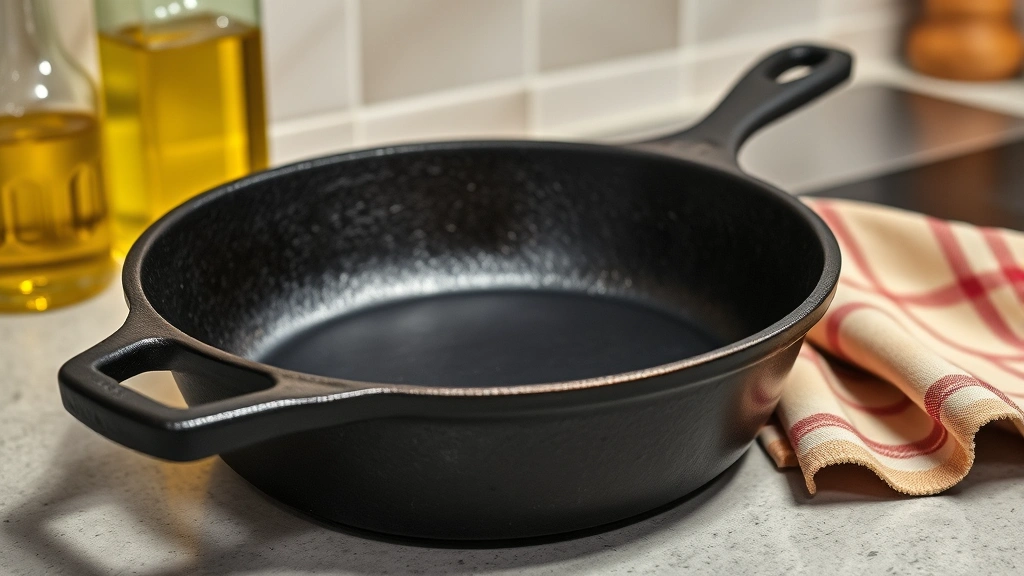
Seasoning Your Restored Pan
Rust removal is only half the battle. Once you’ve eliminated rust, the exposed iron is vulnerable to immediate re-oxidation. Seasoning creates a protective polymer layer that prevents future rust and enables non-stick cooking. This step is absolutely critical—skipping it guarantees rust will return within days.
Seasoning materials: Food-grade oils work best—choose from grapeseed oil (high smoke point), avocado oil, or traditional vegetable shortening like Crisco. Avoid olive oil and butter, as they have low smoke points and turn rancid. You’ll also need a kitchen oven preheated to 450-500°F and lint-free cloths or paper towels.
Seasoning process: Ensure your pan is completely dry—any moisture prevents proper seasoning. Apply a thin layer of oil to the entire pan, inside and out, using a cloth. The key is using very little oil; excess oil creates a sticky, uneven finish. Buff the pan thoroughly so it looks almost dry to the naked eye. Excess oil pools in the bottom and creates a sticky residue rather than a protective layer.
Place the oiled pan upside-down in your preheated oven (put a baking sheet on the rack below to catch any drips). Bake for 1 hour at 450°F, then turn the oven off and let the pan cool completely inside—this takes 2-3 hours. The heat polymerizes the oil, bonding it to the metal surface. One coat provides basic protection; repeat this process 3-6 times for a strong, non-stick seasoning.
Each seasoning layer adds protection and improves non-stick properties. Professional-grade cast iron often has 20+ layers of seasoning built up over years. Your restored pan will gradually develop this patina through regular use and occasional seasoning maintenance. Store your seasoned pan in a dry location, and avoid prolonged water exposure.
Prevention and Long-Term Care
Once you’ve invested time restoring your cast iron, protecting it from future rust is essential. Cast iron care differs significantly from other cookware, requiring intentional maintenance practices. The good news? Proper care is simple and becomes second nature quickly.
Storage environment: Store cast iron in a dry location away from humidity. Basements, bathrooms, and under-sink cabinets are rust nightmares. Instead, choose a kitchen cabinet or shelf where temperature and humidity remain relatively stable. If you live in a humid climate, consider storing cast iron with silica gel packets or in a cabinet with a small dehumidifier. Never store cast iron with the lid on if it’s a Dutch oven—trapped moisture promotes rust.
Cleaning after cooking: Wash cast iron immediately after cooking while it’s still warm. Use hot water and a soft sponge or cloth, avoiding harsh scrubbing that removes seasoning. For stuck-on food, scrub gently with salt and a small amount of oil—the salt acts as a mild abrasive while the oil protects the seasoning. Avoid dishwashers and prolonged soaking, which strip seasoning and promote rust.
Dry your pan immediately and completely after washing. Water left on the surface for even a few minutes begins oxidizing. Place the pan on a warm burner for 30 seconds to evaporate any remaining moisture, then wipe with a paper towel. Some cast iron enthusiasts apply a micro-thin layer of oil after each washing, which provides extra protection in humid climates.
Regular maintenance seasoning: Even well-maintained cast iron benefits from occasional seasoning sessions. Once or twice yearly, repeat the full seasoning process (oiling and oven-baking) to maintain the protective layer. This is especially important if you notice the pan developing a sticky feel or if rust spots appear. Catching rust early and re-seasoning prevents major restoration efforts.
For related cleaning techniques, check out our guides on cleaning gas grills and cleaning grinders, which involve similar mechanical restoration principles. Understanding these broader cleaning methodologies helps develop a comprehensive home maintenance approach. You might also find value in our complete car cleaning guide, which covers protective coatings and surface restoration in depth.
FAQ
Can I use a dishwasher to clean my cast iron pan?
No. Dishwashers are cast iron’s enemy. The hot water, harsh detergents, and prolonged soaking strip seasoning and promote rust formation. Always hand-wash cast iron with mild soap and warm water, drying immediately. Even commercial-grade cast iron with factory seasoning can be damaged by dishwasher cycles.
How long does the electrolysis rust removal process take?
Electrolysis typically requires 4-24 hours depending on rust severity. Light surface rust may clear in 4-8 hours, while heavy rust with deep pitting needs 12-24 hours or longer. Check progress every few hours and stop once rust flakes away easily.
Is white vinegar or apple cider vinegar better for rust removal?
White vinegar (5% acetic acid) is the better choice. Apple cider vinegar contains additional sugars and compounds that can interfere with rust dissolution. Stick with plain white vinegar for consistent, predictable results.
Can I use cooking oil instead of shortening for seasoning?
Most cooking oils work, but vegetable shortening (Crisco) remains the gold standard for cast iron seasoning. It has a higher smoke point than most oils, creates a harder protective layer, and is specifically formulated for this application. Grapeseed and avocado oils are acceptable alternatives, but avoid low-smoke-point oils like olive oil.
What should I do if rust returns after restoration?
Rust returning indicates either inadequate seasoning, storage in a humid environment, or washing practices that strip the protective layer. Address the root cause by re-seasoning the pan, improving storage conditions, or adjusting your cleaning method. If rust returns despite proper care, your storage environment may be too humid—consider a dehumidifier or alternative storage location.
Is pitted cast iron still safe to use?
Yes, pitted cast iron is safe to use even if it has surface pitting. The pitting doesn’t affect food safety or cooking performance. However, deep pitting that creates holes or significantly thins the metal compromises structural integrity. If you can see light through a hole or feel sharp edges, the pan should be retired or repurposed as decoration.
How do I know when my cast iron is properly seasoned?
Properly seasoned cast iron has a dark, matte finish with a slightly slick feel. It shouldn’t be sticky or shiny—excess oil creates a sticky finish. The pan should release food easily when properly heated and seasoned. Build seasoning gradually through repeated applications; professional cast iron often requires 10-20 seasoning cycles.
Can I use rust removal chemicals instead of vinegar or electrolysis?
Commercial rust removers designed for steel may be too aggressive for cast iron. The phosphoric acid in some products can leave residues that are difficult to remove completely. Vinegar, electrolysis, and mechanical methods are safer for cast iron because you can control the process and verify complete removal. Always test any chemical method on a small area first.


