
Cleaning Fresh Eggs: Homesteader Tips Inside
Collecting fresh eggs from your backyard flock is one of the most rewarding aspects of homesteading. However, those beautiful farm-fresh eggs often arrive with dirt, bedding material, and other debris that needs proper removal before storage or use. Unlike commercial eggs that are washed at industrial facilities, homestead eggs require careful hand-cleaning to maintain their protective bloom while ensuring food safety. This guide walks you through everything you need to know about cleaning fresh chicken eggs effectively and safely.
Whether you’re raising chickens for the first time or refining your egg-handling routine, understanding the proper cleaning techniques protects both your eggs and your family’s health. The key is balancing cleanliness with preservation of the natural protective coating that keeps eggs fresh longer. We’ll explore multiple cleaning methods, discuss when to clean versus when to store unwashed, and share professional homesteader techniques that keep your eggs in pristine condition.
Understanding the Egg Bloom and Why It Matters
The egg bloom, also called the cuticle, is a thin protective coating on the outside of every freshly laid egg. This natural layer seals approximately 17,000 pores in the eggshell, preventing bacteria from entering while slowing moisture loss. Understanding this crucial feature is fundamental to proper egg cleaning and storage. When you remove the bloom through improper washing, you compromise the egg’s shelf life and increase contamination risk.
Commercial operations wash eggs with hot water and special detergents, which removes the bloom but allows for longer refrigerated storage due to cold chain management. Homesteaders, however, typically benefit more from preserving the bloom, which enables room-temperature storage for several weeks. This distinction changes your entire cleaning approach. Before you begin cleaning, assess whether your eggs truly need washing or if dry cleaning will suffice.
The bloom is invisible to the naked eye but incredibly effective. Eggs with intact blooms can last 3-4 weeks at room temperature or several months refrigerated. Once the bloom is compromised through wet cleaning, refrigeration becomes essential. Many experienced homesteaders minimize wet cleaning to preserve this natural protection, using dry methods whenever possible. This approach aligns with traditional farming practices and reduces your dependence on refrigeration.
Dry Cleaning Method for Lightly Soiled Eggs
For eggs with minimal soiling—light dust, small bits of bedding, or feather fragments—dry cleaning is your first choice. This method preserves the bloom completely while removing surface debris. Start by using a soft, dry cloth or paper towel to gently wipe the egg. A fine-grit sandpaper (120-150 grit) works exceptionally well for stubborn dried debris without damaging the shell. Rub gently in circular motions, applying minimal pressure.
Some homesteaders prefer specialized egg cleaning pads, which are textured cloths designed specifically for this task. These pads remove surface dirt while respecting the bloom. Alternatively, a soft-bristled toothbrush works well for textured areas or small problem spots. Never use abrasive scouring pads or steel wool, as these damage the shell and remove protective coating. The goal is gentle removal of visible contamination only.
Another effective dry method involves using a pumice stone or fine emery cloth for particularly stubborn spots. Keep pressure light and circular motions smooth. This technique works especially well on eggs with dried mud or caked bedding. Always inspect your work—you should see the glossy shell beneath, not a scratched or dull surface. If dry cleaning isn’t removing the debris after gentle effort, move to wet cleaning rather than scrubbing harder.
Dry cleaning takes just seconds per egg and can be done immediately after collection or batched at the end of the day. Store cleaned eggs in a cool location away from direct sunlight. Many homesteaders keep a small cleaning cloth in their egg collection basket for immediate light cleaning during gathering.
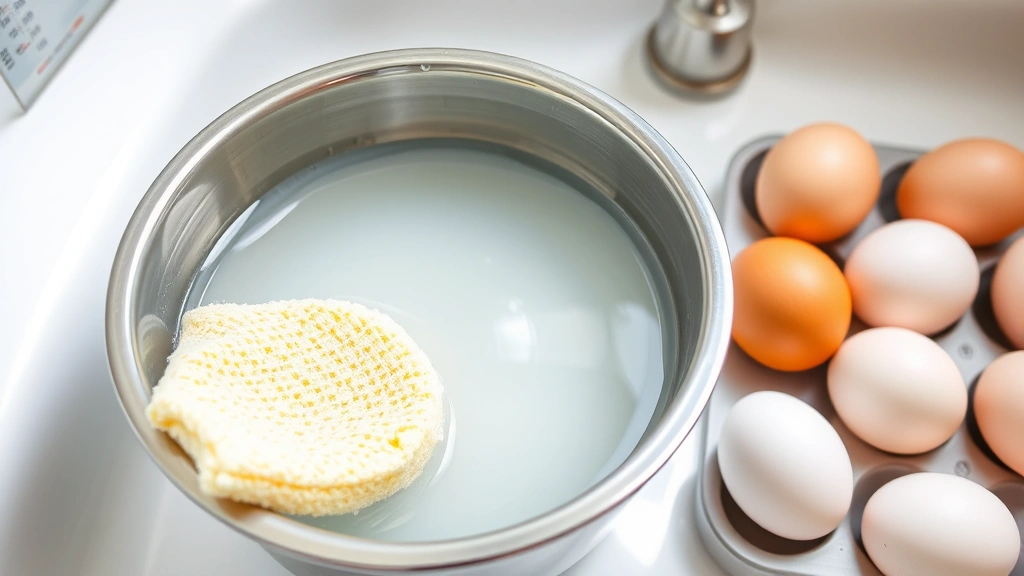
Wet Cleaning: Water Temperature and Technique
When eggs are heavily soiled with feces, mud, or other stubborn debris, wet cleaning becomes necessary. The critical factor here is water temperature. Always use water warmer than the egg itself—ideally 90°F to 120°F. Cold or room-temperature water actually pushes bacteria into the egg through those 17,000 pores, the opposite of your goal. Warm water encourages any bacteria on the surface to move away from pores rather than into them.
Fill a basin with warm water and add a small amount of mild dish soap or specialized egg wash solution. Never use bleach or harsh chemicals, as these can leave residues affecting taste and safety. Submerge eggs gently, using your hands to wipe away debris with light circular motions. Work quickly—eggs shouldn’t soak for more than a few minutes. The combination of warmth and gentle friction removes most contamination without excessive scrubbing.
For particularly stubborn soiling, a soft sponge or cloth works better than your bare hands, providing slightly more scrubbing power while remaining gentle. Focus on problem areas but avoid aggressive scrubbing that damages the shell. Once debris is removed, transfer eggs to a clean rinse basin with warm water at the same temperature. Rinse gently, turning eggs to ensure all soap residue is gone. Soap remaining on shells can affect taste and creates a film that interferes with air exchange.
Dry eggs immediately after rinsing using soft, lint-free cloths or paper towels. Thorough drying is essential—moisture on the shell can encourage bacterial growth and mold. Pat gently rather than rubbing, and ensure no water droplets remain. Wet eggs should be used within a few days or refrigerated immediately, as the cleaning process has compromised the protective bloom.
Some homesteaders use vinegar water (one tablespoon white vinegar per gallon) as a gentle sanitizing rinse after soap washing. This adds an extra safety layer while remaining food-safe. The vinegar smell dissipates quickly and doesn’t affect egg flavor. This method is particularly useful if you’re selling eggs or serving immunocompromised individuals.
Tools and Supplies You’ll Need
Assembling the right supplies makes egg cleaning efficient and effective. Start with soft cloths and paper towels—microfiber cloths work exceptionally well as they’re gentle yet effective at removing debris. Keep several in your collection area for immediate light cleaning. Fine-grit sandpaper (120-150 grit) or specialized egg cleaning pads should be part of your regular supplies.
For wet cleaning, you’ll need two basins—one for washing and one for rinsing. Stainless steel or food-grade plastic works best; avoid materials that harbor bacteria. A soft sponge, non-abrasive scrub brush, or soft-bristled toothbrush provides gentle scrubbing power. Mild dish soap designed for hand-washing (not automatic dishwashers) is appropriate; specialty egg wash products are available but unnecessary for most homesteaders.
Optional but helpful supplies include an egg candler for inspecting shell integrity before cleaning, a drying rack or basket lined with soft cloth, and a thermometer for monitoring water temperature during wet cleaning. White vinegar for sanitizing rinses is inexpensive and highly effective. A dedicated apron with pockets keeps supplies within reach during collection and cleaning sessions.
Consider creating a cleaning station in your coop area or nearby utility space. This keeps supplies organized and makes daily cleaning quick and convenient. A small shelf holding your cloths, sandpaper, brushes, and basins creates an efficient workflow. If you’re cleaning many dozens of eggs regularly, this organization becomes essential for maintaining consistent quality and food safety.
When related to broader homestead cleaning tasks, similar principles apply. Just as you’d learn about how to clean ceramic pans with proper techniques, egg cleaning requires understanding your specific materials and methods. And if you’re expanding your homestead knowledge, exploring DIY Nest Hub Blog offers countless related homesteading topics.
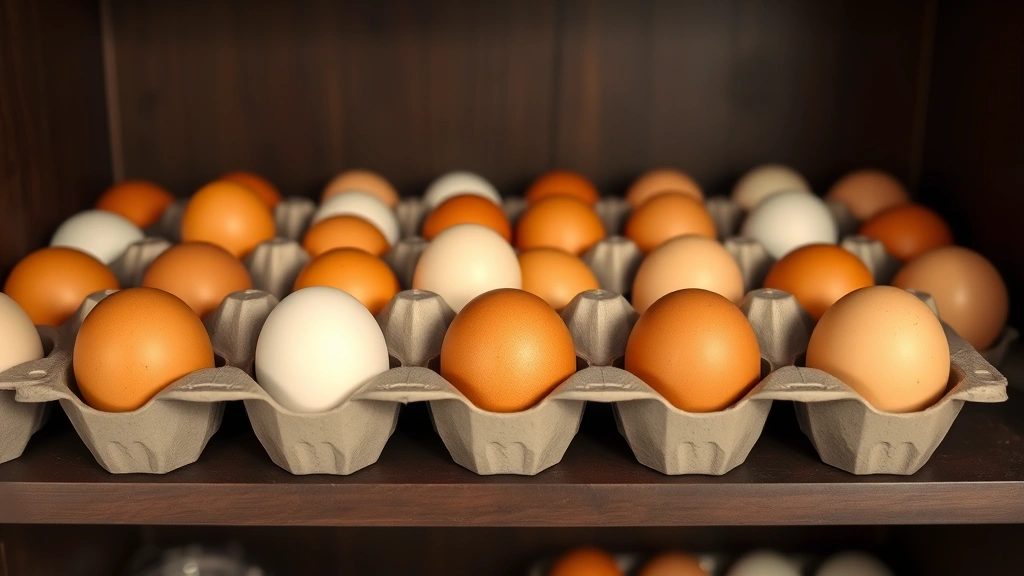
Storage Best Practices After Cleaning
How you store cleaned eggs significantly impacts their longevity and safety. Eggs cleaned with the dry method and possessing intact bloom can be stored at room temperature (55-75°F) for 3-4 weeks. Keep them in a cool, dark location away from direct sunlight and heat sources. A pantry, basement shelf, or even a cool closet works well. Avoid the kitchen counter near appliances or windows.
Wet-cleaned eggs have compromised bloom and require refrigeration. Store them in the coldest part of your refrigerator (not the door, where temperature fluctuates) at 35-40°F. Properly refrigerated wet-cleaned eggs remain safe for 4-5 weeks. Always store eggs pointed-end down to keep the air cell at the top, which slows moisture loss and maintains freshness.
Use egg cartons rather than baskets or bowls for storage, as cartons provide protection from temperature fluctuations and physical damage. Label your eggs with collection date and cleaning method if you’re mixing storage approaches. This prevents confusion and helps you use older eggs first. Keep eggs separate from strong-smelling foods, as shells are porous and can absorb odors.
Never wash eggs and then leave them at room temperature. This combination creates food safety risks. Choose one path: dry-clean and store at room temperature with intact bloom, or wet-clean and refrigerate immediately. Many homesteaders prefer dry cleaning specifically because it preserves room-temperature storage flexibility and reduces energy consumption.
For extended storage beyond several weeks, consider water-glassing—an ancient preservation method where eggs are stored in a food-grade mineral oil or water-glass solution. This creates an airtight seal that preserves eggs for months. While more involved than simple storage, water-glassing is excellent for homesteaders wanting to preserve abundant spring and early summer production for winter use.
Common Mistakes to Avoid
Using cold water: This is the most dangerous mistake. Cold water pushes bacteria into eggs rather than away from them. Always use warm water (90-120°F) for any wet cleaning. If you don’t have a thermometer, water should feel comfortably warm to your wrist—not hot, but definitely not cool.
Aggressive scrubbing: Rough handling damages shells and removes bloom. Remember that gentle circular motions accomplish more than forceful scrubbing. If debris isn’t coming off gently, the egg probably isn’t heavily soiled enough to require wet cleaning—return to dry methods.
Soaking eggs: Extended submersion in water increases bacterial penetration risk. Keep wet-cleaning sessions brief—2-3 minutes maximum. In and out with gentle motion is the goal, not a bath.
Mixing cleaned and uncleaned eggs: Store them separately to maintain proper temperature management. Uncleaned eggs with intact bloom can stay room-temperature while wet-cleaned eggs need refrigeration immediately.
Using harsh chemicals: Bleach, antibacterial soaps, and strong detergents leave residues affecting taste and safety. Mild dish soap and vinegar are all you need. This also applies to your broader cleaning routines—just as how to clean feather pillows requires gentle approaches, eggs demand the same respect.
Ignoring water temperature: This deserves emphasis—water temperature is your primary food safety tool. Invest in a simple kitchen thermometer if you don’t have one. This single tool prevents most egg-cleaning problems.
Storing wet-cleaned eggs at room temperature: Once bloom is compromised, refrigeration is non-negotiable. Don’t take shortcuts on this safety practice.
FAQ
Should I wash eggs immediately after collection or wait?
Light dry cleaning can happen immediately, but most homesteaders batch wet cleaning at day’s end. This saves time and allows you to assess which eggs truly need wet cleaning versus dry methods. Eggs can wait 24 hours safely before cleaning if stored in a cool location.
Can I use antibacterial soap for egg cleaning?
No. Antibacterial soaps are unnecessary and potentially harmful, leaving residues on shells. Mild dish soap designed for hand-washing is sufficient and safer. The warmth of your water and gentle mechanical action provide adequate cleaning without chemicals.
Why do some eggs have a rough texture?
Rough texture indicates the hen’s body deposited calcium during shell formation, creating a textured surface. This is completely normal and doesn’t require special cleaning. Dry methods work perfectly on textured shells.
How do I know if an egg is dirty enough to require wet cleaning?
If dry cleaning removes the debris within 10-15 seconds of gentle effort, that’s sufficient. If debris persists after gentle dry cleaning, move to wet methods. Trust your judgment—heavily soiled eggs with visible feces or mud clearly need washing.
Can I use the same water for multiple eggs when wet cleaning?
Change water after every 6-8 eggs or when it becomes noticeably dirty. Fresh warm water ensures effective cleaning and reduces bacteria transfer between eggs. This is a minor inconvenience that significantly improves food safety.
What temperature should my drying area be?
A cool location (65-75°F) is ideal for drying. Avoid heat sources that might crack shells through rapid moisture loss. Air drying at room temperature takes 5-10 minutes and is perfectly adequate.
Do I need special egg cleaning products?
No. Mild dish soap and warm water are completely adequate and more economical than specialized products. Save money and use what you likely already have in your kitchen.
How long can room-temperature eggs last?
Dry-cleaned eggs with intact bloom last 3-4 weeks at room temperature (55-75°F). Some sources suggest up to 5 weeks for very fresh eggs in optimal conditions, but 3-4 weeks is the reliable guideline. Refrigerated eggs last 4-5 weeks after wet cleaning.


