A clean fridge water dispenser is essential for maintaining safe drinking water and preventing bacterial growth in your refrigerator. Over time, mineral deposits, mold, and sediment accumulate inside the water lines and dispensing mechanism, compromising both water quality and appliance performance. This comprehensive guide walks you through professional-grade cleaning techniques that will restore your water dispenser to like-new condition.
Whether you own a French door model, side-by-side refrigerator, or a bottom-freezer unit, the principles of cleaning remain consistent. Regular maintenance not only ensures healthier drinking water for your family but also extends the lifespan of your refrigerator’s water system. We’ll cover everything from basic daily cleaning to deep-cleaning procedures that eliminate stubborn buildup.
Why Regular Cleaning Matters
Your refrigerator’s water dispenser is a breeding ground for bacteria, mold, and mineral buildup. The moist environment inside water lines creates ideal conditions for microbial growth, particularly if the system isn’t regularly flushed. Studies from the NSF International have shown that refrigerator water dispensers can harbor harmful pathogens if not properly maintained.
Mineral deposits, commonly called limescale, accumulate from tap water minerals like calcium and magnesium. This buildup restricts water flow, reduces dispenser efficiency, and affects water taste. Additionally, mold spores thrive in the dark, damp interior of water lines, potentially contaminating every glass of water you dispense.
Regular cleaning prevents these problems before they escalate. By establishing a consistent maintenance routine similar to how you’d approach cleaning fridge coils, you ensure your water system remains hygienic and functional. Most manufacturers recommend cleaning your water dispenser every month, with filter replacements every six months.
Tools and Materials You’ll Need
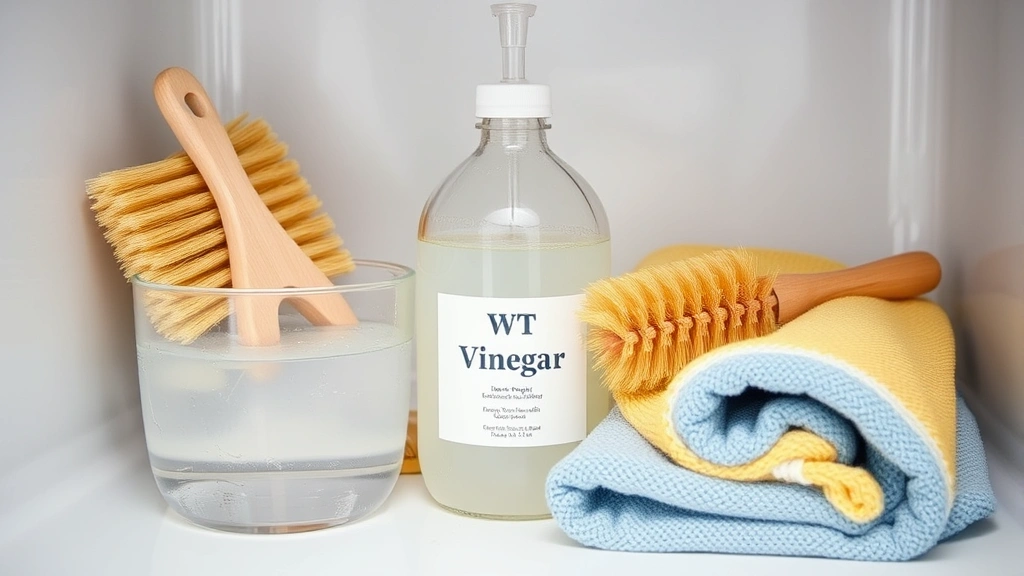
Before starting your cleaning project, gather these essential supplies:
- White vinegar – Natural disinfectant and mineral deposit remover
- Soft-bristled brushes – Various sizes for tight spaces
- Microfiber cloths – Lint-free cleaning without scratching
- Distilled water – Prevents additional mineral deposits
- Sponges – Soft and non-abrasive varieties
- Bucket or large bowl – For soaking dispenser parts
- Screwdriver set – May be needed to access internal components
- Replacement water filter – Keep spares on hand
- Small flashlight – Inspect hard-to-see areas
- Plastic tubing cleaner – Specialized tool for water lines
Avoid using harsh chemical cleaners or abrasive materials that could damage plastic components or leave residue in your water system. Natural, food-safe cleaning solutions work best for this application.
Step-by-Step Cleaning Process
Follow this systematic approach to thoroughly clean your fridge water dispenser:
Step 1: Prepare Your Refrigerator
Begin by unplugging your refrigerator or turning off its water supply at the source. This prevents accidental water discharge and ensures safety while working with electrical components. Allow any residual water to drain by opening the dispenser and letting it run for 10-15 seconds.
Step 2: Remove and Soak Dispenser Parts
Most refrigerators have removable drip trays and dispenser covers. Carefully remove these components by gently pulling or unscrewing them. Place all removable parts in a bucket filled with equal parts white vinegar and distilled water. Let them soak for 30 minutes to dissolve mineral deposits and kill bacteria.
Step 3: Clean the Dispenser Spout
Using a soft-bristled brush dipped in vinegar solution, scrub the dispenser spout thoroughly. Pay special attention to crevices where mold tends to hide. Use a small brush to reach into tight areas. Rinse with distilled water and dry with a microfiber cloth to prevent water spots.
Step 4: Disinfect the Dispenser Slot
The horizontal slot where cups sit during dispensing accumulates significant buildup. Dip a cloth in vinegar solution and wipe this area multiple times. For stubborn deposits, use a plastic scraper to gently remove mineral buildup without damaging the surface. Follow up with distilled water rinses.
Step 5: Flush the System
Reconnect your water supply and run the dispenser for 3-5 minutes to flush the system. This removes loosened debris and any cleaning solution residue. You may notice discolored water initially—this is normal and indicates the system is purging buildup. Continue flushing until water runs clear.
Deep Cleaning the Water Line
For comprehensive sanitation, periodically perform deep cleaning of internal water lines. This process requires more time but delivers superior results.
Accessing the Water Line
Locate your refrigerator’s water line connection point, typically found behind the unit or in the basement if you have a basement-level water supply. Most connections use standard plastic tubing. Before disconnecting anything, place a bucket underneath to catch residual water. Check your refrigerator’s manual for specific instructions, as designs vary significantly between manufacturers.
Vinegar Flush Method
Fill a large syringe or turkey baster with white vinegar. Disconnect the water line from the refrigerator side (not the supply side) and carefully inject vinegar directly into the tubing. Allow it to sit for 15-20 minutes, then flush with distilled water. This dissolves mineral deposits and kills bacteria throughout the line.
Similar to how you’d approach cleaning an evaporator coil, patience is key. Don’t rush the process—allowing solutions to work provides better results than aggressive scrubbing.
Line Replacement Consideration
If your water line is more than 5-7 years old or shows visible discoloration despite cleaning efforts, consider replacing it entirely. Tubing degrades over time and can harbor stubborn bacterial colonies. Replacement tubing costs $15-40 and takes 15-20 minutes to install, providing peace of mind regarding water safety.
Replacing Water Filters
Water filter replacement is crucial for maintaining clean water dispensers. Filters capture sediment, chlorine, and other contaminants, but they become saturated over time.
Filter Replacement Schedule
Most manufacturers recommend replacing water filters every 6 months, though this depends on your water quality and usage frequency. If you have hard water, replace filters every 3-4 months. High-usage households may need more frequent replacements. Check your filter housing for replacement indicators—many models include a status light that alerts you when replacement is necessary.
Installation Process
Locate your filter housing, typically found inside the refrigerator or behind an access panel. Consult your refrigerator’s manual for exact location. Turn off the water supply, then carefully remove the old filter by turning it counterclockwise. Rinse the filter housing with distilled water to remove any sediment. Install the new filter by turning it clockwise until snug, then run water through the dispenser for 2-3 minutes to remove air bubbles and flush the system.
Using quality replacement filters from reputable manufacturers ensures optimal performance. Check the NSF standards for water filters to select certified products that meet safety standards.
Maintenance Schedule
Establishing a regular maintenance routine prevents problems before they develop. Here’s a recommended schedule:
Weekly Tasks
- Wipe the dispenser spout and slot with a damp cloth
- Run water through the dispenser for 10 seconds to flush the line
- Clean the drip tray of any accumulated water or debris
Monthly Tasks
- Soak dispenser parts in vinegar solution for 30 minutes
- Deep clean the dispenser spout with a soft brush
- Inspect for visible mold or discoloration
- Check filter status light for replacement needs
Quarterly Tasks
- Perform a full system flush with vinegar solution
- Inspect water line connections for leaks or damage
- Clean behind and underneath the refrigerator
Annual Tasks
- Replace water filter (or more frequently if needed)
- Consider replacing water tubing if showing signs of wear
- Have a professional inspect the water system if issues persist
Consistency matters more than intensity. Regular light cleaning prevents the need for aggressive deep cleaning. Think of it as preventive maintenance similar to maintaining your home’s security systems—regular attention prevents costly problems.
Troubleshooting Common Issues
Slow Water Dispenser
If water flows slowly, mineral deposits likely clog the system. Run a vinegar flush as described in the deep cleaning section. If flow doesn’t improve, your filter may be saturated and need replacement. Check the Appliance 411 troubleshooting guide for model-specific issues.
Cloudy or Discolored Water
Cloudiness often indicates air bubbles in the system—run water for 2-3 minutes and they should clear. Persistent discoloration suggests mineral deposits or filter saturation. Perform a system flush and replace the filter. If discoloration returns quickly, your water supply may have unusual mineral content requiring a water quality test.
Musty or Off-Taste Water
Mold or bacterial growth causes unpleasant tastes and odors. Perform a thorough vinegar flush of the entire system, including water lines. Replace the water filter. If the problem persists after these steps, consider having your water tested by a professional laboratory. Some municipalities offer free water quality testing—contact your local water utility for information.
Leaking Water
Small drips are often caused by a full drip tray or loose connections. Empty the tray and check all water line connections for tightness. If leaking continues, the water supply line may be cracked or the internal valve may be faulty. Turn off the water supply and contact a professional technician or your refrigerator manufacturer’s service line.
Water Dispenser Won’t Activate
Check that the refrigerator is properly plugged in and the water supply valve is open. Some models have a lock feature preventing accidental dispensing—verify this isn’t activated. If the dispenser still doesn’t work, the solenoid valve may be faulty and require professional replacement.
For persistent problems that home cleaning doesn’t resolve, consult your refrigerator’s manual or contact the manufacturer. Many offer free diagnostic support via phone or online chat. Some issues require professional service, and attempting complex repairs could void your warranty.
FAQ
How often should I clean my fridge water dispenser?
Clean the dispenser spout and slot weekly with a damp cloth. Perform deep soaking of removable parts monthly. Do a complete system flush with vinegar every 3 months. These intervals may need adjustment based on your water quality and usage patterns.
Is white vinegar safe for cleaning water dispensers?
Yes, white vinegar is food-safe and highly effective for cleaning. It dissolves mineral deposits, kills bacteria and mold, and leaves no harmful residue when properly rinsed. Avoid using cleaning vinegar (which has higher acidity) as it may damage certain components. Always rinse thoroughly with distilled water after vinegar cleaning.
Can I use commercial cleaning products on my water dispenser?
Most commercial cleaners aren’t food-safe for water dispensers. Stick with natural solutions like white vinegar or specialized refrigerator water system cleaners from the manufacturer. If using commercial products, verify they’re rated safe for potable water systems and rinse extremely thoroughly.
What type of water should I use for rinsing?
Always use distilled water for rinsing to avoid introducing new mineral deposits. Tap water contains minerals that can redeposit on clean surfaces. Distilled water is inexpensive—a gallon costs $1-3 and lasts through multiple cleaning sessions.
How do I know if my water filter needs replacement?
Most refrigerators have status lights or displays indicating filter condition. Consult your manual for your model’s specific indicator. General signs include reduced water flow, cloudy water, or off-taste. Most filters need replacement every 6 months, though high-mineral water areas may require more frequent changes. Check the manufacturer’s website for your refrigerator’s specific filter specifications.
Is it normal for water to taste different after cleaning?
Yes, slight taste changes are normal after cleaning as the system flushes residual vinegar and debris. Run water through the dispenser for 3-5 minutes after cleaning. If odd taste persists beyond this flushing period, replace the water filter. Persistent taste issues warrant having your water tested by a professional laboratory.
Can I prevent mold from growing in my water dispenser?
Mold prevention involves regular cleaning and keeping the system dry when not in use. Run water through the dispenser daily to keep lines flowing. Ensure the drip tray doesn’t sit full of stagnant water. Store your refrigerator in a location with stable temperature and humidity. Monthly vinegar flushes significantly reduce mold risk. If you live in a particularly humid climate, consider increasing cleaning frequency to every 2-3 weeks.
What should I do if I find visible mold inside my dispenser?
Don’t panic—mold in water dispensers is common and easily addressed. Immediately perform a complete system flush with vinegar solution as described in the deep cleaning section. Replace your water filter. Run water through the dispenser for 5 minutes. If mold returns within a week, the problem may be in inaccessible system components, requiring professional service.
Visit the DIY Nests Hub Blog for more home maintenance guides and comprehensive cleaning strategies for all your household appliances. Our expert tips cover everything from routine upkeep to advanced troubleshooting.


