Clean Window AC: Technician-Approved Guide
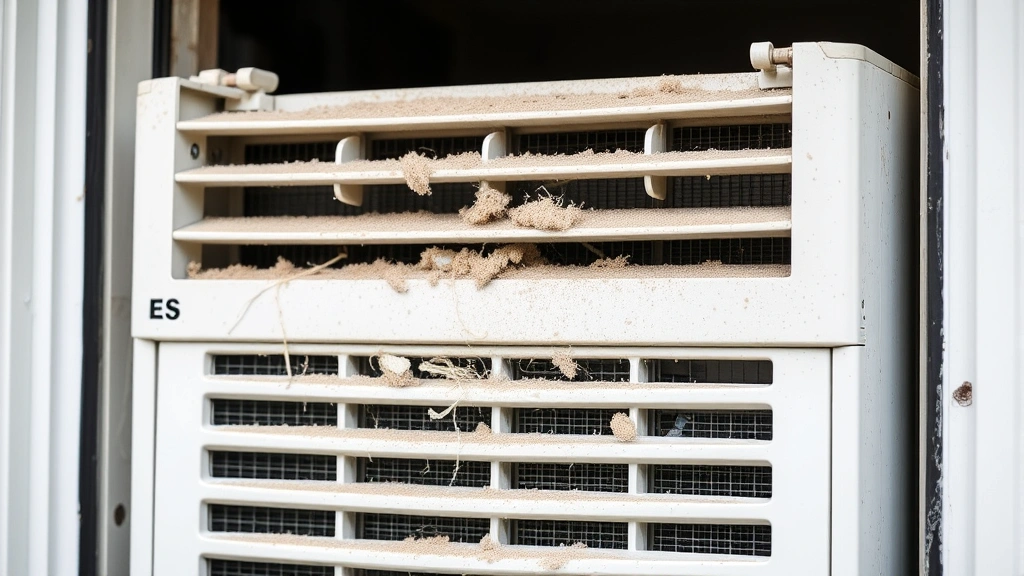
Window air conditioning units work hard to keep your home cool during hot months, but they accumulate dust, debris, and allergens that reduce efficiency and air quality. Regular cleaning is essential for maintaining peak performance, extending unit lifespan, and ensuring your system runs safely. Unlike professional HVAC maintenance, basic window AC cleaning is a straightforward DIY task that requires minimal tools and takes about 30-60 minutes.
This comprehensive guide walks you through every step of cleaning your window AC unit using methods approved by HVAC technicians. Whether you’re dealing with visible dirt buildup or simply want to optimize cooling performance, you’ll learn professional techniques that keep your unit running smoothly without voiding warranties or causing damage. We’ll cover safety protocols, the best cleaning solutions, and troubleshooting tips to help you maintain peak efficiency year-round.
Safety First: Pre-Cleaning Preparation
Before touching any part of your window AC unit, disconnect it completely from electrical power. Unplug the unit from the outlet—never work on a live appliance, even if you believe the power is off. This prevents electrocution hazards and protects both you and your equipment. Allow the unit to cool for at least 15-20 minutes after running, as internal components can be extremely hot and cause burns.
If your window AC unit is permanently installed with hardwired connections, turn off the circuit breaker controlling that unit. Double-check that power is truly disconnected by attempting to turn it on—it should not respond. Wear safety glasses to protect your eyes from dust particles and debris that will dislodge during cleaning. Consider wearing a dust mask if you have respiratory sensitivities, as accumulated dust can trigger allergies. Work on a stable surface like a sturdy table or workbench rather than a windowsill, and ensure you have adequate lighting throughout the process.
Tools and Materials You’ll Need
Gathering the right tools before starting ensures an efficient cleaning process. You’ll need a Phillips head screwdriver for removing the front cover and filter access panels. A soft-bristled brush—ideally an old toothbrush or a specialized AC coil brush—helps dislodge stubborn dust without damaging delicate fins. A vacuum with a brush attachment removes loose debris quickly and prevents it from spreading throughout your workspace.
For cleaning solutions, white vinegar and distilled water create an effective, non-toxic solution for most window AC units. Mix equal parts vinegar and water in a spray bottle for coil cleaning. Alternatively, you can purchase commercial AC coil cleaner from hardware stores—products recommended by EPA-certified HVAC professionals work safely on aluminum fins. Have clean, lint-free cloths or microfiber towels available for wiping components. A fin comb (available at most hardware stores) straightens bent condenser fins that reduce airflow. Compressed air in a can helps blast debris from tight spaces, though a manual hand pump works equally well. Finally, keep a small container of refrigerant-safe lubricant on hand if you notice squeaking fans after cleaning.
How to Remove Your Window AC Unit Safely
Removing your window AC unit requires careful handling to avoid damage. First, unplug the unit and let it cool completely. Most window units have mounting brackets securing them to the window frame—locate these by examining the sides and bottom of the unit. Some models have release tabs or clips that unlock the unit from its mounting bracket; consult your manual if unsure.
Before removing the unit from the window, take a photo of the current setup so you can reinstall it identically. Have a helper support the unit’s weight while you disconnect any brackets—window AC units are heavy (typically 50-100 pounds) and falling units cause serious injuries and property damage. Gently slide the unit toward you while your helper supports it from outside the window. Place it on a sturdy, flat work surface immediately. Never let a window AC unit dangle from its power cord or hang partially out a window. If your unit is permanently installed without a removable mounting bracket, you can clean many components without full removal—see our section on deep cleaning interior components for in-place cleaning techniques.
Cleaning the Front Cover and Filter
The front cover and filter trap the most visible dirt and are the easiest components to clean. Locate the filter access panel—on most units, this is a plastic or metal cover on the front facing your room. Some models have a removable filter you can lift straight out; others have clips or latches you’ll need to release with a screwdriver.
Vacuum the filter thoroughly using your brush attachment to remove surface dust. If the filter is extremely dirty, rinse it gently under warm running water from the sink, letting water flow in the direction of the fins. Never use high-pressure water or spray forcefully against the fins, as this bends them and reduces efficiency. For stubborn dirt, soak the filter for 15-20 minutes in warm water with a few drops of dish soap, then rinse thoroughly and allow it to air dry completely before reinstalling. The front cover can be wiped with a damp cloth or rinsed under warm water. Allow both the filter and cover to dry completely—installing wet components can damage electrical parts and promote mold growth.
Deep Cleaning Interior Components
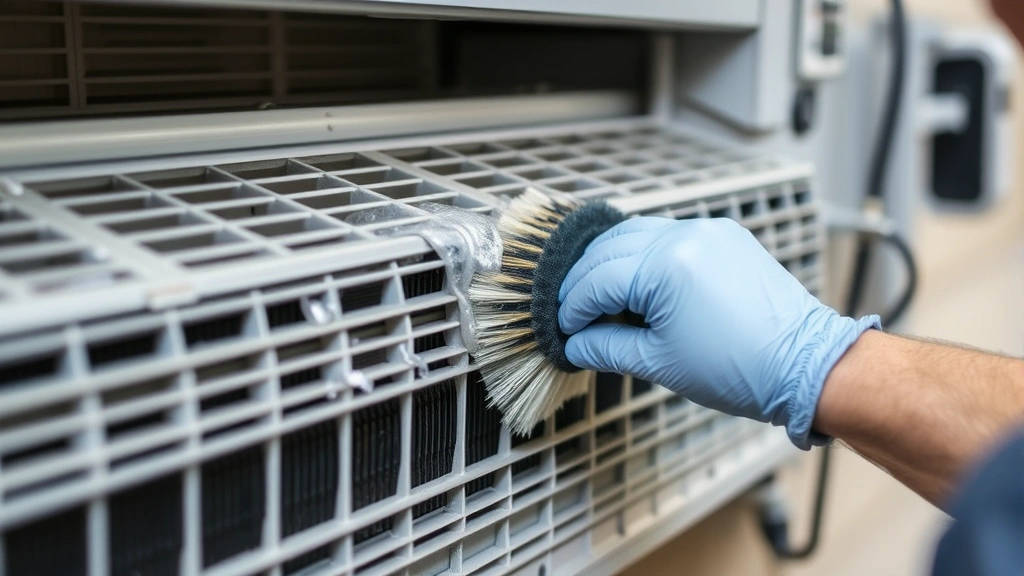
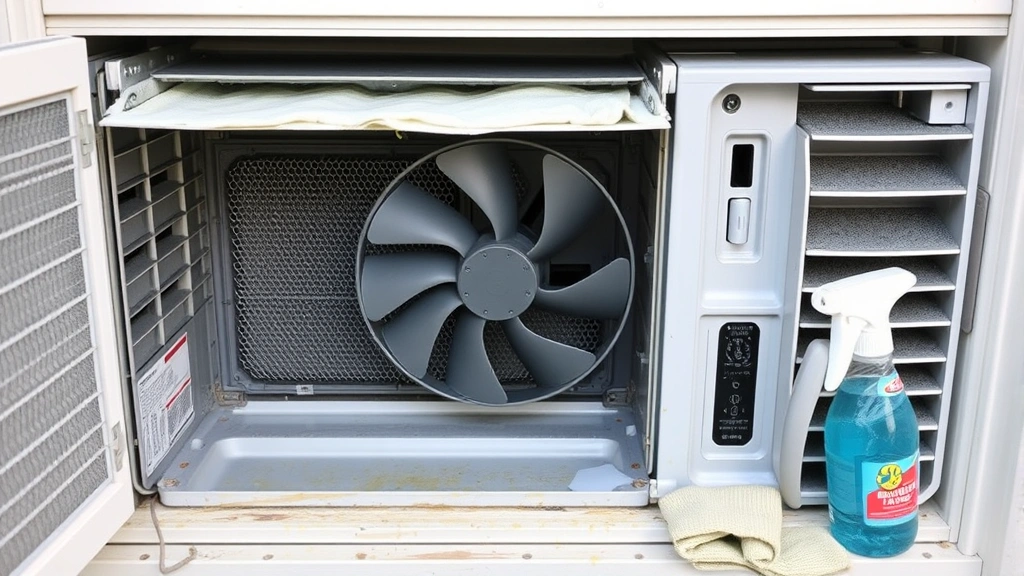
Once you’ve accessed the interior, you’ll see the evaporator coils (the cold side that cools air) and various internal components. These accumulate dust and debris that reduces cooling efficiency. Use your soft-bristled brush or old toothbrush to gently brush away dust from the evaporator coils. Work carefully to avoid bending the delicate aluminum fins. Vacuum up dislodged debris immediately using the brush attachment.
For the fan blades, use a damp cloth to wipe each blade individually. Compressed air works excellently for blowing dust from tight areas around the motor and mounting brackets. Never use water on electrical components like motors, capacitors, or the control board. If you notice visible mold growth (dark spots or discoloration on coils), spray the affected area lightly with your vinegar-water solution and allow it to air dry. The acidity kills mold spores without damaging components. For severe mold, commercial AC coil cleaner approved by ASHRAE standards provides stronger antimicrobial action.
Inspect the drain pan—a small reservoir at the unit’s bottom that collects condensation. Drain pans often contain standing water that grows bacteria and mold. Empty any water, scrub the pan with your brush, and rinse thoroughly. If the drain hole is clogged, clear it carefully with a toothpick or small wire. A clogged drain pan causes water to back up and potentially leak into your wall or create mold problems. Run your vinegar-water solution through the drain pan to sanitize it before reinstalling the unit.
Cleaning the Condenser Coils
The condenser coils (the outdoor-facing side) are where your window AC unit releases heat to the outside air. These coils become heavily soiled with outdoor dust, pollen, and debris, significantly reducing cooling efficiency. If your unit is removed from the window, you have excellent access to these coils.
Start by vacuuming both sides of the coils with your brush attachment, working from inside toward outside to push debris away from the unit. For stubborn buildup, spray your vinegar-water solution lightly onto the coils and allow it to sit for 5-10 minutes. The acetic acid in vinegar dissolves mineral deposits and loosens dirt. Gently brush the coils with your soft-bristled brush, working in the direction of the fins. Vacuum again to remove loosened debris. For heavily soiled coils, commercial AC coil cleaner provides stronger cleaning action—follow product instructions carefully, as some formulations require specific application techniques.
After cleaning, inspect the condenser fins for bending or damage. Bent fins restrict airflow and reduce cooling performance. If you find bent fins, use your fin comb (a specialized tool that costs $10-20 at hardware stores) to straighten them. Gently comb the fins in the direction they naturally face, working carefully to avoid further bending. This simple step can restore 5-10% of lost cooling efficiency in units with damaged fins. Allow all coils to air dry completely before reinstalling the unit.
Reinstalling Your Window AC Unit
Before reinstalling, ensure all components are completely dry—moisture near electrical parts causes shorts and safety hazards. Verify that the filter is reinstalled correctly and the front cover is securely fastened. Check that all internal components like fan blades move freely and aren’t obstructed by debris.
With your helper supporting the unit’s weight, carefully slide it back into the window opening, aligning it with the mounting bracket. Secure all mounting brackets and latches according to your unit’s manual. Ensure the unit is level—a tilted unit allows condensation to accumulate inside the case rather than draining properly. Most window units should tilt slightly toward the outside to encourage proper drainage. Test the window seal around the unit; gaps allow hot air to leak inside, reducing cooling efficiency. Add foam weatherstripping if gaps exist around the sides.
Once the unit is fully installed and secured, plug it in and run it for 15-20 minutes to verify normal operation. You should feel cold air flowing from the front vents, hear normal fan operation without unusual squeaking or rattling, and see water draining from the exterior drain hole. If you notice weak airflow, unusual noises, or water leaking indoors, turn off the unit immediately and troubleshoot before continuing to use it.
Maintenance Schedule and Prevention Tips
Regular maintenance prevents the need for intensive cleaning and keeps your unit running efficiently. Change or clean your filter every 2-4 weeks during cooling season—this is the single most important maintenance task. A clogged filter forces your compressor to work harder, increasing energy costs and reducing lifespan. Monthly filter cleaning takes just 5 minutes and dramatically improves performance.
Perform a basic exterior coil inspection every month during cooling season. If you notice visible dust accumulation on the outdoor-facing side, spray it gently with your garden hose to rinse away surface debris. This 2-minute task prevents heavy buildup that requires intensive cleaning. At the start of each cooling season, perform a complete cleaning as detailed in this guide. At the end of cooling season before storing your unit, clean it thoroughly and ensure it’s completely dry before covering it for winter storage.
To prevent rapid dust accumulation, keep windows and surrounding areas clean. Seal gaps around your window unit to prevent outdoor dust from entering. If you have pets, additional cleaning may be necessary as pet hair accumulates on filters faster. Consider running your unit with the window slightly cracked to allow fresh air circulation, which reduces indoor dust concentration. Avoid placing your AC unit in direct sunlight if possible—units operating in shade run more efficiently and last longer than those in hot sun.
For apartments or situations where you can’t remove your window unit, many of these cleaning steps still apply. You can clean the front filter, wipe accessible interior components, and spray coils with cleaning solution without removing the unit. The process takes longer and is less thorough, but regular in-place cleaning prevents severe buildup. Learn more about specialized filter cleaning techniques that apply to various household appliances, or explore our comprehensive vinegar and baking soda cleaning guide for non-toxic solutions applicable to many home systems.
FAQ
How often should I clean my window AC unit?
Clean or change your filter every 2-4 weeks during cooling season. Perform a complete deep cleaning at the start of each cooling season and again mid-season if you live in a dusty area. Monthly exterior coil rinsing with your garden hose prevents heavy buildup requiring intensive cleaning.
Can I use a pressure washer on my window AC unit?
Never use a pressure washer on window AC units—high-pressure water damages delicate condenser fins, bends them, and forces water into electrical components causing shorts and failure. Gentle garden hose spray or manual rinsing with a soft brush is safe; high pressure is dangerous and unnecessary.
What if my window AC unit leaks water after cleaning?
Water leaks usually indicate a clogged drain pan or drain hole. Check that the drain pan is empty and the drain hole isn’t blocked. Ensure the unit tilts slightly toward the outside. If leaking continues, the unit may have internal damage requiring professional service. Never operate a leaking unit indoors as water damage spreads to walls and insulation.
Is vinegar safe for all AC components?
Vinegar-water solution is safe for coils, fins, and drain pans, but never spray it directly on electrical components like motors, capacitors, or control boards. The acidity doesn’t damage aluminum, copper, or plastic components, making it ideal for coil cleaning. For stubborn mineral deposits, commercial AC coil cleaner provides stronger action while remaining component-safe.
How much can cleaning improve cooling efficiency?
Regular filter maintenance alone improves efficiency by 5-15%. Deep coil cleaning and fin straightening can restore another 10-20% of lost efficiency in heavily soiled units. Combined maintenance can reduce energy costs by 20-30% compared to neglected units, paying for cleaning supplies many times over through lower electricity bills.
Can I clean my window AC without removing it?
Yes, you can clean many components in-place, though removal allows more thorough cleaning. You can access and clean the front filter, interior components, and spray coils with cleaning solution without removal. However, exterior coil cleaning and fin straightening require removal for proper access and effectiveness.
Should I call a professional instead of cleaning myself?
Professional HVAC cleaning costs $150-300 per unit and is unnecessary for basic maintenance. DIY cleaning using this guide provides equally effective results for routine maintenance. Call professionals only if you notice refrigerant leaks, electrical damage, compressor failure, or other issues beyond standard cleaning and maintenance.


