Build a Shed? Expert’s 6-Week Timeline
Building a shed is one of the most rewarding DIY projects you can tackle, combining practical skill-building with tangible results. Whether you’re looking to add storage for garden tools, create a workshop space, or build a backyard retreat, understanding the realistic timeline is crucial for planning and execution. Most homeowners can complete a functional shed in 6 weeks, though variables like weather, experience level, and design complexity can extend or compress this schedule significantly.
The 6-week framework breaks down into distinct phases: planning and preparation (1 week), foundation work (1 week), framing (1.5 weeks), roofing and weatherproofing (1 week), and finishing touches (1.5 weeks). This guide walks you through each phase with expert insights, helping you understand what to expect and how to optimize your timeline for success.
Week 1: Planning, Permits & Site Preparation
The first week is arguably the most critical, though it requires minimal physical labor. Begin by selecting your shed location, considering factors like drainage, sunlight exposure, proximity to property lines, and accessibility for future maintenance. Check local International Building Code (ICC) regulations and municipal zoning requirements, as many jurisdictions require permits for structures over 100-200 square feet.
Contact your local building department to understand permit requirements in your area. Some regions mandate inspections at foundation, framing, and completion stages. Obtaining permits upfront—typically a 3-5 day process—prevents costly violations or teardowns later. While waiting for approvals, finalize your design or purchase shed plans. Consider whether you want a simple 8×10 structure (faster, easier) or a more complex design with lofts or windows.
During this week, also gather tools and materials. Create a detailed materials list including framing lumber, roofing materials, fasteners, and weatherproofing products. Order long-lead items like metal roofing or specialty windows early. Clear and level your site, removing debris, vegetation, and obstacles. If the ground is uneven, mark areas requiring excavation or fill. This preparation directly impacts how smoothly subsequent weeks proceed.
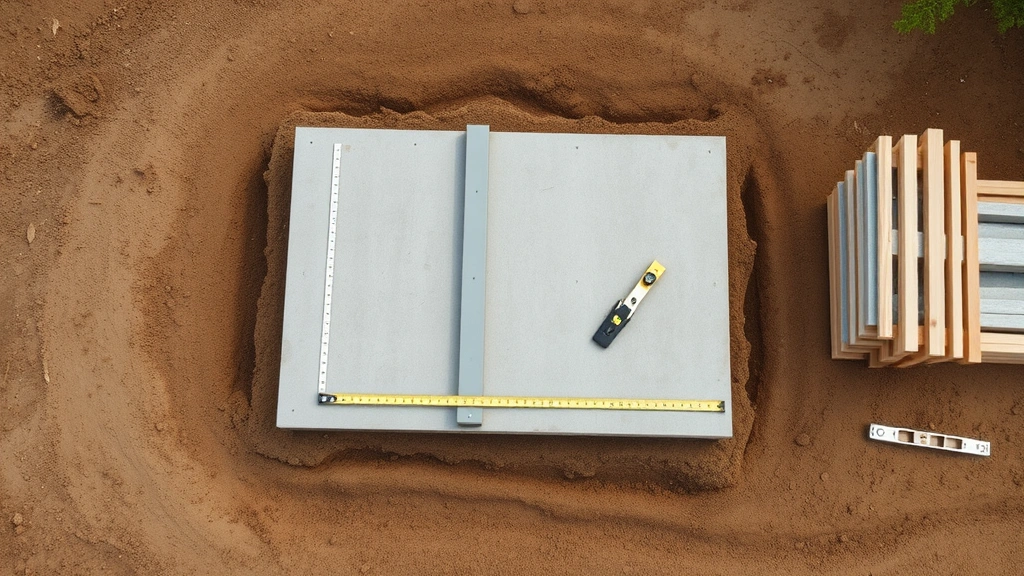
Week 2: Foundation Installation
A solid foundation prevents structural problems and extends your shed’s lifespan. The most common approaches for DIY builders are concrete pad foundations, concrete pier posts, or gravel/paver bases for smaller structures. Concrete pads require 3-7 days to cure fully, so starting early in week 2 ensures readiness for framing by week 3.
If pouring concrete, rent a concrete mixer or order ready-mix delivery. Prepare forms using lumber, ensure proper slope for drainage (typically 1/8 inch per foot), and pour the pad. For pier-post foundations, dig holes below frost line depth (varies by region; check USDA frost line maps for your location), set posts level, and backfill. Gravel bases work for temporary or very small sheds but don’t provide the longevity of concrete solutions.
Allow concrete to cure while preparing framing lumber. Cut band boards, rim joists, and floor frame components to size. Many builders frame the floor system on the ground before installing it on the foundation, which accelerates the process. By week’s end, your foundation should be cured and ready for the floor frame installation.
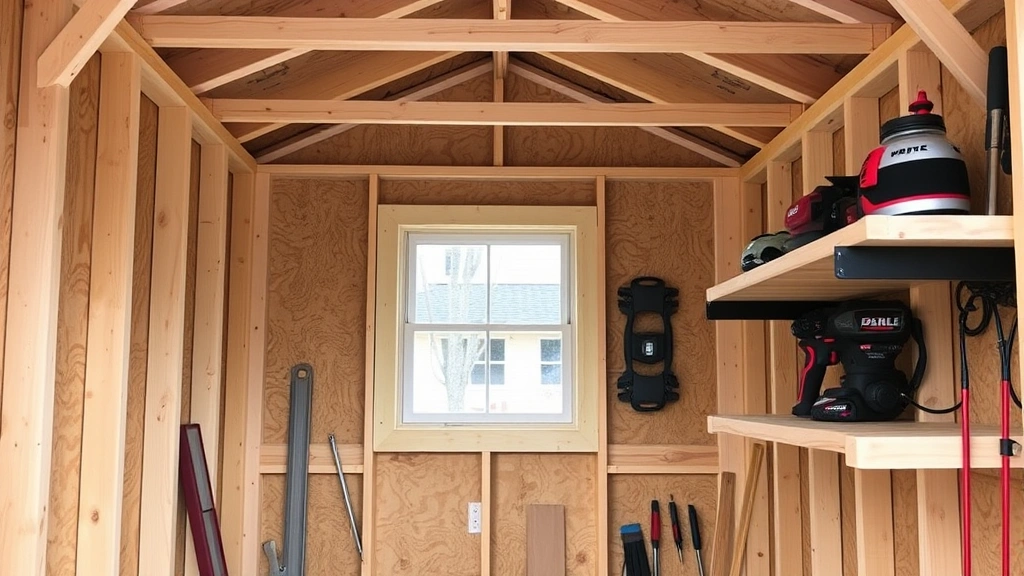
Weeks 3-4: Framing & Structural Work
Framing is the most time-intensive phase, typically consuming 1.5-2 weeks. Begin by installing the floor frame, securing it to the foundation with anchor bolts or concrete screws. Square the frame carefully—measure diagonals to ensure they’re equal—as mistakes here compound throughout the project.
Next, construct wall frames using 2×4 lumber. For a simple rectangular shed, you’ll have four walls with top and bottom plates and vertical studs spaced 16 inches on center. Cut wall sections on the ground, then tilt them up and brace them temporarily. This approach is faster and safer than building walls in place. Install door and window openings according to your plans, reinforcing with headers if required.
Once walls are plumb and braced, install the roof frame. For simple sheds, a basic gable roof uses two sloped rafters meeting at a ridge board. Calculate rafter angles using roof pitch (typically 4:12 to 8:12 for sheds) and cut accordingly. If you’re new to woodworking projects, pre-made roof trusses (ordered beforehand) save time and eliminate complex angle calculations—many builders recommend this shortcut.
Install wall sheathing (plywood or OSB) and roof sheathing. These layers provide structural bracing and prepare surfaces for weatherproofing. By the end of week 4, your shed should have a complete frame and be “under roof,” protecting interior spaces from weather.
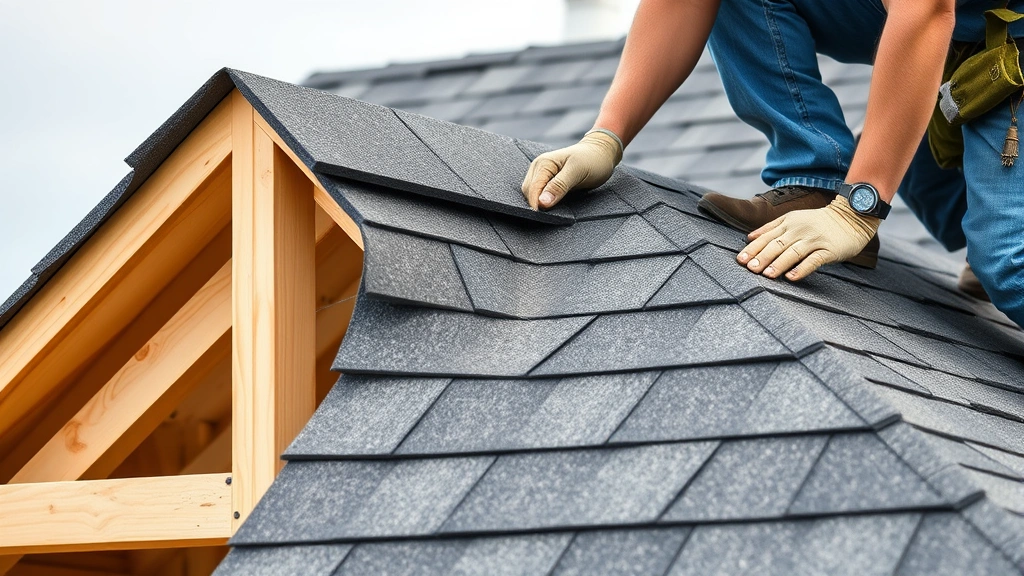
Week 5: Roofing & Weatherproofing
With the frame complete, focus on keeping water out—the primary threat to shed longevity. Install roof underlayment (felt or synthetic), overlapping each course to shed water downslope. Then install roofing material: asphalt shingles (most common), metal panels, or corrugated plastic.
Asphalt shingles require 2-3 days for an average shed roof. Nail according to manufacturer specifications, overlapping courses and sealing shingle tabs with adhesive or nails. Metal roofing is faster to install but requires special fasteners and sealants to prevent leaks. Follow manufacturer guidelines precisely—improper installation voids warranties and causes problems.
Simultaneously, install exterior wall covering. Options include plywood siding, board-and-batten, vinyl, or metal panels. Sheathing installed earlier provides a nailing base. Install windows and exterior doors during this phase, ensuring proper flashing and sealant application. Flashing—metal or rubber pieces that direct water—is critical around openings and roof penetrations.
Inspect all exterior seams, joints, and penetrations. Caulk gaps with exterior-grade sealant. This weatherproofing work is tedious but non-negotiable for preventing water infiltration, mold, and structural decay. Many project delays stem from inadequate waterproofing, so allocate sufficient time here.
Weeks 5-6: Finishing & Final Details
The final 1-2 weeks involve interior finishing and cosmetic touches. Install interior wall covering if desired—drywall, plywood, or simply leave framing exposed. Add insulation if your shed will be climate-controlled or used year-round. Consider whether your project resembles basement finishing projects, which also require thoughtful interior sequencing.
Install flooring appropriate to your shed’s purpose. Concrete works for tool storage; plywood or hardwood suits workshops or recreational spaces. Add shelving, workbenches, or racking systems. If you want painting or staining, apply finish coats now. Review our house painting guide for exterior finish techniques applicable to sheds.
Install electrical systems if needed—run conduit, install outlets, and wire lighting. Hire a licensed electrician for connections to your home’s electrical panel; DIY electrical work often violates building codes and insurance policies. Add exterior features like gutters, downspouts, ramps, or storage racks. Perform a final walkthrough, checking for code compliance, safety hazards, and quality issues.
Timeline Variables & Delays
Weather Impact: Rain halts exterior work; extreme heat complicates concrete curing and roofing. Plan projects during favorable seasons. Cold weather slows concrete and sealant curing; add extra days if building in fall or winter.
Experience Level: First-time builders may need 8-10 weeks; experienced DIYers might finish in 4-5 weeks. Complex designs with multiple roof angles, large doors, or custom details extend timelines significantly.
Material Availability: Supply chain disruptions can delay projects weeks. Order long-lead items immediately after purchasing plans. Verify delivery dates before starting.
Site Conditions: Poor soil drainage, rocky ground, or uneven terrain requires extra foundation work. Existing utilities (electrical lines, gas, septic) near your site may require professional locating and careful navigation.
Permit Delays: Inspections occasionally require rework. Scheduling inspections in advance and ensuring code compliance reduces revision time. Some jurisdictions have lengthy inspection queues; factor this into planning.
Crew Size: Solo builders take longer than two-person teams; four people working efficiently can accelerate framing phases. However, coordination complexity increases with more people. Two experienced builders often represent the sweet spot.
For flooring installation and other finishing work, similar timeline principles apply—proper preparation reduces rework and delays.
FAQ
Can I build a shed in less than 6 weeks?
Yes, with favorable conditions and experience. Simple 8×8 structures with minimal finishing can be completed in 3-4 weeks. However, this requires excellent planning, pre-ordered materials, favorable weather, and possibly a skilled helper. Don’t sacrifice quality for speed—foundation and weatherproofing errors cost far more to fix later.
Do I need a permit for a shed?
Requirements vary by jurisdiction. Most areas require permits for structures over 100-200 square feet or those with permanent foundations. Check National Association of Home Builders (NAHB) resources and your local building department. Unpermitted work can prevent property sales and void insurance coverage.
What’s the biggest timeline killer?
Weather, particularly rain during framing or concrete curing. Plan projects during dry seasons. Interior finishing delays often result from inadequate weatherproofing—water infiltration forces rework. Invest time in proper flashing, caulking, and sealant application.
Should I hire professionals for any parts?
Consider hiring professionals for electrical work (code compliance and safety), complex roof designs, and concrete work if you lack experience. Foundation mistakes are expensive to fix; hiring a concrete contractor for pads often costs $300-800 but ensures proper slope and curing. Roofing is physically demanding and hazardous; some builders hire roofers for this phase.
What tools do I need?
Essential tools include circular saw, miter saw, power drill, level, tape measure, square, and safety equipment (glasses, gloves, dust mask). Rental equipment like concrete mixers, scaffolding, and pneumatic nailers can accelerate work. Many home improvement stores offer daily and weekly rental rates.
How does shed size affect timeline?
An 8×8 shed takes roughly 4-5 weeks; 10×12 sheds take 6-8 weeks; 12×16 structures require 8-12 weeks. Larger buildings have more framing, roofing area, and finishing work. Design complexity matters more than size—a simple large shed might take less time than a small structure with multiple windows, doors, and custom features.
Can weather delays be prevented?
Partially. Choose building seasons with favorable forecasts. Install temporary weather protection (tarps over framing). Schedule concrete work when temperatures are 50-85°F for optimal curing. However, unexpected weather happens—budget extra time and maintain flexibility in your schedule.


