
Build a Shed: Expert Tips for Your Backyard Project
Building a backyard shed is one of the most rewarding DIY projects you can undertake. Whether you need extra storage space, a workshop, or a garden retreat, constructing your own shed allows you to create exactly what you envision while saving thousands in contractor costs. This comprehensive guide walks you through every step of the shed-building process, from initial planning through final touches, ensuring your project succeeds whether you’re a seasoned builder or tackling this for the first time.
The timeline for completing a shed typically ranges from two to eight weeks, depending on size, complexity, and your experience level. Unlike learning a new skill like how long it takes to learn piano, which requires months of practice, a shed is a concrete project with a defined endpoint. With proper planning and realistic expectations, you’ll have a functional structure standing in your yard sooner than you might think.
Planning Your Shed Project
Before you purchase a single board or pick up a hammer, thorough planning is essential. Start by determining the shed’s purpose—will it serve primarily for storage, as a workshop, or perhaps as a garden studio? This decision influences size, ventilation requirements, electrical needs, and overall design. A storage shed needs different features than a workshop space, just as a basement finishing project differs from basic storage solutions.
Size matters considerably. Most homeowners find that 8×10 feet or 10×12 feet provides optimal balance between functionality and manageability. Smaller sheds (6×8 feet) work for basic storage but feel cramped for workshop use. Larger structures (12×16 feet or bigger) require more complex framing and may trigger additional permitting requirements in your jurisdiction.
Create detailed sketches or use design software to visualize your shed. Include door placement, window locations, interior layout, and roof style. Consider your climate—sloped roofs shed water better in rainy regions, while flat roofs work in drier areas. Also think about future access: position the shed where you’ll need to move materials in and out easily, and ensure it doesn’t block views or create drainage problems.
Budget planning is critical. A basic 10×12 shed costs between $3,000 and $8,000 depending on materials, features, and whether you’re building from scratch or using a kit. Factor in:
- Foundation materials (gravel, concrete, or treated lumber)
- Framing lumber and fasteners
- Roofing materials (shingles, metal, or other)
- Exterior siding or cladding
- Doors and windows
- Interior shelving and organization
- Tools you may need to rent or purchase
- Permits and inspections
Like building a PC, which requires knowing your component needs upfront, shed planning requires understanding all your requirements before construction begins. This prevents costly mid-project changes.

Permits, Codes, and Regulations
Don’t skip permit requirements—this is non-negotiable. Most jurisdictions require permits for structures over a certain size, typically 100-200 square feet. Even smaller sheds may need approval in some areas. Contact your local building department to understand requirements specific to your location.
Building codes exist to ensure safety and structural integrity. The International Code Council (ICC) publishes the International Residential Code (IRC), which most jurisdictions adopt with local modifications. Key code requirements typically include:
- Foundation frost depth: Posts must extend below the frost line to prevent heaving
- Wind and snow load ratings: Roof design must handle your region’s weather
- Setback distances: Minimum distances from property lines
- Electrical safety: If adding power, proper grounding and circuit protection
- Door swing clearance: Adequate space for safe egress
Setback requirements vary widely—some areas require 5 feet from property lines, others 10 or more. Violating setbacks creates legal liability and complications if you ever sell your property. Check with your local National Association of Home Builders (NAHB) or municipal planning office for exact specifications.
Your building inspector will conduct inspections at key stages: foundation, framing, and final completion. These inspections protect you by ensuring your shed is structurally sound and meets safety standards. Budget 2-4 weeks for the permit process and inspections.
Site Preparation and Foundation
A solid foundation prevents structural problems, pest infiltration, and premature deterioration. Three main options exist: gravel, concrete piers, and concrete slab.
Gravel foundation: Most affordable and DIY-friendly option. Excavate the site to level ground, compact the soil, and spread 4-6 inches of compacted gravel. This works for smaller sheds in dry climates but doesn’t prevent ground moisture or rodents from accessing the structure.
Concrete piers: Dig holes below frost line depth (typically 2-4 feet depending on location) and set concrete piers with pressure-treated posts. This elevates the shed, allowing air circulation and preventing moisture damage. It’s the sweet spot between cost and durability for most homeowners.
Concrete slab: Most durable and rodent-proof option. Requires excavation, gravel base, rebar reinforcement, and concrete pouring. This is best for areas with high moisture or pest pressure, though it’s more expensive and requires professional installation or significant DIY expertise.
Before any foundation work, call 811 to locate underground utilities. Hitting electrical lines, gas, or water pipes creates dangerous and expensive problems. Most utility location is free and takes a few days.
Proper site grading is equally important. The ground should slope away from your shed in all directions to prevent water pooling. Even a 1-2% slope (dropping 1-2 feet over 50 feet of distance) significantly improves drainage.
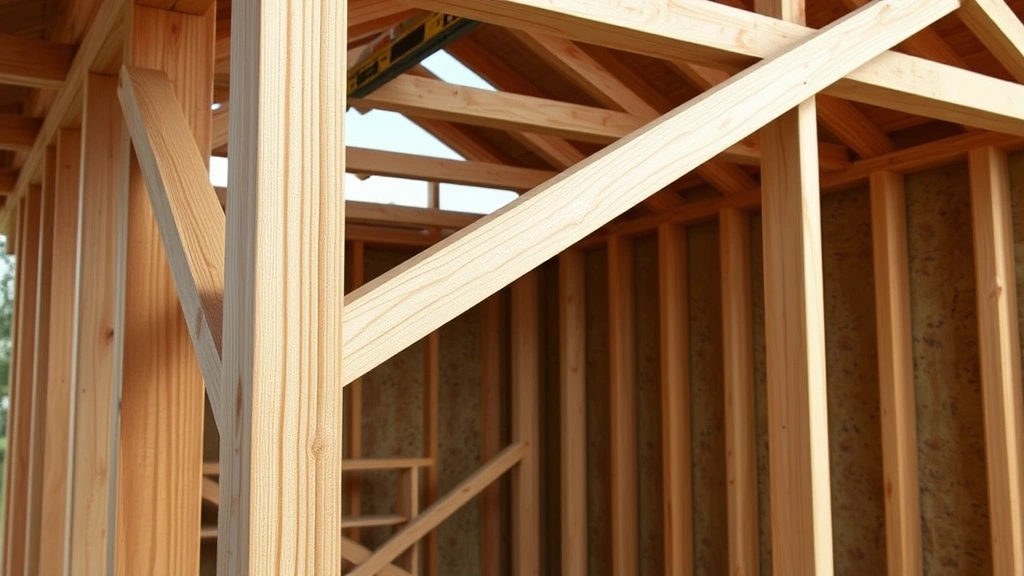
Framing and Structural Work
Framing is where your shed truly takes shape. Standard framing uses 2×4 lumber for walls and 2×6 or 2×8 for roof rafters, depending on span and snow load requirements. Your building inspector or design plans will specify exact requirements.
Wall framing process:
- Build wall frames on the ground: lay out top and bottom plates, add studs 16 inches on center, install headers above door and window openings
- Square and brace each wall to ensure perfect 90-degree corners
- Tilt walls up and secure to the foundation
- Install diagonal bracing or plywood sheathing for lateral stability
- Ensure walls are plumb and square before proceeding
Roof framing: For simple shed roofs, common rafter styles include:
- Gable roof: Traditional peaked design that sheds water and snow effectively
- Shed roof: Single sloped surface, simpler to frame but less weather-resistant
- Hip roof: More complex, wraps around all sides for better wind resistance
Rafter spacing, size, and angle depend on your roof load requirements. In heavy snow areas, steeper angles and larger rafters are necessary. The National Fire Protection Association (NFPA) provides guidelines on structural requirements for various regions.
Proper fastening is critical—use galvanized or stainless steel fasteners to prevent rust. Nail spacing and sizing follow building code requirements. Some builders prefer bolts or hurricane ties for additional strength, especially in wind-prone areas.
Roofing Installation
The roof protects everything inside, making quality installation essential. Start with roof sheathing—typically 1/2-inch plywood or OSB boards nailed to rafters. Ensure sheathing is properly fastened with appropriate nail spacing (typically 6 inches on edges, 12 inches in the field).
Underlayment: Install roofing underlayment before shingles. This secondary moisture barrier protects against leaks if water penetrates shingles. Synthetic underlayment lasts longer than asphalt-saturated felt and provides better traction during installation.
Shingle installation: Asphalt shingles are most common for DIY sheds. Start at the lowest point and work upward, overlapping rows to direct water downward. Nail placement is critical—typically 4 nails per shingle in specific locations. Improper nailing causes shingles to blow off in wind.
Metal roofing: More durable and reflective than asphalt, metal roofing lasts 40+ years. Installation requires specific fasteners and techniques to prevent leaks at seams. Many homeowners hire professionals for metal roofing despite the higher cost.
Don’t forget flashing around any penetrations—vent pipes, chimneys, or skylights. Flashing prevents water from running under shingles and into your structure. This is where most roof leaks originate.
Exterior Finishing
Exterior finishing protects the structure and determines appearance. Siding options include:
- Plywood or OSB: Most economical, requires painting for weather protection
- Vinyl siding: Maintenance-free, durable, wide color selection
- Wood siding: Attractive but requires regular maintenance and painting
- Metal siding: Durable and low-maintenance, industrial appearance
- Board and batten: Rustic charm, requires quality lumber and maintenance
Regardless of siding choice, proper water management is essential. Install drip edges at the roof line to direct water away from walls. Ensure gaps between siding and foundation are sealed to prevent pest entry and moisture infiltration.
Door and window installation: Exterior doors should be insulated and weather-sealed. Install a threshold and weatherstripping to prevent drafts and water infiltration. Windows improve light and ventilation—position them to maximize natural light and cross-ventilation.
Paint or stain provides weatherproofing. Quality exterior paint or stain penetrates wood and protects against UV damage and moisture. Plan to repaint every 3-5 years for wood surfaces. Vinyl and metal don’t require painting but may benefit from periodic cleaning.
Interior Completion and Storage
Interior finishing transforms your shed from shell to functional space. Insulation is worthwhile if you’ll use the space year-round or store temperature-sensitive items. Fiberglass batts between studs provide basic insulation, while spray foam offers better air sealing.
Shelving and organization determine how effectively you use space. Wall-mounted shelving, pegboards, and storage cabinets keep items organized and accessible. Heavy-duty shelving supports tools and equipment safely.
Electrical installation should follow building codes and may require a licensed electrician, depending on local regulations. A simple setup includes a 20-amp circuit with weatherproof outlets. Ground fault circuit interrupter (GFCI) protection is essential for any shed with moisture exposure.
Flooring options range from bare concrete to finished wood. Sealed concrete is durable and easy to clean. Plywood subflooring allows installation of resilient flooring for comfort. Whatever you choose, ensure proper slope for drainage if moisture is a concern.
Ventilation prevents moisture buildup and extends structural life. Install soffit vents and a ridge vent for passive ventilation, or add a small fan for active ventilation in humid climates. This is especially important if you’re storing items sensitive to humidity.
Consider security if storing valuable tools or equipment. Simple locks on doors work for basic deterrence. More valuable sheds warrant reinforced doors, window locks, and possibly motion-sensor lighting.
How long does it actually take to build a shed?
Timeline depends on size and complexity. A basic 10×12 shed takes 4-8 weeks with one person working weekends, or 2-4 weeks with a small team working full-time. Larger or more complex designs take longer. Weather delays can add weeks, and permit/inspection time extends the overall project calendar by 2-4 weeks.
Do I really need a permit for my shed?
Yes, in most jurisdictions. Permits ensure your structure meets safety codes and won’t create legal problems. Unpermitted structures can complicate property sales and insurance claims. Check with your local building department—the process is usually straightforward and inexpensive for small sheds.
What’s the most common shed-building mistake?
Inadequate foundation preparation causes more problems than any other factor. Skipping proper grading, using gravel-only foundations in wet areas, or not accounting for frost heave leads to structural settling, pest infiltration, and water damage. Invest time and money in the foundation.
Can I build a shed in winter?
Challenging but possible. Cold temperatures make concrete curing slow and fastening difficult. Snow and ice create safety hazards. Spring and fall are ideal building seasons in most climates. If building in winter, plan extra time and take precautions against freezing.
Should I hire a professional or DIY?
DIY works if you have basic carpentry skills and time. Professional builders complete projects faster and handle complex aspects like roofing. Hybrid approaches—DIY the framing, hire professionals for roofing—balance cost and quality. Honestly assess your skills before committing.
What if I want to add utilities later?
Plan ahead. Run conduit for electrical wiring during framing before walls close up. Consider plumbing locations if you might add water later. These additions are far easier during construction than retrofitting afterward, similar to how planning infrastructure in a home security system requires early consideration.
How much does a shed really cost?
Basic 10×12 sheds range from $3,000-$8,000 depending on materials and features. DIY saves 40-60% compared to hiring contractors. Premium materials, larger size, or additional features increase costs significantly. A 12×16 shed with utilities might cost $10,000-$15,000.
What’s the best shed material for durability?
Pressure-treated lumber resists rot and insects for 20+ years. Metal roofing lasts 40+ years. Vinyl siding requires minimal maintenance. The best material balance depends on your climate, budget, and maintenance tolerance. Metal roofing with pressure-treated framing and vinyl siding represents excellent durability with moderate maintenance.
For additional guidance on DIY projects, explore our comprehensive DIY blog covering various home improvement topics. While you’re planning your shed, you might also find inspiration in how people approach other significant projects like DIY car repairs, which require similar planning and attention to detail.


