How to Build a Deck: Expert DIY Guide Inside
Building a deck is one of the most rewarding DIY projects you can tackle. Whether you’re creating an outdoor entertainment space or simply expanding your home’s usable square footage, a well-constructed deck adds tremendous value and enjoyment to your property. This comprehensive guide walks you through every step of the deck-building process, from initial planning through final finishing touches.
A deck project typically requires 2-4 weeks for an average 12×16 foot structure, depending on complexity, weather conditions, and your experience level. Unlike learning how long it takes to learn piano, deck building is a hands-on skill that improves with each phase of construction. The investment of time pays dividends in both personal satisfaction and property value appreciation.
Before you grab your tools, understand that proper planning prevents costly mistakes. This guide covers permit requirements, material selection, safety protocols, and construction techniques endorsed by professional builders and building code authorities.
Planning and Permits
The foundation of any successful deck project begins with thorough planning. Start by measuring your desired deck location and sketching a basic design. Most jurisdictions require permits for decks over 30 inches in height or covering more than 200 square feet, though regulations vary by location. Contact your local International Code Council (ICC) office or building department to determine specific requirements for your area.
Your deck design should account for:
- Proper drainage to prevent water pooling and damage
- Load capacity requirements (typically 40 pounds per square foot for residential decks)
- Setback distances from property lines
- Height restrictions and railing code compliance
- Connection to your home’s structure
- Frost line depth for your geographic region
Frost lines vary significantly by location—ranging from 12 inches in warm climates to 48+ inches in northern regions. This critical measurement determines how deep your post holes must be to prevent frost heave, which can destabilize your entire deck structure. Check with your local building department or National Association of Home Builders (NAHB) for your specific frost line depth.
Create detailed plans showing post locations, joist spacing, and railing specifications. Many building departments provide online resources or templates. If your design is complex, consider hiring a structural engineer for a relatively modest fee—this investment protects both your safety and your permit approval.
Materials and Tools
Selecting quality materials ensures your deck withstands years of weather exposure and heavy use. You have several options for decking material, each with distinct advantages:
Pressure-Treated Lumber: The most economical choice, pressure-treated wood resists rot and insect damage through chemical treatment. Modern treatments are copper-based and environmentally safer than older arsenic formulations. Expect 20-30 years of service life.
Cedar or Redwood: These naturally rot-resistant woods offer beautiful aesthetics but require regular staining or sealing. They’re more expensive than pressure-treated options and typically last 15-20 years without maintenance.
Composite Decking: Made from wood fibers and plastic, composites offer low maintenance and excellent durability. They cost 2-3 times more than pressure-treated wood but eliminate annual sealing requirements.
PVC Decking: Fully synthetic options provide maximum durability and minimal maintenance. Premium pricing reflects exceptional longevity and appearance retention.
Essential tools for deck building include:
- Circular saw or miter saw for cutting
- Power drill with driver bits
- Post-hole digger or auger
- Level (4-6 foot for accurate slopes)
- Tape measure and chalk line
- Square and layout tools
- Jigsaw for curved cuts
- Safety equipment: gloves, eye protection, dust mask
- Stud finder for locating rim board
- Adjustable wrench and socket set
Like learning how long it takes to build a PC, deck construction requires the right tools for the job. Renting specialty equipment like power augers or concrete mixers often makes economic sense for one-time projects.
Site Preparation
Proper site preparation prevents future problems and ensures level, stable construction. Begin by clearing vegetation from your deck area, extending at least 2 feet beyond your planned footprint. Mark post locations using chalk lines and a layout string.
Check for underground utilities before digging. Call your local utility locating service (811 in most U.S. regions) to have gas, electric, water, and telecommunications lines marked. This free service prevents dangerous and costly accidents.
Assess your yard’s slope and drainage patterns. Your deck should slope slightly away from your home—about 1/8 inch per foot—to shed water naturally. This prevents water from pooling under the structure where it causes rot and pest problems.
Remove topsoil and vegetation where posts will sit. For areas with heavy clay or poor drainage, consider adding landscape fabric and gravel to improve water management beneath the deck.
Foundation and Posts
A strong foundation is absolutely critical to deck safety and longevity. Posts must rest on solid footing below the frost line, supported by concrete that prevents frost heave and settling.
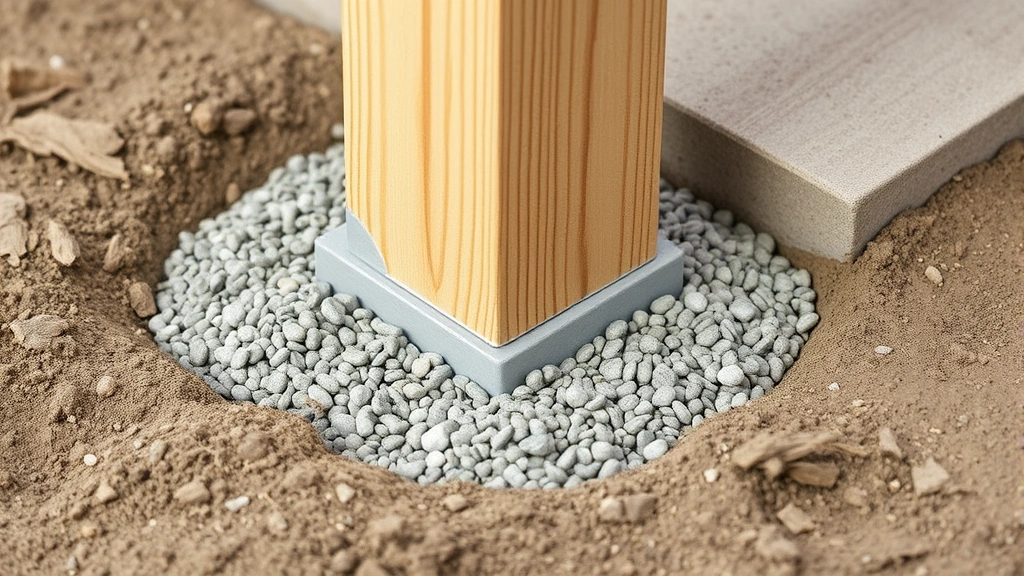
Dig post holes to the proper depth for your region—consult your local building codes authority for exact specifications. Holes should be 12 inches in diameter and extend 6-8 inches deeper than the frost line. This extra depth accommodates a gravel base that improves drainage.
For each post hole:
- Add 6-8 inches of gravel for drainage
- Set a 4×4 post on the gravel, ensuring it’s plumb (perfectly vertical)
- Brace the post in all directions with temporary supports
- Mix concrete according to package directions
- Pour concrete around the post, filling to ground level or slightly above
- Allow concrete to cure 48 hours before removing braces
Posts should rise to your desired deck height plus the joist thickness. Standard deck height is 12-24 inches above ground, though this varies based on your home’s configuration and intended use.
Use only pressure-treated lumber for posts, particularly the portions in contact with soil or concrete. This treatment prevents rot and extends post life significantly. Avoid setting untreated wood directly on concrete, as moisture wicking causes premature decay.
Framing and Structure
The framing system carries all loads from decking, railings, furniture, and people. Proper sizing and spacing of framing members is essential for safety and code compliance.
Rim Boards: These attach to your home’s rim board (the band board around your home’s perimeter). Use lag bolts or bolts through the rim board, spaced 16 inches apart, to securely attach the deck ledger. This connection must support half your deck’s weight—improper attachment is a leading cause of deck collapse. Ensure the ledger is bolted to the rim board, never to siding or brick veneer.
Joist Sizing and Spacing: Joist size depends on span distance and load requirements. Common configurations use 2×8 or 2×10 joists spaced 16 inches apart. Span tables in the International Building Code (IBC) provide specific guidelines based on wood species and load conditions.
Space joists uniformly and secure them to ledgers and rim boards with joist hangers rated for your joist size. Joist hangers distribute loads more effectively than toe-nailing and provide superior strength and safety.
Install blocking between joists at mid-span for decks exceeding 10 feet in width. This bracing prevents joist rotation and improves structural rigidity.
Ensure proper slope for water drainage. The deck should slope away from your home at approximately 1/8 inch per foot. This prevents water from pooling and causing rot damage.
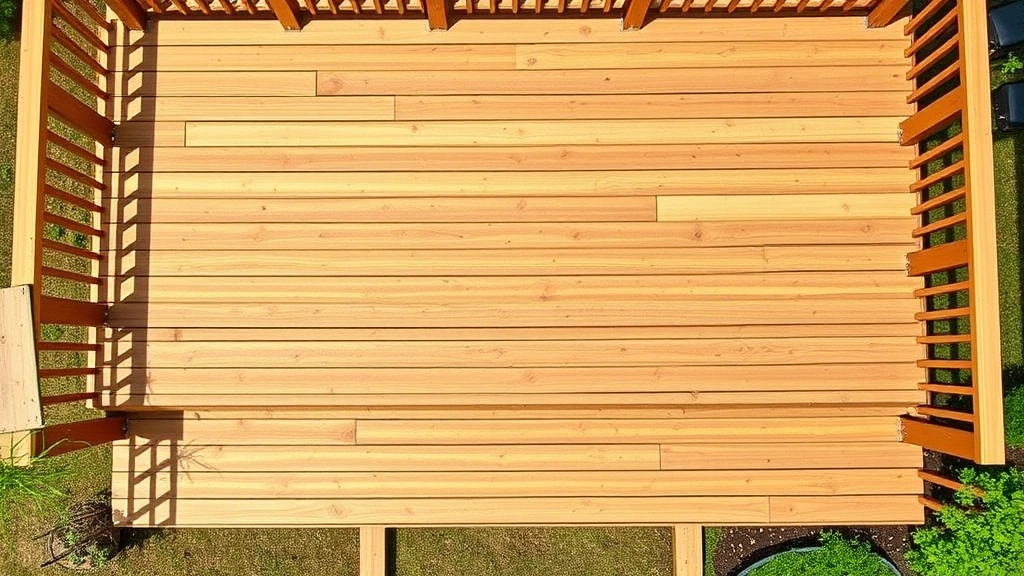
Decking Installation
Decking boards are what you walk on, so their installation directly affects safety and comfort. Board selection and fastening technique significantly impact durability and appearance.
Board Selection: Choose boards with similar coloring and grain patterns for attractive appearance. Avoid boards with large knots near edges, as these are prone to splitting. For pressure-treated wood, allow boards to acclimate to your local humidity for 2-3 weeks before installation.
Fastening Method: Use corrosion-resistant fasteners—stainless steel, hot-dipped galvanized, or coated screws—to prevent rust staining and decay. Avoid nails, which loosen over time as the deck moves with seasonal wood movement. Deck screws specifically designed for composite or wood decking provide superior holding power.
For each board, use two fasteners per joist. Space fasteners 1-1.5 inches from board edges to prevent splitting. Fasteners should sit slightly below the board surface but not so deep they create water-collecting depressions.
Board Spacing: Leave 1/8 to 1/4 inch gaps between boards to allow for wood expansion in humid conditions and drainage. Composite boards require slightly larger gaps (typically 1/4 inch) to accommodate thermal expansion.
Run boards perpendicular to joists for visual appeal and optimal structural performance. Stagger board joints across multiple joists rather than allowing them to align, which creates weak points.
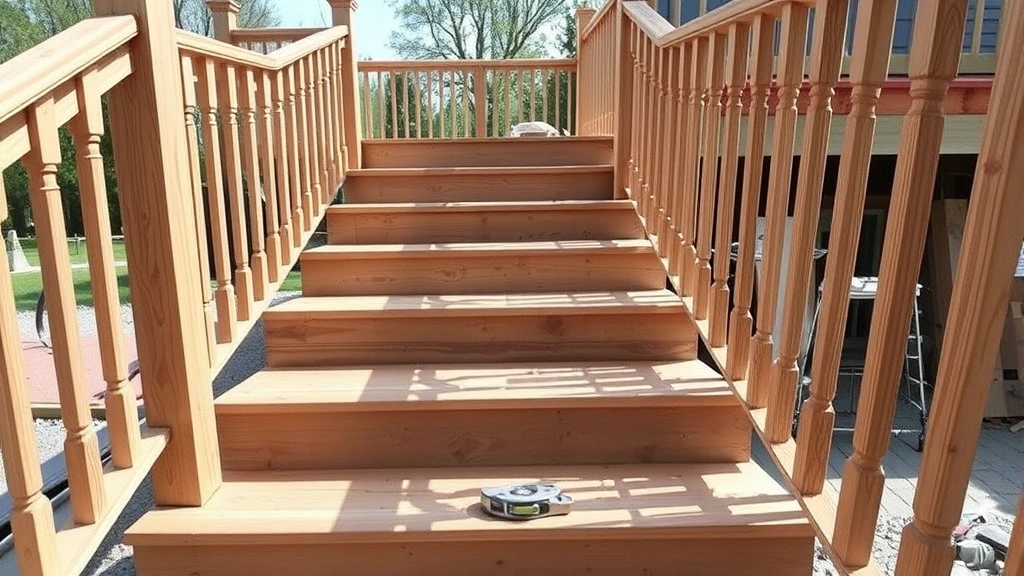
Railings and Stairs
Building code requires railings on decks over 30 inches high, and these safety features prevent serious falls. Railing specifications are strictly regulated because they directly impact user safety.
Railing Height and Strength: Railings must be 36-42 inches high, measured from the deck surface. They must resist a 200-pound horizontal force without failing—a requirement that eliminates many decorative options. Install railings solidly to deck framing, not just surface-mounted where they could be knocked loose.
Baluster Spacing: Vertical balusters (spindles) cannot be spaced more than 4 inches apart. This prevents children from getting their heads stuck between balusters. Check spacing with a 4-inch sphere—if it passes through, spacing is too wide.
Stair Construction: Deck stairs must have consistent rise and run dimensions. Rise (vertical height) should be 7-7.75 inches per step, while run (horizontal depth) should be 10-11 inches. Stairs must include handrails if they exceed 4 steps and are 30 inches or wider. Handrails must be 1.25-2 inches in diameter and positioned 34-38 inches above stair nosing.
Use solid, non-slip treads on stairs. Many builders use the same decking material as the deck surface, though specialized stair treads with texture offer better traction in wet conditions.
Consult your local building department for specific stair requirements, as some jurisdictions have additional specifications beyond standard code minimums.
Finishing and Maintenance
Proper finishing and ongoing maintenance extend your deck’s life dramatically. The finishing process varies based on your chosen material.
Wood Decking Finishing: Pressure-treated wood benefits from sealing within 3-6 months of installation, before weathering creates a gray, rough surface. Apply exterior-grade sealant or stain according to product directions. Most wood decks require resealing every 1-3 years, depending on climate and product quality.
Composite and PVC Maintenance: These materials require minimal maintenance—typically just occasional cleaning with mild soap and water. Avoid pressure washing above 1500 PSI, which can damage the surface.
Seasonal Maintenance: Clear debris from deck surfaces and under the deck structure. Ensure water drains properly away from posts and ledgers. In winter, avoid salt and chemical de-icers that damage wood and composite materials; use sand or kitty litter for traction instead.
If you enjoy hands-on home improvement projects, explore our guide on beginner woodworking projects for additional skills that complement deck building. Similarly, understanding home security systems helps you protect your new outdoor space, while basic DIY car repairs round out your practical skills.
For additional deck design inspiration and construction techniques, visit the DIY Nests Hub Blog for comprehensive home improvement resources.
FAQ
How deep should deck post holes be?
Post holes must extend below your local frost line depth, plus an additional 6-8 inches for a gravel base. Frost line depths range from 12 inches in warm climates to 48+ inches in northern regions. Contact your local building department for the exact specification for your area.
Can I build a deck on a slope?
Yes, but slopes require additional planning. Use posts of varying heights to maintain level decking while following the natural grade. Ensure proper water drainage away from posts and ledgers, and provide adequate clearance under the deck structure for water flow.
What’s the difference between deck screws and regular screws?
Deck screws feature aggressive threading for better grip in wood, corrosion-resistant coatings, and a design that prevents popping. Regular screws lack these features and are unsuitable for outdoor applications where moisture and movement cause fastener failure.
How often should I seal my deck?
Pressure-treated wood decks typically require sealing every 1-3 years, depending on climate, sun exposure, and product quality. Composite and PVC decks require minimal maintenance—typically just cleaning. Check your material manufacturer’s recommendations for specific guidance.
Do I need a permit to build a deck?
Most jurisdictions require permits for decks over 30 inches high or exceeding 200 square feet. However, requirements vary by location. Contact your local building department before starting your project. Permits ensure your design meets safety codes and protect your property investment.
What’s the proper railing spacing?
Vertical balusters cannot be spaced more than 4 inches apart. Test spacing with a 4-inch sphere—if it passes through, spacing is too wide and violates building code. This specification prevents children from getting their heads caught between balusters.
How long does a deck last?
Pressure-treated wood decks last 20-30 years with proper maintenance. Cedar and redwood decks last 15-20 years. Composite decks last 25-30+ years, while PVC decks can last 30+ years. Proper installation, regular maintenance, and appropriate material selection significantly impact longevity.


