Wood Stain Dry Time: Expert Tips for Perfect Finishing Results
Understanding wood stain dry time is essential for any DIY woodworking project. Whether you’re staining a deck, refinishing furniture, or tackling a basement finishing project, knowing exactly how long your stain needs to cure can mean the difference between a professional-looking finish and a disappointing result. The drying time varies significantly based on multiple factors including wood type, stain formula, environmental conditions, and application method.
Many DIYers rush the staining process without realizing that premature handling or topcoat application can ruin hours of careful work. This comprehensive guide breaks down everything you need to know about wood stain drying times, helping you plan your project timeline accurately and achieve stunning results every time.

Understanding Wood Stain Types and Their Dry Times
Wood stain comes in several formulations, each with distinct drying characteristics. Oil-based stains typically require 4-8 hours of dry time before light handling and 24 hours before applying a topcoat. Water-based stains dry much faster, usually within 1-3 hours, making them popular for quick projects. Gel stains fall somewhere in between, requiring 2-6 hours of surface drying time.
The type of wood you’re staining also influences dry time. Softwoods like pine absorb stain quickly and may dry faster than hardwoods like oak or walnut. When working on your next building project, always check the manufacturer’s specifications on your specific stain bottle, as formulations vary between brands.
Understanding the difference between “dry to touch” and “cure time” is critical. Dry to touch means the surface feels dry and won’t transfer stain to your fingers, but the wood hasn’t fully cured. Full curing—when the stain has completely hardened and bonded with the wood—takes significantly longer and is essential before applying protective finishes.
Factors That Affect Drying Duration
Multiple environmental and material factors influence how long wood stain takes to dry. The primary variables include:
- Wood porosity: Highly porous woods absorb stain faster, potentially reducing visible dry time but requiring full penetration for proper color development
- Stain concentration: Darker stains with higher pigment loads take longer to dry than lighter formulations
- Application thickness: Thick applications trap solvents deeper in the wood, extending drying time significantly
- Ventilation: Air circulation speeds evaporation and accelerates the drying process
- Wood moisture content: Pre-existing moisture in the wood interferes with stain absorption and drying
- Primer or pre-stain conditioner: These products affect how quickly stain dries on softwoods
When planning a complete basement finishing project, account for all these variables since basement environments tend to be humid and cool, both of which extend drying times considerably.
Oil-Based vs Water-Based Stains
The choice between oil-based and water-based stains significantly impacts your project timeline. Oil-based stains penetrate wood deeply, creating rich, warm tones that many woodworkers prefer. However, they require mineral spirits for cleanup and emit volatile organic compounds (VOCs). Typical dry times range from 4-12 hours depending on conditions, with full cure taking 24-48 hours.
According to the EPA guidelines on volatile organic compounds, oil-based products require proper ventilation and safety precautions. Water-based stains offer faster drying (1-3 hours), low VOC emissions, and water cleanup, making them ideal for indoor projects or time-sensitive work.
Water-based formulations have improved significantly in recent years, offering excellent color saturation and durability comparable to oil-based products. They dry quickly because water evaporates faster than mineral spirits, allowing you to apply topcoats sooner and complete projects in a single day when necessary.
Gel stains occupy a middle ground, offering excellent control and minimal drips while drying in 2-6 hours. They work particularly well on vertical surfaces like cabinet doors or trim where traditional liquid stains might run.
Temperature and Humidity Impact
Environmental conditions dramatically affect wood stain drying times. Temperature accelerates solvent evaporation; stains dry significantly faster in warm conditions (70-80°F) compared to cold environments (50-60°F). Humidity works against drying—high moisture in the air slows evaporation and can cause blotchy finishes or uneven color development.
Ideal staining conditions exist when temperature ranges between 65-75°F and relative humidity stays between 30-50%. Below 50°F, oil-based stains may take twice as long to dry. Above 85°F with low humidity, you might experience premature surface drying that traps solvents underneath, creating problems during topcoat application.
Humidity is particularly problematic in basements and other enclosed spaces. If you’re completing a DIY basement finishing project, invest in a dehumidifier to maintain proper moisture levels during staining. The National Weather Service provides humidity monitoring guidance for optimal working conditions.
During winter months or in naturally damp climates, plan for extended drying times. Some professionals add 50% to manufacturer-recommended drying times when working in less-than-ideal conditions, ensuring proper curing before topcoat application.
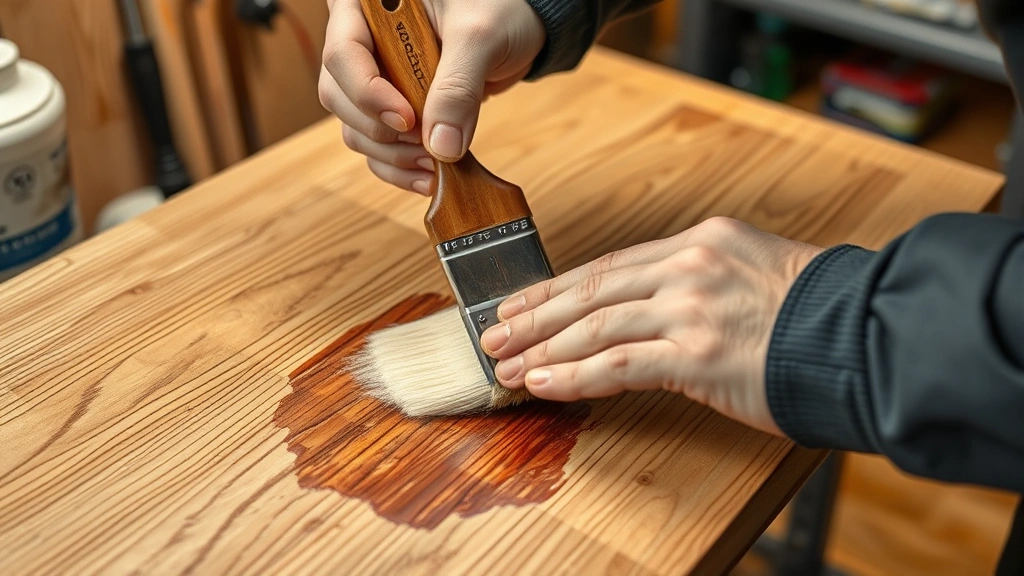
Application Techniques for Faster Drying
How you apply stain directly impacts drying time. Thin, even applications dry much faster than thick coats. Using a foam brush, cloth, or quality bristle brush allows you to control application thickness and achieve uniform color without excessive saturation.
Apply stain in thin coats using long, even strokes following the wood grain. Excess stain sitting on the surface creates thick spots that dry slowly and may appear darker or blotchy. Wiping off excess stain after 5-15 minutes (depending on the product) accelerates drying while controlling color intensity.
Proper ventilation dramatically reduces drying time. Open windows, use box fans, or set up shop fans to create air circulation across stained surfaces. Cross-ventilation—air flowing through the space rather than just around it—works most effectively. In enclosed spaces, consider portable air filtration units that remove odors while improving drying conditions.
Surface preparation also matters. Sanding wood to 120-150 grit before staining ensures even absorption and faster drying compared to rougher surfaces. Pre-stain wood conditioner on softwoods helps regulate absorption, preventing blotchy finishes and promoting more uniform drying.
Common Mistakes That Slow Drying
Many DIYers inadvertently extend drying times through preventable mistakes. Over-application is the most common error—applying too much stain at once creates pools that take hours longer to dry. Always start with less stain and apply additional coats if needed rather than loading on heavy initial applications.
Staining in poor environmental conditions without adjustment leads to extended drying times. Attempting to stain in a cold garage or damp basement without addressing temperature and humidity will frustrate your timeline. Inadequate ventilation traps solvents in the air and on the wood surface, slowing evaporation significantly.
Covering stained wood while it’s still wet prevents air circulation and can trap moisture, causing blotchy finishes and extended cure times. Never cover drying stain with plastic sheeting or tarps until it’s completely cured. Using expired or improperly stored stain may also affect drying characteristics—check product dates and storage conditions.
Applying topcoats too quickly remains a critical mistake. Even if stain feels dry to the touch, insufficient curing allows trapped solvents to interact with polyurethane or other finishes, creating adhesion problems, cloudiness, or finish failure. Always follow manufacturer recommendations for minimum waiting periods before topcoat application.
Preparing for Topcoat Application
Once stain reaches proper drying and curing stages, surface preparation for topcoats becomes critical. Light sanding with 220-grit sandpaper between coats removes dust particles and slight imperfections, promoting better adhesion. Vacuum thoroughly to remove all sanding dust—any particles trapped under polyurethane create visible bumps and reduce finish quality.
The International Code Council provides building standards for protective finishes in various applications. For structural wood requiring durability, ensure stain has fully cured before applying protective topcoats according to applicable building codes and manufacturer specifications.
Verify stain compatibility with your chosen topcoat. Oil-based stains work with both oil and water-based polyurethanes, though some water-based products may not adhere well to oil-based stains without proper surface preparation. Water-based stains work best with water-based topcoats, though quality oil-based polyurethanes typically provide excellent adhesion.
Test your topcoat on a hidden area first to confirm compatibility and appearance. Some combinations can create unexpected color shifts or adhesion issues. Temperature and humidity during topcoat application should match staining conditions—maintain the same environmental range for consistent results.
When applying multiple stain coats, allow complete drying between applications. Some projects benefit from 2-3 stain coats for deeper color development. Each coat requires full drying time before the next application, so factor this into your project timeline.
FAQ
How long does wood stain take to dry before I can apply polyurethane?
Most oil-based stains require 24 hours before polyurethane application, while water-based stains typically need only 3-6 hours. Always check your specific product’s label, as formulations vary. Environmental conditions may extend these timeframes—add 50% extra time in cool or humid conditions.
Can I speed up wood stain drying time?
Yes, improve ventilation, increase temperature to 70-75°F, reduce humidity with dehumidifiers, and apply thinner coats. Avoid covering the stained surface and ensure adequate air circulation. However, never artificially heat stain with heat guns, which can cause uneven drying and finish problems.
Why is my wood stain still wet after 24 hours?
High humidity, low temperature, thick application, or poor ventilation cause extended drying. Check that you applied thin, even coats and verify environmental conditions. Basements and enclosed spaces often require dehumidifiers and fans to achieve proper drying in reasonable timeframes.
What’s the difference between dry time and cure time?
Dry time is when the surface no longer feels wet and won’t transfer to your fingers (typically 1-8 hours). Cure time is when the stain fully hardens and bonds with the wood (24-48 hours for most products). Topcoats should only be applied after the stain has fully cured.
Should I sand between stain coats?
Light sanding with 220-grit paper between stain coats helps subsequent coats adhere better and creates a more uniform finish. Sand lightly, vacuum thoroughly to remove all dust, and allow the previous coat to fully dry before sanding.
Does wood type affect stain drying time?
Yes, porous softwoods like pine absorb stain quickly, potentially drying faster than dense hardwoods like oak. However, the stain’s chemical composition and environmental conditions typically have greater impact than wood type on total drying time.


