DIY Concrete Countertops: Expert Tips & Costs
Concrete countertops have evolved from industrial aesthetics to sophisticated kitchen and bathroom surfaces that rival granite and marble in appeal. Whether you’re renovating a kitchen, updating a bathroom, or designing a custom workspace, concrete offers unparalleled design flexibility, durability, and cost-effectiveness compared to traditional countertop materials. The beauty of concrete lies not just in its appearance but in the opportunity to create truly personalized surfaces with custom colors, textures, and finishes that reflect your unique style.
One of the most compelling reasons homeowners choose concrete countertops is the significant cost savings when tackling the project yourself. Professional installation typically ranges from $100 to $200 per square foot, but DIY concrete countertops can reduce material costs to $15 to $30 per square foot. Understanding the full scope of expenses, techniques, and finishing options helps you make informed decisions and achieve professional-quality results without the premium price tag.
Understanding Concrete Countertop Costs
The total investment for DIY concrete countertops breaks down into several distinct categories: materials, tools, and finishing products. For an average 25-square-foot kitchen countertop, material costs typically range from $375 to $750, making this an affordable alternative to natural stone or engineered surfaces. This estimate assumes you’re creating countertops in place or casting them off-site and installing them afterward.
Material expenses include concrete mix, which costs approximately $10 to $20 per 80-pound bag depending on quality and additives. A typical 25-square-foot countertop requires 6 to 8 bags of concrete mix. Additionally, you’ll need reinforcement materials like rebar or wire mesh ($20 to $40), release agents ($15 to $25), and decorative aggregates if desired ($30 to $100). Sealers represent another significant cost category, ranging from $50 to $200 depending on the type and coverage area you select.
When comparing your DIY project to professional installation costs, the labor savings become immediately apparent. Professional concrete countertop installers charge $50 to $150 per hour plus material markups, often totaling $2,500 to $5,000 for a standard kitchen installation. By handling the work yourself, you eliminate these labor costs entirely, though you should budget additional time for learning proper techniques and allowing adequate curing periods.
Before starting, evaluate whether you need to invest in specialized tools. If you already own basic equipment like a circular saw, drill, level, and measuring tape, your tool expenses remain minimal. However, if you’re purchasing tools for the first time, budget an additional $200 to $500 for essential equipment including a concrete mixer, concrete vibrator, finishing trowels, and safety gear.
Essential Materials and Tools
Successful concrete countertop projects depend on selecting appropriate materials specifically formulated for countertop applications. Standard concrete mix works, but countertop-specific mixes offer superior workability, lower water requirements, and better finishing characteristics. Products like Rapid Set Concrete Mix or similar specialized concrete formulations cost slightly more but deliver better results for DIY installers.
The reinforcement system prevents cracking and provides structural integrity. Wire mesh (2×2 inch grid) costs approximately $0.30 to $0.50 per square foot, while rebar runs $0.50 to $1.00 per linear foot. For most residential countertops, 1/4-inch rebar spaced 12 inches apart provides adequate reinforcement. Some installers combine both materials for optimal crack prevention.
Release agents facilitate form removal and impact the final surface appearance. Paste wax ($15 to $25 per container) creates a smooth finish, while concrete-specific release oils ($20 to $40) work well for intricate molds. Always test release agents on scrap concrete to understand their effect on your chosen finish.
Essential tools for concrete countertop installation include:
- Concrete mixer: Renting a mixer ($30 to $50 daily) is more economical than purchasing for most DIYers
- Vibrator: Concrete vibrators ($40 to $100 rental) eliminate air pockets and ensure proper consolidation
- Finishing trowels: Quality steel trowels ($25 to $60 each) are essential for achieving smooth surfaces
- Grinder: Concrete grinders ($50 to $100 daily rental) polish and finish the surface
- Sanding supplies: Diamond pads in various grits ($100 to $300 total) create your desired finish
- Safety equipment: Dust masks, safety glasses, and gloves ($30 to $75) protect you during grinding and sealing
Decorative options significantly enhance the final appearance. Integral pigments ($40 to $100) color the entire concrete mass, while surface stains ($30 to $80) add artistic effects after curing. Decorative aggregates like glass, stone, or recycled materials range from $50 to $200 depending on quantity and type. Consider exploring American Concrete Institute resources for technical specifications on decorative materials.
Design and Planning Considerations
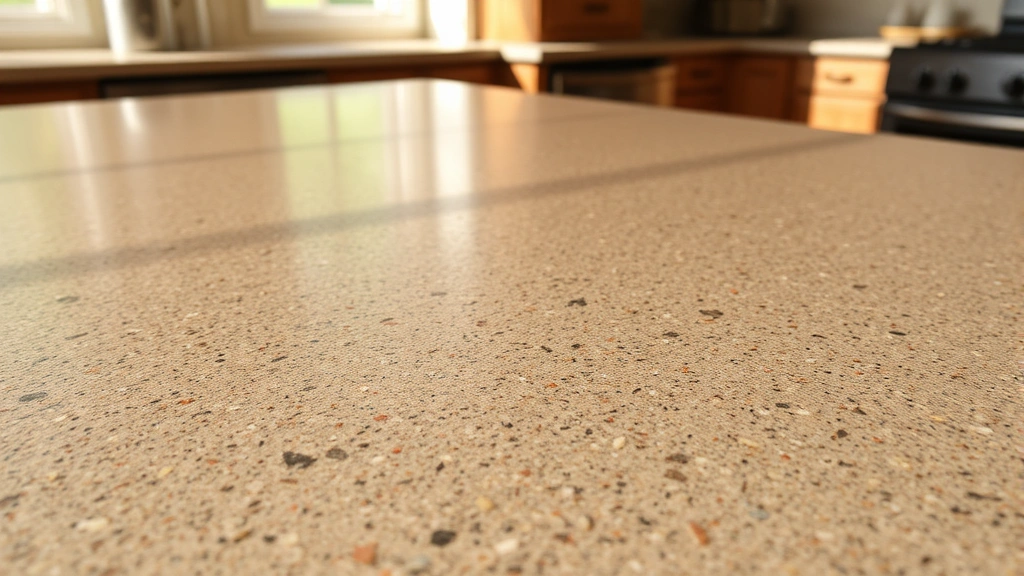
Before purchasing materials, create detailed plans addressing dimensions, thickness, edge details, and finish preferences. Most residential countertops measure 24 to 25 inches deep and 1.5 inches thick, providing adequate workspace and structural strength. Sketch your layout including sink locations, cooktop placement, and any decorative elements you plan to incorporate.
Sink integration requires advance planning. You can either create an undermount sink detail by casting around a sink basin, or drill and install a drop-in sink after the concrete cures. Undermount sinks create seamless integration but demand precise mold construction. Drop-in sinks are more forgiving for first-time installers and allow easier sink replacement in the future.
Edge profiles dramatically affect the finished appearance and perceived quality. Simple square edges cost nothing extra but appear utilitarian. Beveled edges ($0 to $30 in additional materials) add sophistication, while rounded edges require specialized edge forms ($50 to $150). Decorative edge details like bull-nose or ogee profiles transform basic countertops into custom statements.
Consider the difference between cast-in-place and precast approaches. Cast-in-place countertops are formed directly over your cabinets, simplifying installation but requiring more on-site finishing work. Precast countertops are created in a workshop or garage, then installed after curing, allowing better quality control and finishing but requiring careful transportation and support planning. Most DIYers find precast methods more manageable for achieving professional results.
Related to broader home improvement projects, you might also consider how concrete countertops integrate with other renovations. If you’re simultaneously tackling bathroom additions or kitchen renovations, coordinating finishes and styles creates cohesive design throughout your home.
Step-by-Step Installation Process
The installation process begins with meticulous mold construction. Your forms must be rigid, level, and sealed to prevent concrete leakage. Use melamine, plywood, or custom-built forms depending on your edge profile preferences. Seal all seams with caulk and coat interior surfaces with release agent before concrete placement.
Mix concrete according to manufacturer specifications, adding water gradually until achieving a peanut butter-like consistency. Too much water weakens the final product and causes surface efflorescence (white residue), while too little water makes the mix difficult to work and consolidate. Most countertop mixes require approximately 5 to 7 quarts of water per 80-pound bag.
Pour concrete into molds in layers, vibrating each layer for 20 to 30 seconds to eliminate air pockets. Over-vibration causes aggregate segregation and surface defects, while under-vibration leaves voids that weaken the countertop. Work methodically, filling forms completely while maintaining level surfaces.
Strike off excess concrete using a straightedge, then allow the surface to set for 24 to 48 hours before removing forms. The concrete should be firm but not fully cured before form removal. Too-early removal risks surface damage, while waiting too long makes form removal unnecessarily difficult.
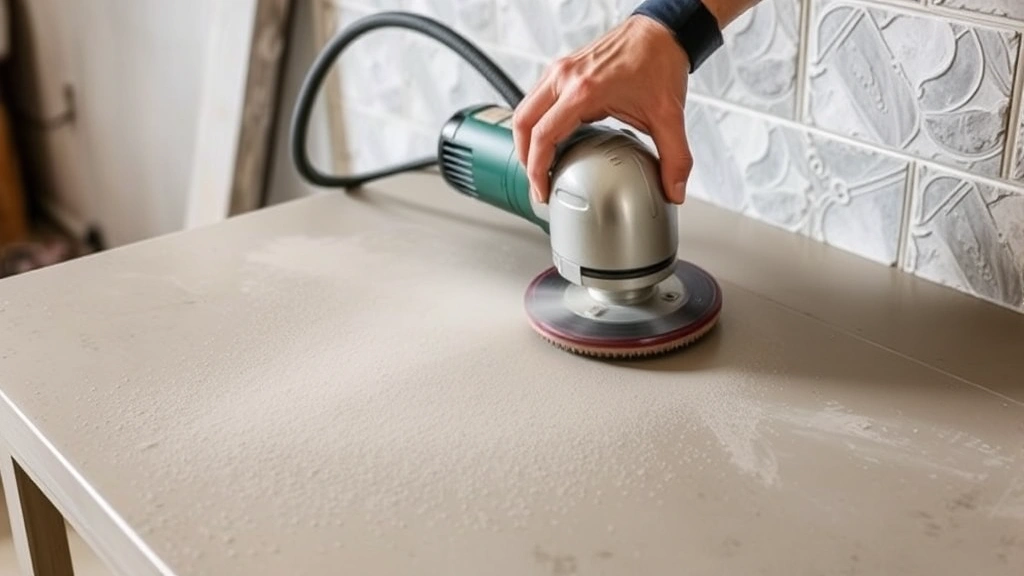
After form removal, begin surface finishing. Sand the concrete progressively through grits ranging from 60 to 400, depending on your desired final appearance. Each sanding stage removes surface imperfections and reveals aggregate while creating progressively smoother surfaces. This labor-intensive process typically requires 4 to 8 hours of grinding and sanding for a standard kitchen countertop.
Allow concrete to cure fully for 28 days before applying sealers and putting the countertop into service. This patience ensures maximum strength development and proper seal adhesion. During curing, maintain consistent moisture and temperature conditions for optimal results.
Sealing and Finishing Techniques
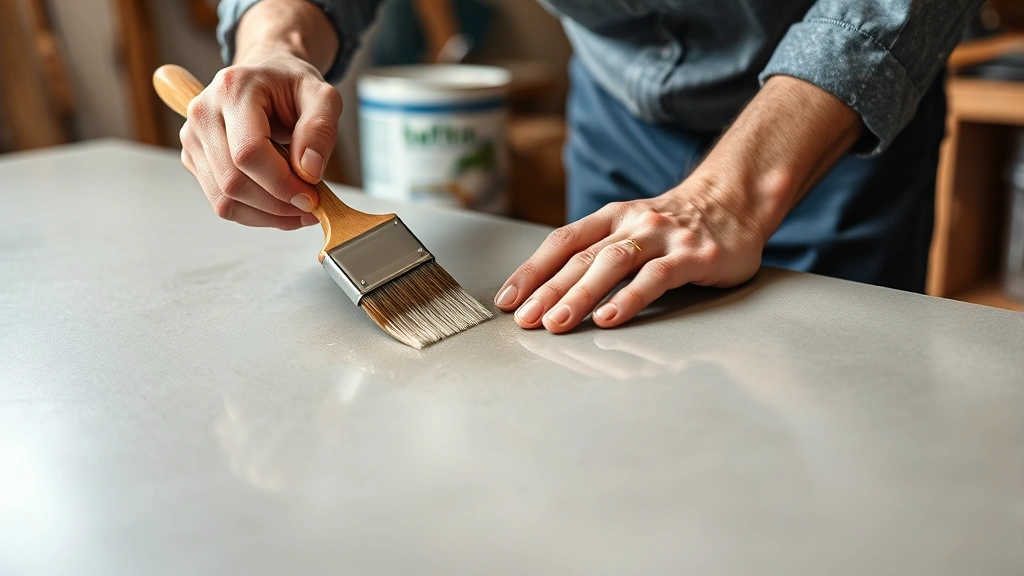
Sealing concrete countertops is absolutely essential for protecting against staining, moisture penetration, and damage from acidic substances like lemon juice and wine. Without proper sealing, concrete’s porous nature absorbs liquids, leaving permanent marks and potentially causing deterioration. Several sealing options exist, each with distinct advantages and cost implications.
Penetrating sealers ($50 to $120 per gallon) soak into the concrete surface, providing protection while maintaining the natural concrete appearance. These sealers work best on matte or lightly polished finishes and require reapplication every 1 to 3 years. Penetrating options include acrylic-based products and silane/siloxane formulations, with the latter offering superior water and oil repellency.
Film-forming sealers ($60 to $150 per gallon) create a protective barrier on the concrete surface, offering more robust protection but potentially altering the concrete’s appearance slightly. Polyurethane sealers provide excellent durability and chemical resistance, making them ideal for kitchen countertops. Epoxy sealers offer superior hardness and gloss but may yellow over time with UV exposure.
Wax finishes ($30 to $80 per application) create warm, natural-looking surfaces with excellent feel but require more frequent maintenance and reapplication. Wax works beautifully on polished concrete but demands regular buffing to maintain appearance. Many designers combine wax with penetrating sealers for optimal results.
Apply sealers according to manufacturer instructions, typically requiring 2 to 3 coats with drying time between applications. Ensure proper ventilation during sealing, as many products emit strong odors. Allow sealers to cure completely before exposing countertops to water or food contact, typically 48 to 72 hours depending on product specifications.
For enhanced aesthetics, consider applying concrete stains before sealing. Acid stains ($25 to $60 per gallon) chemically react with concrete, creating unique variegated color patterns. Water-based stains ($30 to $70 per gallon) offer broader color ranges and easier application but less dramatic effects. Test stains on concrete samples to ensure your chosen colors complement your kitchen design.
Maintenance and Long-Term Care
Properly sealed and maintained concrete countertops develop character over time, with patina that many homeowners find appealing. Daily maintenance involves simple wiping with mild soap and water, avoiding abrasive scrubbers that damage sealers. Use cutting boards to prevent knife marks, and clean spills promptly to prevent staining, particularly with acidic substances.
Concrete’s porous nature means that despite sealing, some minor staining may occur over time. This patina is often considered part of concrete’s charm, though you can minimize it through consistent sealing maintenance. Reapply penetrating sealers annually or as needed, and refresh film-forming sealers every 2 to 3 years depending on traffic and usage intensity.
Avoid placing hot cookware directly on unsealed concrete, as extreme heat can damage sealers. Use trivets or hot pads to protect surfaces. While concrete withstands considerable abuse, sharp impacts can chip edges or create small cracks. Address chips promptly using color-matched concrete patching compounds to prevent water infiltration.
If your concrete countertops develop cracks, assess whether they’re structural or cosmetic. Hairline cracks (less than 1/8 inch wide) are typically cosmetic and can be sealed with epoxy or concrete caulk. Wider cracks may indicate structural issues and warrant professional evaluation. International Code Council guidelines provide standards for assessing concrete integrity in residential applications.
Comparing concrete countertop maintenance to other surfaces reveals concrete’s practicality. Unlike natural stone requiring specialized cleaners and frequent sealing, concrete tolerates standard household cleaners and requires less frequent maintenance than some alternatives. The durability of properly installed and sealed concrete often exceeds 25 to 30 years with minimal intervention.
For homeowners simultaneously undertaking basement finishing projects or flooring installation work, concrete experience transfers well. Understanding concrete properties, finishing techniques, and maintenance becomes valuable knowledge for multiple home improvement applications.
FAQ
How much does it cost to get fillings for concrete countertops?
Concrete countertop repairs using concrete fillings typically cost $50 to $300 depending on damage extent and repair location. Small chip repairs using color-matched concrete patching compounds cost $20 to $75 for materials and basic DIY labor. Larger cracks requiring epoxy injection systems range from $100 to $300. Professional repair services charge $75 to $150 per hour plus materials. For comparison, professional countertop replacement costs significantly more, making repairs a practical investment in extending countertop life.
What’s the typical lifespan of DIY concrete countertops?
Properly installed and maintained concrete countertops last 25 to 30 years or longer, rivaling or exceeding granite and quartz durability. Lifespan depends heavily on sealer maintenance, usage patterns, and environmental conditions. Consistent sealing every 1 to 3 years and prompt repair of chips or cracks maximizes longevity. Many homeowners find their concrete countertops outlast initial expectations when given appropriate care.
Can I install concrete countertops over existing surfaces?
Yes, concrete countertops can be installed over existing laminate or tile surfaces if the substrate is structurally sound and properly prepared. Remove loose material, repair any damage, and ensure adequate support for the additional weight. Most installers prefer removing old surfaces completely for optimal adhesion and structural integrity, though overlay methods work in specific situations. Consult structural guidelines from the American Concrete Institute before proceeding with overlay installations.
What’s the difference between polished and honed concrete finishes?
Polished concrete involves grinding progressively finer diamond grits to create a glossy, reflective surface that reveals aggregate and color depth. Honed concrete stops at medium grits (typically 400 grit), creating a matte, velvety surface without gloss. Polished finishes are more formal and dramatic, while honed finishes feel warmer and more natural. Polished finishes require more maintenance but showcase decorative aggregates beautifully. Choose based on your design preferences and maintenance commitment.
Are concrete countertops food-safe without sealing?
Unsealed concrete is porous and absorbs bacteria, food particles, and liquids, making it unsuitable for food preparation surfaces. Proper sealing is absolutely essential for food safety compliance and hygiene. Use food-safe sealers specifically rated for countertop applications, following all manufacturer guidelines. Never use sealers containing harmful chemicals on food contact surfaces. When properly sealed with appropriate products, concrete countertops meet food safety standards and perform reliably in kitchen applications.
How do I fix stains on concrete countertops?
Address fresh stains immediately by blotting with absorbent materials and rinsing thoroughly. For set-in stains, try poultice treatments using baking soda and water paste left on the stain for 24 to 48 hours. Mild acids like vinegar diluted in water sometimes remove mineral deposits, though test on inconspicuous areas first. Persistent stains may require professional restoration or strategic acceptance as patina. Regularly resealing prevents new stains from setting into the concrete.


