How to Blanch Vegetables: Chef-Approved Guide for Perfect Results
Blanching is a fundamental cooking technique that professional chefs and home cooks use to preserve vegetables’ vibrant color, crisp texture, and nutritional value. Whether you’re preparing vegetables for freezing, removing skins, or pre-cooking before a final preparation method, mastering the blanching process ensures consistent, restaurant-quality results every time. This technique involves briefly immersing vegetables in boiling water followed by immediate cooling in ice water to halt the cooking process.
The beauty of blanching lies in its simplicity and effectiveness. By understanding the proper timing, temperature control, and cooling methods, you can transform your vegetable preparation routine. This guide walks you through everything from selecting the right vegetables to troubleshooting common mistakes, giving you the confidence to blanch like a seasoned culinary professional.
What Is Blanching and Why It Matters
Blanching is a two-step cooking method: vegetables are submerged in rapidly boiling salted water for a precise duration, then immediately transferred to ice water to stop the cooking process. This technique serves multiple purposes in both professional kitchens and home food preparation. The brief exposure to heat deactivates enzymes responsible for color degradation, texture breakdown, and flavor loss during storage. When you’re finishing your basement with a kitchen area, understanding proper food preservation techniques becomes invaluable for your new space.
The primary benefits of blanching include enzyme inactivation, which extends the shelf life of frozen vegetables by up to twelve months. The process also removes surface dirt and microorganisms, partially softens tough skins for easier peeling, and brightens the natural pigmentation of green, red, and orange vegetables. Additionally, blanching reduces the strong flavors in certain vegetables like cabbage and Brussels sprouts, making them more palatable for sensitive palates.
Professional chefs blanch vegetables for various applications: pre-cooking before roasting or sautéing, preparing vegetables for cold salads, removing peels from tomatoes and peaches, and preserving seasonal produce at peak ripeness. Understanding when and how to blanch appropriately determines the success of your final dish and the longevity of your preserved vegetables.
Essential Equipment and Setup
Before beginning any blanching operation, gather the necessary equipment to ensure efficiency and safety. You’ll need a large stainless steel pot with a minimum capacity of six to eight quarts, allowing adequate water volume and space for vegetable movement. A quality pot selection influences heat distribution and recovery time between batches.
Essential blanching equipment includes:
- Large pot: Stainless steel construction resists corrosion and maintains water temperature effectively
- Slotted spoon or spider strainer: Allows quick removal of vegetables while draining excess water
- Large bowl or ice bath container: Holds ice water for rapid cooling; use a bowl larger than your pot for efficient transfer
- Kitchen timer: Precise timing prevents overcooking; digital timers with alarms prove most reliable
- Colander: Final draining vessel preventing water pooling on finished vegetables
- Cutting board and sharp knife: Proper preparation requires uniformly sized pieces for consistent cooking
- Thermometer: Optional but helpful for monitoring water temperature recovery between batches
Prepare your workspace by filling your large pot with water, using approximately one gallon per pound of vegetables. Add one tablespoon of salt per gallon to season the water and raise its boiling point slightly. Position your ice bath container adjacent to the stove, filling it with ice and cold water before beginning. This setup minimizes handling time and prevents temperature fluctuations that compromise blanching quality.
Step-by-Step Blanching Process
Follow this methodical approach to achieve perfect blanching results consistently. Begin by preparing your vegetables: wash thoroughly under cold running water, trim stems and leaves, and cut into uniform pieces. Uniform sizing ensures even cooking throughout the batch, preventing some pieces from undercooking while others overcook.
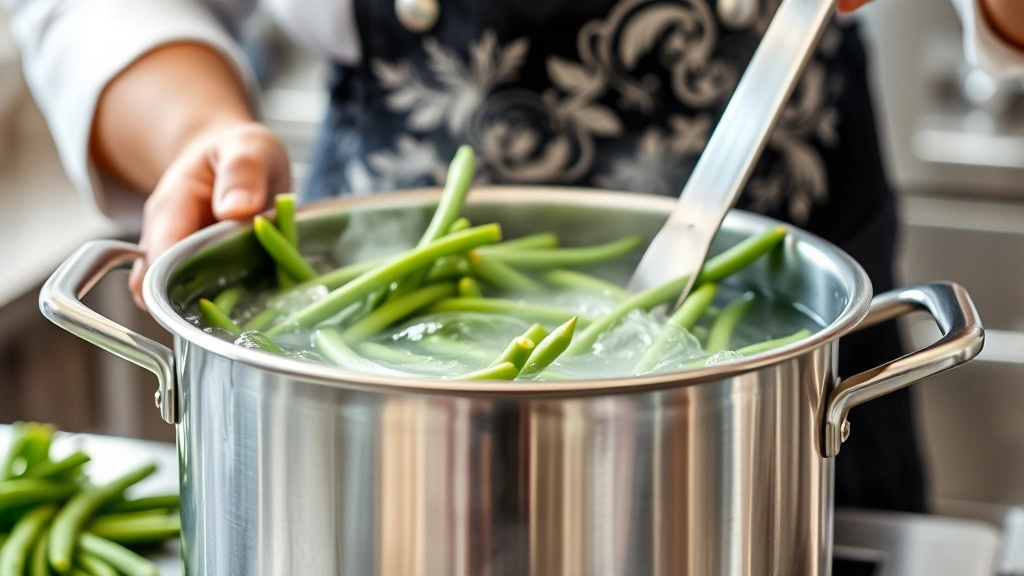
Bring your salted water to a rolling boil before adding vegetables. The water should maintain a vigorous boil throughout the blanching period, so use high heat and ensure adequate water volume. Add prepared vegetables in a single layer when possible, though slight overlapping is acceptable. Immediately start your timer as vegetables enter the water; this is the critical moment determining final texture and color preservation.
The blanching duration varies significantly by vegetable type and piece size, typically ranging from two to five minutes for most common vegetables. Maintain a rolling boil throughout the process; if water temperature drops significantly, remove vegetables immediately and wait for water to return to boiling before continuing with subsequent batches. This prevents overcooking the current batch while waiting for temperature recovery.
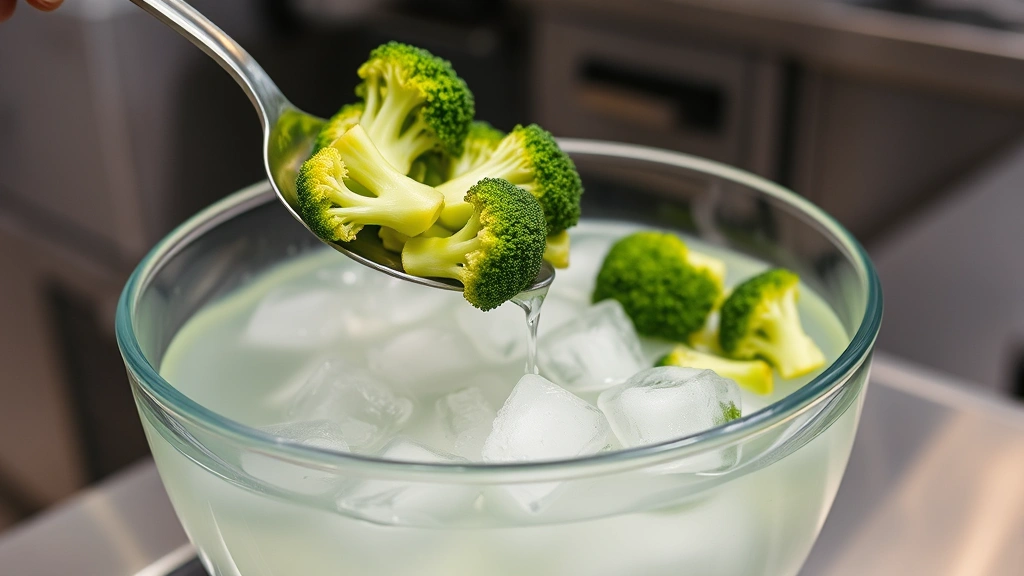
When time expires, use your slotted spoon or spider strainer to quickly transfer vegetables to the prepared ice bath. Submerge completely and stir gently to ensure uniform cooling. The ice bath should reduce vegetable temperature to near room temperature within the same duration as the blanching time. For example, if blanching took three minutes, cooling should also require approximately three minutes.
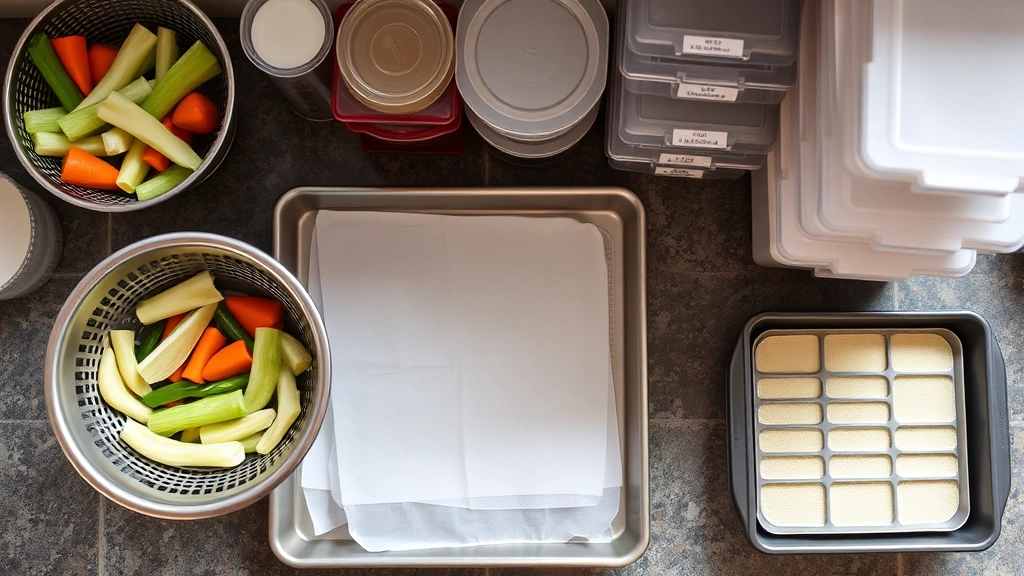
Once cooled completely, transfer vegetables to your colander and allow excess water to drain thoroughly. Proper draining prevents ice crystallization during freezing and ensures optimal texture upon thawing. Pat vegetables dry with clean kitchen towels if preparing for immediate use or if your storage method requires minimal moisture.
Blanching Times by Vegetable Type
Accurate timing is non-negotiable for successful blanching. Different vegetables require different durations based on their density, water content, and desired final texture. These recommendations assume medium-sized pieces and maintain proper food safety standards for preserved foods.
Green vegetables: Asparagus (three to four minutes), green beans (three to four minutes), broccoli florets (three to four minutes), Brussels sprouts halved (four to five minutes), cabbage (three minutes), peas (two to three minutes), and spinach (two to three minutes). Green vegetables benefit most from blanching, as the process preserves their chlorophyll-based color and prevents the olive-green discoloration that occurs during freezing without blanching.
Root vegetables: Beets (three to four minutes for small whole, four to five for medium), carrots (three to four minutes sliced, five for whole small), potatoes (five to ten minutes depending on size), and turnips (three to four minutes). Root vegetables have denser cellular structures, requiring slightly longer blanching times than leafy or soft vegetables. Cut root vegetables into uniform pieces to ensure consistent cooking.
Other vegetables: Cauliflower florets (three to four minutes), celery (three minutes), corn on the cob (seven to eleven minutes depending on size), eggplant (four minutes), okra (three to four minutes), peppers (three minutes), and zucchini (two to three minutes). These vegetables represent diverse textures and compositions, so monitor closely during your first blanching attempt to refine timing for your preference.
When blanching combinations of vegetables, process each type separately using the same water. This prevents faster-cooking vegetables from overcooking while waiting for slower-cooking varieties to reach doneness. However, you may blanch the same vegetable in batches sequentially without changing water, as long as the water returns to a rolling boil between batches.
Cooling and Storage Methods
The cooling phase is equally important as the blanching itself. Inadequate cooling allows residual heat to continue cooking vegetables, resulting in mushy texture and nutrient loss. Proper ice baths stop the cooking process immediately, preserving the ideal texture and color you’ve worked to achieve.
For optimal cooling, use a ratio of one part vegetables to three parts ice water. If your ice supply is limited, prepare additional ice using your freezer or purchase commercial ice. Change the ice bath water if it becomes too warm during processing; water temperature should remain below 50°F throughout cooling. Some professional kitchens use continuous ice baths with overflow drainage to maintain consistent cooling temperatures across multiple batches.
After cooling and draining, you have several storage options depending on your intended use. For immediate consumption within two to three days, store blanched vegetables in sealed containers in your refrigerator. For longer-term preservation, freeze vegetables using these methods:
- Tray freezing: Arrange cooled, dried vegetables in a single layer on sheet pans and freeze for two to three hours until solid, then transfer to freezer containers. This prevents clumping and allows easy portioning.
- Vacuum sealing: Use a vacuum sealer to remove air from storage bags before freezing, which prevents freezer burn and extends storage life to twelve months or longer.
- Freezer containers: Transfer blanched vegetables directly to rigid freezer containers, leaving minimal headspace. Label containers with vegetable type and blanching date.
- Flash freezing with liquid: Cover vegetables with a light syrup or water solution before freezing to maintain moisture and texture, particularly beneficial for delicate vegetables.
Properly blanched and frozen vegetables maintain quality for eight to twelve months when stored at 0°F or below. Label all containers clearly with contents and date processed. Organize your freezer using a first-in-first-out system to ensure older vegetables are used before newer batches.
Common Blanching Mistakes
Understanding frequent errors helps you avoid them and achieve consistent success. The most common mistake is insufficient water volume relative to vegetable quantity. When too many vegetables enter the pot simultaneously, water temperature drops significantly, extending cooking time and resulting in uneven texture. Use the guideline of one gallon of water per pound of vegetables and blanch in smaller batches if necessary.
Inadequate cooling is another prevalent error. When vegetables don’t cool completely or quickly enough, residual heat continues the cooking process, creating mushy texture and destroying nutrients. Ensure your ice bath is prepared and ready before blanching begins, and use sufficient ice to maintain cold temperatures throughout cooling.
Timing inaccuracy, whether blanching too long or too short, dramatically affects results. Underblanching fails to deactivate enzymes, resulting in continued deterioration during storage. Overblanching creates mushy vegetables and nutrient loss. Use a reliable timer and begin timing immediately when vegetables enter boiling water, not when you add water to the pot.
Skipping the salt in blanching water is a mistake that results in bland vegetables and potential nutrient leaching into the water instead of remaining in the vegetable tissues. Salt also raises water’s boiling point slightly, improving blanching efficiency. Use one tablespoon of salt per gallon of water as a standard measure.
Failing to prepare an adequate ice bath before beginning blanching wastes time and compromises cooling. Have your ice bath ready and positioned conveniently to your stove. If you must delay cooling while preparing the ice bath, your vegetables have already begun overcooking.
Using the same blanching water for too many batches without temperature recovery results in progressively longer cooking times and inconsistent results. If water temperature doesn’t return to a rolling boil within two to three minutes of the previous batch completion, prepare fresh water.
Advanced Techniques and Tips
Once you’ve mastered basic blanching, several advanced techniques enhance your results and expand your applications. Shock blanching involves a second brief ice bath after the initial cooling to ensure maximum texture preservation. This technique works particularly well for vegetables destined for cold preparations like salads.
Steam blanching offers an alternative to water blanching, particularly beneficial for vegetables that lose significant nutrients or flavor to water leaching, such as broccoli and cauliflower. Use a steamer basket over boiling water, adjusting times by approximately 50 percent longer than water blanching. Steam blanching produces slightly different texture characteristics, so experiment to determine your preference.
Combination blanching involves blanching multiple vegetables together when they require similar cooking times. Green beans and carrots blanch well together, as do broccoli and cauliflower. This technique saves time and water while producing complementary vegetable combinations ready for subsequent cooking or storage.
Blanching for peeling utilizes heat to loosen skins before blanching completion. Tomatoes and peaches typically blanch for sixty to ninety seconds just until skin splits, then immediately cool and peel. The skin slips off easily after blanching, revealing the tender flesh beneath. This technique differs from standard blanching by using shorter times and focusing on skin separation rather than full cooking.
Professional chefs blanch vegetables slightly less than home cooks typically do, preferring al dente texture that firms further during final cooking methods. If you plan to blanch vegetables for subsequent cooking rather than storage, reduce blanching time by approximately 25 percent to prevent overcooking during final preparation. When preparing blanched vegetables for painting a new kitchen or dining area, optimal texture becomes crucial for presentation.
Batch processing efficiency improves dramatically when you organize your workspace strategically. Prepare all vegetables before beginning, arrange equipment in order of use, and maintain consistent timing across batches. Some professional operations blanch continuously for hours, using multiple pots and ice baths to maintain consistent production rates.
Water temperature monitoring using a thermometer helps identify when water has recovered to proper boiling temperature between batches. This prevents the mistake of adding vegetables to insufficiently heated water, which extends blanching time and compromises results. Many professional kitchens use digital thermometers with alarms set to alert when water reaches 212°F.
Seasoning blanching water appropriately enhances vegetable flavor subtly. Beyond salt, some chefs add a squeeze of lemon juice or white vinegar to blanching water for vegetables like green beans and asparagus, which brightens flavor and color. Experiment cautiously, as aggressive seasoning can overpower delicate vegetable flavors.
Frequently Asked Questions
Can you blanch vegetables without ice?
While ice provides the most effective cooling method, you can use very cold water from a tap or well if ice is unavailable. However, cooling takes significantly longer, allowing continued cooking that compromises texture and nutrients. Ice baths cool vegetables in minutes; cold water cooling requires ten to fifteen minutes or longer. For best results, always use ice when possible.
How long do blanched vegetables last in the freezer?
Properly blanched and frozen vegetables maintain peak quality for eight to twelve months at 0°F or below. After twelve months, vegetables remain safe to eat but gradually lose texture, color, and nutritional value. Label containers with blanching dates and rotate stock regularly using the first-in-first-out method.
Should you add oil to blanching water?
No, oil should never be added to blanching water. Oil prevents proper water contact with vegetables, creates a slippery cooking surface, and complicates cooling processes. Oil is appropriate for subsequent cooking methods but not for blanching itself.
Can you reblanch vegetables that weren’t blanched initially?
Reblanching vegetables that weren’t initially blanched provides some enzyme deactivation but doesn’t fully compensate for the missed opportunity. The vegetables have already begun degradation during storage, so reblanching won’t restore them to original quality. Always blanch before freezing for optimal results.
What’s the difference between blanching and parboiling?
Blanching uses very brief cooking times with immediate cooling, while parboiling involves longer cooking intended to partially cook vegetables for completion using another method. Parboiling doesn’t require ice bath cooling; vegetables are simply drained and cooled to room temperature. Blanching emphasizes enzyme deactivation and preservation; parboiling emphasizes partial cooking.
Can you blanch fresh herbs?
Blanching isn’t recommended for most fresh herbs, as the brief cooking and cooling damages delicate leaves. For herb preservation, freeze herbs in ice cube trays with water or oil, or dry them using your oven or food dehydrator. Parsley and basil tolerate brief blanching if you prefer that method, but most herbs don’t benefit from blanching.
How do you know when blanching water is ready?
Water is ready when it reaches a rolling boil, characterized by large, rapidly breaking bubbles covering the entire water surface. A gentle simmer isn’t sufficient; you need vigorous, continuous boiling to achieve proper blanching. If you’re uncertain, use a thermometer to confirm 212°F at sea level.
Can commercial blanching equipment improve home results?
Commercial equipment like continuous blanchers and specialized cooling systems improves efficiency and consistency for large-scale operations but isn’t necessary for home blanching. Your kitchen stove, pot, and ice bath provide sufficient capability for excellent home blanching results. Focus on proper technique rather than equipment investment.


