Egg Candling DIY: Expert Tips for Success
Egg candling is a time-honored technique that allows you to monitor the development of embryos inside eggs without breaking the shell. Whether you’re raising backyard chickens, incubating quail eggs, or managing a small poultry operation, understanding how to candle an egg is essential for ensuring successful hatches and healthy chicks. This non-invasive method uses a bright light source to illuminate the egg’s interior, revealing critical information about embryo development, fertility, and viability.
The practice of candling dates back centuries and remains one of the most reliable ways to assess egg quality during incubation. By learning proper candling techniques, you can identify problematic eggs early, remove non-viable specimens, and optimize your hatch rates. This comprehensive guide will walk you through everything you need to know about candling eggs at home, from selecting the right equipment to interpreting what you see inside each egg.
What Is Egg Candling and Why It Matters
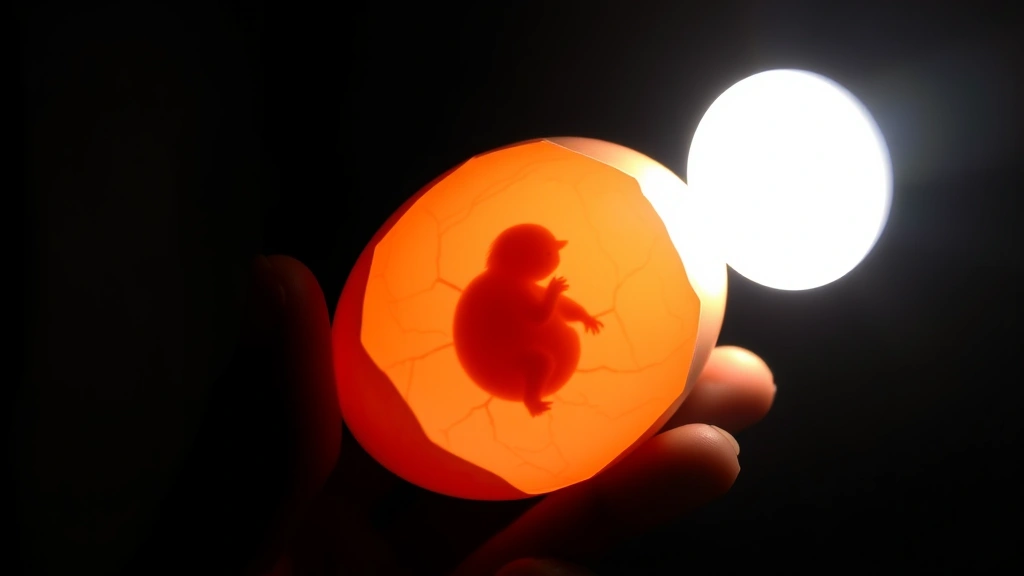
Egg candling involves holding an egg up to a bright light source in a darkened environment to examine its interior contents. The term “candling” originated from the practice of using candles for this purpose, though modern candling devices are far more effective and safer. The shell of an egg is semi-translucent, allowing light to pass through and reveal the developing embryo, blood vessels, air cell, and yolk positioning.
The primary reasons for candling include identifying fertile versus infertile eggs, monitoring embryonic development stages, detecting bacterial contamination or mold growth, assessing egg quality, and determining when eggs are ready for lockdown before hatching. Early detection of non-viable eggs allows you to remove them from the incubator, preventing the spread of bacteria and creating more space for developing embryos. Additionally, candling helps you understand whether your incubation conditions—temperature, humidity, and turning—are optimal for successful development.
For hobbyists managing backyard flocks and those interested in DIY poultry projects, candling provides valuable feedback without requiring expensive laboratory equipment. Understanding embryo development through candling also deepens your appreciation for the biological processes occurring inside each egg and helps you make informed decisions about which eggs to incubate.
Essential Equipment for Home Candling
Setting up a proper candling station requires minimal investment but makes a significant difference in your ability to see egg contents clearly. The most critical component is a reliable light source designed specifically for candling or an improvised alternative that produces sufficient brightness without generating excessive heat.
Dedicated candling devices are available from poultry supply retailers and online marketplaces. These handheld or stationary lights typically feature LED technology, which produces bright illumination while remaining cool to the touch. LED candlers are preferable to incandescent models because they use less electricity, generate minimal heat, and last considerably longer. Many modern candlers include adjustable brightness settings and rubber viewing cones that fit different egg sizes, from small quail eggs to large goose eggs.
If you prefer a budget-friendly approach, you can create an effective candler using a high-intensity flashlight, a desk lamp with an LED bulb, or even a smartphone flashlight in a darkened room. The key is ensuring the light is bright enough to penetrate the egg shell and reveal interior details. Some people construct DIY candlers by drilling a hole in a cardboard box and positioning a bright light source inside, creating a viewing chamber.
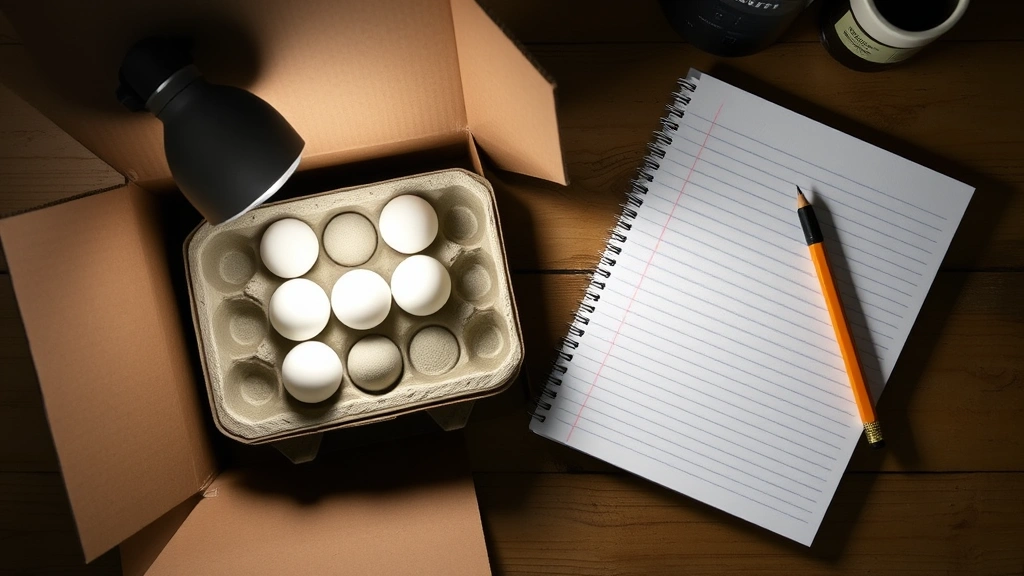
Additional supplies you’ll need include:
- Darkened room or enclosed space for clear visibility
- Egg carton or holder to prevent rolling during examination
- Notebook or digital device for recording candling results
- Pencil or marker for marking eggs (use pencil, never pen)
- Clean hands or cotton gloves to prevent contamination
- Optional: magnifying glass for detailed embryo observation
Consider consulting poultry association guidelines for specific equipment recommendations based on your flock size and egg types.
Step-by-Step Candling Process
Successful candling requires a systematic approach and gentle handling of eggs throughout the process. Begin by preparing your candling station in a completely darkened room—even ambient light can interfere with your ability to see egg contents clearly. Set up your light source, egg holder, and recording materials before you begin.
The basic candling procedure:
- Prepare your workspace: Dim all lights and allow your eyes to adjust to darkness for 2-3 minutes. This improves your ability to see subtle details inside eggs.
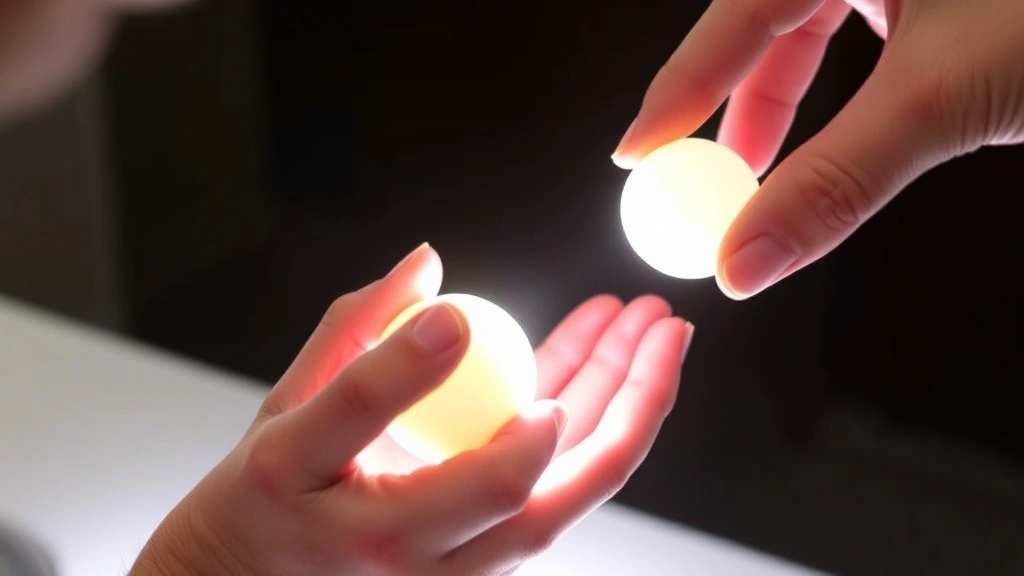
- Select the first egg: Gently remove an egg from your incubator and place it in your holder or carton. Handle eggs with clean, dry hands to prevent transferring bacteria or oils to the shell.
- Position the egg: Hold the egg against the candling light with the larger end facing the light source. The air cell is located at the larger end, and examining it first gives you important information about the egg’s condition.
- Observe the air cell: Look for the size and shape of the dark space at the egg’s large end. In fresh eggs, the air cell should be no larger than the size of a dime. As incubation progresses, this air cell expands as moisture evaporates from the egg.
- Examine the yolk: Rotate the egg slowly to observe the yolk position and look for blood vessels. The yolk should be centered in the egg, and blood vessels should be visible in developing embryos.
- Check for contamination: Look for signs of mold (dark spots), blood spots, or unusual discoloration that might indicate bacterial growth or developmental problems.
- Record your observations: Note the date, egg number, and candling results. Use a pencil to mark eggs that appear non-viable or questionable.
- Return the egg: Gently place the candled egg back into the incubator or storage location. Minimize the time eggs spend outside the incubator.
The entire candling process for each egg should take only 30-60 seconds. Extended exposure to room temperature and light can negatively impact embryo development, so work efficiently without rushing to the point of carelessness.
Interpreting Candling Results by Development Stage
Understanding what you see at different stages of incubation is crucial for accurate assessment. Chicken eggs typically hatch after 21 days of incubation, and candling results change dramatically throughout this period.
Day 1-3 (Early Candling): At this stage, fertile eggs show minimal visible changes. You may barely see the yolk, and blood vessels are not yet visible. Infertile eggs appear clear with only the yolk visible. This is why some experienced candlers skip early candling to avoid unnecessary egg handling.
Day 7-10 (First Major Candling): This is the ideal time for your first detailed candling. Fertile eggs show a distinct web of blood vessels spreading from the embryo. The embryo itself appears as a dark spot or small mass. The air cell remains small. Non-viable or infertile eggs appear clear with no blood vessel development. This is when you should remove any obviously non-viable eggs from your incubator.
Day 14-18 (Mid-Incubation Candling): The embryo has grown substantially and now fills a significant portion of the egg. Blood vessels are extensive and clearly visible. The air cell has expanded noticeably. The yolk becomes increasingly dark as the embryo consumes its nutrients. Viable eggs show obvious movement and blood vessel activity. Dead embryos appear as dark, motionless masses with no blood vessel activity.
Day 19-21 (Late Candling/Lockdown): By day 19, most of the egg appears dark because the embryo has grown so large. The air cell should occupy approximately one-third of the egg’s length. This is when you enter lockdown, stopping egg turning and increasing humidity. Avoid candling during lockdown unless absolutely necessary, as the embryo is positioning itself for hatching and excessive disturbance can interfere with this critical process.
For other poultry species, adjust these timelines accordingly. Quail eggs hatch in 16-18 days, duck eggs in 28 days, and turkey eggs in 28 days. Consult species-specific incubation guides for accurate development stages.
Common Candling Mistakes to Avoid
Even experienced candlers occasionally make errors that can compromise their hatch rates. Understanding common mistakes helps you maintain optimal conditions for embryo development.
Excessive handling: Candling too frequently or leaving eggs outside the incubator too long exposes developing embryos to temperature fluctuations and increases stress. Limit candling to 2-3 times during the incubation period: once around day 7-10 to remove clearly non-viable eggs, and optionally once more around day 14-18. Skip candling entirely if you’re uncomfortable interpreting results.
Using inappropriate light sources: Incandescent bulbs generate significant heat that can damage nearby embryos or increase incubator temperature. Extremely dim lights make it impossible to see blood vessels and embryo development. Use dedicated LED candlers or bright LED flashlights for best results.
Misinterpreting blood spots as fertility: A blood spot visible in the egg white is not the same as a developing embryo. Blood spots indicate a broken blood vessel and do not indicate fertility. Fertile eggs show organized blood vessel networks spreading from the embryo, not isolated spots.
Neglecting sanitation: Handling multiple eggs without washing hands between candling sessions can transfer bacteria from non-viable eggs to viable ones. Always use clean hands or gloves, and consider using fresh gloves for each candling session.
Candling during lockdown: Once you’ve entered the final 2-3 days before hatch, stop candling. The embryo is positioning itself for pipping (breaking through the shell), and unnecessary disturbance can cause improper positioning, leading to pipping in the wrong location and hatching failure.
Ignoring humidity levels: While candling doesn’t directly affect humidity, improper humidity management affects what you observe during candling. If the air cell is expanding too quickly, humidity is too low. If it’s barely expanding, humidity is too high. Adjust your incubator settings based on candling observations.
Safety Considerations During Candling
While candling is generally a safe procedure, several precautions protect both you and your developing embryos during the process.
Prevent contamination: Wash your hands thoroughly before and after candling sessions. If you observe signs of bacterial contamination (unusual odors, visible mold, discolored eggs), handle those eggs last and wash hands immediately afterward. Never return contaminated eggs to your incubator, as bacteria can spread to viable eggs.
Maintain appropriate temperatures: Eggs should not be exposed to room temperature for more than 15-20 minutes during candling. Extended cooling can interrupt embryo development and reduce hatch rates. Work efficiently and return eggs to the incubator promptly.
Avoid excessive light exposure: While brief exposure to candling light doesn’t harm embryos, prolonged or repeated bright light exposure can stress developing chicks. Use the minimum light duration necessary to complete your observations.
Handle eggs with care: Never shake, drop, or roughly handle eggs during candling. Developing embryos are fragile, and physical trauma can cause death or deformities. Support eggs gently and avoid sudden movements.
Use appropriate lighting equipment: Ensure your light source is stable and won’t fall into your workspace. Keep electrical cords organized to prevent tripping hazards. If using heat-generating lights, position them away from your body and ensure proper ventilation.
Protect your eyes: Bright LED lights can cause temporary discomfort if you look directly into them. When candling, look at the egg illuminated by the light rather than directly at the light source itself.
Troubleshooting Candling Challenges
Sometimes candling reveals unexpected results or raises questions about what you’re observing. Understanding common challenges helps you respond appropriately.
Difficulty seeing blood vessels: If you cannot clearly see blood vessels in eggs you believe are fertile, the light source may be insufficiently bright, or your eyes may need more time to adjust to darkness. Spend 3-5 minutes in complete darkness before candling to maximize your vision. Consider upgrading to a brighter LED candler. Some egg shells are thicker or darker than others, making them harder to candle. Brown eggs are typically more challenging to candle than white eggs.
Unclear air cell visibility: The air cell should be clearly visible at the large end of the egg. If you cannot locate it, ensure you’re holding the egg with the large end toward the light. If the air cell is extremely small in eggs you’ve been incubating for 7+ days, humidity may be too high. If it’s unusually large, humidity is likely too low.
Apparent movement without blood vessels: If you see what appears to be movement but no blood vessels, you’re likely observing the yolk shifting position rather than embryo movement. True embryo movement appears as specific activity from a dark mass, not general yolk movement.
Identifying infertility versus early death: Infertile eggs appear clear with no blood vessel development at day 7-10 candling. Embryos that died early show blood vessel development but no movement and no growth beyond the initial stages. Both should be removed from the incubator.
Mold and contamination concerns: Dark spots that appear to spread from a central location may indicate mold growth. These eggs should be removed immediately and disposed of outside your incubation area. The distinctive smell of contaminated eggs is usually unmistakable—a foul, unpleasant odor indicates bacterial growth.
Candling white versus brown eggs: Brown eggs have thicker, less translucent shells than white eggs, making them more challenging to candle. If you’re struggling to see details in brown eggs, this is normal. Focus on observing obvious features like large blood vessel networks and embryo position rather than expecting the same clarity as white eggs.
For detailed candling guidelines, consult university extension poultry resources specific to your region and egg type.
FAQ
How many times should I candle eggs during incubation?
Most experts recommend candling 2-3 times during a 21-day chicken egg incubation: once at day 7-10 to remove clearly non-viable eggs, optionally once at day 14-18 to monitor development, and never after day 19 (lockdown). More frequent candling unnecessarily stresses embryos and increases contamination risk.
Can I candle eggs if I’m unsure about what I’m seeing?
Yes, it’s better to candle cautiously than to keep non-viable eggs in your incubator. If you’re uncertain, mark questionable eggs and candle them again 2-3 days later. Development changes rapidly, making uncertain eggs much clearer at the next candling. When in doubt, consult local agricultural extension services for guidance.
What does a blood ring indicate?
A blood ring appears as a dark red circle inside the egg when candled and indicates that an embryo began developing but died, usually due to temperature fluctuations, improper humidity, or genetic issues. Remove blood ring eggs immediately, as they may rupture and contaminate viable eggs.
Is it normal for air cells to vary in size between eggs?
Yes, slight variations are normal. However, if air cells are dramatically different sizes in eggs incubated under identical conditions, those with unusually large air cells may have small cracks allowing accelerated moisture loss. Monitor these eggs closely and be prepared to remove them if development appears compromised.
Can I candle eggs without removing them from the incubator?
Some modern incubators feature viewing windows or can accommodate candling without opening the lid. If your incubator doesn’t have these features, removing eggs briefly for candling is necessary. Minimize time outside the incubator to 15-20 minutes total per candling session.
What should I do with eggs that fail candling?
Remove non-viable eggs from the incubator immediately. You can dispose of them in household trash, bury them in your garden, or compost them if your system accepts animal products. Never return failed eggs to the incubator, as they may rupture and contaminate viable eggs with bacteria.
How do I know if my candling light is bright enough?
A proper candling light should illuminate the entire egg interior clearly, revealing blood vessels, embryo position, and air cell size. If you can barely see the yolk, your light is too dim. Test different light sources and upgrade if necessary—better visibility leads to more accurate assessments.
Can candling damage developing embryos?
Brief candling with appropriate light sources causes no damage to developing embryos. However, excessive heat from incandescent bulbs, extended exposure to room temperature, or rough handling during candling can harm development. Use LED lights, work quickly, and handle eggs gently to prevent problems.
What’s the difference between candling and other DIY home monitoring techniques?
Candling is a specific, non-invasive observation technique for eggs. Unlike invasive testing methods, candling allows repeated observation without harming the egg. This makes it ideal for home-based incubation operations managing small flocks.


