How to Candle Eggs at Home: Complete Farmer Tips Inside
Candling eggs is one of the most essential skills for backyard chicken keepers, quail farmers, and anyone incubating poultry at home. This simple yet precise technique allows you to monitor embryonic development, identify infertile eggs early, and ensure only viable eggs reach hatch day. Whether you’re managing a small hobby flock or scaling up your home farming operation, understanding how to candle eggs properly can dramatically improve your hatch rates and reduce wasted incubation time.
The process involves shining a bright light through an egg to observe the contents without cracking the shell. By examining the air cell, blood vessels, and embryo development at specific intervals, you gain invaluable insight into which eggs are developing normally and which should be removed from the incubator. This guide walks you through everything from selecting the right equipment to interpreting what you see, ensuring you can confidently candle eggs like experienced farmers.
What Is Egg Candling and Why It Matters
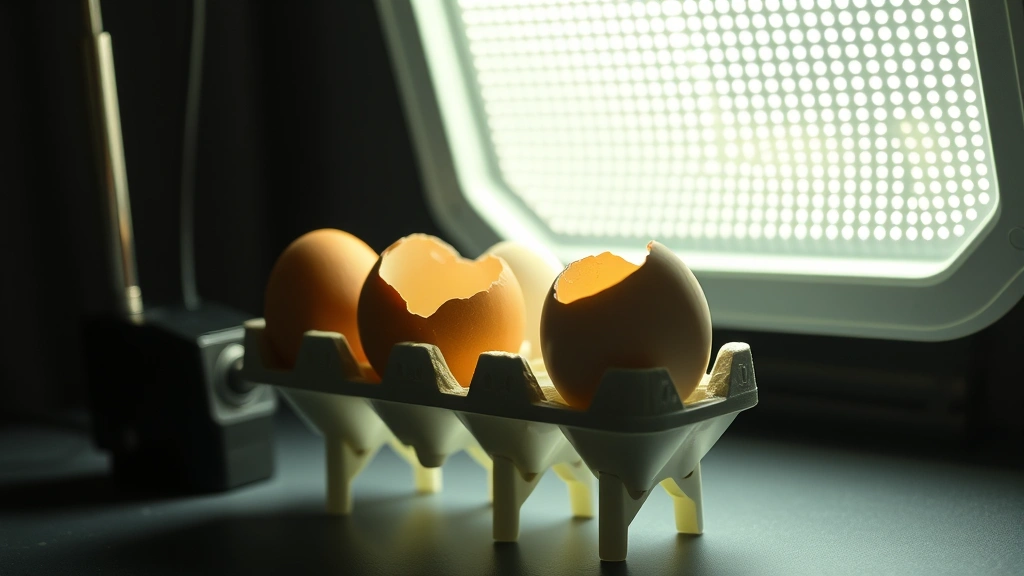
Egg candling is the practice of holding an egg up to a bright light source to examine its internal contents without breaking the shell. The term “candling” originated centuries ago when farmers literally used candles for this purpose. Today, we use specialized candling lights, flashlights, or even smartphone lights to achieve the same result more effectively.
The primary purpose of candling is to assess embryonic development and identify problems early in the incubation cycle. By candling at strategic intervals—typically at days 7, 14, and 18 for chicken eggs—you can remove infertile eggs and those with dead embryos before they spoil and potentially contaminate viable eggs. This practice is crucial because a single rotten egg can release gases that harm neighboring embryos and create unpleasant odors in your incubator.
Beyond fertility assessment, candling reveals critical information about embryo health. You can detect developmental abnormalities, monitor blood vessel formation, observe air cell expansion, and confirm that the embryo is positioned correctly for hatching. For anyone serious about improving hatch rates and maintaining a healthy flock, candling is non-negotiable. Visit our comprehensive guide on how to candle an egg for additional techniques and troubleshooting tips.

Essential Equipment for Home Candling
You don’t need expensive professional equipment to candle eggs effectively. Here’s what successful home farmers use:
- Candling Light Source: A bright LED flashlight (1000+ lumens), a dedicated egg candler, or even a strong smartphone light works well. Commercial egg candlers designed specifically for this task offer optimal light distribution and are relatively inexpensive.
- Dark Room or Environment: Candling requires darkness to see the light passing through the egg clearly. A basement, closet, or room with blackout curtains works perfectly. This is why many farmers candle in the evening or early morning.
- Egg Holder or Support: A simple cardboard tube, foam cup with a hole cut in the bottom, or commercial egg candler holder keeps your hands free and positions the egg optimally against the light.
- Record-Keeping Materials: A notebook or digital spreadsheet to track which eggs are developing normally, which are infertile, and which show signs of problems. This data becomes invaluable for future breeding decisions.
- Clean Cloth or Wipes: Gentle cleaning supplies to remove any dust or debris from eggs before candling, improving light transmission and visibility.
Many farmers create DIY candling stations by mounting a high-powered LED flashlight in a cardboard box with appropriate holes cut for egg positioning. This setup costs under twenty dollars but functions as well as commercial alternatives. The DIY Pallet Projects philosophy applies here too—resourcefulness and creativity go a long way in home farming.
Step-by-Step Candling Process
Follow these steps to candle eggs safely and accurately:
- Prepare Your Environment: Darken your candling room completely. Turn on your light source and allow your eyes to adjust to the darkness for a minute or two. This adjustment period significantly improves your ability to see internal egg contents clearly.
- Gather Your Eggs: Remove eggs from the incubator one at a time, handling them gently to avoid jostling the developing embryo. Keep eggs organized by marking them with pencil (never use markers, which can clog pores). Some farmers use different marks for each candling date.
- Position the Egg: Hold the egg pointed end down against your light source, or place it in your candling holder. The air cell is located at the large end of the egg—this is your starting point for observation.
- Observe the Air Cell: The air cell should appear as a dark space at the large end. On day 7, it should be approximately 1/8 inch deep. By day 14, it expands to about 1/4 inch. This expansion indicates normal development and moisture loss.
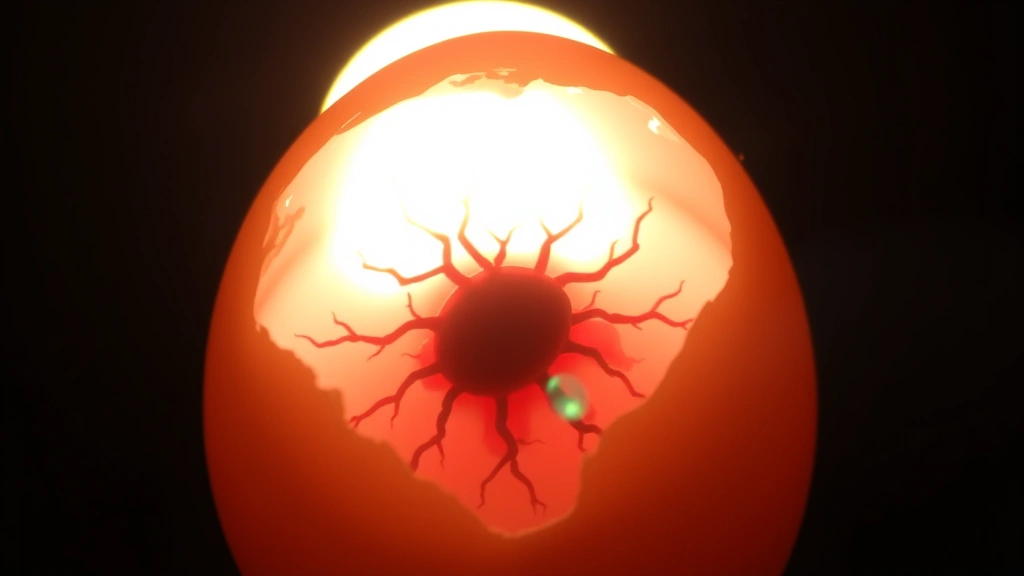
- Examine Blood Vessels: Look for a network of blood vessels radiating from the embryo. On day 7, these appear as fine red lines. By day 14, they’re more pronounced and fill much of the egg. Absence of blood vessels indicates infertility or early death.
- Check Embryo Position: A healthy embryo appears as a dark mass surrounded by blood vessels. As development progresses, it becomes larger and more defined. The embryo should be centered, not pushed to one side.
- Return Eggs Promptly: Place candled eggs back in the incubator as quickly as possible, maintaining proper temperature and humidity. Extended exposure to room temperature can stress developing embryos.
The entire candling process should take only seconds per egg once you develop proficiency. Speed matters because each minute outside the incubator represents a slight temperature drop that embryos must compensate for.
Reading Candling Results by Day
Day 7 Candling (Chicken Eggs): At this stage, you’re primarily identifying infertile eggs and early deaths. Infertile eggs appear completely clear with no blood vessels visible. Early deaths show a blood ring—a distinct ring of blood vessels with a clear center, indicating the embryo died before development began. Fertile, developing eggs show clear blood vessel networks spreading through the albumen.
Day 14 Candling: By mid-incubation, the embryo is substantially larger and occupies roughly half the egg. Blood vessels are prominent and complex. The air cell has expanded noticeably. Remove any eggs showing no further development since day 7, as these won’t produce viable chicks. Look for clear eggs (infertile) and blood rings (dead embryos).
Day 18 Candling: The embryo now fills most of the egg, appearing as a dark mass. The air cell is significantly larger—approximately 1/3 of the egg’s depth. Blood vessels are less visible because the embryo is so large. At this point, you should stop turning eggs and prepare for lockdown. Only remove eggs that are clearly non-viable.
Different poultry species have different development timelines. Duck eggs require 28 days, quail eggs 16-17 days, and turkey eggs 28 days. Adjust your candling schedule accordingly. For detailed information on different species, check our section on candling different poultry species below.
Common Candling Mistakes to Avoid
Over-Candling: Excessive candling exposes embryos to temperature fluctuations and increases stress. Limit candling to three sessions for chicken eggs: day 7, 14, and optionally day 18. Resist the urge to candle daily, even when curiosity strikes.
Misidentifying Infertile Eggs: Infertile eggs appear completely clear with no blood vessels whatsoever. Don’t confuse them with early developmental stages. When in doubt, mark the egg and candle again in three days to confirm.
Ignoring Blood Rings: A blood ring indicates the embryo died, typically from temperature fluctuations, poor humidity, or genetic issues. Remove these eggs immediately—they won’t recover and may explode, contaminating your incubator.
Rough Handling: Candling requires gentle, deliberate movements. Sudden jostling can cause internal bleeding or damage to the developing embryo. Always support eggs firmly but gently.
Inadequate Lighting: Dim light sources make it impossible to see internal details clearly. Invest in a bright LED light or commercial candler. A weak light leads to false conclusions and poor decision-making about which eggs to keep.
Candling in Bright Rooms: Even good light sources produce poor results in bright environments. Always candle in complete darkness for maximum visibility and accurate assessment.
Inconsistent Timing: Candling at different times than planned throws off your interpretation of normal development. Stick to your schedule—day 7, 14, and 18 for chicken eggs—to ensure accurate comparisons.
Candling Different Poultry Species
Chicken Eggs: The standard incubation period is 21 days. Candle at days 7, 14, and 18. Blood vessels appear as early as day 3 in viable eggs. By day 7, you can confidently identify infertile eggs and early deaths. Day 14 candling confirms continued development. Day 18 candling is optional but helps identify last-minute problems before lockdown.
Duck Eggs: Duck eggs require 28 days of incubation and have thicker shells, making candling slightly more challenging. Use a very bright light source. Candle at days 7, 14, 21, and 25. Duck embryos develop more slowly than chicken embryos, so don’t expect the same progress on day 7. Duck eggs also require higher humidity levels throughout incubation.
Quail Eggs: These tiny eggs incubate for 16-17 days and are difficult to candle due to their size and shell thickness. Many farmers skip candling quail entirely, relying instead on careful temperature and humidity management. If you attempt candling, use the brightest available light and check at days 3, 7, and 14. Quail eggs are fragile—handle with exceptional care.
Turkey Eggs: Turkey eggs require 28 days, similar to duck eggs, but are larger and easier to candle. Use the same schedule as duck eggs: days 7, 14, 21, and 25. Turkey embryos develop robustly, and candling results are usually very clear and easy to interpret.
Goose Eggs: Goose eggs are the largest and easiest to candle, requiring 28-30 days of incubation. Candle at days 7, 14, 21, and 25. The larger size and thinner shell relative to volume make candling straightforward even with modest light sources.
Safety and Sanitation Considerations
Candling involves direct contact with eggs that may harbor bacteria or pathogens. Always wash your hands thoroughly before and after candling sessions. Some farmers wear disposable gloves to add an extra layer of protection, especially when handling eggs with visible cracks or contamination.
Cracked or leaking eggs should never be returned to the incubator. These eggs are contamination risks and won’t produce viable chicks anyway. Discard them immediately and clean your hands thoroughly. Some farmers maintain a separate “quarantine” area for questionable eggs until they can definitively determine viability.
Maintain sanitation in your candling area by wiping down your light source and any reusable equipment regularly. Dust and debris accumulate on light sources, reducing their effectiveness and potentially harboring bacteria. A simple microfiber cloth and mild disinfectant keep your equipment clean and functional.
Ensure your candling light source doesn’t get excessively hot. Some high-powered lights generate significant heat, which can damage eggs if they’re held too close. Maintain appropriate distance—typically 2-4 inches from the egg to the light source, depending on your light’s power output. This prevents heat damage while maintaining optimal visibility.
If you’re candling multiple batches of eggs from different sources, disinfect your equipment between batches to prevent cross-contamination. This is especially important if any eggs showed signs of infection or disease. A 10% bleach solution works well for disinfecting reusable candling equipment.
For those managing larger operations, consider establishing a dedicated candling station separate from your incubation area. This separation reduces the risk of introducing contaminants to your incubators and keeps your workspace organized. Many farmers combine their candling station with record-keeping areas and egg storage, creating an efficient workflow. Similar organizational principles apply to other home projects—check out our guide on DIY Home Security for ideas on creating dedicated spaces for different home management tasks.
FAQ
Can I candle eggs with a regular flashlight?
Yes, a bright LED flashlight works well for candling. Look for lights rated at 1000 lumens or higher for best results. Smartphone flashlights can work in a pinch but typically lack the brightness and focused beam of dedicated flashlights. Commercial egg candlers, while optional, provide optimal light distribution and ergonomic handling.
What does a blood ring mean?
A blood ring indicates the embryo died during early development, typically between days 1-7. It appears as a distinct ring of blood vessels with a clear center. Remove blood-ringed eggs immediately—they won’t develop further and pose contamination risks. Blood rings usually result from temperature fluctuations, poor humidity, or genetic factors.
How long should candling take per egg?
Experienced candlers assess each egg in 5-15 seconds. Speed improves with practice as you learn what to look for. The key is minimizing time outside the incubator to prevent temperature stress. Organize your eggs and candling area to maximize efficiency without sacrificing accuracy.
Is it normal to see movement when candling?
Yes, especially on day 14 and later. You may observe the embryo moving or blood pulsing through vessels. This is an excellent sign of viability. If you see no movement on day 18, the embryo may be dead or in a problematic position, though some embryos move less visibly than others.
Can candling damage the egg?
Proper candling doesn’t damage eggs. However, rough handling, excessive heat from light sources, or extended exposure outside the incubator can harm developing embryos. Use gentle, deliberate movements and minimize candling time. Keep light sources at appropriate distances to avoid heat stress.
Why do some eggs look clear when candling?
Clear eggs are infertile—the rooster never fertilized them, or fertilization failed. These eggs contain no developing embryo and show no blood vessels. Remove clear eggs at your first candling session (day 7) to free incubator space for viable eggs.
What’s the best time to candle eggs?
Candle eggs in the evening or early morning when you can easily darken your workspace. Many farmers candle before turning eggs, making it part of their daily routine. Some candle after turning, which works equally well. Consistency matters more than specific timing.
Do I need to turn eggs during candling?
No, candling is a brief interruption to the turning schedule. Turn eggs before and after candling, but not during the candling session itself. Some farmers note their turning schedule to ensure they don’t miss turns on candling days.
Can I candle eggs from the first day of incubation?
Candling before day 7 is usually unproductive. Blood vessels are barely visible, and it’s difficult to reliably assess fertility. Waiting until day 7 gives embryos time to develop visible structures that clearly indicate viability. Candling earlier increases stress without providing useful information.
What humidity level is best for candling?
Humidity affects candling results indirectly by influencing how quickly the air cell expands. Proper humidity (40-50% for most chicken eggs) ensures normal development and air cell progression. Candling accuracy depends partly on consistent humidity management, so focus on maintaining correct levels throughout incubation.


