Table of Contents
Introduction
Picture yourself stepping out to your car on a sunny morning, the paint gleaming brilliantly and every inch radiating that fresh, showroom-level shine. There’s something magical about it, isn’t there? DIY car detailing isn’t just another weekend chore—it’s your chance to really connect with your vehicle while keeping it looking absolutely stunning. Whether you’re the type who gets excited about horsepower and engine specs, or you simply want your ride to look its best, learning to detail your car at home is incredibly rewarding.
Here’s the thing about keeping your car pristine: it’s not just about looks (though that matters too). A well-maintained exterior acts like armor against weather, dirt, and all the nasty stuff our roads throw at it. Plus, there’s that undeniable boost to your confidence when you’re driving something that turns heads. And let’s be honest—when it comes time to sell or trade in, a car that’s been properly cared for speaks volumes. Many people avoid professional detailing because of the cost or the hassle of scheduling around someone else’s availability. But here’s what I’ve learned: with the right approach and tools, DIY car repairs and detailing become not just doable, but genuinely enjoyable.
Now, car detailing does involve quite a few different techniques and products—I won’t sugarcoat that. You’ve got washing methods that protect your paint, interior conditioning that keeps everything fresh, and each step builds on the last one. Think of it like cooking a great meal: every ingredient matters. While you’re mastering the art of detailing, you might also want to check out other maintenance skills like how to clean car headlights or dive into cleaning the car engine bay. Trust me, these skills work together beautifully—your car won’t just look amazing, it’ll perform better too.
I know what you’re thinking: “Isn’t this stuff better left to the pros?” Here’s the truth—with some patience and a willingness to learn, you can absolutely get professional-quality results at home. It starts with understanding what supplies actually work (spoiler alert: you don’t need to break the bank). Quality microfiber cloths, the right waxes and polishes, and knowing how to use them properly. We’ll help you sidestep those rookie mistakes that can make you want to throw in the towel—like using dish soap on your paint or skipping protective coatings entirely.
What You’ll Learn in This Guide
We’re going to walk through everything you need to transform your car with professional-quality DIY detailing techniques. Whether you’re just starting out or you’ve tried this before and want to up your game, we’ve got you covered.
- Essential Tools and Supplies: Discover the basic equipment and cleaning products you need for effective car detailing, ensuring you have the right tools for exterior and interior care.
- Step-by-Step Detailing Process: Learn a thorough process for washing, claying, polishing, waxing, vacuuming, and interior conditioning to restore and protect every surface of your car.
- Common Mistakes to Avoid: Understand pitfalls that can undermine your efforts and get tips to avoid damaging your car’s finish or interior materials.
- Knowing When to Call a Professional: Gain insight into situations where professional services are advisable, ensuring your car receives the specialized care it may need.
What we’re building together here is your complete roadmap to confident DIY car detailing. We’ll break down each step with detailed explanations, share some product recommendations that actually work, and give you the kind of insider tips that make the whole process smoother and more enjoyable. And if you’re curious about expanding your DIY skills beyond detailing, learning about DIY car repairs can be a game-changer for your overall car care routine.
Getting familiar with different cleaning tools and products—and more importantly, knowing how to use them correctly—will save you from expensive mistakes and help you achieve that mirror-like finish every single time. We’re starting with the absolute basics and building up to the kind of detailing skills that’ll have your neighbors asking for your secrets.
The best part about DIY car detailing? You’re not just saving money (though that’s definitely nice). You’re creating this satisfying ritual that deepens your connection with your car. After a few practice sessions, you’ll find yourself looking forward to it. There’s something deeply rewarding about seeing your hard work reflected in every gleaming surface. Ready to dive in and discover how a few simple steps can completely transform your ride?
So you’ve got the basics down and you’re seeing the benefits of DIY car detailing. Great! Now here’s where things get really interesting—the tools and supplies that’ll make or break your detailing game. Whether you’re the type who spends weekends tinkering with cars or you just want your ride looking sharp, getting the right gear matters. A lot. Think of it this way: you wouldn’t try to paint a masterpiece with a house brush, right? Same concept here. The right tools don’t just make your life easier—they protect your car’s surfaces from the kind of damage that makes you want to cry. Let’s dig into what you actually need to get that professional-level shine without breaking the bank.
Essential Tools and Supplies for DIY Car Detailing
Here’s the deal with car detailing tools: quality beats quantity every single time. You don’t need a garage full of gadgets, but what you do get needs to work properly. Many car owners discover (usually the hard way) that investing in the right specialized tools saves both time and headaches. Want to know a secret? The difference between a mediocre detail job and one that makes your neighbors jealous often comes down to picking the right microfiber cloths. These aren’t your average cleaning rags—they’re specifically designed not to scratch your paint while still grabbing every speck of dirt.
But wait, there’s more to this puzzle. (Sorry, had to.) Your cleaning products are just as important as your tools—maybe more so. We’re talking about soaps that actually understand car paint, waxes that don’t just make things shiny but protect your investment, and specialized cleaners for glass and tires. You know what’s often overlooked? Having a solid vacuum for interiors and a decent hose setup for rinsing. Trust me, these aren’t afterthoughts—they’re game changers. Get this combo right, and you’ll wonder why you ever paid someone else to detail your car.
Cleaning Tools and Products: Key Considerations
Alright, let’s break this down into the must-haves for your detailing toolkit:
- Microfiber Cloths and Applicators: These are your best friends in the detailing world. They’re soft, they won’t scratch anything, and they grab dirt like nobody’s business. Perfect for washing, drying, and polishing—basically everything you’ll be doing. Using rough materials is like using sandpaper on silk. Don’t do it.
- Brushes for Different Surfaces: Not all brushes are created equal. You need different ones for wheel rims (tougher bristles), air vents (softer touch), and upholstery (somewhere in between). It’s like having the right tool for every job—each one gets into those annoying spots without causing damage.
- Automotive-Specific Soaps and Waxes: Here’s where things get serious. Household detergents? They’ll strip your paint faster than you can say “oops.” Car-specific products are pH balanced and designed to protect while they clean. Waxes and polishes aren’t just for show—they’re like sunscreen for your car.
- Vacuum and Hose Equipment: A quality vacuum with attachments is worth its weight in gold for interior work. Seats, carpets, those weird crevices where crumbs hide—it handles everything. As for hoses, adjustable water pressure is key. Too much pressure creates water spots; too little won’t rinse properly.
Once you’ve got these essentials sorted, planning your detailing sessions becomes so much easier. You’ll know exactly what tool to reach for at each step, and your results will show it. The right equipment doesn’t just save effort—it transforms the whole experience from a chore into something you might actually enjoy. (Seriously, there’s something satisfying about seeing your car go from dusty to stunning.)
Step-by-Step DIY Car Detailing Process
Now for the fun part—putting all those tools to work! Having great equipment is one thing, but knowing how to use it? That’s where the magic happens. Professional-grade results come from following a methodical approach that covers every surface and component of your car. Skip steps or rush through them, and you’ll end up with disappointing results (and possibly some damage you’ll regret). The good news? Once you get the sequence down, it becomes second nature. Plus, learning about DIY car repairs can give you bonus skills that make you feel like a total car care expert.
The process flows like this: start with exterior washing, move through claying and polishing, then finish with waxing to make everything gleam. Interior work is its own adventure—vacuuming, upholstery care, and treating all those delicate dashboard surfaces. It sounds like a lot, but here’s what nobody tells you: when you do it right, it’s actually pretty relaxing. Almost meditative. Each step builds on the last one, and before you know it, you’ve transformed your car from everyday driver to something that looks like it just rolled off the showroom floor.
Key Aspects of the Car Detailing Process
Let’s walk through the essential steps that’ll get you professional-looking results:
- Exterior Washing and Claying: Start with a solid wash to get rid of the obvious stuff—dirt, grime, that mystery splatter from last week. Then comes claying, which sounds fancy but is really just removing the embedded nasties that washing can’t touch. Think of it as deep cleaning for your paint.
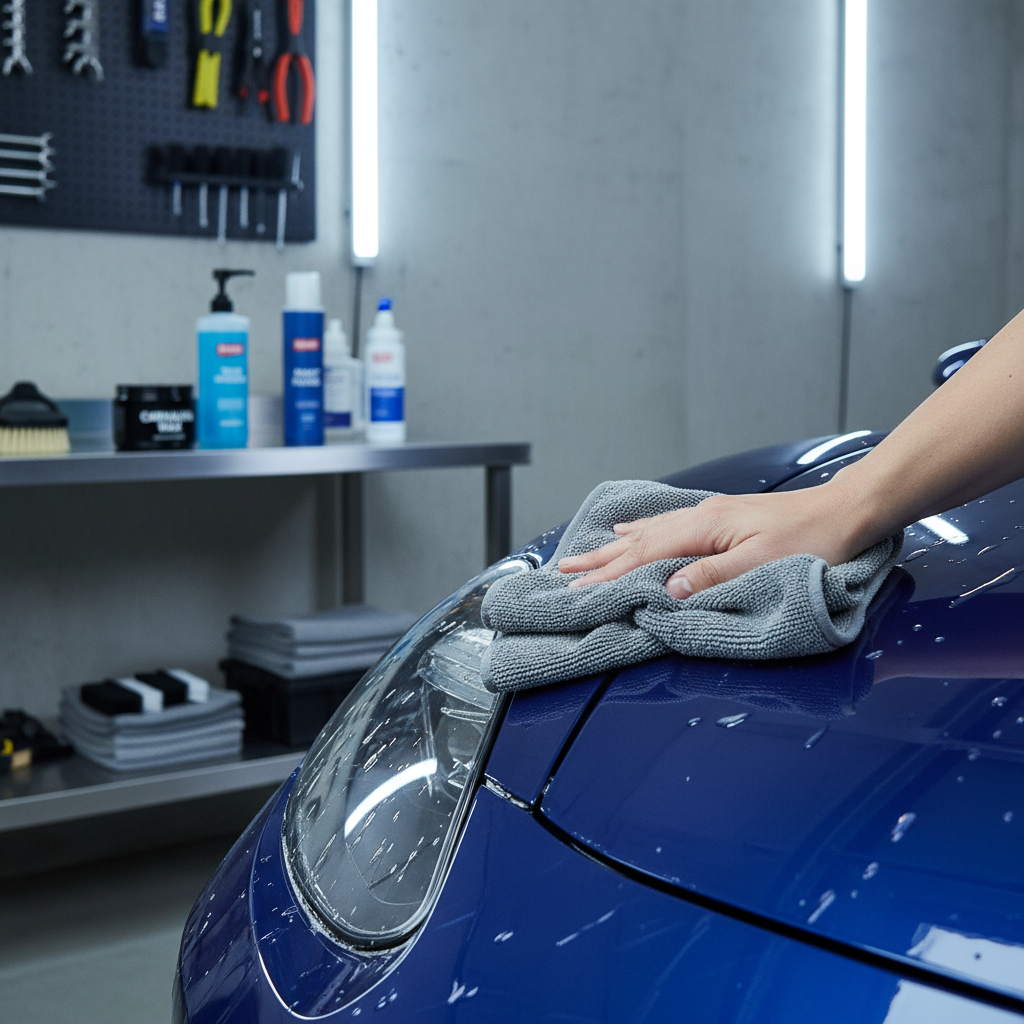
- Polishing and Waxing: Polishing smooths out those little scratches and brings back the shine you thought was gone forever. Waxing is your protection layer—it’s like armor against UV rays, bird droppings, and all the other stuff trying to ruin your paint job.
- Interior Vacuuming and Cleaning: Time for the inside. A thorough vacuum gets everything from obvious crumbs to that mysterious dust that appears everywhere. Then you tackle upholstery and dashboard cleaning—restoring color, removing stains, and preventing that cracked, faded look nobody wants.
- Final Inspection and Touch-Ups: The home stretch! Walk around your car like a detective looking for anything you missed. A few protective sprays on tires and glass, and you’re done. This is where you step back and admire your handiwork (because you’ve earned it).

Here’s the thing about DIY car detailing—it’s not just about keeping your car clean. It’s about that moment when you step back and see your ride gleaming like it just rolled off the lot. You’re protecting your investment, sure, but you’re also building a real connection with your vehicle. And let’s be honest, there’s something deeply satisfying about doing it yourself. Quality microfiber cloths, the right brushes, automotive-specific soaps—these aren’t just tools, they’re your secret weapons for achieving that professional look. Each detailing session gets easier (and more fun) as you dial in your technique.
The beauty lies in the process itself. Start with a thorough wash, move through claying, then tackle the interior with proper vacuuming and conditioning. Every step reveals something better underneath. But here’s what I’ve learned the hard way: those common mistakes will bite you. Harsh household cleaners? They’ll strip your paint faster than you can say “oops.” Skipping protective coatings? You’re basically inviting damage to set up camp on your car. Know when to call in the pros, too—some repairs and deep restorations are just beyond what we can handle in our driveways.
Ready to take this further? Your newfound detailing skills are just the beginning. Check out our beginner-friendly DIY car repairs guide—because knowing how to change your oil and maintain your brakes pairs perfectly with keeping your car looking sharp. If you’re catching the DIY bug (and trust me, it’s contagious), our guides on DIY flooring installation and house painting will sharpen that attention to detail you’ve been developing. And after a long day of detailing? Our DIY bath salts guide has the perfect recipe for unwinding. It’s all connected—taking care of your stuff, taking care of yourself.
But remember this: know your limits. Some things are better left to the professionals, especially when we’re talking serious mechanical issues or advanced bodywork. The smart move? Combine your DIY skills with good judgment about when to get expert help. You’ve got the knowledge now, the techniques, the tools. Most importantly, you’ve got the confidence to make your car look and feel amazing. Embrace it, enjoy the process, and take pride in what you’ve accomplished. Your car will thank you, and honestly? You’ll surprise yourself with what you can achieve.
Frequently Asked Questions
-
How often should I detail my car?
- Detailing every 1-3 months is recommended depending on your car’s use and exposure to elements for optimal maintenance and appearance.
-
Can I use household cleaning products for car detailing?
- It’s best to use automotive-specific products as household cleaners may damage paint and interior materials.
-
Is DIY detailing safe for all car types?
- Yes, with the right techniques and products, DIY detailing can be safely applied to most vehicle types.
-
What is the difference between washing and detailing?
- Washing is a basic exterior clean, while detailing involves thorough cleaning, restoration, and protection of all surfaces.
-
How can I protect my car paint after detailing?
- Apply wax or sealant after detailing to create a protective barrier against environmental damage and keep the shine longer.