How to Clean a Faucet Aerator: Plumber-Approved Method
A clogged faucet aerator is one of the most common household plumbing issues, yet it’s also one of the easiest to fix yourself. Over time, mineral deposits, sediment, and debris accumulate inside your aerator, restricting water flow and creating uneven spray patterns. Most homeowners don’t realize that what feels like a failing faucet is simply a dirty aerator that needs cleaning. The good news? You don’t need to call a plumber or replace your entire faucet. With basic household items and about 15 minutes of your time, you can restore your faucet to perfect working condition.
Whether you’re dealing with low water pressure, a weak spray, or water coming out in strange directions, cleaning your faucet aerator is the first troubleshooting step that professional plumbers recommend. This guide walks you through the exact process that licensed plumbers use, plus insider tips to prevent future buildup and maintain optimal water flow throughout your home.
What Is a Faucet Aerator and Why It Gets Clogged
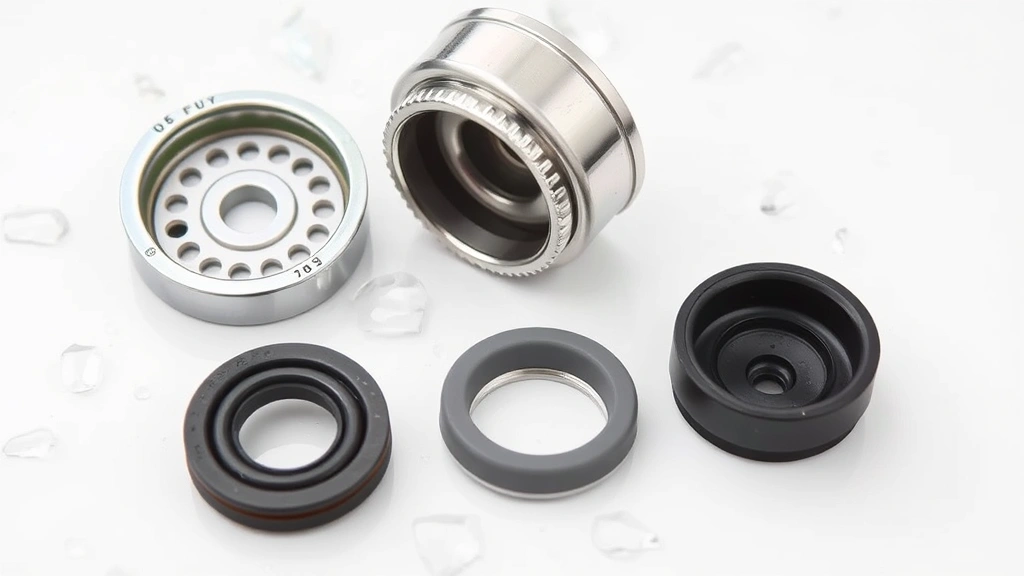
A faucet aerator is the small screen or mesh component screwed onto the tip of your faucet spout. Its primary function is to mix air into the water stream, which accomplishes several important tasks: it reduces water consumption by up to 50 percent, creates a smooth and consistent spray pattern, and prevents splashing. The aerator contains multiple internal components including screens, a flow restrictor, and a swivel housing that work together to regulate water flow.
The reason aerators clog so frequently relates directly to their design. Because they filter and regulate water, they naturally trap particles before those particles can damage your faucet’s internal mechanisms. Common culprits include calcium and magnesium deposits (especially in hard water areas), rust particles from aging pipes, sediment from municipal water supplies, and debris from construction or repairs on water lines. When these materials accumulate, they form a crusty buildup that restricts water flow and distorts the spray pattern.
Understanding the anatomy of your aerator helps you clean it more effectively. Most aerators have three main parts: the outer housing (the part you grip), the internal screens and filters, and the flow restrictor washer. Each component can accumulate different types of deposits, which is why a thorough cleaning requires accessing all these parts. If you’re looking to improve overall water quality in your home, you might also consider how this relates to broader home maintenance practices covered on our DIY Nests Hub Blog.
Tools and Materials You’ll Need
The beauty of cleaning a faucet aerator is that you likely already have everything you need in your home. Here’s the complete list of tools and materials:
- Adjustable wrench or aerator wrench – For gripping and turning the aerator
- White vinegar – The primary cleaning agent for dissolving mineral deposits
- Small bowl or cup – For soaking aerator components
- Old toothbrush – For scrubbing away stubborn buildup
- Paper towels or clean cloth – For drying components
- Plastic bag – Optional, for soaking the aerator while attached
- Needle or thin wire – For clearing clogged mesh holes
- Rubber bands – For securing the plastic bag during soaking
Avoid using harsh chemical drain cleaners, as these can damage the aerator’s rubber washers and seals. Vinegar is your best friend here—it’s effective, safe, and environmentally friendly. If you don’t have vinegar on hand, you can also use lemon juice or commercial lime removal products specifically designed for bathroom fixtures.

Step-by-Step Cleaning Instructions
Step 1: Turn Off the Water (Safety First)
Before you begin any work on your faucet, turn off the water supply. Locate the shut-off valve under your sink (usually two knobs, one for hot and one for cold water). Turn both valves clockwise until they stop. Open the faucet to confirm the water is off and to release any remaining pressure in the lines. This prevents unexpected water spray while you’re working and ensures your safety.
Step 2: Remove the Aerator
Using your adjustable wrench or specialized aerator wrench, grip the aerator firmly and turn it counterclockwise. Most aerators screw off by hand, but if it’s stuck due to mineral buildup, the wrench provides better grip and leverage. Be gentle—you don’t want to damage the aerator or the faucet spout. If it’s extremely stuck, apply a bit of vinegar around the base and let it sit for 10-15 minutes to help loosen the mineral deposits.
Step 3: Disassemble the Aerator
Once removed, examine your aerator carefully. Most aerators have a simple design that separates into 3-4 components. Gently unscrew or pop apart the pieces (check the manufacturer’s instructions if available). You’ll typically find: the outer housing, one or more screens, a rubber washer or gasket, and possibly a flow restrictor. Keep these components in order so you can reassemble them correctly.
Step 4: Rinse Under Running Water
Hold each component under warm running water and use your fingers or the old toothbrush to remove loose debris. This initial rinse removes sediment and makes the subsequent vinegar soak more effective. For the screens, run water through them in both directions to dislodge particles.
Step 5: Soak in Vinegar
Fill your small bowl with white vinegar and submerge all aerator components for 30 minutes to 2 hours, depending on how heavily clogged they are. For severe buildup, overnight soaking is acceptable. The acetic acid in vinegar dissolves mineral deposits naturally. If you prefer not to disassemble the aerator, you can soak it whole—though disassembly allows the vinegar to reach all internal surfaces more effectively.
Step 6: Scrub Away Remaining Deposits
After soaking, use your old toothbrush to gently scrub each component, paying special attention to the screens and any visible crusty areas. For stubborn deposits, use a needle or thin wire to carefully poke through the mesh holes of the screens. Work slowly and deliberately to avoid damaging the delicate mesh. Rinse thoroughly under running water after scrubbing.
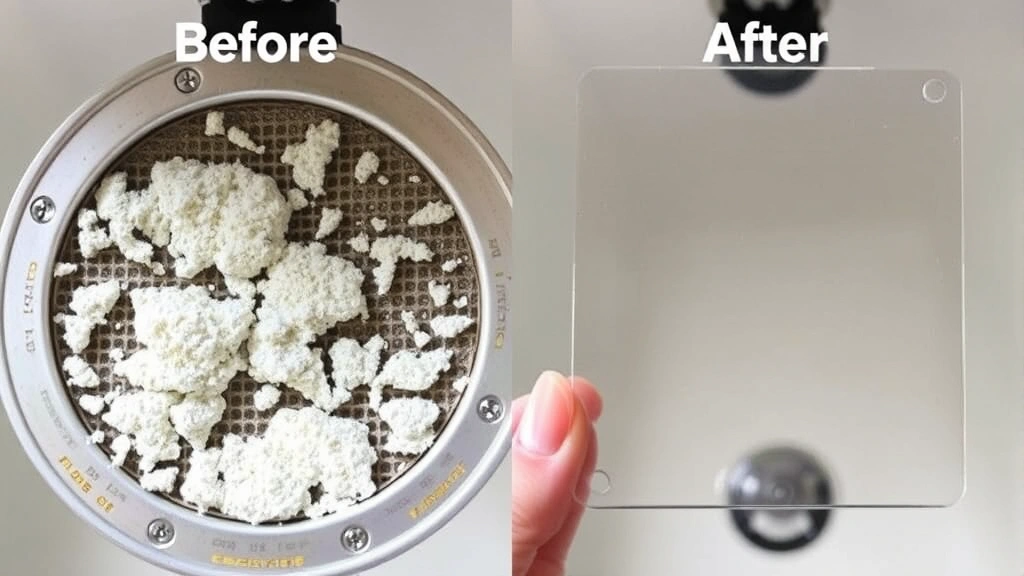
Step 7: Inspect and Reassemble
Before reassembling, hold each screen up to light and look through it. You should be able to see clearly through the mesh. If deposits remain, repeat the soaking and scrubbing process. Once everything is clean, carefully reassemble the aerator in reverse order, ensuring the rubber gasket is properly positioned. Hand-tighten only—you don’t need to use the wrench for reinstallation.
Step 8: Reinstall and Test
Screw the cleaned aerator back onto your faucet spout, turning clockwise until snug. Don’t over-tighten, as this can damage the threads. Turn the water supply back on by turning the shut-off valves counterclockwise. Test your faucet—you should notice significantly improved water pressure and a more consistent spray pattern. If the water still seems weak, you may have debris in the faucet lines themselves, which requires different troubleshooting.
Deep Cleaning for Heavily Clogged Aerators
For aerators with severe mineral buildup or those that haven’t been cleaned in years, you may need a more aggressive approach. Start with the standard vinegar soak, but extend it to 4-8 hours or overnight. For particularly stubborn deposits, try this enhanced method:
Vinegar and Baking Soda Method
After the initial vinegar soak, remove the components and sprinkle baking soda over them while they’re still wet with vinegar. This creates a fizzing action that helps lift away stubborn mineral crusts. Use your toothbrush to work the paste into all crevices. Rinse thoroughly and repeat if necessary. This combination is especially effective on calcium deposits common in hard water areas.
Ultrasonic Cleaning (Optional)
If you have access to an ultrasonic cleaner (some hardware stores have them, or you might borrow one), this tool is incredibly effective for aerator cleaning. The vibrations dislodge particles that manual scrubbing might miss. Soak the components in vinegar inside the ultrasonic cleaner for 10-15 minutes for remarkable results.
When to Consider Replacement
If after deep cleaning your aerator still doesn’t function properly, or if you notice visible damage to the screens or housing, replacement is your best option. Quality replacement aerators cost between $5 and $20 and are widely available at hardware stores and online retailers. This is a much cheaper alternative to calling a plumber.
Prevention and Maintenance Tips
Once you’ve cleaned your faucet aerator, you’ll want to prevent future clogs. These maintenance strategies keep your aerators running smoothly:
- Clean quarterly – Set a reminder to clean your aerators every three months, or more frequently if you have hard water
- Install a water softener – If mineral buildup is severe, a water softening system reduces deposits throughout your entire plumbing system
- Use aerator screens – Some hardware stores sell pre-filter screens that catch debris before it reaches your aerator
- Flush your lines – After any water line work in your area, run your faucets for several minutes to clear debris from your pipes
- Monitor water pressure – If you notice gradual pressure decrease, clean the aerator before it becomes completely clogged
As part of broader home cleaning routines, regular aerator maintenance ensures your plumbing systems stay efficient. While you’re maintaining your home’s plumbing, don’t overlook other important maintenance tasks that keep your home in top condition.
When to Replace Instead of Clean
Not every aerator problem requires cleaning. Sometimes replacement is the better choice:
- Damaged screens – If the mesh is torn, corroded, or has holes, the aerator can’t function properly and should be replaced
- Broken housing – Cracks in the plastic or metal housing compromise the aerator’s ability to regulate flow
- Non-removable parts – Some modern aerators are sealed units that can’t be disassembled; if cleaning doesn’t work, replacement is necessary
- Missing components – If you lose any internal pieces during cleaning, replacement is easier than sourcing individual components
- Persistent low pressure – If cleaning doesn’t restore normal flow, the problem likely lies in your faucet or water lines, not the aerator
When replacing an aerator, note the size and thread pattern of your current one. Most faucets use standard sizes (22mm or 24mm), but some specialty faucets require specific aerators. Your hardware store can help you identify the correct replacement, or you can check your faucet manufacturer’s specifications online.
If you’re dealing with broader plumbing or home improvement projects, you might find our guide on DIY house painting useful for refreshing your bathroom alongside plumbing upgrades.
FAQ
How often should I clean my faucet aerator?
In areas with soft water, cleaning every six months is sufficient. In hard water areas, quarterly cleaning (every three months) prevents significant buildup. If you notice decreased water pressure or uneven spray, that’s your signal to clean immediately, regardless of schedule.
Can I clean an aerator without removing it?
Yes, you can soak an attached aerator by tying a plastic bag filled with vinegar around your faucet spout using rubber bands. However, this method is less effective than disassembly because the vinegar can’t reach internal components as thoroughly. Disassembly takes only a few extra minutes and yields better results.
Is white vinegar safe for all faucet types?
White vinegar is safe for virtually all faucet finishes including chrome, stainless steel, brass, and nickel. It won’t damage rubber washers or seals at normal concentrations. However, avoid vinegar on natural stone or specialty finishes—check your faucet manufacturer’s recommendations if you have an unusual material.
What if my faucet pressure is still low after cleaning the aerator?
Low pressure after aerator cleaning suggests the problem is upstream. Check if other faucets in your home have normal pressure. If they do, the issue is in your specific faucet’s internal cartridge or supply lines. If pressure is low throughout your home, contact your water utility company—the problem may be on the municipal side. For professional diagnosis, consult a licensed plumber in your area.
Can I use CLR or other commercial cleaners on my aerator?
While commercial lime and rust removers work quickly, they’re harsher than vinegar and can damage rubber components in your aerator. Vinegar is gentler, equally effective for most household mineral buildup, and safer for all aerator materials. Reserve commercial cleaners for extreme situations and follow product instructions carefully.
How do I know what size aerator to buy for replacement?
The vast majority of modern faucets use either 15/16-inch (22mm) or 55/64-inch (24mm) aerators. Your current aerator will have the size printed on it, or you can take it to your hardware store to compare. Universal aerators are also available that fit most standard faucets.
Is there a way to prevent mineral buildup in the first place?
Installing a whole-house water softener is the most effective solution for hard water areas. If that’s not feasible, point-of-use filters on individual faucets help, and regular maintenance cleaning prevents severe buildup. Flushing your water lines after municipal water work also reduces debris-related clogs.


