
How to Clean Mold off Bathroom Ceiling: Expert Tips & Safe Removal Guide
Mold growth on bathroom ceilings is one of the most common household problems homeowners face, especially in humid environments. The bathroom’s warm, moist air creates the perfect breeding ground for mold spores, which can spread rapidly if left untreated. Beyond the aesthetic concern, mold poses serious health risks—particularly for individuals with respiratory conditions, allergies, or compromised immune systems. Understanding how to safely identify, assess, and remove mold from your bathroom ceiling is essential for maintaining a healthy home environment.
This comprehensive guide will walk you through professional-grade techniques for mold removal, from initial inspection to prevention strategies. Whether you’re dealing with surface-level discoloration or more stubborn mold colonies, we’ll cover both DIY approaches and situations where professional intervention becomes necessary. We’ll also discuss the importance of addressing underlying moisture problems to prevent recurrence.
Understanding Mold Growth in Bathrooms
Mold is a type of fungus that thrives in damp, dark environments. In bathrooms, moisture from showers, baths, and general humidity provides ideal conditions for mold spores to germinate and colonize surfaces. The bathroom ceiling is particularly vulnerable because warm, humid air rises and condenses on cooler ceiling surfaces, creating persistent moisture that mold requires for growth.
Several factors contribute to accelerated mold development in bathroom ceilings:
- Poor ventilation: Bathrooms without adequate exhaust fans or windows allow humidity to accumulate
- Inadequate insulation: Cold ceiling surfaces increase condensation rates
- Plumbing leaks: Hidden water intrusion from pipes or fixtures above the ceiling
- High humidity levels: Bathrooms regularly reaching 60-80% humidity encourage mold proliferation
- Organic material: Dust, skin cells, and soap residue provide nutrients for mold growth
Common bathroom ceiling mold appears as black, green, or brown spots or patches. While some mold is cosmetic, certain species like Stachybotrys (black mold) can produce mycotoxins harmful to human health. Early identification and removal prevent health complications and structural damage to your home.
Safety Precautions Before You Start
Before tackling any mold removal project, prioritizing safety is non-negotiable. Mold exposure can trigger respiratory issues, allergic reactions, and asthma exacerbation, particularly in vulnerable populations. Taking proper precautions protects both you and your household members.
Essential safety measures include:
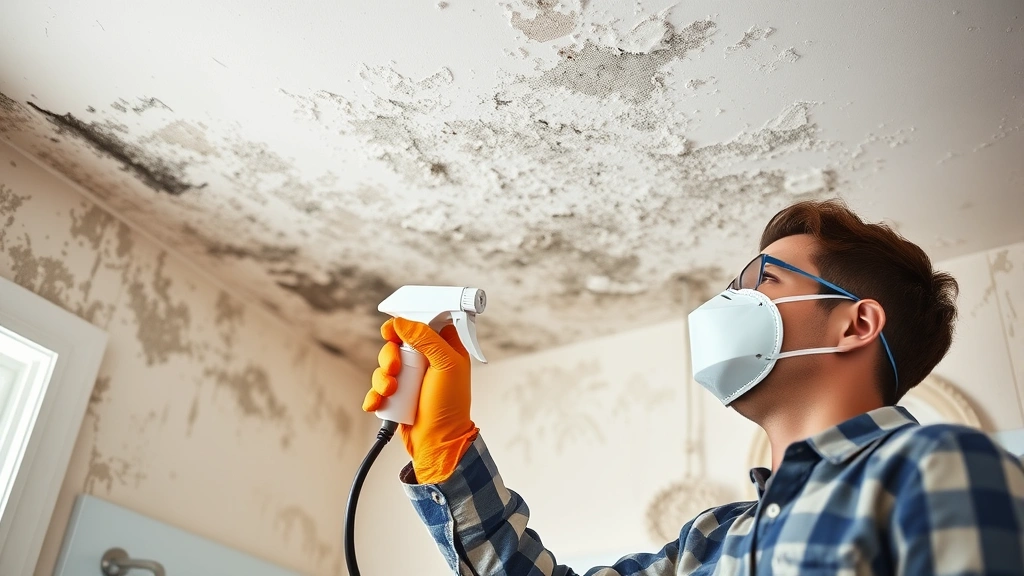
- Personal protective equipment (PPE): Always wear an N95 or N100 respirator mask rated for mold spores, not a simple dust mask. Disposable gloves, eye protection, and long sleeves minimize direct contact with mold and cleaning chemicals
- Ventilation: Open windows and doors to maximize air circulation. Turn on bathroom exhaust fans and consider placing a portable fan in the doorway to direct mold spores outside
- Chemical safety: Never mix bleach with ammonia or other cleaning products, as this creates toxic chlorine gas. Read all product labels carefully and follow manufacturer instructions
- Isolation: Keep children and pets away from the work area during and immediately after treatment
- Health considerations: If you have respiratory conditions, severe allergies, or immunocompromised status, consider hiring professionals instead of DIY removal
Ensure your workspace is well-lit so you can see all affected areas clearly. Consider wearing a headlamp if ceiling work requires looking upward for extended periods.
Assessing the Extent of Mold Damage
Before purchasing supplies or beginning cleanup, accurately assess how much mold you’re dealing with. The EPA and International Code Council provide guidelines suggesting that mold colonies covering less than 10 square feet can typically be handled through DIY methods, while larger infestations require professional remediation.
To measure affected area, use a measuring tape to determine the length and width of all visible mold patches. Add up total square footage across your ceiling. Look for these warning signs that indicate professional help is necessary:
- Mold covers more than 10 square feet
- Mold has penetrated drywall, insulation, or structural framing
- You discover mold behind ceiling tiles or in attic spaces
- Persistent musty odors suggest hidden mold colonies
- Visible water stains or soft ceiling spots indicate structural compromise
- Previous mold treatment failed or mold returned quickly
Document mold locations with photos before and after cleaning. This documentation helps track recurrence patterns and identify underlying moisture sources that require attention.
Tools and Materials You’ll Need
Gathering proper equipment before starting ensures efficient, effective mold removal. Quality tools and appropriate cleaning solutions make the difference between successful elimination and recurring problems.
Essential cleaning supplies:
- Cleaning solutions: White vinegar (natural alternative), commercial mold removers with EPA approval, or diluted bleach solution (1 part bleach to 10 parts water). For porous surfaces, consider HEPA-filter vacuum cleaners designed for mold remediation
- Application tools: Spray bottles, soft-bristled brushes, microfiber cloths, sponges, and a stiff putty knife for removing stubborn growth
- Safety equipment: N95 or N100 respirator masks, nitrile gloves, safety glasses, and protective clothing
- Ventilation: Portable HEPA air purifiers help capture airborne spores during cleanup
- Disposal materials: Heavy-duty plastic bags for contaminated materials, duct tape for sealing bags
Many homeowners prefer eco-friendly cleaning approaches. White vinegar effectively kills most common bathroom molds and doesn’t produce toxic fumes. Hydrogen peroxide (3% solution) also works well and breaks down into water and oxygen, leaving no harmful residues. For stubborn mold, baking soda mixed with vinegar creates a natural paste with excellent penetrating power.
Step-by-Step Cleaning Process
Following a systematic approach ensures thorough mold removal and reduces recurrence risk. This process works for most common bathroom ceiling mold situations.
Step 1: Prepare Your Workspace
Turn on bathroom exhaust fans and open windows to maximum capacity. Place fans in doorways directing air outward. Lay plastic sheeting on the floor to contain spores and cleaning runoff. Ensure adequate lighting—mold can hide in shadowed areas. Put on all PPE including respirator mask, gloves, and eye protection before approaching moldy surfaces.
Step 2: Dry the Area
Before applying cleaning solutions, reduce moisture as much as possible. Use towels or a wet-dry vacuum to remove standing water or excessive moisture. A dehumidifier running during and after cleaning helps lower humidity levels that enable mold regrowth. This step is crucial for treatment effectiveness.
Step 3: Apply Cleaning Solution
Spray your chosen cleaning solution generously onto moldy areas, ensuring complete saturation. For vinegar or hydrogen peroxide, allow 10-15 minutes contact time before scrubbing. For commercial mold removers, follow product-specific timing recommendations. This waiting period allows the solution to penetrate and kill mold at the root level, not just surface discoloration.
Step 4: Scrub Thoroughly
Using a soft-bristled brush or sponge, gently scrub the affected ceiling areas with circular motions. Work systematically across the entire affected zone, ensuring you address all visible mold. For textured ceilings, you may need to work harder to reach mold deep within surface irregularities. Don’t be afraid to apply elbow grease—proper scrubbing is essential for complete mold removal.
Step 5: Rinse and Dry
Spray clean water onto treated areas using a spray bottle or damp cloth to rinse away cleaning solution and dead mold spores. Wipe thoroughly with clean, dry cloths or use a wet-dry vacuum to remove excess moisture. Complete drying is critical—remaining moisture enables rapid mold regrowth. Consider running fans for several hours after cleaning to ensure thorough drying.
Step 6: Apply Preventative Treatment
Once the ceiling is completely dry, apply a mold-preventative product designed for bathroom ceilings. These products create a protective barrier that inhibits new mold growth. Follow manufacturer instructions carefully for proper application and drying time.

Treating Different Ceiling Materials
Bathroom ceilings vary in composition, and different materials require tailored cleaning approaches. Using incorrect methods can damage your ceiling or reduce cleaning effectiveness.
Drywall or Painted Ceilings:
Standard drywall ceilings tolerate most cleaning solutions well. Vinegar, hydrogen peroxide, and commercial mold removers all work effectively. The key is avoiding excessive moisture that could compromise drywall integrity. Use spray applications rather than soaking, and dry thoroughly afterward. If mold has caused discoloration that persists after cleaning, primer and paint can conceal stains while providing additional protection. Check out our DIY house painting guide for detailed ceiling painting techniques.
Drop Tile or Suspended Ceilings:
Acoustic tile ceilings are porous and absorb moisture readily, making them particularly susceptible to mold. If mold has penetrated tile material deeply, replacement is often more effective than cleaning. For surface mold, use gentle cleaning methods with minimal moisture. Spray solutions lightly and allow longer drying times. Many professionals recommend replacing affected tiles rather than attempting deep cleaning, as mold often returns in porous materials.
Textured or Popcorn Ceilings:
Textured ceilings trap mold deep within surface irregularities, making thorough cleaning challenging. Soft-bristled brushes work better than stiff ones to avoid surface damage. Consider that popcorn ceilings installed before 1980 may contain asbestos—have these professionally tested before any cleaning or removal work. Modern textured ceilings can be cleaned with standard solutions, but replacement may be more practical than attempting complete mold removal.
Fiberglass or Composite Materials:
Some modern bathrooms feature composite ceiling panels designed for moisture resistance. These tolerate aggressive cleaning and moisture exposure better than traditional materials. Check manufacturer specifications before applying any chemical treatments, as some products may discolor or damage composite surfaces. Most composites respond well to vinegar or hydrogen peroxide solutions.
Preventing Future Mold Growth
Successful mold removal requires addressing the moisture conditions that enabled growth initially. Without controlling humidity and moisture sources, mold will inevitably return, often within weeks or months.
Ventilation Improvements:
Install or upgrade bathroom exhaust fans to meet current building codes. The International Code Council building standards recommend fans rated for your bathroom’s square footage, typically 1 CFM per square foot for bathrooms without windows. Run fans during and for 20-30 minutes after showers. Consider installing humidity-sensing fans that operate automatically when moisture levels rise above preset thresholds.
Moisture Control Strategies:
- Install a bathroom dehumidifier to maintain humidity below 50-60%
- Ensure proper bathroom ventilation ducting exits to exterior spaces, not attics
- Insulate cold water pipes to reduce condensation
- Repair any ceiling leaks or water intrusion immediately
- Use shower curtains or doors to contain moisture within shower areas
- Wipe down wet ceiling areas after hot showers using a squeegee or cloth
Maintenance Routines:
Regular inspection and cleaning prevent mold from establishing large colonies. Schedule monthly ceiling checks, particularly in high-humidity bathrooms. Wipe down visible condensation promptly. Clean bathroom surfaces with mold-inhibiting products monthly. Address any new moisture problems immediately—early intervention prevents costly remediation later.
For comprehensive home protection strategies, explore our guide on DIY home security, which includes moisture and water damage prevention as part of overall home maintenance.
When to Call a Professional
While many homeowners can successfully handle small mold problems, certain situations demand professional expertise. Knowing when to call experts prevents health risks and ensures thorough remediation.
Contact professional mold remediation specialists when:
- Mold covers more than 10 square feet of ceiling area
- Mold has penetrated structural materials like wood framing or insulation
- You discover mold in HVAC systems, attics, or wall cavities
- Previous cleaning attempts failed and mold returned
- Household members have severe allergies, asthma, or immunocompromised conditions
- You suspect black mold (Stachybotrys) or other toxic species
- Ceiling shows signs of structural damage or soft spots indicating water damage
- You’re uncertain about mold identification or extent of contamination
Professional remediators follow strict protocols established by the Institute of Inspection, Cleaning and Restoration Certification (IICRC) and conduct thorough inspections to identify moisture sources. They use specialized equipment like moisture meters and thermal imaging to detect hidden mold and underlying problems. Professional remediation costs more initially but prevents recurring problems and ensures complete elimination of health risks.
Many professionals also address root causes—improving ventilation, fixing leaks, or installing moisture barriers—that DIY approaches often miss. This comprehensive treatment prevents expensive mold recurrence.
FAQ
Is bathroom ceiling mold dangerous?
Mold exposure poses health risks, particularly respiratory issues, allergic reactions, and asthma exacerbation. Certain mold species produce mycotoxins that cause more serious health effects. Individuals with compromised immune systems face elevated risks. Prompt removal and proper ventilation protect household health.
Can I use bleach to clean bathroom ceiling mold?
Diluted bleach (1:10 ratio) effectively kills mold, but has drawbacks. Bleach doesn’t penetrate porous materials deeply and can cause respiratory irritation. It’s toxic if mixed with ammonia. Many experts prefer vinegar or hydrogen peroxide as safer alternatives with comparable effectiveness. If using bleach, ensure excellent ventilation and never combine with other products.
How long does mold removal take?
Small mold patches (under 2 square feet) typically require 30-60 minutes of active cleaning time. Larger areas may take 2-4 hours. Drying and allowing preventative treatments to cure add additional time. Plan for full ceiling drying overnight before resuming normal bathroom use. Professional remediation of extensive mold may require multiple days depending on scope.
Why does bathroom mold keep returning?
Recurring mold indicates unresolved moisture problems. Common causes include inadequate ventilation, poor bathroom insulation, plumbing leaks, or high ambient humidity. Addressing root causes through ventilation improvements, moisture control, and prompt leak repair prevents recurrence. Simply cleaning mold without controlling moisture is temporary treatment.
What’s the difference between mold and mildew?
Mildew is a surface fungus that appears as powdery white or gray coating, while mold is more serious and appears as black, green, or brown growth that penetrates surfaces. Mildew is easier to clean with basic solutions, while mold requires more aggressive treatment. Both thrive in moisture and require humidity control to prevent recurrence.
Should I paint over mold?
Never paint over active mold—paint seals moisture and accelerates mold growth beneath the surface. Always remove mold completely, allow thorough drying, and apply mold-killing primer before painting. Primer creates a protective barrier inhibiting new mold growth. This approach ensures long-lasting results rather than cosmetic concealment.
Can I prevent mold with bathroom exhaust fans alone?
Exhaust fans are essential but often insufficient alone. Fans must be properly sized (1 CFM per square foot), vented to exterior spaces, and run consistently. Combining fans with dehumidifiers, improved insulation, and prompt moisture removal provides comprehensive moisture control. Regular maintenance and inspection ensure fans operate at peak efficiency.
What humidity level prevents mold growth?
Mold thrives above 60% humidity and grows most aggressively above 70%. Maintaining bathroom humidity below 50-60% significantly reduces mold risk. Use humidity meters to monitor levels and adjust ventilation accordingly. Morning humidity spikes after showers are normal—extended elevated humidity indicates ventilation problems requiring attention.
For additional home maintenance guidance, visit the DIY Nests Hub Blog for comprehensive resources on household projects and upkeep. Whether you’re addressing mold or tackling other home improvements like cleaning leather furniture or cleaning leather clothes, proper techniques and safety practices ensure successful results.


