How to Clean Vinyl Siding: Expert Tips for Homeowners
Vinyl siding is one of the most popular exterior cladding materials for residential homes, prized for its durability, low maintenance requirements, and aesthetic appeal. However, even the most resilient vinyl siding accumulates dirt, algae, mildew, and environmental contaminants over time. Regular cleaning not only enhances your home’s curb appeal but also extends the lifespan of your siding by preventing degradation and damage. This comprehensive guide walks you through professional-grade techniques that homeowners can safely execute without hiring expensive contractors.
Cleaning vinyl siding properly requires understanding the material’s vulnerabilities, selecting appropriate cleaning solutions, and employing the right techniques to avoid damage. Unlike how to clean leather furniture or other delicate surfaces, vinyl siding can withstand more aggressive cleaning—but improper methods can still cause permanent harm. This guide reveals insider secrets from professional cleaners and building maintenance specialists to help you achieve showroom-quality results.
Understanding Vinyl Siding Composition and Common Contaminants
Vinyl siding consists of polyvinyl chloride (PVC) compounds engineered to resist UV radiation, moisture, and temperature fluctuations. The material’s surface can degrade when exposed to harsh chemicals, extreme pressure, or abrasive tools. Understanding what causes discoloration helps you select appropriate cleaning methods and protective measures.
The most common contaminants affecting vinyl siding include:
- Algae and mildew: These biological growths thrive in damp environments, particularly on north-facing walls and shaded areas. They appear as green, black, or brownish streaks and can spread rapidly if left untreated.
- Dirt and dust: Airborne particles settle on siding surfaces, creating a dull, gray appearance. This buildup is especially noticeable after storms or in areas with heavy traffic.
- Oxidation: UV exposure causes the siding’s protective layer to break down, resulting in chalky residue and faded color.
- Mold and fungal growth: These organisms flourish in humid climates and can compromise the siding’s structural integrity if not addressed promptly.
- Rust stains: Iron particles from nearby metal fixtures, gutters, or atmospheric deposition create orange-brown discoloration that requires specialized treatment.
- Tree sap and pollen: Natural debris accumulates on siding, particularly near trees, and can harden into stubborn deposits.
The Vinyl Institute recommends annual inspections to identify early signs of contamination before they cause permanent damage. Preventative cleaning extends siding longevity and maintains your home’s value.
Essential Tools and Safety Equipment
Proper preparation ensures efficient cleaning and prevents accidents. Invest in quality tools designed specifically for exterior cleaning tasks. Unlike general home cleaning supplies discussed in our DIY Nests Hub Blog, siding cleaning requires specialized equipment suited to outdoor conditions.
Required tools include:
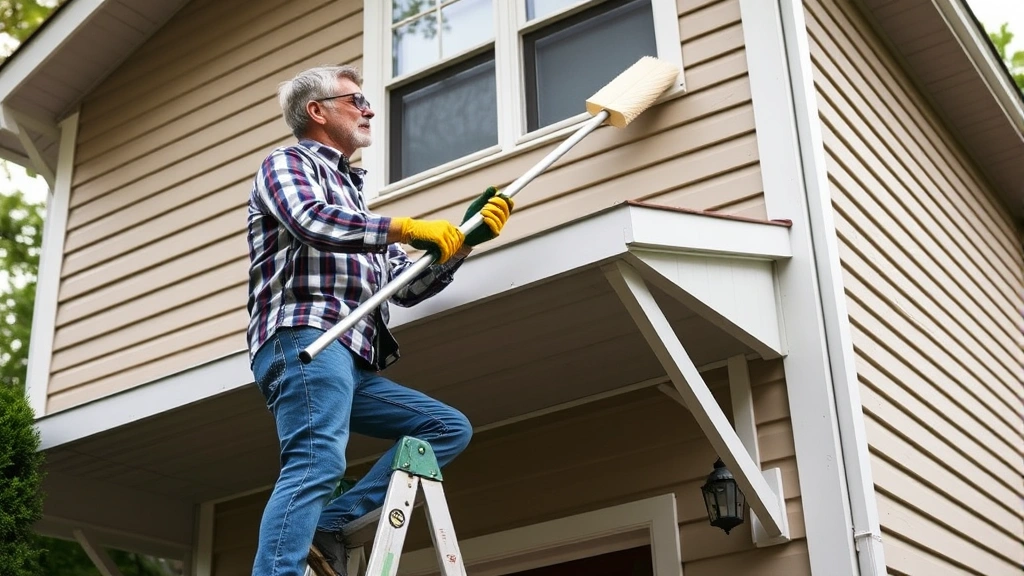
- Extension ladder: A 24-32 foot aluminum ladder with stabilizer bars provides safe access to upper sections. Never use a ladder on uneven ground without proper leveling.
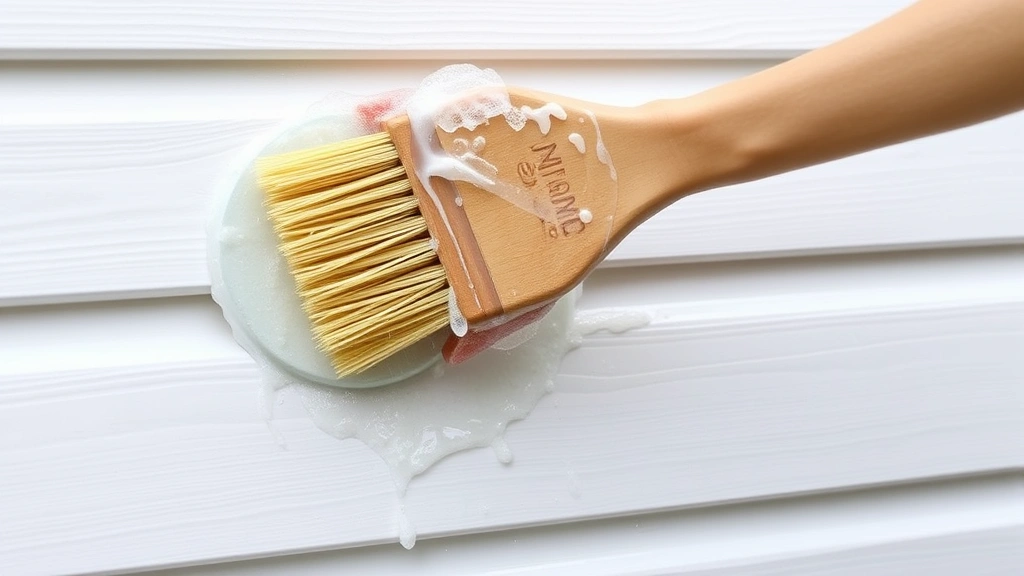
- Soft-bristled brush: Natural or synthetic bristles attached to an extension pole allow gentle scrubbing without scratching the vinyl surface.
- Microfiber cloths: These absorbent cloths remove cleaning solution residue without leaving streaks or lint.
- Bucket and wringer: A 5-gallon bucket with a wringer mechanism controls water runoff and prevents oversaturation.
- Sponge mop: Long-handled mops reach siding areas without requiring constant ladder repositioning.
- Garden hose with spray nozzle: A variable-pressure nozzle provides controlled rinsing without high-pressure damage.
- Protective eyewear: Splashing cleaning solutions and debris require full eye protection.
- Chemical-resistant gloves: Nitrile or latex gloves protect skin from cleaning agents and contaminants.
- Non-slip footwear: Wet surfaces create slipping hazards; wear shoes with superior grip.
- Work apron: A tool apron keeps supplies accessible while freeing both hands for climbing and cleaning.
The Occupational Safety and Health Administration (OSHA) emphasizes ladder safety protocols, including maintaining three-point contact and avoiding overreaching. Never lean beyond the ladder’s sides or work during adverse weather conditions.
Choosing the Right Cleaning Solutions
Selecting appropriate cleaning agents is crucial for achieving results without damaging vinyl. Different contaminants require different solutions, and understanding the chemistry behind effective cleaning prevents costly mistakes.
Recommended cleaning solutions:
- Mild detergent solution: Mix one cup of liquid dish soap with one gallon of water for general dirt and dust removal. This gentle approach suits routine maintenance and light soiling.
- Vinegar-based cleaner: Combine one part white vinegar with three parts water to tackle mildew and mineral deposits. The acidity breaks down biological growth without harsh chemicals.
- Oxygen bleach: This environmentally friendly alternative to chlorine bleach effectively removes algae and mold. Mix according to manufacturer instructions, typically one part bleach to three parts water. Oxygen bleach is safer for surrounding landscaping and aquatic ecosystems.
- Trisodium phosphate (TSP): A powerful degreaser effective for stubborn stains, oil residue, and heavy soiling. TSP requires careful handling and proper protective equipment. Always follow package directions and local environmental regulations.
- Specialized mildew removers: Commercial products formulated specifically for vinyl siding contain surfactants that penetrate and dissolve fungal growth efficiently.
Solutions to avoid:
- Chlorine bleach concentrations exceeding one part to ten parts water, which can cause fading and brittleness
- Abrasive scrubbing powders or scouring compounds that scratch the surface
- Acidic solutions with pH below 3, which degrade vinyl polymers
- Petroleum-based solvents that dissolve the protective coating
- Caustic alkaline cleaners with pH above 11, which cause discoloration
The International Code Council (ICC) provides guidelines for exterior building maintenance that include chemical compatibility specifications for various cladding materials. Always verify manufacturer recommendations for your specific siding brand before applying any cleaning solution.

Step-by-Step Cleaning Process
A systematic approach ensures thorough cleaning and prevents missed areas. Follow this methodical process for professional results.
Step 1: Inspect and Prepare
Before beginning, conduct a thorough inspection of your vinyl siding. Look for cracks, loose panels, or damaged seams that require attention. Check weather forecasts to avoid cleaning during rain or extreme heat. Ideal conditions include overcast days with temperatures between 50°F and 85°F, which prevent cleaning solution from drying too quickly and allow proper evaporation without thermal stress.
Remove outdoor furniture, decorative elements, and anything stored against the siding. Cover nearby plants, AC units, and landscape features with plastic sheeting to protect them from cleaning solutions and runoff.
Step 2: Rinse Initial Surface
Use your garden hose with a gentle spray pattern to remove loose dirt and debris. Start from the top and work downward, following the natural direction of water flow. This initial rinse prevents dirt from becoming embedded during scrubbing and reveals the actual condition of your siding.
Step 3: Prepare Cleaning Solution
Mix your chosen cleaning solution in a large bucket according to the formula selected. For mild detergent, start with the one-to-one ratio mentioned earlier. For oxygen bleach or specialty cleaners, follow manufacturer instructions precisely. Having the solution prepared before climbing ensures efficiency and safety.
Step 4: Apply Cleaning Solution
Using a soft-bristled brush attached to an extension pole or a sponge mop, apply the cleaning solution to a manageable section of siding, approximately 10-15 feet wide. Work from top to bottom, allowing the solution to penetrate for 10-15 minutes. This dwell time permits the chemical agents to break down contaminants effectively. Avoid allowing the solution to dry completely, as this creates residue and reduces cleaning effectiveness.
Step 5: Gentle Scrubbing
Using light to moderate pressure, scrub the siding with your soft-bristled brush in circular motions. Focus on areas with visible staining, mildew, or algae growth. Never use wire brushes, pressure washers on high settings, or abrasive tools that can scratch or gouge the vinyl. The goal is to agitate contaminants loose, not to remove the surface layer.
Step 6: Rinse Thoroughly
Rinse the cleaned section thoroughly with your garden hose, using moderate pressure. Start from the top and allow water to cascade downward, flushing away both cleaning solution and dislodged contaminants. Ensure no cleaning solution residue remains, as dried residue creates streaking and can attract dirt more readily.
Step 7: Repeat and Complete
Move to the next section and repeat steps 4-6 until your entire home is cleaned. Maintain consistency in technique and dwell time for uniform results. Work systematically around the house rather than jumping between areas, which prevents missed spots and ensures even cleaning.
Advanced Techniques for Stubborn Stains
Some contaminants resist standard cleaning methods and require specialized approaches. These advanced techniques address particularly challenging stains while protecting your vinyl investment.
Rust and Iron Stain Removal
Rust stains demand acidic solutions that dissolve iron oxide without harming vinyl. Commercial rust removers formulated for vinyl siding provide the optimal balance. Apply the solution directly to affected areas and allow 15-20 minutes of dwell time. Gently scrub with a soft brush and rinse immediately with copious amounts of water. Never use muriatic acid or other aggressive acids, which permanently damage vinyl.
Heavy Mold and Mildew
Extensive fungal growth requires extended treatment periods. Apply oxygen bleach solution and allow 30-45 minutes of dwell time. For particularly stubborn growth, apply the solution twice with 20-minute intervals between applications. Soft-bristle scrubbing combined with chemical treatment yields superior results compared to either method alone. Consider applying a mildew preventative coating after cleaning to inhibit future growth.
Tree Sap and Sticky Residues
Hardened sap requires careful softening before removal. Apply a solution of equal parts white vinegar and water, allowing 30 minutes of soaking. The acidity gradually softens the residue without damaging vinyl. Use plastic scrapers (never metal) to gently lift loosened sap. Follow with standard cleaning to remove any remaining residue.
Oxidation and Chalk Removal
UV-damaged siding develops a chalky surface layer that dulls appearance and indicates advanced degradation. TSP solution effectively removes oxidation buildup. Apply the solution, allow 20 minutes of dwell time, scrub gently, and rinse thoroughly. After oxidation removal, consider applying a UV-protective sealant to prevent recurrence and extend siding longevity.
Pressure Washing: When to Use and When to Avoid
Pressure washing offers efficiency for large areas but carries significant risks when applied improperly. Understanding appropriate pressure levels and techniques prevents expensive damage comparable to issues addressed in our guide on DIY car cleaning, where technique matters tremendously.
Safe pressure washing parameters:
- Pressure limit: Never exceed 1,500 PSI (pounds per square inch). Most vinyl siding manufacturers recommend maximum pressures of 1,200-1,500 PSI. Pressures above this threshold force water behind the siding panels, causing structural damage and mold growth within wall cavities.
- Nozzle distance: Maintain a minimum distance of 12-18 inches between the nozzle and siding surface. This distance reduces impact pressure and prevents localized damage.
- Nozzle angle: Use a 40-degree or wider angle nozzle rather than concentrated streams. Narrow angle nozzles concentrate pressure dangerously and create permanent gouges.
- Water temperature: Use cold water only. Hot water can soften vinyl and cause warping or discoloration.
Areas where pressure washing is inappropriate:
- Around window and door frames where water can infiltrate interior spaces
- Near seams and joints where high pressure forces water into wall cavities
- Above basement windows or other openings vulnerable to water penetration
- Near electrical outlets, light fixtures, or other building penetrations
- On siding with existing cracks, damage, or loose panels
The Contractors State License Board documentation emphasizes that improper pressure washing causes water intrusion damage costing thousands to repair. When in doubt, use manual cleaning methods instead of risking structural damage.
Maintenance Schedule and Prevention Strategies
Consistent maintenance prevents heavy soiling and extends vinyl siding lifespan significantly. A proactive approach proves far more economical than reactive deep cleaning after severe contamination develops.
Recommended maintenance schedule:
- Monthly visual inspections: Walk around your home and check for early signs of algae, mildew, or dirt accumulation. Early detection allows targeted cleaning before problems spread.
- Quarterly light cleaning: Rinse siding with a garden hose and soft-bristled brush every three months to prevent dirt buildup. This simple maintenance eliminates the need for aggressive cleaning later.
- Annual deep cleaning: Perform thorough cleaning with appropriate solutions once yearly, typically in spring or early fall when weather is mild and growth is moderate.
- Post-storm inspection: After severe weather, check for debris, damage, and contamination. Address issues promptly to prevent complications.
Prevention strategies:
- Trim nearby vegetation: Branches hanging over siding encourage mold growth and deposit sap and pollen. Maintain clearance of at least three feet between trees and siding.
- Improve drainage: Ensure gutters and downspouts function properly and direct water away from the foundation. Poor drainage creates moisture conditions favoring mold and mildew.
- Increase air circulation: Prune shrubs and remove obstructions blocking air flow around your home. Improved ventilation reduces humidity and discourages fungal growth.
- Install protective coatings: UV-protective and mildew-inhibiting sealants available specifically for vinyl siding extend life and reduce maintenance frequency.
- Address moisture sources: Fix leaking gutters, downspouts, or exterior faucets that create wet conditions on siding surfaces.
- Clean roof regularly: Debris on roofs washes onto siding during rain. Regular roof cleaning prevents this secondary contamination.
Much like maintaining other exterior surfaces, vinyl siding benefits from the systematic approach outlined in our comprehensive DIY home security guide, where regular inspections catch problems early before they become expensive issues.
Frequently Asked Questions
How often should I clean vinyl siding?
Most homes benefit from annual deep cleaning, with quarterly light cleaning between major sessions. Homes in humid climates or near trees may require more frequent attention. Monitor your siding’s condition and adjust frequency based on visible soiling rather than adhering strictly to a calendar schedule.
Can I use a power washer on vinyl siding?
Power washing is acceptable only at pressures below 1,500 PSI with proper technique. Many professionals recommend avoiding power washers entirely on vinyl siding due to water intrusion risks. Hand-scrubbing with soft brushes provides superior safety and control, particularly for homeowners unfamiliar with pressure equipment.
What’s the safest cleaning solution for vinyl siding?
Mild detergent solution (one cup dish soap per gallon of water) is the safest option for routine cleaning. For mildew and algae, oxygen bleach solutions are environmentally friendly and effective. Always test new solutions on inconspicuous areas before applying to visible sections.
Will cleaning vinyl siding damage the protective coating?
Proper cleaning techniques using appropriate solutions actually preserve the protective coating by removing contaminants that degrade it. Harsh chemicals, abrasive tools, or excessive pressure cause damage. Following manufacturer recommendations prevents coating deterioration.
How long does it take to clean a typical home’s siding?
Most single-story homes require 4-6 hours of work, while two-story homes typically take 8-12 hours depending on size, soiling severity, and technique. Breaking the project into multiple days prevents fatigue and safety issues associated with extended ladder work.
Can I clean vinyl siding in winter?
Avoid cleaning when temperatures are below 50°F or when frost or ice is present. Cold temperatures prevent proper drying and can trap moisture behind siding panels. Additionally, icy surfaces create slip hazards. Spring through fall offers ideal cleaning conditions.
What should I do if cleaning reveals damage to my siding?
Cracks, warping, or loose panels require professional assessment and repair. Continue cleaning around damaged areas carefully, and contact a contractor experienced with vinyl siding repair. Addressing damage promptly prevents water infiltration and structural problems.
Is it safe to clean siding while standing on a ladder?
Yes, with proper precautions. Always maintain three-point contact with the ladder, never overreach, and avoid leaning sideways. Consider using extension poles and long-handled brushes to minimize ladder repositioning. If the project feels unsafe, hire professionals with appropriate equipment and insurance.
Cleaning vinyl siding is an achievable DIY project when approached methodically with proper tools and techniques. Regular maintenance preserves your home’s appearance and protects your investment for decades to come.


