How to Build a Shed: Expert Tips Inside
Building a shed is one of the most rewarding DIY projects you can undertake. Whether you need extra storage space, a workshop, or a garden retreat, constructing your own shed gives you complete control over the design, materials, and functionality. This comprehensive guide walks you through every step of the process, from planning and site preparation to framing, roofing, and finishing touches.
A well-built shed not only adds value to your property but also provides a dedicated space for organizing tools, equipment, and seasonal items. Unlike purchasing a pre-made structure, building your own allows for customization that perfectly fits your needs and aesthetic preferences. Throughout this guide, we’ll cover essential techniques, safety considerations, and best practices to ensure your shed project succeeds.
Planning Your Shed Project
Before you purchase a single board or nail, invest time in thorough planning. Determine the purpose of your shed—storage, workshop, garden space, or hobby area—as this influences size, ventilation, and internal layout. Most homeowners start with sheds ranging from 8×10 feet to 12×16 feet, though your available space and budget will guide your decision.
Create detailed sketches or use design software to visualize your shed. Consider the roof style (gabled, gambrel, or flat), door placement, window locations, and interior organization. Document all dimensions carefully. You’ll also want to think about whether you need electrical outlets, insulation, or climate control features. If you’re interested in improving other areas of your home, explore our guide on basement finishing for storage inspiration that translates to shed design.
Calculate material quantities precisely to avoid multiple trips to the supplier. Create a comprehensive shopping list organized by category: lumber, fasteners, roofing materials, doors, windows, and finishing supplies. Research local material costs and compare suppliers. A detailed plan saves money, time, and frustration during construction.
Understanding Permits and Codes
Before breaking ground, contact your local building department to understand permit requirements. Many jurisdictions require permits for sheds exceeding certain square footage—often 100-200 square feet, though this varies significantly. Failing to obtain required permits can result in fines, difficulty selling your property, or orders to demolish the structure.
Building codes dictate setback distances from property lines (typically 5-10 feet), height restrictions, and foundation requirements. The International Code Council provides model building codes adopted by most jurisdictions. Review these specifications before finalizing your design. Some areas also have homeowners association restrictions that supersede standard codes.
Obtain all necessary approvals in writing. Building inspectors will typically inspect your work at key stages: foundation, framing, and final completion. These inspections ensure your shed meets safety standards and local regulations. The modest cost of permits is worthwhile for legal compliance and structural integrity assurance.
Site Preparation and Foundation
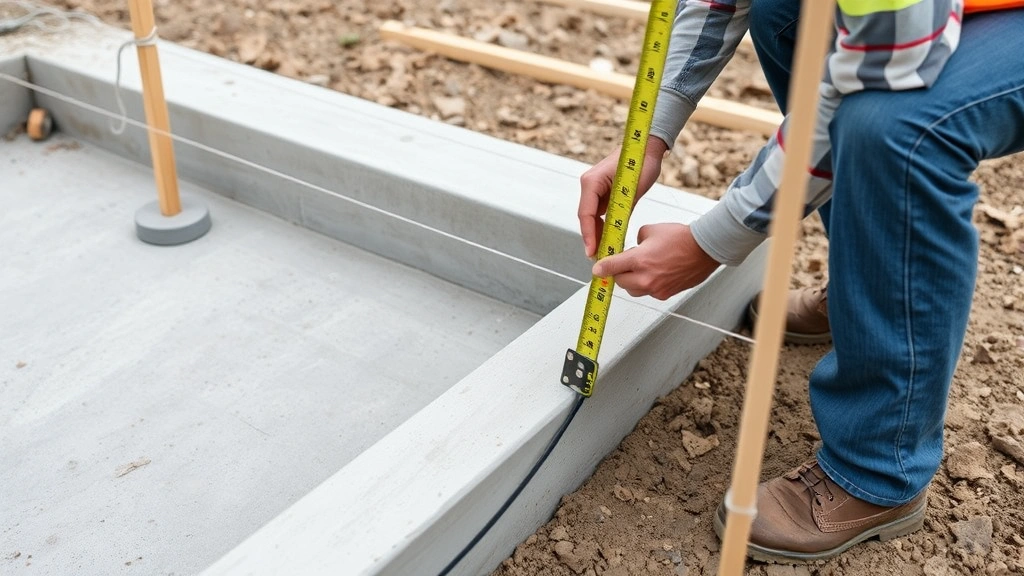
Select a level or gently sloping location with good drainage. Avoid areas prone to standing water or excessive shade that prevents proper maintenance access. Clear the site of vegetation, rocks, and debris. Mark the shed footprint using string and stakes, checking corners with the 3-4-5 triangle method for perfect right angles.
Your foundation options depend on local codes and soil conditions. Concrete piers (post holes with concrete footings) work well for most residential sheds. Dig holes below the frost line—typically 3-4 feet deep in northern climates—to prevent frost heave that shifts the structure. For warmer climates, 18-24 inch depths often suffice. Space piers 4-6 feet apart depending on your design.
Alternatively, a concrete slab provides excellent support and creates a finished floor. Prepare the base by removing topsoil, adding 4 inches of gravel for drainage, and installing concrete forms. Pour concrete to 4-6 inches thick, sloping slightly for water runoff. Allow concrete to cure for 7 days before building. For those planning workshop activities, review our beginner woodworking projects guide to understand workspace requirements.
Ensure proper drainage around your shed by grading soil away from the foundation. Install gutters and downspouts to direct roof water at least 4-6 feet from the structure. Poor drainage causes foundation deterioration and wood rot.
Framing the Structure
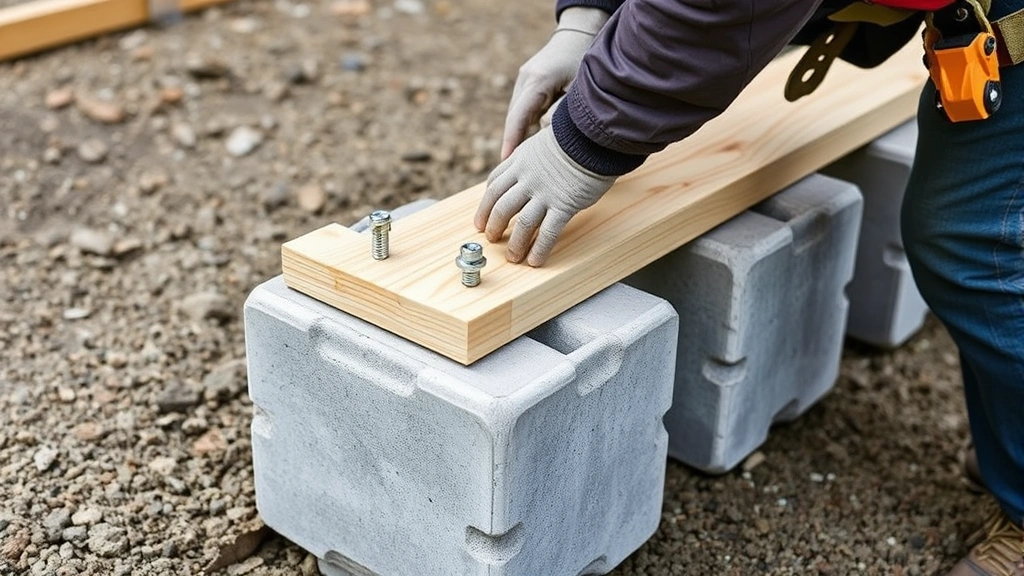
Begin with the rim or band board, attaching it securely to your foundation piers or concrete slab using concrete anchors or bolts. This frame distributes the structure’s weight evenly. Use pressure-treated lumber for all parts touching concrete to prevent rot.
Construct wall frames on the ground, then raise them into position. Each wall consists of vertical studs (typically 2×4 lumber spaced 16 inches on center) connected by top and bottom plates. Cut studs to length accounting for plate thickness. Door and window openings require header beams sized based on span—consult American Wood Council span tables for proper sizing.
Use 16-penny nails or 3-inch screws at every connection point, using at least two fasteners per joint. Ensure walls are perfectly vertical using a level before bracing them with temporary diagonal supports. Connect walls at corners with additional fasteners for structural integrity.
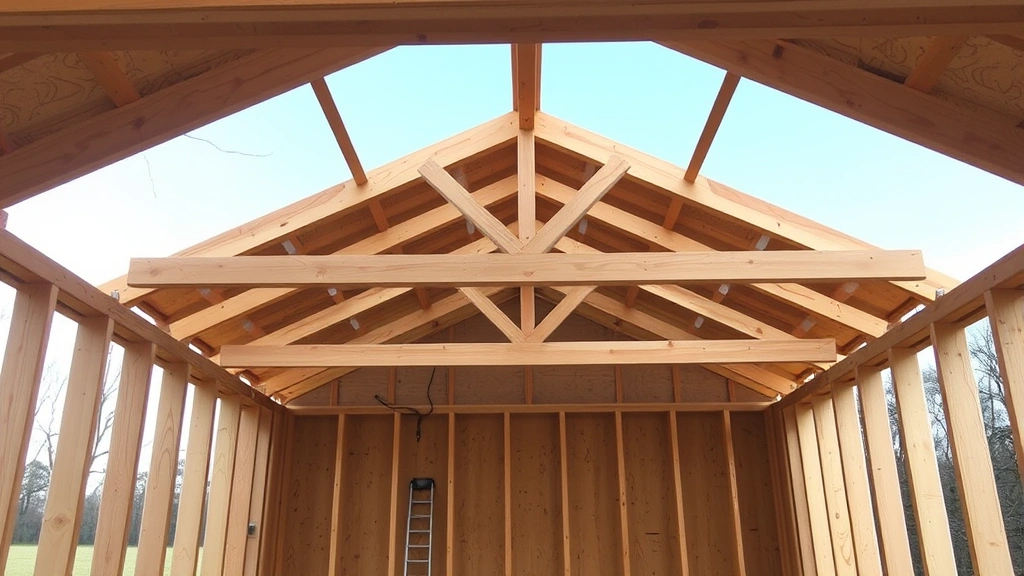
Install roof trusses or rafters according to your design. Gabled roofs use two sloped surfaces meeting at a peak, while gambrel roofs feature four surfaces creating more interior headroom. Calculate rafter angles using the roof pitch (rise over run—typically 4:12 to 8:12 for sheds). Space trusses 16 or 24 inches on center depending on snow load requirements in your area.
Proper roof ventilation prevents moisture accumulation and extends shingle life. Install soffit vents near the eaves and ridge vents at the peak to create continuous airflow. This is especially important if your shed stores items sensitive to humidity.
Installing the Roof
Start roofing installation after the frame is complete and braced. Install roof sheathing (plywood or OSB) perpendicular to the rafters, leaving 1/8-inch gaps for expansion. Secure sheathing with 8-penny nails spaced 6-12 inches apart.
Apply a waterproof underlayment across the entire roof surface. Synthetic underlayment offers superior durability compared to traditional tar paper. Start at the eaves and work upward, overlapping each course by 4-6 inches. Nail or staple the underlayment according to manufacturer specifications.
Install drip edge along eaves and gables before shingling. This metal flashing prevents water from running behind the shingles. Begin shingle installation at the eaves, working upward toward the ridge. Stagger shingle joints for water shedding efficiency. Use roofing nails or pneumatic guns, placing 4-6 fasteners per shingle. Follow manufacturer guidelines for nail placement and quantity.
At the ridge, use ridge cap shingles or folded regular shingles for a finished appearance. Install flashing around any roof penetrations (vents, chimneys) to prevent leaks. Proper flashing installation is critical—water infiltration causes extensive interior damage.
Finishing and Weatherproofing
Install doors and windows before weatherproofing exterior walls. Hang doors using quality hinges and latches rated for outdoor use. Windows should have proper flashing to shed water away from the frame. Seal all penetrations with exterior-grade caulk.
Weatherproof exterior walls with siding, metal panels, or board-and-batten. Paint or stain wood siding within 6 months of installation to prevent weathering. Consider proper house painting techniques for exterior durability. Metal siding requires no painting but may dent more easily than wood.
Insulate walls and ceilings if your shed will be used year-round or for temperature-sensitive storage. Fiberglass batts, blown-in cellulose, or foam board all work effectively. Install vapor barriers on the warm side of insulation to prevent moisture accumulation. Seal any gaps in the thermal envelope to maximize efficiency.
Interior finishing depends on your shed’s purpose. Concrete floors suit workshops and storage areas. Plywood subflooring with vinyl or rubber flooring works for climate-controlled spaces. Install shelving, workbenches, or storage systems that maximize usable space. Paint interior walls with moisture-resistant paint to improve light reflection and durability.
Add electrical service if needed, following local codes and hiring a licensed electrician for connections to your home’s main panel. Outdoor-rated outlets and weatherproof covers protect equipment and personnel. Adequate lighting improves safety and usability, especially for workshop applications.
For long-term protection, establish a maintenance routine. Inspect the roof annually for damaged shingles or flashing. Check for signs of rot or pest damage. Caulk gaps that develop over time. Reapply exterior finish every 3-5 years depending on exposure and material type. Regular maintenance extends your shed’s lifespan significantly.
FAQ
Do I need a permit to build a shed?
Permit requirements vary by jurisdiction. Most areas require permits for sheds exceeding 100-200 square feet or those with permanent foundations. Check with your local building department before construction begins. Obtaining permits ensures your shed meets safety codes and prevents legal issues if you sell your property.
What’s the best foundation for a shed?
Concrete piers work well for most residential sheds, especially in areas with freeze-thaw cycles. A concrete slab provides excellent support and creates a finished floor suitable for workshops or storage. Pressure-treated skids work for temporary structures in mild climates. Your choice depends on local building codes, soil conditions, and intended use.
How long does it take to build a shed?
A typical 10×12 shed takes 3-6 weeks for a single person working part-time, or 1-2 weeks with a helper. This timeline includes planning, site preparation, foundation work, framing, roofing, and finishing. More complex designs or larger structures require additional time. Proper planning and preparation significantly accelerate the process.
What tools do I need for shed construction?
Essential tools include a circular saw or miter saw, drill-driver, level, tape measure, square, and hammer or pneumatic nailer. A power miter saw dramatically improves accuracy and speed for cutting rafters and trim. Rent specialized equipment like telescoping roof brackets if needed. Quality tools make construction safer and more efficient.
Can I build a shed on my property line?
Building codes typically require setbacks of 5-10 feet from property lines, though this varies by jurisdiction. Check your local zoning regulations and property deed for specific requirements. Violating setback rules can result in fines or orders to relocate the structure. Confirm measurements before finalizing your site selection.
How do I prevent my shed from rotting?
Use pressure-treated lumber for all components touching concrete or soil. Install proper drainage around the foundation to prevent water accumulation. Ensure adequate ventilation inside the shed to reduce moisture. Inspect regularly for signs of decay and address any issues immediately. Reapply exterior finish every 3-5 years to protect wood surfaces.
What’s the best roof pitch for a shed?
A 4:12 to 6:12 pitch (4-6 inches of rise per 12 inches of horizontal run) works well for most sheds. Steeper pitches shed water more effectively and provide better snow shedding in northern climates. However, steeper roofs require more materials and are more challenging to install. Choose based on your climate and aesthetic preferences. Consult National Frame Builders Association guidelines for your specific region.
Should I insulate my shed?
Insulation benefits temperature-sensitive storage, workshops, or year-round usage. It reduces heating and cooling costs if you add climate control. For basic storage of non-temperature-sensitive items, insulation isn’t necessary. Consider your intended use, local climate, and budget when making this decision.


