How to Build a Deck: Expert Tips Revealed
Building a deck is one of the most rewarding DIY projects you can undertake, transforming your outdoor space into a functional entertainment area while adding significant value to your home. Whether you’re a seasoned builder or tackling your first major construction project, understanding the fundamentals of deck building—from planning and material selection to installation and finishing—ensures a safe, durable structure that withstands years of weather and use.
This comprehensive guide walks you through every stage of deck construction, providing expert insights on design considerations, building codes, material choices, and step-by-step installation techniques. By following these proven methods and safety practices, you’ll create an outdoor living space that becomes the centerpiece of your home’s exterior.
Planning and Design Fundamentals
Before driving a single nail, invest substantial time in planning your deck project. Successful deck construction begins with clear vision of what you want to achieve—whether it’s an intimate gathering space, a entertaining platform, or a tranquil retreat. Consider how the deck will connect to your home’s architecture, ensuring the design complements existing structures and landscaping elements.
Start by measuring your available space and sketching preliminary layouts. Think about traffic flow, sun exposure throughout the day, and views you want to maximize or minimize. Your deck’s size should balance your yard’s proportions without overwhelming the landscape. Most residential decks range from 12×16 feet to 16×20 feet, providing comfortable space for furniture and movement without excessive material costs.
Height is another critical consideration. Ground-level decks (under 30 inches) are simpler to construct but may feel disconnected from your home. Elevated decks create visual interest and better define outdoor spaces, though they require more robust structural support and safety considerations. Consult local International Building Code (ICC) standards for specific height requirements in your region.
Sketch your design with precise measurements, noting post locations, joist placement, and any special features like built-in seating, planters, or stairs. This detailed planning prevents costly mistakes during construction and ensures you purchase correct material quantities.
Permits and Building Codes
Obtaining proper permits is non-negotiable for deck construction, protecting both your safety and property value. Most municipalities require permits for decks exceeding 30 inches in height or exceeding specific square footage thresholds. Contact your local building department or National Association of Home Builders to understand specific requirements in your jurisdiction.
Building codes establish minimum standards for structural integrity, railing height and strength, stair dimensions, post spacing, and load capacity. These regulations exist because deck failures can cause serious injuries or death. The International Building Code requires railings on decks over 30 inches high, with specific baluster spacing (no more than 4 inches between vertical members) to prevent child entrapment.
Your permit application typically requires detailed construction plans showing post locations, joist sizing, railing specifications, and materials. A building inspector will review your plans and conduct inspections at critical stages—foundation, framing, and final completion. These inspections verify compliance with safety standards and building codes.
Don’t skip this step. Unpermitted decks can create liability issues, complicate future home sales, and may require expensive removal or reconstruction if discovered. Budget the permit cost as part of your overall project expense.
Materials Selection and Preparation
Selecting appropriate materials significantly impacts your deck’s longevity, appearance, and maintenance requirements. The three primary options include pressure-treated lumber, composite materials, and tropical hardwoods, each with distinct advantages and considerations.
Pressure-Treated Lumber remains the most economical choice, treated with preservatives to resist rot and insect damage. Modern treatments are environmentally safer than older formulations. This material requires regular maintenance—staining or sealing every 2-3 years—but offers excellent structural properties and familiar workability for DIY builders.
Composite Decking combines wood fibers with plastic polymers, creating a low-maintenance surface that resists fading, staining, and rot. While more expensive upfront, composites eliminate sanding, staining, and frequent sealing. They’re ideal for homeowners seeking minimal maintenance, though they can be softer than wood and may require additional support for equivalent load capacity.
Tropical Hardwoods like Ipe and Cumaru offer exceptional durability and beauty, naturally resistant to rot and insects. However, they’re expensive, extremely dense (requiring pre-drilling for fasteners), and raise sustainability concerns. These materials suit premium projects where budget allows.
For structural components—posts, beams, and joists—pressure-treated lumber rated for ground contact is essential. For decking boards and railings, you have flexibility based on maintenance preferences and budget. Purchase materials well before construction begins, allowing them to acclimate to local humidity conditions, which minimizes warping and movement.
Foundation and Posts Installation
A solid foundation is absolutely critical—it literally supports everything above it. Poor foundation work leads to sagging, shifting, and eventual structural failure. Posts must rest on footings that extend below the frost line, preventing frost heave (ground expansion in winter) from lifting your deck.
Frost line depth varies by geographic location, ranging from zero inches in warm climates to 48+ inches in northern regions. Contact your local building department for specific requirements. In areas with deep frost lines, concrete footings extend below grade, with posts mounted on concrete piers that rise above ground.
Dig post holes using a power auger for efficiency and consistency. Holes should be 10-12 inches in diameter and extend 6-12 inches below the frost line depth. Place 6 inches of gravel at the bottom for drainage, then set concrete footings. Some builders use adjustable concrete piers that simplify post height adjustment and allow for ground-level installation without digging below frost line—check if your local codes permit this method.
Posts should be 6×6 or 4×6 pressure-treated lumber, depending on load requirements and span distances. Space posts according to your design plan, typically 8-12 feet apart. Ensure all posts are perfectly vertical using a level, and brace them temporarily until beams are secured. Proper post installation prevents the settling and tilting that causes deck failure.
Framing and Joists Assembly
Once posts are set and concrete has cured (minimum 48 hours), install the beam that connects all posts. The beam is typically a doubled 2×10 or 2×12 (depending on span and load), bolted to posts with lag bolts or through-bolts. This main structural element carries all deck weight and must be absolutely level.
Check the beam level in both directions, shimming under the beam at posts if necessary. Improper beam slope causes water pooling and uneven joist support. Use a long level (4-6 feet) to verify accuracy across the entire beam length.
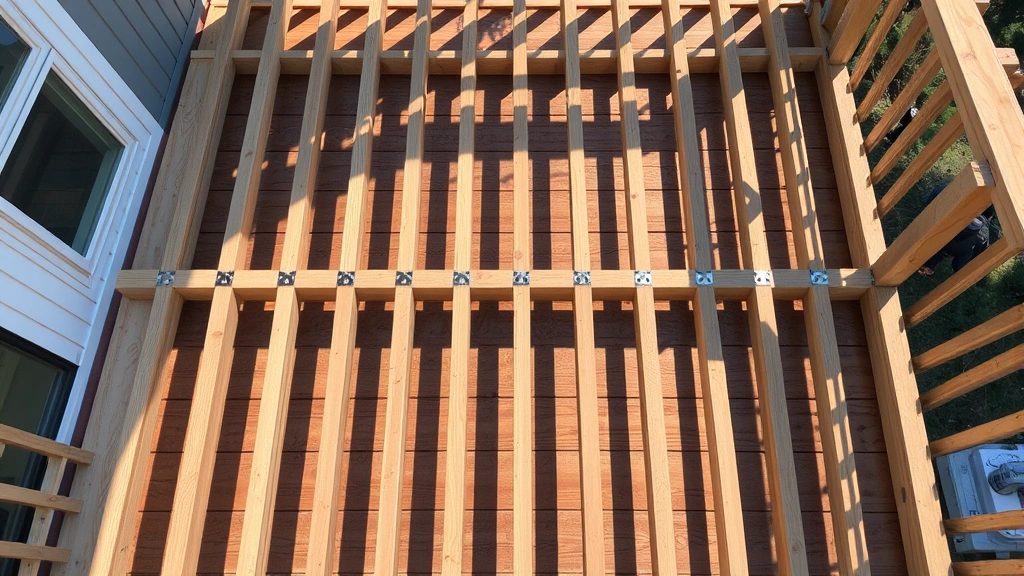
Joists run perpendicular to the beam, typically spaced 16 inches on center (the industry standard for residential decks). Joist size depends on span distance and load requirements—consult American Wood Council span tables for specific sizing. Common residential joists are 2×8 or 2×10 pressure-treated lumber.
Attach joists to the beam using joist hangers—metal brackets that support the joist and transfer load directly to the beam. Joist hangers are far superior to toe-nailing and are code-required in most jurisdictions. Install rim joists (end joists) around the deck perimeter, creating a box that defines the deck boundary and provides edge support for decking boards.
Ensure all joists are crowned (slight curve facing up) in the same direction. This natural curve straightens under load, improving drainage and preventing spongy feeling decks. Space joists consistently—measure twice to ensure accurate placement.
Decking Boards Installation
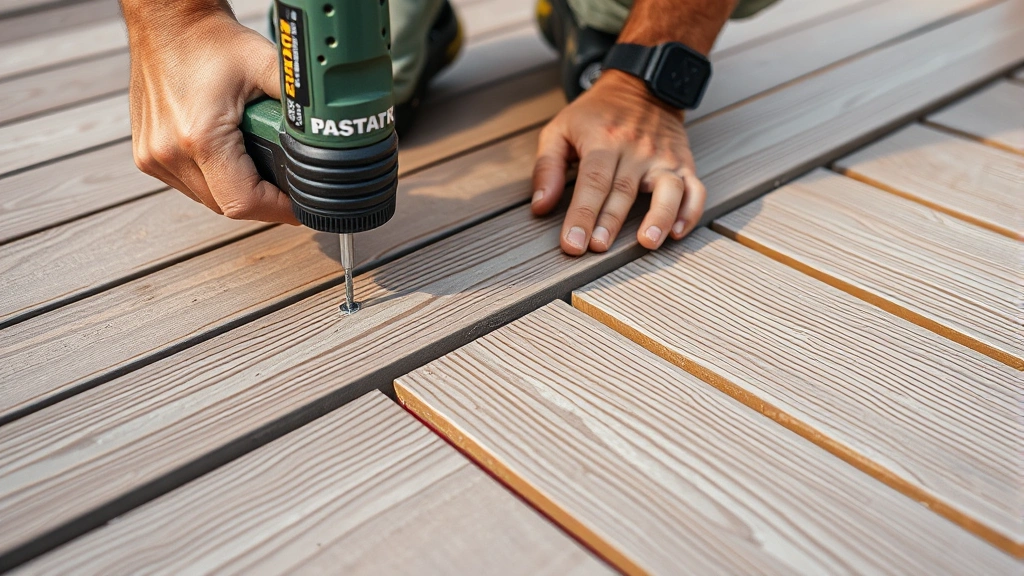
Decking board installation is where your deck’s appearance truly comes together. Proper installation ensures safety, longevity, and attractive appearance. Start with a chalk line snapped parallel to your house, ensuring the first board is perfectly straight. This establishes the pattern for all subsequent boards.
Leave 1/8 to 1/4 inch gaps between boards for drainage and wood movement due to moisture changes. Boards swell when wet and shrink when dry—insufficient gaps cause cupping, buckling, and rot as water becomes trapped between boards. Use spacers (thin shims or purpose-built spacing tools) to maintain consistent gaps.
Secure each board with corrosion-resistant fasteners—either stainless steel screws or hot-dipped galvanized nails. Screws are superior, providing better holding power and allowing for adjustments if needed. Use 2.5-inch screws for standard 2×6 decking, placing fasteners in a pattern that prevents splitting: two fasteners per joist per board, offset slightly to avoid alignment that creates visible lines.
Start fastening at one end and work toward the other, checking alignment frequently. Slightly bowed boards can be straightened by positioning fasteners strategically or using a deck board straightener tool. Avoid forcing severely bowed boards into place—they’ll cup and create trip hazards.
Consider stagger patterns to enhance visual appeal. Running boards in alternating lengths creates interest while utilizing material efficiently. Leave 1/2 inch gap between deck boards and your house to allow water drainage and air circulation, preventing rot on house framing.
Railings and Safety Features
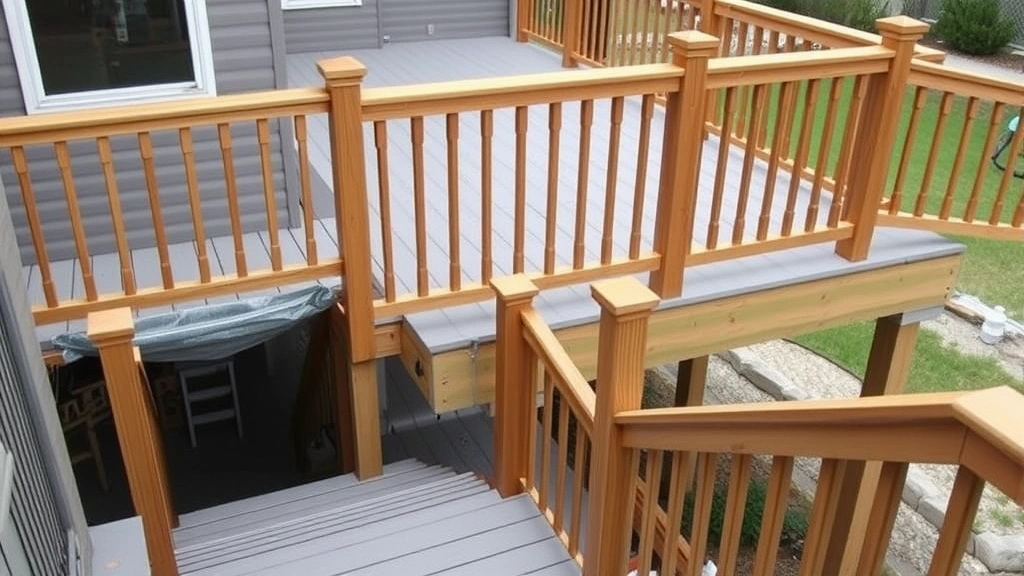
Railings serve critical safety functions, preventing falls while defining deck boundaries. Building codes mandate railings on decks over 30 inches high, with specific requirements for height (typically 36-42 inches measured from deck surface to railing top) and baluster spacing.
The 4-inch sphere rule is fundamental: no opening in the railing system should allow passage of a 4-inch sphere, preventing children from getting their heads stuck. This means balusters (vertical railing members) must be spaced no more than 4 inches apart. Horizontal members between balusters must be spaced to prevent climbing, with standards varying by code—typically no more than 4 inches apart vertically.
Install railing posts at deck corners and typically every 6 feet along the perimeter. Posts should be 4×4 pressure-treated lumber, securely bolted to the deck structure. Between posts, install horizontal rails (typically 2x4s) that receive balusters. Balusters can be traditional 2x2s, metal spindles, or composite materials—choose based on your aesthetic preferences and maintenance tolerance.
Stairs require similar safety considerations: handrails on both sides for stairs wider than 44 inches, proper step depth (minimum 10 inches), consistent riser height (maximum 7.75 inches), and railing protection on open sides. These specifications prevent trips and falls that cause serious injuries.
Consider your deck’s intended use when designing railings. Residential railings can be more decorative than commercial applications, but safety remains paramount. A well-designed railing enhances your deck’s appearance while meeting all safety requirements.
Finishing and Maintenance
After construction completion, finishing protects your deck investment and enhances its appearance. The finishing approach depends on your chosen materials. Pressure-treated lumber benefits from staining or sealing within the first year, before UV exposure and weathering create gray discoloration.
Select finishes appropriate for exterior use—deck stains and sealers are formulated to withstand weather exposure better than interior products. Semi-transparent stains highlight wood grain while providing protection, while solid stains offer more uniform color and coverage. Clear sealers protect wood without color alteration, though they require more frequent reapplication.
Composite decking typically requires minimal finishing, though some manufacturers recommend cleaning annually and applying protective coatings periodically. Hardwood decks benefit from occasional sanding and resealing to maintain appearance and protection.
Establish a maintenance routine to maximize your deck’s lifespan. Regular cleaning removes debris that traps moisture and promotes rot. Inspect fasteners annually, tightening or replacing any that have loosened. Check for signs of rot or insect damage, addressing problems immediately before they spread. Most pressure-treated decks require restaining or resealing every 2-3 years, while composite decks need minimal maintenance.
For homeowners interested in comprehensive home improvement, explore our guide on DIY basement finishing to understand how to expand your living space. Additionally, understanding proper DIY flooring installation techniques enhances your overall construction knowledge. If you’re interested in outdoor aesthetics, our DIY house painting guide provides complementary finishing techniques. For those developing woodworking skills, our DIY beginner woodworking projects resource builds foundational skills applicable to deck construction. Return to our DIY Nests Hub Blog for additional home improvement resources.
Proper finishing and maintenance transform your deck from a functional structure into a beautiful outdoor living space that lasts decades. The time invested in protection pays dividends through extended deck life and consistent appearance.
FAQ
How long does deck construction typically take?
A standard 12×16 foot deck takes 3-5 days for experienced builders, 1-2 weeks for DIY builders. Timeline depends on complexity, crew size, weather conditions, and permit inspection scheduling. Elevated decks with stairs and railings require additional time. Plan conservatively and don’t rush critical steps like foundation work.
What’s the best time of year to build a deck?
Spring and early fall offer ideal conditions—moderate temperatures, manageable humidity, and less rain. Avoid winter (frozen ground prevents digging) and rainy seasons (wet lumber is difficult to work with). Plan your project 2-3 months ahead to secure permits and materials.
Can I build a deck directly on the ground without footings?
No—ground-level decks still require footings below the frost line to prevent frost heave damage. Even low decks shift and tilt without proper foundation. This is non-negotiable for structural integrity and safety.
How much weight can a residential deck support?
Building codes typically require decks to support 40 pounds per square foot of live load (people and furniture), plus 10 pounds per square foot of dead load (deck structure). A 12×16 deck supports approximately 3,000 pounds of live load combined. Proper joist sizing ensures this capacity.
Do I need a permit for a deck under 30 inches high?
Requirements vary by jurisdiction. Many areas don’t require permits for ground-level decks under specific square footage, but regulations differ significantly. Always contact your local building department—skipping permits creates liability and complicates future home sales.
What fasteners should I use for deck construction?
Use hot-dipped galvanized or stainless steel fasteners rated for exterior use. Regular steel fasteners rust and stain wood. Deck screws (2.5-3 inches) are superior to nails, providing better holding power and allowing adjustments. Never use interior fasteners—corrosion compromises structural integrity.
How often should I seal my deck?
Pressure-treated lumber decks need sealing every 2-3 years depending on climate and finish type. Composite decks require minimal maintenance—typically annual cleaning and occasional protective treatment. Hardwood decks may need yearly sealing. Regular inspection guides resealing frequency.


