DIY Drywall Repair: How Long Will It Take? Expert Tips
Drywall damage is one of the most common issues homeowners face, whether from accidental wall impacts, water damage, or settling. The good news is that drywall repair is one of the most accessible DIY projects you can tackle, and understanding the timeline helps you plan your renovation properly. Most small to medium repairs take anywhere from 2 to 8 hours total, including drying time, though the actual hands-on work is considerably shorter.
Whether you’re fixing a small nail hole or patching a larger section, the repair timeline depends on several factors: damage size, repair method, material quality, and environmental conditions. This comprehensive guide walks you through realistic timeframes for every drywall repair scenario, from quick touch-ups to substantial patches. We’ll also cover preparation, application, sanding, and finishing so you understand exactly how long each phase takes and how to work efficiently.

Understanding Drywall Repair Timeline Basics
Before diving into specific repair types, it’s important to understand that drywall repair time breaks down into two distinct phases: active work time and drying/curing time. Active work time is when you’re actually handling tools and materials—measuring, cutting, applying joint compound, and sanding. Drying time is the waiting period between coats where chemistry does the heavy lifting.
The Gypsum Association provides guidelines on drywall installation and repair standards, noting that proper drying between coats is essential for professional results. Most standard joint compound requires 12 to 24 hours between coats under ideal conditions (70°F, 50% humidity). However, lightweight or quick-setting compounds can reduce this to 1-3 hours, which dramatically changes your project timeline.
Your actual timeline also depends on whether you’re completing the repair in one session or spreading it across multiple days. Many DIYers apply one coat, wait overnight, then continue the next day. Others use fast-setting products to complete everything in a single afternoon. Both approaches work—it’s about your schedule and comfort level.
Small Holes and Nail Pops: 30 Minutes to 2 Hours
Tiny holes (under 1 inch) are the quickest repairs. These include nail holes, small impacts, and fastener pops. Active work time is roughly 15-30 minutes, with total project time extending to 1-2 hours once drying is factored in.
For nail holes, you’ll apply lightweight spackling compound or patching paste directly into the hole using a putty knife, let it dry (typically 1-3 hours for fast-setting products), then sand smooth and paint. If using standard joint compound, expect overnight drying. The actual application takes less than five minutes per hole.
Nail pops—where fasteners push through the drywall surface—require slightly more attention. You’ll need to identify the underlying cause (usually nail popping out due to framing movement), potentially reset the fastener, then cover with compound. This adds another 15-20 minutes to the repair process.
Pro tip: Purchase quick-setting spackling for these small repairs. Brands like DAP Fast ‘N Final or similar products dry in 1-3 hours versus overnight, letting you complete the entire job in a single afternoon.
Medium Damage Patches: 2 to 4 Hours Plus Drying
Medium repairs—holes ranging from 2 to 6 inches in diameter—require the classic patch-and-mud method. Active work time typically runs 1.5 to 2.5 hours, but total project time extends to 4-8 hours when you include drying between coats.
This repair type involves:
- Preparation (15-20 minutes): Cutting away damaged drywall to create clean edges, typically using a utility knife or drywall saw
- Patching (20-30 minutes): Cutting a backing patch or using a self-adhesive patch kit, securing it to the wall
- First coat of joint compound (15-20 minutes): Spreading a thin layer over the patch
- Drying time (2-24 hours): Depends on product type and environmental conditions
- Second and third coats (20-30 minutes per coat): Each subsequent coat requires application and drying time
- Sanding (15-20 minutes): Light sanding between coats and final sanding
If using standard joint compound, expect 24 hours between coats. With quick-set products, you might complete the repair in 4-6 hours total. Many homeowners apply the first coat, leave overnight, then complete remaining coats and sanding the next day.
Large Section Repairs: 4 to 8 Hours Plus Curing
Large repairs—holes bigger than 6 inches or sections requiring cutout and replacement—are more involved but follow the same basic principles. Total active work time ranges from 3 to 6 hours, with complete curing extending the project to 24-48 hours.
These repairs involve:
- Damage assessment and marking (10-15 minutes): Determining the extent of damage and marking cut lines
- Cutting and removal (30-45 minutes): Using a drywall saw to remove damaged sections, creating clean rectangular openings
- Framing and backing installation (45-60 minutes): Installing blocking between studs or creating backing for the new piece
- Drywall piece cutting and installation (30-45 minutes): Measuring, cutting new drywall, and securing with drywall screws
- Taping seams (20-30 minutes): Applying joint tape along all seams where new drywall meets existing wall
- Multiple mudding coats (1-2 hours total): Three coats typically required for seamless finish
- Sanding and finishing (30-45 minutes): Final sanding and preparation for paint
For large repairs, you’ll almost certainly spread work across multiple days. Most professionals recommend applying one coat, waiting 24 hours, then continuing. This ensures proper curing and reduces the chance of cracking.
Preparation and Tools You’ll Need
Proper preparation significantly impacts your repair timeline. Having the right tools ready before starting saves 30-60 minutes and prevents mid-project trips to the hardware store. Essential tools include:
- Utility knife and extra blades
- Drywall saw (for larger cuts)
- Putty knives (4-inch and 6-inch minimum)
- Joint compound (standard or quick-set)
- Drywall tape (paper or mesh)
- Sanding block or pole sander
- Dust mask and safety glasses
- Primer and paint matching existing walls
- Measuring tape and straightedge
Consider your space before starting. If you’re doing basement finishing or large wall repairs, ventilation becomes critical. Dust from sanding spreads throughout your home, so opening windows and using fans helps manage this.
Material selection affects timeline too. Lightweight joint compound is easier to sand than standard compound, potentially saving 10-15 minutes on the sanding phase. Quick-set products let you apply multiple coats in one day rather than spreading across two days.
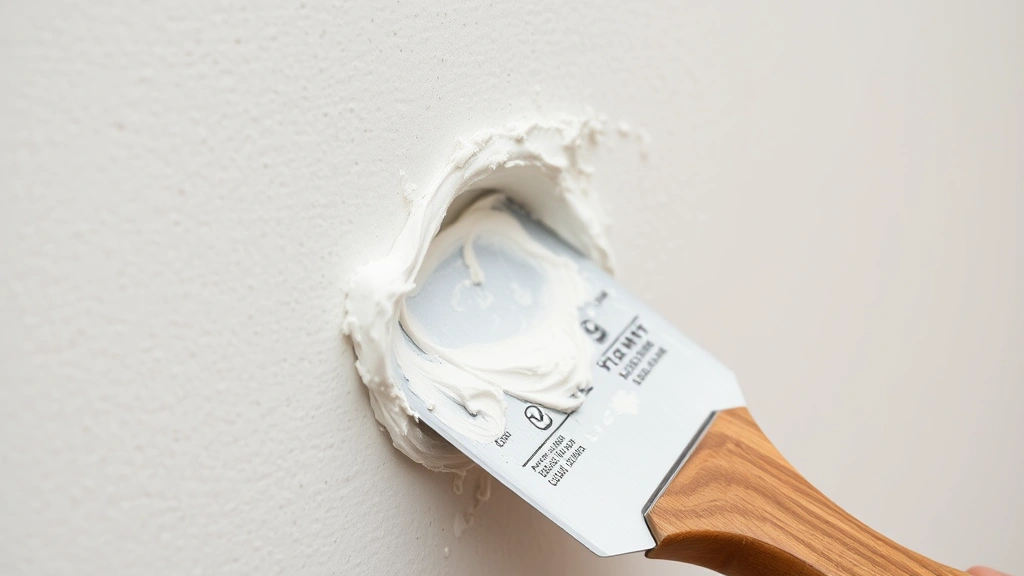
The Mudding and Taping Process Explained
The mudding and taping process is where most drywall repair time is spent, particularly the drying phases. Understanding this process helps you manage expectations and work efficiently.
For patches, you’ll typically apply three coats of joint compound:
First coat (skim coat): This thin layer covers the patch or tape, filling low spots. Use a 4-inch putty knife, applying compound in one direction. This coat should be thin enough that you can slightly see through it—this isn’t about coverage, it’s about adhesion. Drying time: 2-24 hours depending on product and humidity.
Second coat (fill coat): Once the first coat is dry, apply a second coat using a 6-inch knife, extending further beyond the patch. This coat bridges the gap between the patch area and surrounding wall. Drying time: 2-24 hours.
Third coat (finish coat): The final coat uses a 10-12 inch knife, feathering the edges to blend seamlessly with the surrounding wall. This coat is typically thinner than previous coats. Drying time: 2-24 hours before sanding.
Each coat application takes roughly 15-20 minutes of active work. The drying time between coats is where the timeline extends. Using fast-setting joint compound reduces drying time to 1-3 hours, allowing you to apply multiple coats in a single day.
The key to efficient mudding is letting gravity help you. Spread compound in smooth, even strokes, feathering the edges so they blend into the wall. Avoid overspreading—thinner coats dry faster and sand more easily than thick applications.
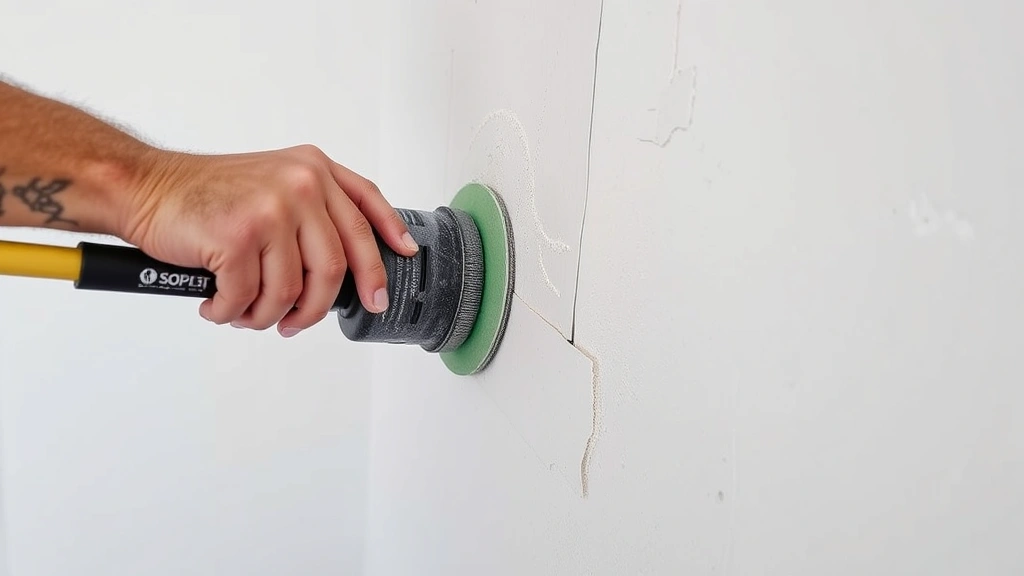
Sanding, Priming, and Painting Timeline
Once your final coat is completely dry, sanding is the next critical step. Sanding takes 15-45 minutes depending on patch size and your technique. This phase determines whether your repair looks professional or amateur, so it deserves attention.
Use 120-150 grit sandpaper for initial sanding, then 220 grit for final smoothing. Sand in circular motions, keeping pressure light and even. The goal is to smooth the compound without creating low spots or gouges. Light sanding is better than aggressive sanding—you can always sand more, but you can’t easily add compound back.
After sanding, wipe away all dust with a damp cloth or tack cloth. This step takes 5-10 minutes but is crucial for paint adhesion.
Priming takes 15-20 minutes of application time plus 1-3 hours drying time depending on primer type. Quality primer improves paint adhesion and coverage, reducing the number of paint coats needed. Many professionals use drywall primer-sealers that dry quickly.
Painting the repair area takes 10-15 minutes for application, plus 2-4 hours drying time before a second coat (if needed). Most repairs require two paint coats for proper coverage.
Total timeline for sanding, priming, and painting: 1-2 hours of active work plus 4-8 hours drying time. This can extend across two days or be completed in one long day with fast-drying products.
Factors That Affect Your Repair Duration
Environmental conditions dramatically impact drying times, potentially adding hours or days to your project. Temperature, humidity, and air circulation all matter.
Temperature: Joint compound dries fastest at 70°F. Below 65°F, drying slows significantly. Below 50°F, standard compound won’t dry properly at all. Cold basements or unheated spaces require either heated drying conditions or acceptance of longer timelines. Quick-set compounds work better in cooler conditions.
Humidity: High humidity (above 85%) slows drying dramatically. In humid climates or during summer months, expect drying times to double or triple. Using fans and dehumidifiers helps, but you can’t fight physics. Dry conditions (below 40% humidity) speed drying considerably.
Air circulation: Fans significantly speed drying. A box fan positioned to circulate air around the repair can cut drying time by 25-50%. However, avoid direct hot air from heating vents, which can cause uneven drying and cracking.
Your skill level also affects timeline. Experienced DIYers apply compound more efficiently, feather edges better (requiring less sanding), and work more confidently. First-timers might add 30-60% to estimated times while learning proper technique.
Material quality matters too. Premium joint compounds sand more smoothly and require fewer coats than budget options. Investing in quality materials often saves time in the sanding phase.
If you’re tackling multiple repairs—say, fixing several damaged areas during house painting projects—you can work on different areas while others dry, effectively reducing total project time.
Pro Tips to Speed Up Your Project
Several strategies help complete drywall repairs more quickly without sacrificing quality:
Use quick-set joint compound: Products like DAP Fast ‘N Final or USG Durabond dry in 1-3 hours versus 12-24 hours for standard compound. The tradeoff is slightly harder sanding, but the time savings are significant.
Apply thinner coats: Three thin coats dry faster and sand easier than two thick coats. Thinner coats also reduce cracking risk.
Use a damp sponge instead of sandpaper: For small repairs, a damp sponge gently rubbed over dried compound smooths edges without creating dust. This works best for the final coat and saves sanding time.
Improve air circulation: Fans and open windows reduce drying time by 25-50%. Position a box fan to blow across the repair area, not directly on it.
Keep materials at room temperature: Cold joint compound dries slower. Storing materials in a warm area (70°F+) ensures optimal drying.
Do prep work while compound dries: While waiting for coats to dry, prepare tools, lay out materials for the next phase, or work on different repairs. This multitasking approach makes the timeline feel shorter.
Invest in quality tools: A good putty knife with flexible, even blade application makes compound application faster and more professional. Cheap tools make the work harder and slower.
Practice your technique on scrap: Spending 15 minutes practicing on cardboard or drywall scraps before tackling your repair prevents mistakes that require rework.
FAQ
How long does drywall compound take to dry?
Standard joint compound dries in 12-24 hours under ideal conditions (70°F, 50% humidity). Quick-set compounds dry in 1-3 hours. Drying time increases in cold, humid conditions and decreases with good air circulation and low humidity.
Can I paint over joint compound immediately?
No, you must wait until compound is completely dry and sanded smooth. Painting wet or damp compound traps moisture, causing bubbling, peeling, and poor adhesion. Always prime before painting to ensure proper coverage and color matching.
How many coats of joint compound do I need?
Small holes need one coat of spackling. Patches typically require three coats of joint compound—a skim coat for adhesion, a fill coat for coverage, and a finish coat for blending. Large repairs might need four coats depending on the area size and your application technique.
What’s the difference between joint compound and spackling?
Spackling is formulated for small holes (under 1 inch) and dries harder but shrinks more. Joint compound is better for larger areas, sands more smoothly, and is more forgiving for feathering. For small repairs, spackling is faster; for larger patches, joint compound is better.
Can I speed up drying time?
Yes, several methods work: use quick-set compound, improve air circulation with fans, maintain 70°F temperature, keep humidity below 50%, and apply thinner coats. However, you can’t rush chemistry—compound needs time to cure properly regardless of drying speed.
Do I need to prime after sanding?
Yes, primer is essential. Joint compound is porous and absorbs paint differently than surrounding drywall, causing visible patches without primer. A quality primer-sealer ensures even coverage and better color matching.
How do I prevent cracking in my repair?
Use thin coats, allow proper drying between coats, apply quality compound, maintain stable temperature and humidity, and avoid thick applications. Fast-drying compounds are more prone to cracking, so use them judiciously.
What if my repair still shows after painting?
This usually means inadequate primer or insufficient sanding/feathering. Use primer-sealer designed for drywall, apply at least two primer coats, and ensure edges are feathered 8-12 inches beyond the patch for seamless blending.


