
DIY Shed: How Long Does It Take? Expert Timeline
Building a shed is one of the most rewarding DIY projects you can undertake, transforming unused yard space into functional storage or a creative workspace. However, many homeowners ask the same question: how long does it actually take to build a shed? The answer depends on multiple factors including shed size, design complexity, your experience level, weather conditions, and the permits required in your area. Whether you’re planning a simple 8×10 storage shed or an elaborate structure with electrical systems, understanding the realistic timeline helps you prepare mentally and logistically for the project ahead.
The timeline for a DIY shed typically ranges from two weeks to three months for most residential projects, though this can vary significantly based on your specific circumstances. A basic, single-person project might stretch longer if you’re working only on weekends, while a team effort could compress the schedule considerably. This guide breaks down every phase of shed construction, providing expert estimates and practical tips to help you complete your project efficiently and safely.
Pre-Construction Planning Phase
Before you drive a single nail, proper planning is essential and often overlooked by eager DIYers. This phase typically takes one to three weeks and includes several critical steps. First, you’ll need to check local International Code Council building codes and obtain necessary permits—a process that can add significant time depending on your municipality. Some jurisdictions require detailed plans, inspections at multiple stages, and zoning verification.
During planning, you should finalize your shed design, select materials, and create a detailed budget. Visit local building departments to understand setback requirements, height restrictions, and whether your shed requires a foundation permit. Research National Association of Home Builders standards for guidance on best practices. Take time to measure your yard, account for drainage patterns, and identify utility lines before excavation. Creating a materials list and ordering supplies in advance prevents construction delays caused by backorders or missing components.
This planning investment pays dividends throughout construction. A well-thought-out project with proper permits avoids costly rework and ensures your shed meets local requirements. Many experienced builders recommend spending at least two full days on detailed planning for every week of construction time.
Foundation and Site Preparation
Foundation work typically consumes three to seven days depending on site conditions and foundation type. Site preparation begins with clearing vegetation, leveling the ground, and marking the exact shed footprint using string lines and stakes. This initial work takes one to two days for most residential lots.
The foundation choice dramatically affects timeline and long-term durability. Gravel pad foundations (the quickest option) take one day to complete but offer minimal frost protection in cold climates. Concrete slab foundations require proper base preparation, forming, pouring, and curing—typically five to seven days total, including the critical 28-day strength-gain period (though you can begin framing after 7 days in most cases). Frost-protected shallow foundations require deeper excavation and insulation installation, adding two to three extra days.
Post and pier foundations, popular for elevated sheds, take three to five days to install depending on the number of piers and soil conditions. Whatever foundation type you select, ensure proper drainage by sloping the ground away from the shed perimeter. Poor drainage causes premature deterioration and structural problems that far exceed the time saved by rushing this phase.
Related: Learn about DIY basement finishing techniques which often involve similar foundation principles adapted for below-grade spaces.
Framing the Shed Structure
Framing represents the longest single phase for most DIY shed builders, typically requiring five to ten days for a standard 8×10 structure. This phase includes building the floor frame, wall frames, and roof trusses or rafters. The timeline extends based on shed size—a 10×12 shed might take 12-14 days, while a 12×16 structure could require three weeks of framing work.
Wall framing begins after the floor system is complete and properly leveled. Standard practice involves building wall sections on the ground, then tilting them upright and securing them to the floor frame. This approach is faster and safer than building walls in place. For a basic shed with four walls, expect two to three days for wall framing, including door and window openings.
Roof framing follows wall completion. Pre-fabricated trusses (ordered from suppliers) dramatically reduce timeline compared to cutting and assembling rafters on-site. Using trusses cuts roof framing time from five days to just one or two days. However, if you’re building rafters from scratch, budget an additional three to four days for layout, cutting, and assembly. Proper roof pitch and overhang are crucial for weather protection and must be accurate to prevent future leaks.
Throughout framing, maintain consistent level and plumb measurements using quality tools. Rushing this phase creates compounding errors that become exponentially harder to fix in later stages. Consider hiring a framing professional if you’re inexperienced—the modest expense often saves weeks of frustrating corrections.
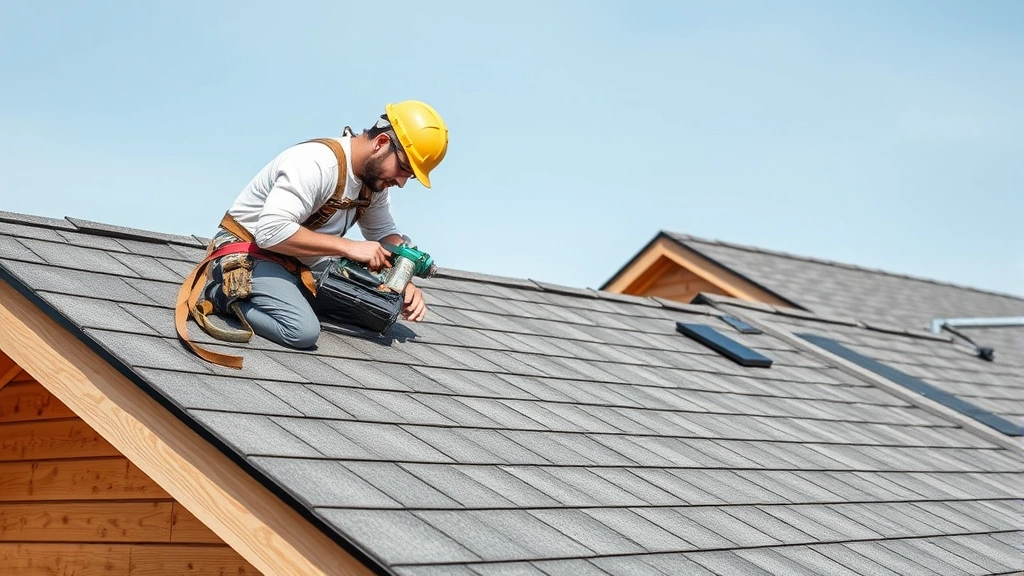
Roofing Installation
Roofing typically takes two to four days for standard asphalt shingles on a typical shed. This timeline includes sheathing installation, underlayment, flashing, and shingle application. The process begins after the roof frame is complete and properly braced.
Roof sheathing (typically 1/2-inch plywood) goes down first, followed by underlayment that provides secondary weather protection. Quality underlayment is non-negotiable for leak prevention and longevity. Metal drip edge and flashing around any penetrations (vents, chimneys) must be installed before shingles. These details take extra time but prevent costly water damage.
Asphalt shingle installation proceeds from the bottom up, with each course overlapping the one below. A single person can typically cover 100-150 square feet per day, meaning a 10×12 shed roof (approximately 150 square feet per side) takes two to three days for shingle installation alone. Metal roofing, while more durable, requires different fastening techniques and takes similar time. Premium roofing materials like architectural shingles or standing seam metal may add one extra day due to increased complexity.
Weather significantly impacts roofing timeline. Rain delays work and creates unsafe conditions. Schedule roofing during your local dry season if possible, and plan for weather contingencies. Never rush roof work—improper installation causes leaks that compromise the entire structure.
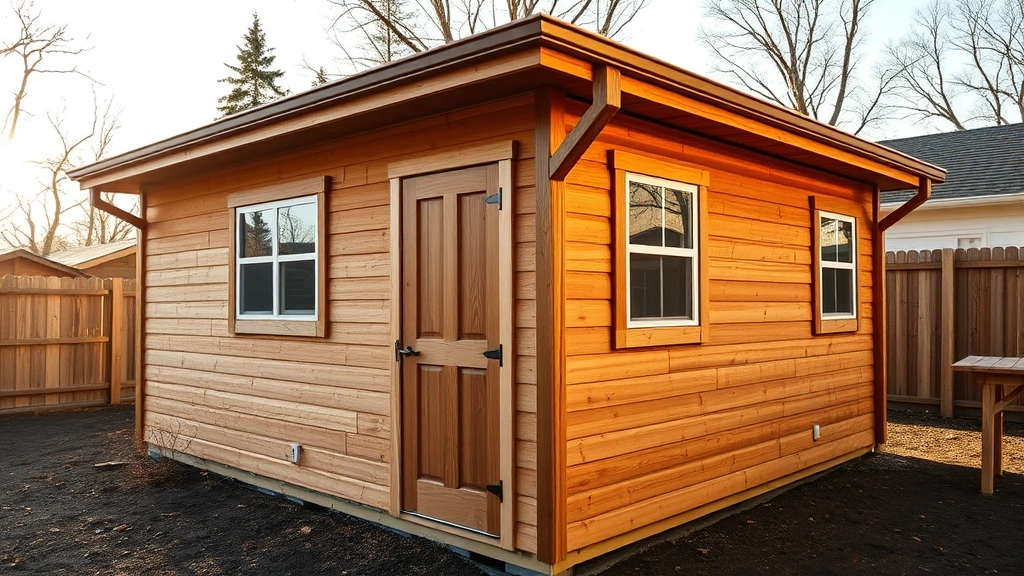
Exterior Finishing
Exterior finishing encompasses siding, trim, doors, and windows, typically requiring four to eight days depending on material choices and complexity. Siding installation varies dramatically by material: vinyl siding takes three to four days for a standard shed, fiber cement board takes four to five days due to cutting and sealing requirements, and wood siding might take five to six days including staining or painting.
Before siding installation, ensure the structure is properly wrapped with house wrap and that windows and doors are correctly installed and flashed. These preparatory steps take one to two days but are essential for weather protection and energy efficiency. Quality flashing around all openings prevents water infiltration—one of the most common causes of shed failure.
Door and window installation requires precision. Exterior doors must be perfectly level and plumb to operate smoothly and seal properly. French doors, sliding glass doors, or specialty windows add complexity and time compared to simple fixed windows. Budget an extra day if your shed design includes multiple windows or specialty glazing.
Trim work—fascia, soffit, and corner boards—takes one to two days and significantly improves aesthetics and weather protection. Proper trim installation with appropriate flashing prevents water from entering wall cavities. Paint or stain application adds another one to two days depending on surface preparation requirements and drying time between coats.
Related: Explore DIY house painting techniques that apply equally well to shed exterior finishing and provide professional results.
Interior and Final Details
Interior work typically takes two to five days depending on complexity. Basic sheds might require only floor protection and shelving installation, while climate-controlled workshops need insulation, drywall, electrical systems, and HVAC considerations. If you’re building a simple storage shed, this phase is relatively quick: install shelving, organize storage systems, and add lighting if desired.
For climate-controlled spaces, insulation installation takes one to two days depending on cavity depth and coverage area. Proper ventilation and moisture control prevent mold and deterioration. Adding electrical systems requires a licensed electrician in most jurisdictions, adding time and expense but ensuring safety and code compliance. Budget three to five days for electrical work if outlets, lighting, and circuits are required.
Flooring options range from simple concrete (already in place with a concrete foundation) to finished wood or composite materials. Epoxy coating over concrete takes one day, while installing finished flooring adds two to three days. Shelving and storage systems installation takes one to two days depending on quantity and complexity.
Final details include touch-ups, caulking gaps, weatherproofing seams, and organizing the interior. These finishing touches take one to two days but significantly impact longevity and functionality. Don’t skip final inspections—walk through the entire shed systematically, checking for gaps, loose fasteners, and areas needing touch-up.
Factors Affecting Your Timeline
Shed Size and Complexity: A basic 8×8 shed might take three to four weeks, while a 12×20 structure with multiple windows could require eight to ten weeks. Complexity multiplies timeline exponentially—simple rectangular designs build faster than structures with angled roofs, dormers, or multiple door configurations.
Your Experience Level: First-time builders typically work 30-40% slower than experienced DIYers. If this is your first major construction project, add 20-30% to estimated timelines. Consider taking a workshop or consulting with experienced builders for critical phases like framing and roofing.
Available Work Time: A full-time builder working five days weekly completes projects much faster than someone working only weekends. A project estimated at 30 work days takes six weeks at five days per week, but 15 weeks at one day per week. Weather interruptions extend timelines further—plan for 10-20% extra time for weather delays in most climates.
Weather Conditions: Rain, snow, and extreme temperatures halt exterior work. Winter construction in cold climates stretches timelines significantly due to frozen ground, reduced daylight, and safety concerns. Spring and fall typically offer optimal building conditions. Check historical weather patterns for your area and schedule accordingly.
Material Availability: Supply chain disruptions can delay projects weeks or months. Order long-lead items (trusses, specialty materials) immediately after purchasing plans. Maintain backup plans for material substitutions if delays occur.
Permitting and Inspections: Permit approval timelines vary from days to months depending on your jurisdiction. Some municipalities require inspections at multiple stages (foundation, framing, final), each adding inspection scheduling time. Budget two to four weeks for the complete permitting and inspection process.
Tips to Speed Up Construction
Prepare Thoroughly: Detailed planning and material gathering before breaking ground prevents mid-project delays. Create a master checklist and order all materials well in advance, confirming delivery dates.
Recruit Help: Additional hands dramatically accelerate construction. A two-person team completes framing 40-50% faster than a solo builder. More complex phases like roof installation benefit especially from having multiple workers.
Use Prefabrication: Pre-made trusses, door frames, and window units reduce on-site assembly time significantly. While slightly more expensive, the timeline savings often justify the cost, especially for first-time builders.
Invest in Quality Tools: Proper tools prevent frustration and errors. A pneumatic nail gun, power drill, and miter saw dramatically accelerate work compared to manual tools. Rent expensive specialty equipment rather than purchasing.
Establish Efficient Workflows: Organize materials logically near work areas to minimize retrieval time. Complete similar tasks in sequence rather than jumping between different types of work, which reduces mental setup time and increases efficiency.
Schedule Weather-Sensitive Work Strategically: Plan roofing and exterior finishing during your area’s driest season. Complete interior work during less favorable weather when exterior work becomes impossible.
Related: Review DIY home security installation which can be added to your shed project during final phases for enhanced protection.
Document Progress: Take photos at each phase to track progress and identify issues early. Documentation also helps if disputes arise with inspectors or contractors.
FAQ
How long does it take to build a 10×12 shed?
A 10×12 shed typically requires 30-40 work days for experienced DIYers working full-time, or 6-10 weeks for part-time builders. This timeline includes planning, foundation, framing, roofing, exterior finishing, and basic interior work. Complexity, weather, and experience level significantly affect actual duration.
Can I build a shed in a weekend?
Building a complete functional shed in one weekend is unrealistic for most projects. However, you could complete foundation prep, framing, and roof installation over an extended long weekend (three to four days) with multiple helpers and pre-fabricated components. Most builders should expect at least 4-6 weeks for a finished shed.
What’s the fastest way to build a shed?
Using prefabricated components (trusses, wall panels, doors), recruiting multiple helpers, and having detailed plans ready before starting dramatically accelerates construction. Pre-made kits can be assembled in 2-3 weeks compared to 8-12 weeks for traditional stick-built sheds. Concrete slab foundations also speed up the process compared to complex pier systems.
Do I need permits for a shed?
Most jurisdictions require permits for sheds over a certain size (typically 100-200 square feet). Permit requirements vary by location—check with your local building department before starting. Permits add 2-4 weeks to your timeline but ensure your structure meets safety codes and prevents future legal issues when selling your property.
What’s the most time-consuming part of shed building?
Framing typically consumes the most time—5-10 days for standard sheds. Roofing and exterior finishing are also time-intensive. These phases require precision and can’t be rushed without compromising quality and longevity. Foundation work, while critical, usually takes less total time than structural framing.
How much faster is building with helpers?
Each additional helper typically reduces project timeline by 25-35% depending on task complexity. Simple tasks like material carrying benefit more from extra hands than precision work like framing. Two helpers working together usually complete a project in roughly 50-60% of the time one person would require.
Should I hire professionals for any phases?
Roofing and electrical work are excellent candidates for professional installation if you lack experience. These phases significantly impact safety and longevity. Professional roofers complete this phase in 1-2 days versus 3-4 days for DIYers. Licensed electricians ensure code compliance and prevent safety hazards. Hiring professionals for these critical phases often saves time and money compared to learning as you go.
Related: Explore DIY flooring installation techniques that can enhance your shed’s functionality and finish quality.
Building a DIY shed is an achievable project that delivers tremendous satisfaction and lasting value. By understanding realistic timelines, planning thoroughly, and managing expectations around weather and complexity, you’ll successfully complete your project. Remember that rushing leads to mistakes that cost far more time and money to correct than taking the project at a reasonable pace. Start with detailed planning, recruit help for major phases, and don’t hesitate to bring in professionals for specialized work like roofing or electrical installation. Your finished shed will provide years of functional storage or workspace, making every hour invested worthwhile.
For additional DIY inspiration and project guidance, visit the DIY Nests Hub Blog where you’ll find comprehensive guides for home improvement projects of all types. You might also enjoy exploring DIY pallet projects for creative storage solutions and interior shed organization ideas.


