How to Build a Deck: Expert Tips Inside
Building a deck transforms your outdoor space into a functional entertainment area that adds value to your home. Whether you’re a seasoned DIYer or tackling your first major project, understanding the fundamentals of deck construction ensures safety, durability, and compliance with local building codes. This comprehensive guide walks you through every step, from planning and permitting to finishing touches.
A well-built deck withstands years of weather exposure, foot traffic, and seasonal stress. The difference between a deck that lasts two decades and one that fails in five years often comes down to proper planning, material selection, and attention to code requirements. We’ll cover structural requirements, material choices, and proven techniques used by professional builders.
Planning and Permits
Before purchasing a single board, invest time in proper planning. Measure your space carefully, sketch your design, and determine how the deck will connect to your home. Most jurisdictions require deck permits, and for good reason—improper construction poses safety hazards and creates liability issues.
Visit your local building department to understand specific requirements. Deck codes vary by region, but most follow guidelines from the International Code Council (ICC). Key requirements typically include:
- Minimum post spacing and size requirements
- Footing depth below frost line (typically 12-48 inches depending on climate)
- Railing height and baluster spacing (usually 4 inches maximum)
- Ledger board attachment specifications
- Load capacity ratings (typically 40 pounds per square foot)
Create detailed plans showing dimensions, materials, footing locations, and how the deck attaches to your house. Many building departments require these before issuing permits. If you’re uncertain about design calculations, consult a structural engineer—the cost of professional review is minimal compared to potential repair or replacement expenses.
Check for underground utilities before digging. Contact your local utility locating service (usually available by calling 811) to mark gas lines, electrical conduits, and water pipes. This prevents dangerous accidents and costly repairs.
Materials Selection
Your material choice affects durability, maintenance requirements, and overall cost. Common deck materials include pressure-treated lumber, cedar, composite materials, and PVC.
Pressure-Treated Lumber: The most economical option, pressure-treated wood resists rot and insect damage through chemical preservation. Modern treatments are safer than older copper-chromium-arsenic formulations. Expect to pay $0.50-$1.50 per board foot. This material requires periodic staining or sealing to maintain appearance and extend lifespan.
Cedar and Redwood: These naturally rot-resistant softwoods offer attractive appearance but cost $1.50-$3.00 per board foot. They require annual maintenance and don’t last as long as treated lumber in harsh climates. Excellent for those prioritizing aesthetics and willing to invest in upkeep.
Composite Materials: Engineered from wood fibers and plastic binders, composites ($2.00-$4.00 per board foot) resist fading, staining, and rot. They require less maintenance than wood but can be slippery when wet and may expand/contract differently than wood in temperature extremes. Verify load ratings and installation specifications from manufacturers.
PVC Decking: Premium option ($3.00-$5.00 per board foot) offering excellent durability and minimal maintenance. Performs well in wet climates and resists mold and mildew better than composites. Installation techniques differ from wood—consult manufacturer guidelines carefully.
For structural components (posts, beams, joists), use pressure-treated lumber rated for ground contact if below-grade. The American Wood Council provides detailed specifications for lumber grades and load capacities.
Foundation and Footings
Proper footings prevent frost heave, settling, and structural failure. This is where many DIY decks fail—inadequate footings lead to sagging, cracking, and safety hazards.
Determine frost line depth for your region (ranging from 12 inches in mild climates to 48+ inches in northern areas). Footings must extend below this depth to prevent frost heave during winter freeze-thaw cycles. Dig holes using a post hole digger or auger, making them 10-12 inches in diameter for standard 4×4 posts.
Several footing methods work effectively:
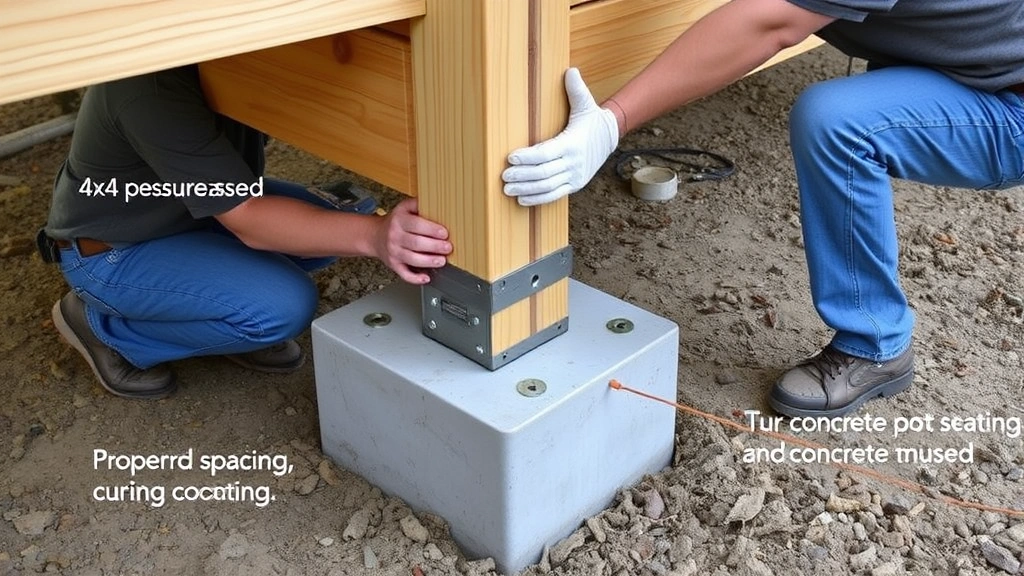
- Concrete Piers: Insert cardboard sonotubes into holes, pour concrete, and set adjustable post bases. This allows for easy height adjustment and is the most common method for DIY builders.
- Ground-Level Footings: For low decks (under 30 inches), some codes allow frost-protected shallow foundations or concrete pads if frost line is shallow.
- Frost-Protected Shallow Foundations: Advanced technique using insulation to protect shallow footings; requires engineer design and isn’t recommended for beginners.
Set concrete footings below frost line depth, typically 3-4 feet in northern climates. Use concrete rated for outdoor exposure (minimum 3,000 PSI). Allow 7 days for curing before installing posts. Install adjustable post bases that allow for minor height corrections and provide a moisture barrier between concrete and wood.
Never set posts directly on concrete or soil—moisture wicks into wood and causes rot. Post bases create air space and shed water, dramatically extending post lifespan.
Framing the Structure
Once footings cure, install posts, then build the frame. Proper sizing and spacing of structural members prevents sagging and ensures safety.
Post Installation: Cut posts to height, leaving extra length to trim after frame installation. Set posts in bases, checking plumb (vertical) with a level. Brace posts temporarily while building the frame. For decks higher than 4 feet, posts should be 4×4 or larger; smaller decks may use 4×4 or 6×6 depending on span and load.
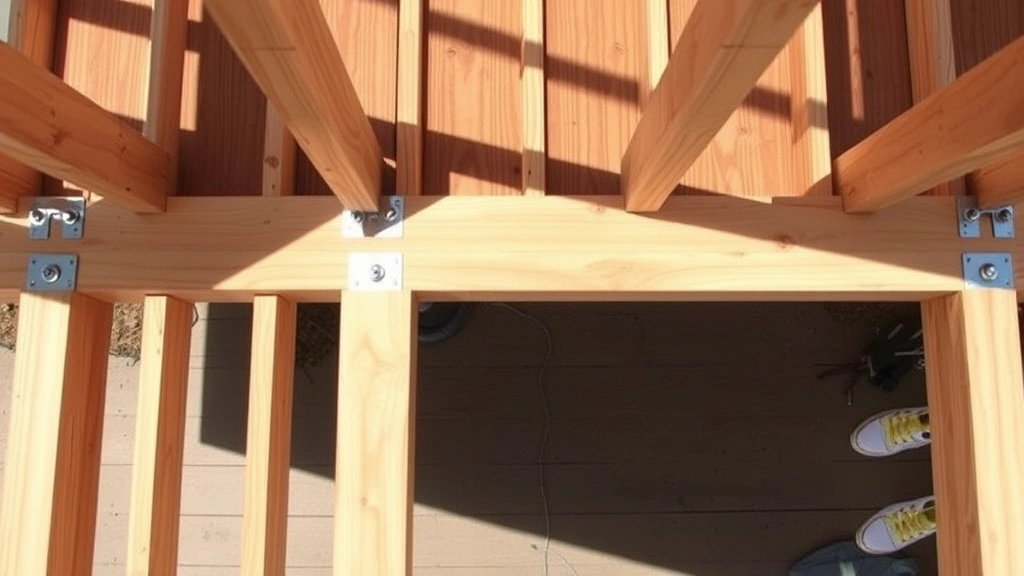
Beam Installation: Beams span between posts and support joists. Beam size depends on span and post spacing. A 2×10 beam typically spans 8-10 feet for residential loads. Consult span tables from the American Wood Council or your local building department for exact requirements. Attach beams to posts with bolts (not nails), using hardware rated for outdoor use. Space bolts 12 inches apart, minimum two per connection.
Joist Installation: Joists run perpendicular to beams and support decking boards. Typical spacing is 16 inches on-center for 2×6 joists or 12 inches for 2×8 joists, depending on species and span. Attach joists with joist hangers (metal brackets bolted to beams) rather than toe-nailing—hangers distribute loads more effectively and create stronger connections.
Ledger Board Connection: If attaching to your house, install the ledger board using lag screws or bolts spaced 16 inches apart into rim joist. Flash the ledger board with metal flashing to prevent water from running behind it into your home’s structure. This detail is critical—water damage to rim joists is a common and expensive problem. Slope the deck slightly (1/8 inch per foot) away from the house to shed water.
Check all framing for square using the 3-4-5 triangle method: measure 3 feet along one side, 4 feet along an adjacent side, and the diagonal should measure 5 feet. Make adjustments before installing decking.
Decking Installation
Decking boards create the walking surface and should be installed with proper spacing and fastening for safety and durability.
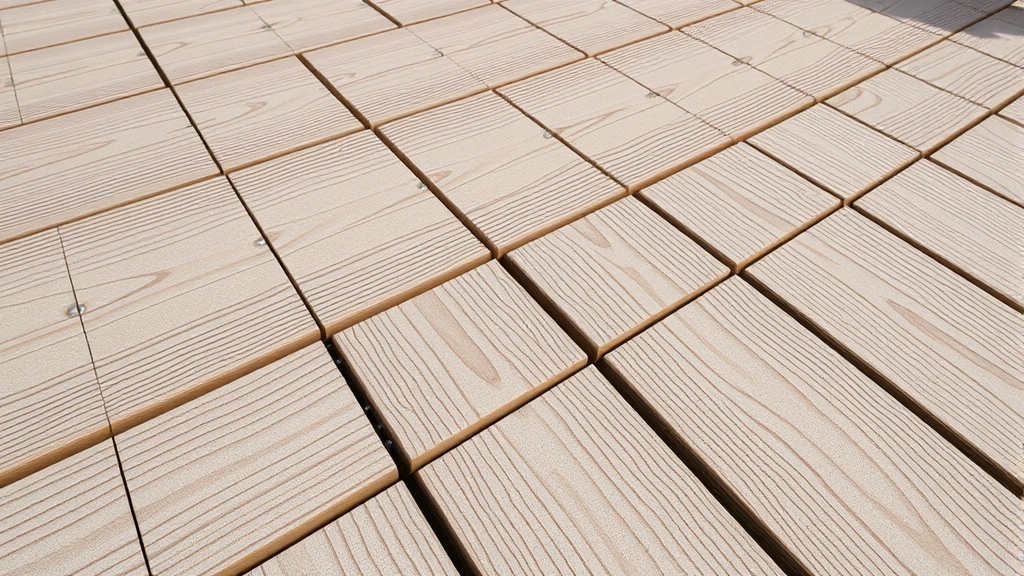
Board Selection and Spacing: Sort boards before installation, setting aside warped or severely checked pieces. Allow 1/8 inch gaps between boards for expansion and contraction (except composite materials, which may have different requirements—check manufacturer specs). Boards expand when wet and contract when dry; insufficient spacing causes buckling and cracking.
Fastening Methods: Use corrosion-resistant fasteners—stainless steel or deck screws rated for outdoor use. Avoid galvanized nails for pressure-treated lumber (chemical reaction causes corrosion). For composite decking, follow manufacturer specifications exactly, as some materials require specific fastener types and spacing.
Fasten boards with two fasteners per joist, placed 1-1.5 inches from board edges to prevent splitting. Some builders use hidden fastening systems (clips beneath boards) for cleaner appearance, though these cost more and require specific joist spacing. For most DIY projects, visible fasteners work fine and are easier to install and maintain.
Stagger board joints over multiple joists—never align joints directly over single joists, which creates weak points. Staggered joints distribute loads and improve appearance.
Consider the National Wood Flooring Association guidelines for wood decking moisture content and acclimation before installation, especially in humid climates.
Railings and Safety Features
Railings are essential safety components required by code for most decks. Specific requirements vary by jurisdiction, but standard guidelines are:
- Railing height: 36-42 inches from deck surface to top rail
- Baluster spacing: Maximum 4 inches (sphere rule—a 4-inch sphere cannot pass between balusters)
- Load capacity: Railings must withstand 200 pounds of horizontal force
- No gaps: Horizontal rails must have no opening exceeding 4 inches
Install railings on all open sides of decks higher than 30 inches. Posts should be 4×4 or larger, spaced maximum 6 feet apart. Attach top and bottom rails with bolts rather than nails. Use vertical balusters spaced no more than 4 inches apart to prevent child entrapment.
Stairs require handrails on at least one side for more than three steps. Handrails should be 34-38 inches high and sized for gripping (1.25-2 inches diameter). Step risers should be uniform (within 3/8 inch) and treads 10-11 inches deep. These specifications prevent trips and falls.
For additional security measures, consider gated access to stairs if you have young children or pets, or install motion-sensor lighting for nighttime safety.
Finishing and Maintenance
Finishing protects your deck investment and maintains appearance. The type of finish depends on your material choice.
Wood Decks: Apply stain or sealant within six months of installation. Semi-transparent stains show wood grain while providing UV protection and water resistance. Solid stains offer more color options but hide natural wood character. Plan on resealing every 1-2 years depending on climate and sun exposure. Before refinishing, clean the deck thoroughly with a deck cleaner and pressure washer (keeping nozzle 12+ inches away to avoid surface damage).
Composite Decks: Most composites require minimal maintenance—occasional cleaning with mild soap and water. Some manufacturers recommend applying protective coatings annually. Check specific product recommendations from your material supplier.
Routine Maintenance: Remove debris regularly to prevent moisture accumulation. Clear gutters and downspouts to direct water away from the deck structure. Inspect posts, beams, and ledger boards annually for signs of rot, checking for soft spots by pressing with a screwdriver. Address water damage immediately to prevent structural failure.
For related guidance on finishing, see our DIY house painting guide, which covers finish selection and application techniques.
Inspect fasteners periodically and tighten as needed. Check railings for loose boards or bolts, especially after winter. Replace damaged boards promptly. A small repair now prevents larger problems later.
Consider power washing annually (low pressure, 500-1500 PSI maximum) to remove algae and mold growth, particularly in shaded areas. This maintains appearance and extends finish life.
FAQ
How deep should deck footings be?
Footings must extend below your local frost line to prevent heaving. Northern climates require 3-4 feet; southern areas may only need 12-18 inches. Contact your building department for specific requirements. Never skip this step—frost heave causes catastrophic structural damage.
Can I attach a deck to vinyl siding?
No. Remove vinyl siding where the ledger board attaches, install the ledger directly to rim joist, then reinstall siding over the ledger. Water trapped behind vinyl siding causes rot. Proper flashing is essential.
What’s the difference between deck screws and wood screws?
Deck screws feature corrosion-resistant coatings and are designed for outdoor exposure. They’re more expensive than standard wood screws but worth the investment. Standard wood screws rust quickly in moisture-rich deck environments.
How often should I stain or seal my wood deck?
Most wood decks need resealing every 1-2 years. Climate, sun exposure, and traffic patterns affect frequency. If water beads on the surface, the seal is still effective. When water soaks in, it’s time to reseal. Check annually and plan accordingly.
Is composite decking worth the extra cost?
Composite costs 2-3 times more than pressure-treated wood but requires minimal maintenance and lasts 25+ years. If you value low maintenance over initial cost savings, composites provide excellent value. For budget-conscious builders willing to reseal periodically, pressure-treated lumber is economical.
What’s the maximum distance between deck posts?
Post spacing depends on beam size, wood species, and load. Typically, 4×4 posts spaced 8-10 feet apart support residential decks. Larger spacing requires larger beams. Consult span tables or your building department for specific requirements.
Do I need a permit for a small deck?
Most jurisdictions require permits for any permanent deck structure. Check with your building department—requirements vary. Permits ensure compliance with safety codes and protect your home’s resale value. Unpermitted decks can create legal and insurance issues.
How can I prevent deck rot?
Proper drainage and ventilation prevent rot. Ensure footings extend below frost line, use post bases to create air space, flash the ledger board, maintain adequate slope for water runoff, and keep debris cleared. Annual inspections catch problems early.


