How Long Does Spackle Take to Dry? Pro Tips for Quick Results
Spackle is one of the most essential materials in any DIYer’s toolkit, whether you’re patching drywall holes, filling gaps, or preparing surfaces for paint. But if you’ve ever stood in front of a freshly spackled wall wondering “how long until I can sand this?” you’re not alone. Drying time is critical to achieving professional-looking results, and understanding the variables that affect it can save you hours of frustration and prevent costly mistakes.
The straightforward answer is that most spackling compounds dry between 1 to 24 hours depending on the type, thickness of application, and environmental conditions. However, the real story is far more nuanced. Lightweight spackle might be ready for sanding in as little as 1-2 hours, while heavy-duty joint compound can take a full day or longer. Temperature, humidity, ventilation, and application thickness all play crucial roles in determining actual drying time. Understanding these factors will help you work more efficiently and achieve superior wall finishes.
Types of Spackle and Their Drying Times
Not all spackling products are created equal, and each has distinct drying characteristics. Understanding the differences will help you choose the right product for your project timeline.
Lightweight Spackling Compound is the fastest-drying option available. This water-based product typically dries in 1-2 hours at standard room temperature and humidity. It’s ideal for small holes and minor imperfections because it’s easy to apply, sand smooth, and doesn’t shrink significantly as it dries. The trade-off is that it’s not suitable for large repairs or areas that will experience stress or movement. Many professionals use lightweight spackle for cosmetic touch-ups on finished walls before final painting.
All-Purpose Joint Compound offers a middle ground between speed and durability. This versatile product dries in 2-4 hours for thin coats and is suitable for small to medium repairs. It provides better adhesion than lightweight spackle and can handle slightly larger applications. When you’re working on a basement finishing project, all-purpose compound is often the preferred choice because it offers reliability across various environmental conditions.
Heavyweight or Setting-Type Spackle is formulated for demanding repairs and can take 4-24 hours to fully cure, depending on the specific product and application thickness. These compounds are chemically activated (they “set” rather than simply dry) and provide exceptional strength and durability. They’re essential for larger holes, structural repairs, or areas subject to vibration or temperature fluctuations. Setting-type spackle won’t shrink as much as other types, making it the professional choice for visible repairs.
Fast-Setting Spackle is a specialized product designed for professionals who need quick turnaround times. These compounds can be ready for sanding in 15-30 minutes, though they’re typically more expensive and require careful application technique. They’re excellent for commercial projects or situations where time is critical.
Environmental Factors That Affect Drying Speed
Temperature and humidity are the primary environmental variables that influence spackle drying time. According to ASTM International standards, most spackling products are tested at 70°F (21°C) with 50% relative humidity. Conditions that deviate from these standards will significantly impact actual drying times.
Temperature Effects: Spackle dries faster in warmer conditions because heat accelerates evaporation of water and chemical reactions within the compound. At 75-80°F, you can expect drying times at the lower end of manufacturer specifications. Conversely, cold conditions dramatically slow drying. At 50°F, drying times can double or triple. In winter or unheated spaces, plan for extended drying periods and consider using fast-setting varieties.
Humidity Levels: High humidity is the enemy of fast drying. In humid environments (above 60% relative humidity), water evaporation slows considerably, extending drying times by 50% or more. Basements and bathrooms are particularly challenging environments. Conversely, dry conditions (below 40% humidity) accelerate drying significantly. If you’re tackling drywall repairs in an arid climate or during winter heating season, expect faster results.
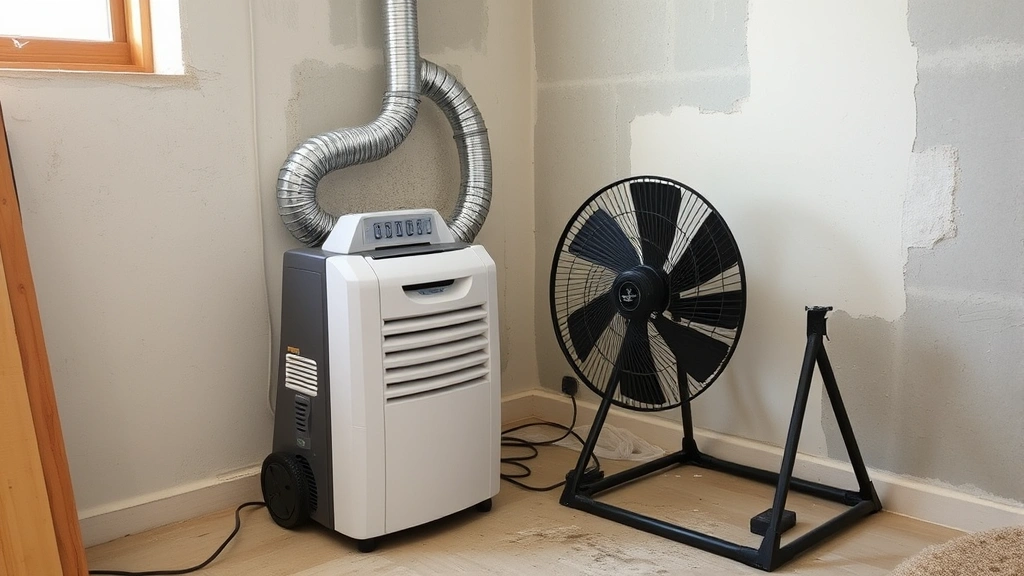
Air Circulation: Proper ventilation dramatically reduces drying time. Open windows, use fans to create air movement across the spackled surfaces, or install temporary ventilation equipment. Even modest air circulation can cut drying time by 25-30%. However, avoid direct drafts that can cause uneven drying and potential cracking.
Seasonal Considerations: Summer conditions generally favor faster drying, while winter and spring present challenges. Spring is particularly problematic because outside air often contains high moisture content. If you’re planning interior wall repairs as part of a larger house painting project, schedule spackle work for warm, dry days.
Application Techniques for Faster Drying
How you apply spackle directly impacts drying time. Thicker applications take exponentially longer to dry than thin ones—this is the most critical factor you can control.
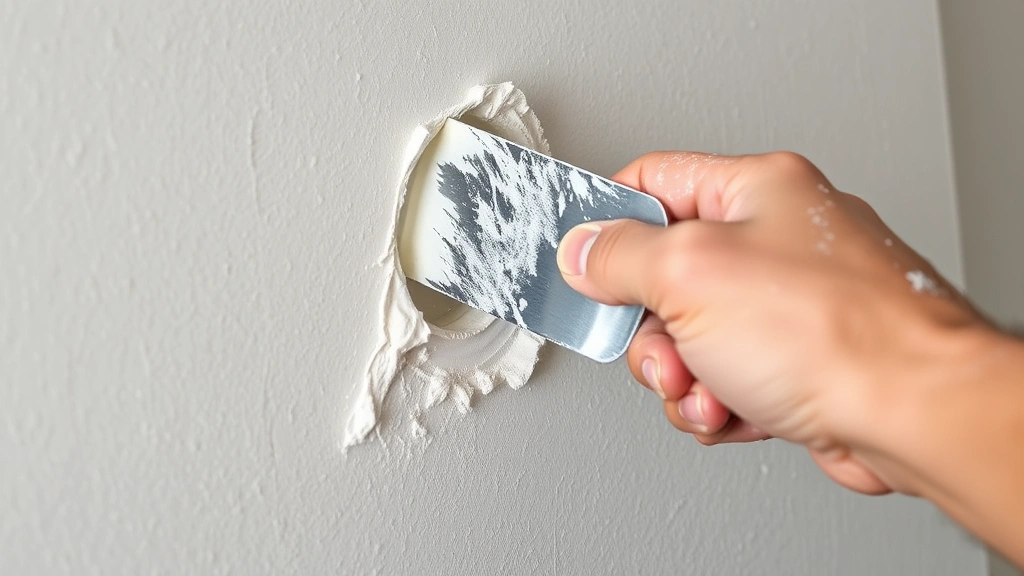
Application Thickness: The fundamental rule is to apply spackle in thin coats. A 1/8-inch coat dries much faster than a 1/4-inch coat. For repairs larger than a pencil hole, use the “feather” technique: apply a thin base coat, let it dry, then apply thin finish coats. This multi-coat approach takes longer overall but produces superior results and prevents the shrinkage cracking that occurs with thick single applications. Professional drywall contractors typically apply 2-3 thin coats rather than one thick coat.
Surface Preparation: Clean, dry surfaces accept spackle better and allow faster drying. Remove dust, loose debris, and any moisture before applying spackle. If the hole or crack is wet, allow it to dry completely first. Prime bare drywall before spackling to ensure consistent drying and better adhesion.
Taping for Larger Repairs: For holes larger than 3 inches, use drywall patch kits or mesh tape with joint compound rather than spackle alone. While this requires more time investment, the results are more durable. When using mesh tape, apply thin coats of compound over the tape, allowing each coat to dry before applying the next.
Tool Selection: Use properly sized putty knives or taping knives. A 2-3 inch knife works for small holes, while 6-10 inch knives are better for larger areas. The right tool helps you apply thinner, more even coats that dry faster and sand smoother. When applying spackle, press firmly to eliminate air pockets and ensure good adhesion to the substrate.
Testing Readiness for Sanding
Sanding spackle before it’s completely dry ruins the repair and wastes your effort. Conversely, waiting longer than necessary wastes time. Here’s how to determine true readiness.
Visual Inspection: Most spackle lightens in color as it dries. Lightweight compounds typically change from a slightly off-white to pure white. When the color change is complete and uniform across the repair, drying is usually complete. However, this isn’t foolproof—the surface can appear dry while the interior remains damp.
Touch Testing: Lightly touch the spackled area with your fingertip. It should feel hard and offer resistance. If it feels soft, spongy, or slightly cool to the touch, it’s not ready. Fully dried spackle feels solid and doesn’t yield to finger pressure. This test is more reliable than visual inspection alone.
Scratch Testing: Use your fingernail or a putty knife corner to gently scratch the surface. If the spackle crumbles or powders easily, it’s ready to sand. If it’s tacky or gummy, it needs more time. The scratch test provides immediate feedback about cure state.
The Moisture Meter Method: Professional contractors sometimes use moisture meters to verify dryness. Most spackle is ready for sanding when moisture content drops below 10%. This is the most objective method but requires equipment most DIYers don’t have.
Common Mistakes That Slow Drying
Even experienced DIYers sometimes make errors that extend drying times unnecessarily or create problems.
Applying Too Much Spackle: This is the most common mistake. Beginners often apply spackle too thickly, hoping to fill repairs in one coat. Thick applications can take 2-3 times longer to dry than thin coats and are prone to shrinkage cracking. Always apply thin coats and build up gradually.
Poor Ventilation: Closing windows and doors during spackle application traps moisture and slows drying dramatically. Even modest air circulation makes a significant difference. If working outdoors during flooring installation or other projects, maintain good ventilation in adjacent areas too.
Ignoring Temperature: Attempting to spackle in cold basements or unheated spaces during winter is counterproductive. If you must work in cold conditions, use fast-setting products and consider temporary heating. The time investment in creating proper conditions pays off in faster, better results.
Applying Over Damp Surfaces: Spackle applied over wet or damp drywall dries much more slowly. This is especially problematic after cleaning or in humid environments. Always verify that surfaces are completely dry before spackling.
Using Expired Products: Spackle and joint compound can lose effectiveness over time, especially if containers have been opened and exposed to air. Check the expiration date and storage conditions. Old products may dry unpredictably or not at all.
Pro Tips for Maximum Efficiency
Professional drywall contractors have developed techniques that significantly improve efficiency and results. Implementing these strategies will elevate your DIY work.
Create Optimal Conditions: Before starting any spackle project, prepare the environment. Open windows for ventilation, ensure temperatures are between 65-75°F, and reduce humidity if possible. If you’re working in a humid basement, use a dehumidifier. This upfront effort pays dividends in reduced drying times and better results. When working on basement finishing, environmental control is especially important.
Use the Right Product for the Job: Match the spackle type to your repair size and timeline. Small cosmetic repairs? Use lightweight spackle. Larger structural repairs? Use setting-type compound. Emergency repairs? Consider fast-setting products. The extra cost of specialized products is offset by time savings and better results.
Invest in Quality Tools: Good putty knives and taping knives cost more but make application easier and faster. Cheap, flimsy tools make it harder to apply thin, even coats. Quality tools also last longer and provide better control.
Prepare Multiple Coats: Rather than waiting for each coat to fully dry, prepare all your repairs and apply initial coats to everything. By the time you finish the last repair, the first one will be dry enough for the next coat. This parallel workflow maximizes your productive time.
Sand Between Coats: Light sanding between coats (after drying) improves adhesion of subsequent coats and creates a smoother final surface. Use 120-150 grit sandpaper and sand lightly—you’re just roughing up the surface, not aggressively sanding.
Prime Before Painting: Spackle and joint compound absorb paint differently than drywall, creating visible patches if you don’t prime. Use a quality primer-sealer designed for drywall. This step prevents additional coats of paint and provides better final appearance.
Temperature Acceleration: In cool weather, use a space heater to warm the work area to 70-75°F. The cost of heating is minimal compared to the time savings. Never use heat guns directly on spackle—this causes uneven drying and cracking.
Humidity Control: In humid conditions, use fans or portable dehumidifiers to reduce ambient moisture. Even dropping humidity from 70% to 50% can cut drying times by 30-40%. This is especially valuable during humid seasons.
For comprehensive guidance on wall preparation and finishing, consult the Gypsum Association, which provides technical standards for drywall finishing. Additionally, the International Code Council offers guidelines on interior finishing materials and safety standards.
FAQ
Can I speed up spackle drying with heat?
Moderate heat helps, but excessive heat causes problems. Space heaters at a distance work well, warming the room to 70-75°F. Never use heat guns directly on spackle—this creates uneven drying, cracking, and potential fire hazards. The safest approach is environmental heating rather than direct heat application.
Is it okay to paint over spackle before it’s completely dry?
Absolutely not. Painting over damp spackle traps moisture, causing the spackle to continue drying underneath the paint layer. This leads to blistering, peeling paint, and a failed repair. Always verify complete dryness using the touch and scratch tests before priming or painting.
Why is my spackle cracking as it dries?
Cracking typically results from applying spackle too thickly in a single coat. As thick spackle dries, the outer surface dries faster than the interior, creating stress and cracks. The solution is applying multiple thin coats instead of one thick coat. Additionally, fast drying from direct heat or extreme air circulation can cause cracking. Allow natural, moderate drying conditions.
Does spackle type affect how it looks after painting?
Yes, different spackle types have different absorption rates and may show slight color differences after painting. Lightweight spackle sometimes shows as faint patches if not properly primed. Using a quality primer-sealer designed for drywall eliminates this problem. Setting-type spackle generally provides more consistent results with fewer visible patches.
Can I use spackle in cold weather?
Most standard spackle products struggle in temperatures below 50°F. Drying times extend dramatically, and cure quality suffers. If you must work in cold conditions, use fast-setting compounds and consider temporary heating. Alternatively, wait for warmer weather to tackle spackle work. Fast-setting products formulated for cold weather are available but are more expensive.
How long should I wait before second coat application?
Follow manufacturer recommendations, which typically specify 1-4 hours depending on the product and first coat thickness. The touch test is your best guide—the first coat should be hard and non-yielding before applying the second coat. Applying coats too soon traps moisture and extends overall drying time.
Is ventilation really that important for drying?
Yes, ventilation is crucial. Proper air circulation can reduce drying time by 25-40% compared to stagnant conditions. Opening windows, using fans, or installing temporary ventilation makes a significant practical difference. This is especially important in bathrooms, basements, or other naturally humid spaces.


