PC Building Time: Expert Tips for Speedy Setup
Building your own personal computer is one of the most rewarding DIY projects you can undertake. Whether you’re a first-time builder or an experienced enthusiast, understanding how long the assembly process takes is crucial for planning your build day. The answer isn’t one-size-fits-all—factors like experience level, component complexity, and preparation significantly impact your timeline.
Most builders complete a standard PC build in 2 to 4 hours, though this varies considerably. Beginners might need 4 to 6 hours, while experienced builders can finish in 45 minutes to 2 hours. This comprehensive guide walks you through realistic timeframes, optimization strategies, and pro tips to ensure your build goes smoothly. Much like other DIY home improvement projects, proper preparation is the key to success.

Factors Affecting Build Time
Several variables determine whether your PC build takes 2 hours or 6 hours. Your experience level is the primary factor—first-time builders typically take significantly longer because they’re learning the process while executing it. Experienced builders have muscle memory for cable routing, motherboard installation, and RAM seating.
The complexity of your build matters tremendously. A simple build with a basic CPU cooler, standard ATX motherboard, and two RAM sticks takes less time than a high-end system with multiple storage drives, custom cooling solutions, or specialized components. Your case design also impacts timing—some cases feature tool-free drive bays and excellent cable management routing, while others require manual screwing and careful planning.
Environmental factors play a role too. Working in a clean, organized space with proper lighting reduces mistakes and fumbling. Temperature and humidity affect component handling—static electricity concerns might make you move more deliberately. Finally, your familiarity with your specific components matters; reading manuals takes time, but prevents costly errors.

Preparation Phase Timeline
Smart builders invest 30 to 60 minutes before assembly begins. This preparation phase dramatically reduces total build time by preventing false starts and missing information. Start by reading your motherboard manual completely—this 15 to 20-minute investment is invaluable. The manual contains crucial information about RAM slot configuration, CPU socket orientation, and power connector locations.
Next, organize your workspace (10 minutes). Lay out all components in the order you’ll install them. Set up an anti-static mat or wrist strap—proper grounding prevents expensive damage. Gather tools: a Phillips head screwdriver, flashlight, and thermal paste (usually pre-applied). Review online build guides specific to your exact motherboard model (10 to 15 minutes).
Test fit your CPU cooler (10 minutes). Some coolers have specific installation requirements that conflict with RAM placement. Identifying these issues before you’ve installed the motherboard saves significant time. Check that your power supply fits your case and that your GPU will fit in your case with your cooler installed. These compatibility checks prevent mid-build discoveries that require component repositioning.
Assembly Breakdown by Component
Understanding where time goes during assembly helps you plan realistically. Here’s a detailed breakdown for a standard build:
- Power Supply Installation (5-10 minutes): Mount the PSU in the case, typically in the bottom rear compartment. Secure with four screws. Don’t plug in the 24-pin motherboard connector yet.
- Motherboard Installation (10-15 minutes): Install I/O shield, position motherboard standoffs, align motherboard, install screws. This step requires precision—loose connections cause problems later. Beginners often spend extra time ensuring perfect alignment.
- CPU Installation (3-5 minutes): Lift retention lever, position CPU carefully, lower lever. This is quick but demands precision. Modern CPUs are delicate.
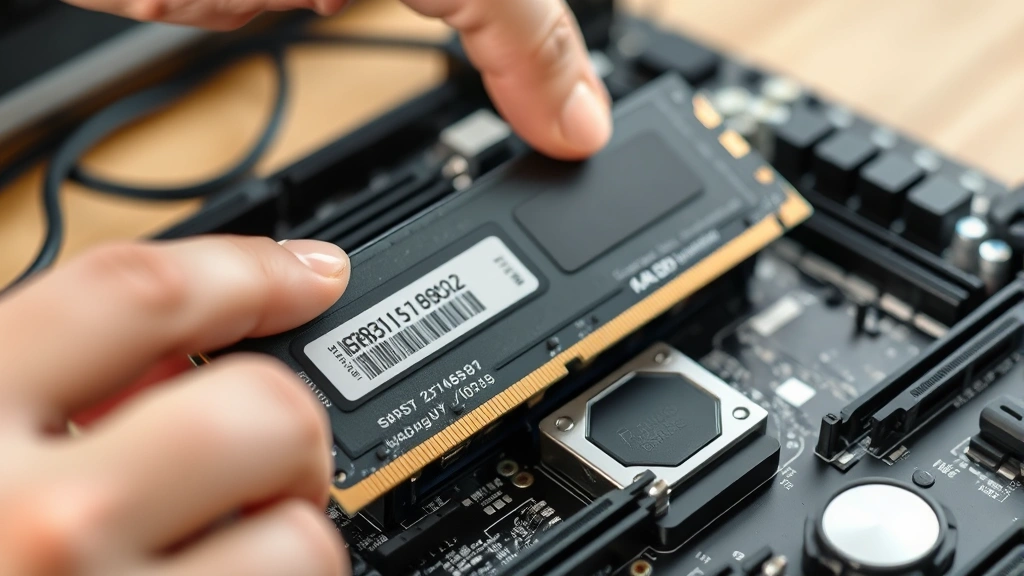
- RAM Installation (2-3 minutes): Align notches, press firmly until clips snap. Each module takes about 30 seconds.
- CPU Cooler Installation (5-15 minutes): This varies wildly. Stock coolers take 3-5 minutes. AIO liquid coolers require pump mounting, radiator placement, and bracket installation—10 to 15 minutes. Air coolers fall between these extremes.
- GPU Installation (5-10 minutes): Remove slot covers, align with top slot, press until it clicks. Install retention bracket and power connectors.
- Storage Drive Installation (5-10 minutes): Mount 2.5-inch SSDs or 3.5-inch HDDs in bays. Multiple drives take longer. NVMe SSDs are fastest—just insert into M.2 slot and secure with single screw.
- Cable Management (15-30 minutes): Connect 24-pin motherboard power, 8-pin CPU power, GPU power, SATA power, case fans. Route cables behind motherboard tray. This is where most time is spent. Experienced builders minimize cable management time through experience.
- Final Connections (5-10 minutes): Connect case headers (power button, reset, LEDs), front panel USB, front panel audio.
Adding these segments shows why 2 to 4 hours is typical. Cable management is the time sink for most builders.
Optimization Strategies for Speed
If you want to accelerate your build, implement these proven strategies. First, prepare your case before installing the motherboard. Install the I/O shield, power supply, and cable-manage the PSU cables while you have full access. This prevents awkward angles later.
Second, pre-install components before mounting the motherboard. Install RAM, CPU, and M.2 storage while the motherboard sits on its box. This is faster and easier than doing it in the case. Only attach the motherboard once these components are seated.
Third, use tool-free mechanisms where available. Modern cases feature tool-free drive bays and magnetic dust filters. Exploit these features. Select cases with superior cable management when possible—cases with pre-routed cable channels save 10 to 15 minutes.
Fourth, minimize cable routing complexity. Plan your cable paths before connecting anything. Use cable ties and velcro straps strategically. Poor planning causes rework.
Fifth, trust component compatibility. If you’ve verified components are compatible before purchase, don’t second-guess during assembly. Unnecessary testing wastes time.
Sixth, use quality thermal paste application. Pre-applied paste saves time. If applying paste yourself, use the rice grain method—quick, reliable, and effective. Avoid over-applying.
For comparison, undertaking other DIY house painting projects similarly benefits from proper preparation and strategic execution.
Common Delays and How to Avoid Them
Most build delays stem from avoidable mistakes. RAM not fully seating is extremely common. Push until both clips snap loudly. If unsure, press harder—RAM needs firm seating. Budget 2 to 3 minutes extra if you’re uncertain.
Missing the motherboard manual causes confusion about power connector locations and header pin assignments. Avoid this by reading manuals before starting. Ten minutes of reading prevents 20 minutes of troubleshooting.
Incorrect CPU cooler installation derails many builds. Different coolers require different mounting approaches. Some mount to the motherboard directly; others require backplate installation first. Read the cooler instructions before opening the motherboard manual to understand the sequence.
Case compatibility issues surface unexpectedly. GPU length conflicts with drive bays. Cooler height conflicts with RAM. Prevent this through advance research. Check manufacturer specifications for your specific case and cooler combination.
Forgotten cable connections appear during power-on testing. Create a checklist: 24-pin motherboard power, 8-pin CPU power, GPU power connectors, SATA power. Verify each before closing the case.
Thermal paste application mistakes cause thermal concerns. Most coolers come with pre-applied paste—use it. If applying yourself, less is more. A rice grain of paste is sufficient.
Static electricity damage, while rare with modern components, causes anxiety and delays. Use a proper anti-static mat and wrist strap. This 5-minute setup investment prevents potential catastrophe.
Post-Build Testing and Verification
After assembly, allocate 30 to 45 minutes for testing and verification. This prevents shipping a non-functional system or discovering problems after installation in your desk setup.
First, perform a visual inspection. Verify all power connectors are fully seated. Check that RAM clips are fully engaged. Ensure the CPU cooler is properly mounted with no visible gaps. Look for any loose screws or components.
Second, perform a power-on test. Connect power but don’t close the case. Press the power button and listen for POST (Power-On Self-Test) beep. The system should boot to BIOS. If it doesn’t, troubleshoot before proceeding. Common issues include unseated RAM, unseated CPU, or loose power connectors.
Third, verify component recognition in BIOS. Check that the motherboard recognizes your CPU (correct model and core count), RAM (correct capacity), and storage drives. This 10-minute check catches installation errors.
Fourth, install your operating system. This takes 20 to 30 minutes depending on installation media and drive speed. Use a USB installation drive for fastest installation.
Fifth, install chipset drivers and GPU drivers. Modern systems often recognize components without explicit drivers, but proper drivers ensure optimal performance and stability. Budget 15 to 20 minutes for driver installation and system restart.
Finally, perform stress testing if desired. Prime95, MemTest86, and 3DMark verify stability under load. Initial stress testing takes 30 to 60 minutes but catches thermal and stability issues before they become problems.
This testing phase is non-negotiable. Skipping it invites problems later. The 45 minutes invested here prevents hours of troubleshooting.
FAQ
How long does it take to build a gaming PC?
Gaming PCs typically take the same time as standard builds—2 to 4 hours. However, custom cooling solutions for high-end components can extend this to 5 to 6 hours. Multiple storage drives and premium cable management also add time. The additional complexity of high-end components justifies the extra time investment.
Can I build a PC in under an hour?
Experienced builders with simple components can complete builds in 45 minutes to 1 hour. This requires pre-planning, minimal cable management prioritization, and component familiarity. First-time builders should not expect this timeline.
What’s the fastest way to build a PC?
Pre-install components on the motherboard before case mounting. Use minimal cable management initially. Install and connect only essential components first. Route cables after OS installation. Use tool-free case features. Select components known for easy installation.
Should I rush my PC build?
No. Rushing causes mistakes—unseated RAM, forgotten power connectors, thermal paste errors. These mistakes cause system failures requiring disassembly and rework. Invest the time properly. A 4-hour build beats a 2-hour build that doesn’t power on.
Do I need experience to build a PC quickly?
Experience dramatically reduces build time. Beginners should expect 4 to 6 hours. With each build, you develop intuition about component placement and cable routing. Your third or fourth build will feel significantly faster than your first.
What tools do I need to speed up my build?
A quality Phillips head screwdriver is essential. A flashlight helps visibility in dark case corners. Magnetic screwdrivers prevent dropped screws. Velcro cable ties organize wires faster than traditional ties. An anti-static mat provides peace of mind. These tools total under $50 and save significant time.
How does build time affect warranty?
Build time doesn’t affect manufacturer warranties on components. However, improper installation voids warranties. Take time to install components correctly. A slow, careful build is better than a fast, careless one.


